..--- Our Best Day Of Sailing & The Naked Man ---
.....................................--- Friday Oct. 09, 2009 ---
Day's Starting and Stopping Points Under Sail:
Today's Starting Waypoint #10 = N. 37o 08.054' -- W. -110o 57.223
Today's Ending Waypoint #11 = N. 37o 15.996' -- W. -110o 51.955
Night's Anchorage: West side of Main Channel, by 'Naked Man Point'.
Anchorage = N. 37o 15.935' -- W. -110o 52.031'
Today's Progress: Sailed Total =16 1/2 miles -- Up-Lake = 16 1/2 miles -- Motored = 1 milesTrip Totals: Sailed 75 1/2 miles -- Up Lake Miles 57 1/2 -- River Mile 68 - Motored 18 1/2 miles
We were barely off our shore moorage and out into the bay and in the process of moving the dingy from alongside the Mac to back on its tow bar when a Park Ranger's boat coming into the bay started our way. Ruth had just put the Honda into forward when from some distance he flashed his blue lights at us. He then pulled up along side to talk to us. Ruth forgot she was in gear and we motored right on by him. Not the best maneuver by us, but he didn't seem to get upset by it as he turned around and came back along side as we glided to a stop. He asked if we were the sailboat that was trying to sail to Hite. We responded that were.
........
He told us that they had been looking for us for 3 days. We wondered how that came about and he said that a friend called them worried about us and asked if they would look out for us. At this point we didn't know who or why that was, but we guessed that it was Shawn who had driven the Suburban back to Blanding from Page after dropping us there. He was the one who was suppose to pick us up at either Bullfrog/Halls or Hite. We had told him it would be 2-4 weeks before we needed him to come pick us up, but maybe Blanding had the same or higher winds we had encountered and he had worried and panicked. (Latter after talking to Shawn we found out that this was the case.)
The ranger wanted to know if we were ok and we told him I had been injured and that was why we had spent 5 nights in Balanced Rock Canyon. After we declined any medical help he wished us well and left, but we saw him later in the day on the lake. Also while we were in Balanced Rock Canyon I saw what looked like a government marked plane fly towards us and then when near us do a 180 and fly away. It was flying at a much lower altitude than all of the tour planes we saw every day and we found out that they try and sweep the main channel each day with a helicopter (which we had also seen) and a plane. We weren't too happy that a number of people had been looking for us when there was no need and hoped it didn't take them from more important things.
........
Back out on the lake where we had left off we were meet with wind and waves equivalent to what had sent us looking for shelter the day before. Ruth was a little apprehensive about sailing, so we just drifted with the wind and waves that did push us about 1/2 mile in the right direction. Finally the decision was made to go for it and we raised just the main on its 2nd reef point.
........
We were off and running on just the reefed main..........
........
........at about 4+ knots for most of the next 4 1/2 hours, never having to tack into the wind once. Finally the decision to sail up-lake with the prevailing winds at our back was paying off. This was our best day of sailing on the lake and we made 16 1/2 miles up-lake in those 4 1/2 hours and were elated at that.
........
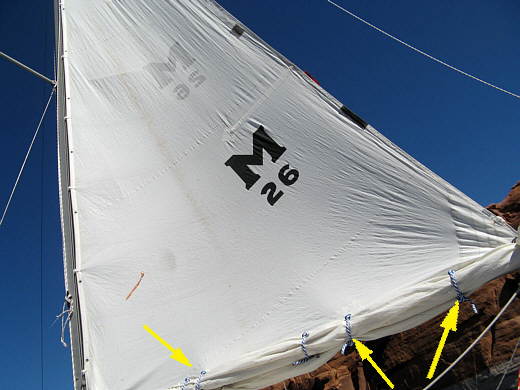
This picture and the following might help someone who is having trouble reefing their sails. We had a lot of problems on our first trip reefing and getting the boom up where it was suppose to be where it wouldn't get into the bimini and the sail had a good shape. We improved the situation on our Idaho/Canada trip. Then on this trip we made further improvements to the system to where now we can reef to the 1st or 2nd reef point fairly fast and end up with the boom up and a good sail shape. This also wasn't expensive to do as all that was required was two cleats and some 1/4 inch braided line.
........
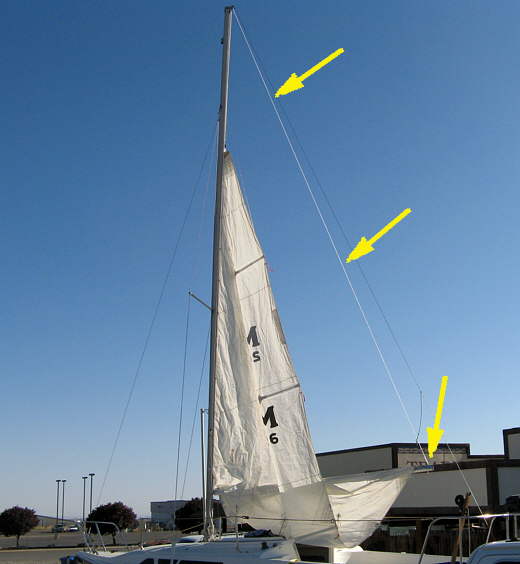
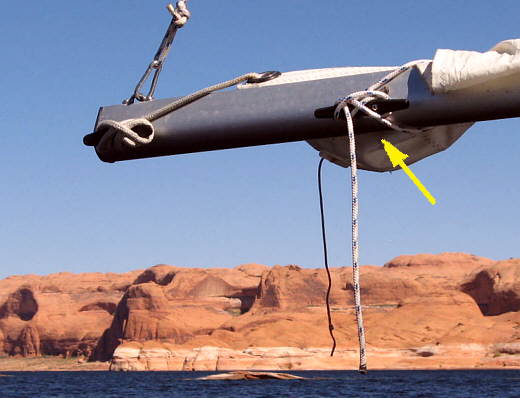
I start by lifting the boom slightly with the topping lift (arrows) so that it won't fall into the cockpit while reefing (the picture above was taken when I installed the topping lift at home, but while reefing the sail will look like this at the beginning of the reefing process.
I would strongly recommend the topping lift mod as it helps to hold the mast up anytime that it is necessary or handy, such as when anchored at night and you want it up and out of the way, but back to reefing.........
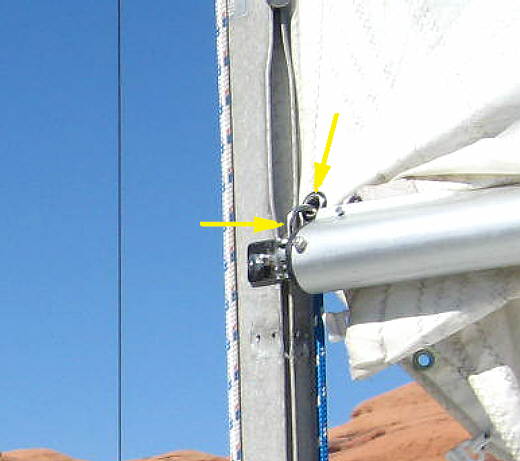
After raising the boom slightly with the toping lift I start the reef by lowering the main down to the reef point I want to use. Then hook the cringle (top arrow) at that reef point through the hooked gooseneck bolt that holds the boom to the gooseneck (left arrow). Next I pull the main back up with the halyard until it is tight and cleat it off on the bottom of the mast.
Note: If you don't have the hooked bolt at the gooseneck (left arrow) then you need to tie the cringle down to this point.........
Next I move to the back of the sail where it is attached to the boom where the outhaul line and the cleat at the very end of the boom are, but first:
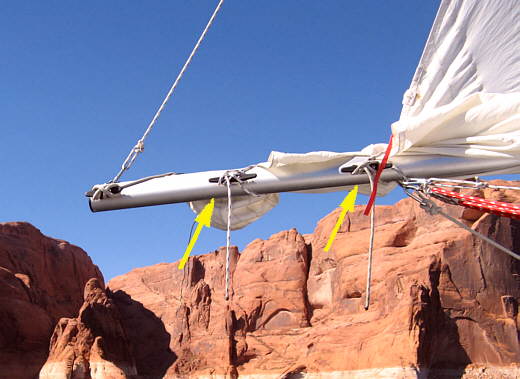
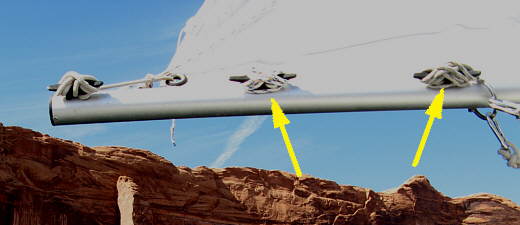
Before this trip I added 2 cleats (arrows) to the boom. They were located as follows.
With the main up and not reefed find the cringle at the back of the sail (leech) for the first reef point. Come straight down vertically from that point to the boom and mark that place on the boom. Now put a cleat (left arrow above) with its forward edge a couple inches aft of your mark towards the end of the boom.
No go up the back of the sail (leech) and find the next cringle for the second reef point and go directly down from it to the boom and mark that place and put another cleat behind it like the first one (right arrow above).
If you have 3 reef points in your sail do the above one more time.........
Note these lines were also made when the cleats were installed:
I took some short lengths of 1/4 inch braided line and tied a stopper knot on one end. Then I threaded that line down through the hole at the center of the cleat to the point the stopper knot stopped the line in the center hole in the cleat.........
When the sail isn't reefed (above) the two lines that go through the cleat center are wrapped around the cleats and cleated off ready for use.
........
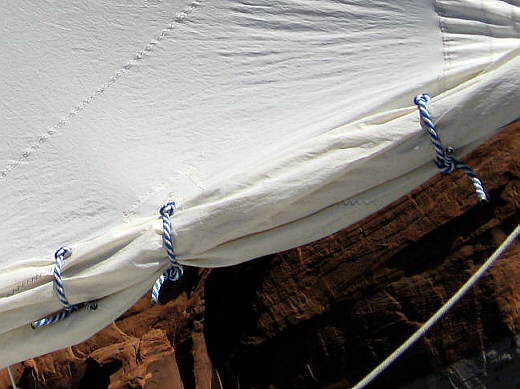
Now to continue with the reef, take the line loose of the cleat, but leave it through the center of the cleat with the stopper knot stopping it from coming clear. Then take the 1/4 inch line around the bottom of the boom and up the back side of the sail. Put it through the cringle at the reef point you want to use. Then back down to the cleat on the near side. Using the cleat like a pulley, pull the sail at the cringle down on the boom and back to the cleat and cleat the line off. Now the sail is tight to the boom at the cringle and along its foot back from the cringle by the mast back to this point.
........As I return to the mast I tie the sail to the boom with the reef ties. On our sail there are 3 at the first reef point and two at the second reef point. In the picture above (and the first in this series) the sail is on the 2nd reef point and all of the ties in use as it was reefed to the 1st reef point prior to going to the second.
Finally I release the topping lift and let the sail fill and you will find that the boom stays up and the sail has good shape. This takes about as much time as it took you to read this once you practice it a couple times. We are very happy with this set up.........
Back to our great day of sailing. We sailed to and past the San Juan River Arm of the lake.
........
I had talked to Ruth a day or so earlier that it would be great if we could at least sail to the San Juan Arm and then motor north to Halls where Shawn could come pick us up. Well I didn't say anything to her to remind her of that conversation and she didn't bring it up as we continued under sail. I was still hurting for sure, but I would be hurting sitting at home, so why not be hurting doing something like this that took my mind off of it.
........
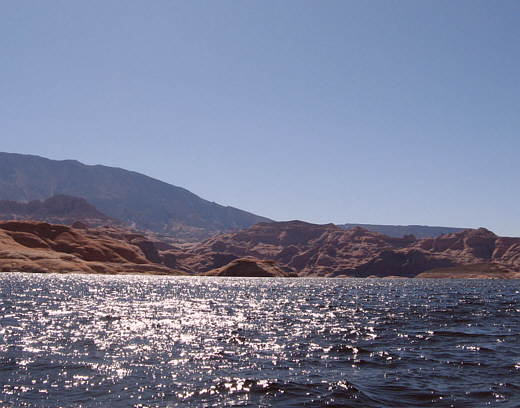
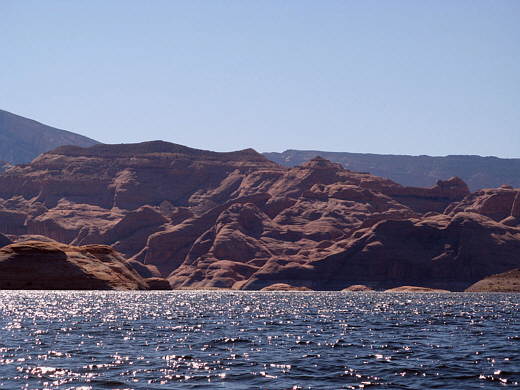
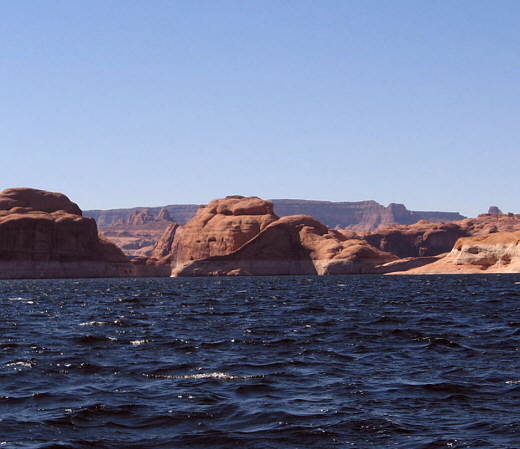
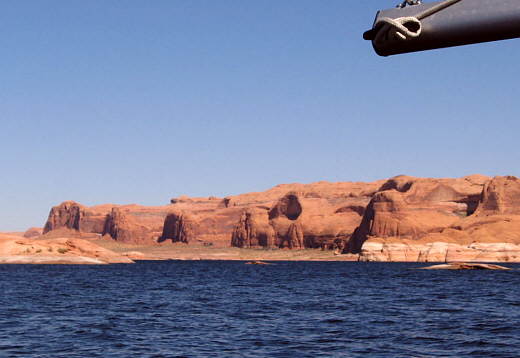
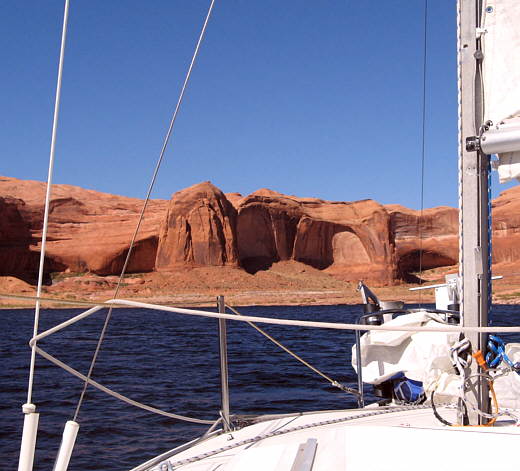
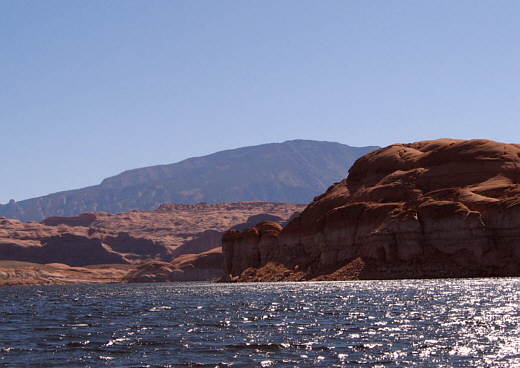
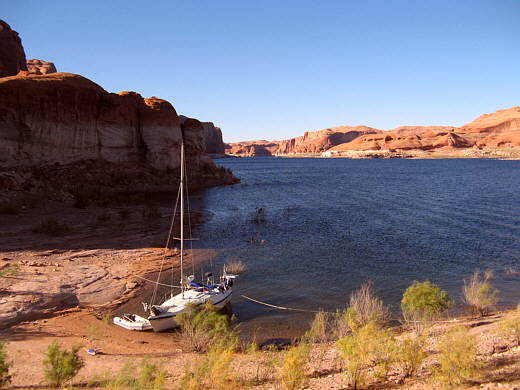
The scenery remained awesome and...........
........
........ Navajo mountain continued to fall off our stern to the south as we were now traveling mostly north.
........
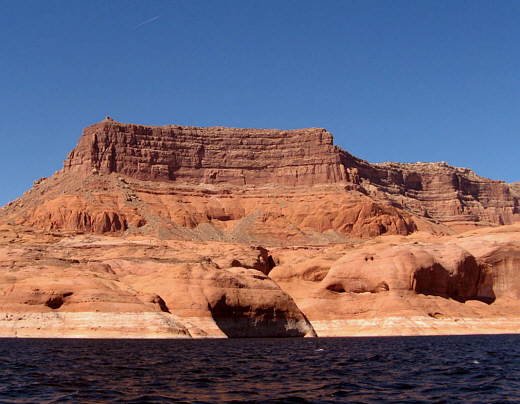
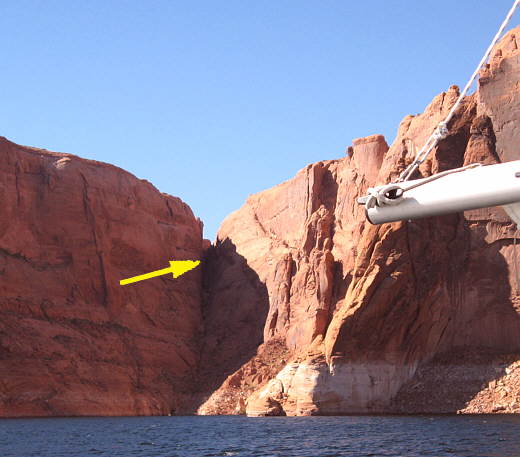
About 7 miles north past the confluence of the main Colorado River arm of the lake and the minor San Juan River arm you arrive at a place that is called "Hole In The Rock" (arrow). In the town Ruth and I live in, Blanding, UT, most of the residents belong to the Church of Jesus Christ of Latter-day Saints (we don't). Many of the townspeople's ancestors arrived in southeast Utah via the Hole In The Rock. Here is a quote from a history site that will explain it better:
"November 1879, 250 men, women, and children, with 80 wagons and 1,000 head of cattle, found themselves up against terribly broken, seemingly impassable terrain. The settlers had been en route for more than two weeks when they reached the 1,200-foot-deep Colorado River gorge, sixty-five miles southeast of Escalante."
Here is the link where you can read the story of what preceded that and what followed........
http://www.media.utah.edu/UHE/h/HOLEINTHEROCK.html
........
Shortly after passing The Hole In The Rock we were approaching 5 p.m. and it was time to find a safe place for the boat and us for the night. We approached a long sweeping left-hand bend in the river that was mostly a low bench on the port side of the Kera Jane. Over in the distance walking along the bench not too far above the river we saw a man walking along the shore with a walking stick. This led us to believe that someone must be tied up around the far side of the bend.
Just around the northwest side of the bend where we wanted to be there were 2 small sand beaches that might prove to be places to tie up for the night. We looked them over, but didn't like them as there was no good way to tie the boat off on them. In the distance we saw one last possibility of a more sheltered little cove before the shoreline once again rose to become sheer rock walls. I was sure we would find a boat tied up there after seeing the guy walking and no boats to this point.
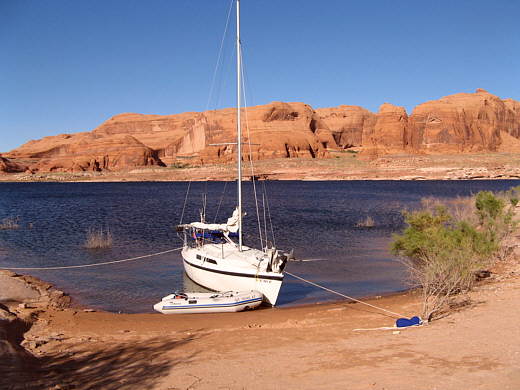
Well low and behold it was empty and looked perfect with a small narrow sand beach at its head. Ruth ran us in and up on the sand and the bow was tied off to two trees just a few feet away. Then a stern line was run off of both sides of the stern to the shore to keep the stern from swinging around.
........
With that taken care of I insisted that Ruth go ashore, since she had only been off the boat once in 14 days or so at Dangling Rope Marina. We had just both gotten ashore when this tall guy, probably in his late 60's, buck naked except for his hat, sandals and walking stick approaches. At this point Ruth hadn't seen him and I kind of pointed and whispered to Ruth that there was a naked man coming. He walked up, well tanned or 'cooked' from head to toe and everywhere in between as Ruth observed and confided in me later. He said, "don't mind me" and proceeded to tell us what a nice looking boat the Kera Jane was and that he had a houseboat 'just over the hill'. Then he left Ruth and I just looking at each other and took off up and over the hill.
........
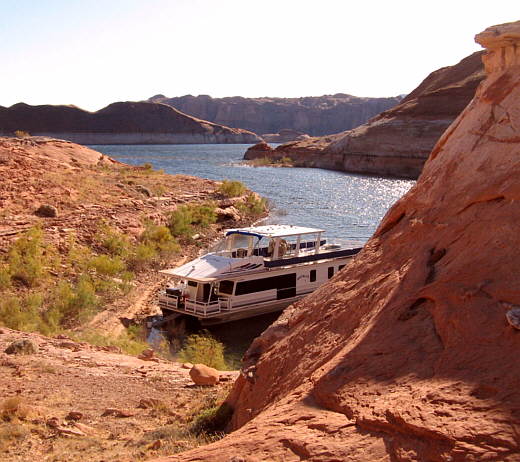
Sure enough just over the hill a couple hundred yards away was his houseboat in a very small and narrow canyon that attached itself to the lake back around the bend in the direction of The Hole In The Rock.
........
I told Ruth he was probably some retired millionaire that had probably wore a suit and tie to work for 40 years or so and couldn't wait until the day came when he could rid himself of them.
We went to bed hyped and thinking that our luck had changed and we would start knocking off 15 mile days one after another. Only the wind gods knew if they would deliver or not on this dream of ours.
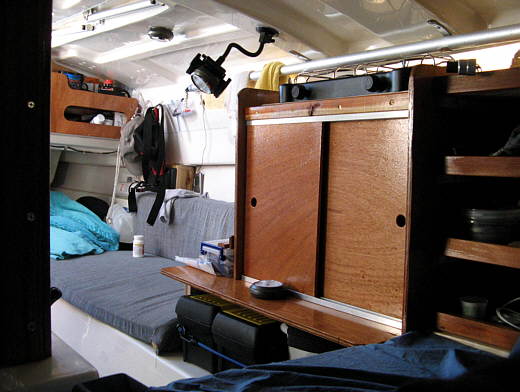
During the course of the day I'd been taking pictures of the inside of the Mac, to show you what it is like after some time on the water and what we carry and where.
........
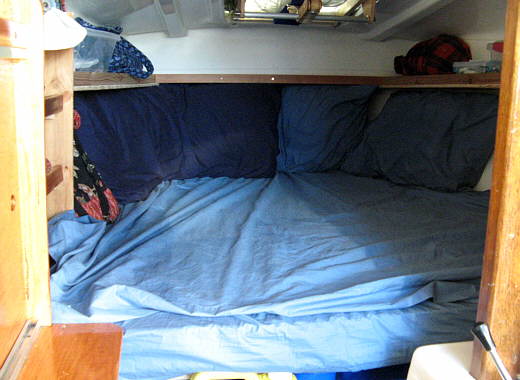
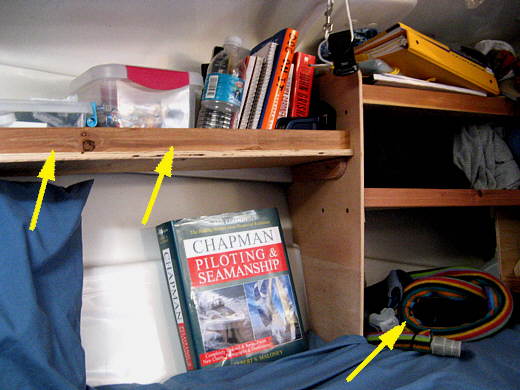
Here we are looking into the enlarged V-berth with storage at its head and along side of it forward. During the day we push the blankets forward and then put the pillows there also just leaving the bottom sheet over the 3 separate covered mattress sections. This way it is easy to get to the storage under the bed, by lifting whichever mattress you need to in order to get to the storage under that part of the bed.
........
Along both sides of the V-berth (top arrows) there is a shelf that goes forward. Just aft of it on both sides there are storage areas with shelves. The bottom arrow points to my CPAP machine that I use for sleep apnea and is the big electricity user on the boat at about 6 amps or 36-48 amp hours a night. The generator along with the solar panel replaces that electricity during the day.
The book in the view, Chapman - Piloting and Seamanship was on sale at West Marine in Long Beach, CA when we were there for $24 instead of the $70 cover price and is a great book for someone new to boating like we are. The other great book we have that is more sailboat oriented is The Annapolis Book of Seamanship by John Rousmaniere. Both of these were recommended by our good friend Bill 'sparky' Smith, thanks Sparky.
........
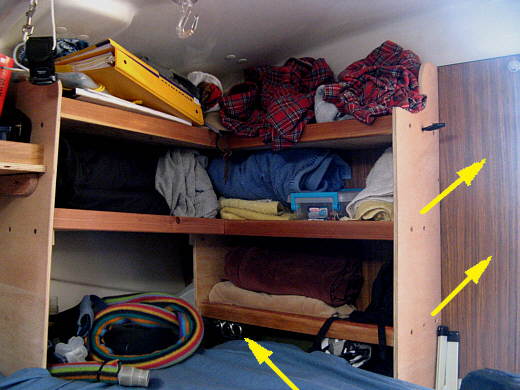
Here are the two main storage compartments on my side of the bed although Ruth and I spit the right one. The arrows point to the wall between the V-berth and the sink area. All of this use to be the head and to us was wasted space. Believe it or not this is plenty of storage for clothes for an extended cruise along with the shelves that go forward from these. We fold and roll our clothes up and I for instance take about 3 changes of underwear, 3-4 pair of socks, about 3 jeans 3 T-shirts and 3 shirts plus night clothes and sweat shirts and jackets with the latter kept handy in the aft berth area. As has been mentioned we wash every other day or so, so some clothes are either on us or are in the wash sack or stored here.
........
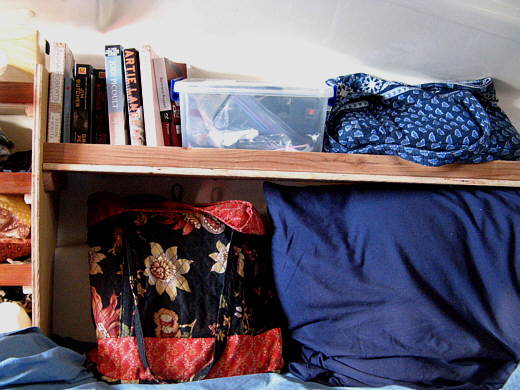
Here is Ruth's side (port side of the boat) showing the shelves that go forward towards the foot of the V-berth. They are high enough so that your arms and/or legs will fit under them.
........
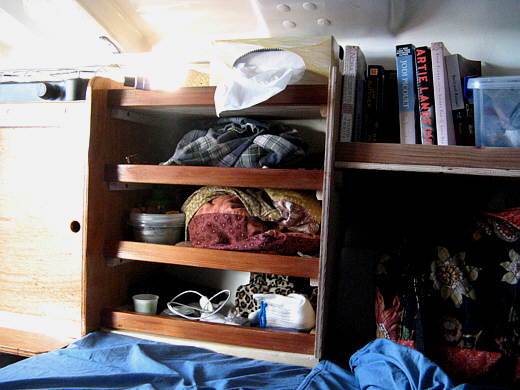
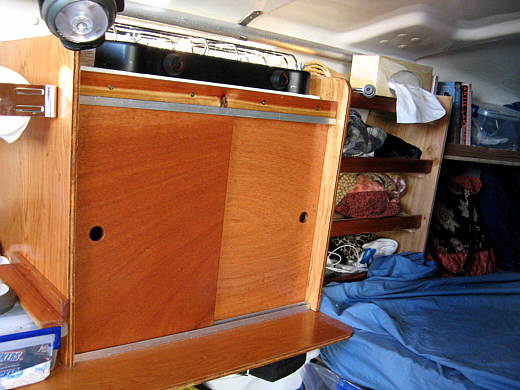
Her is Ruth's main storage area.........
........
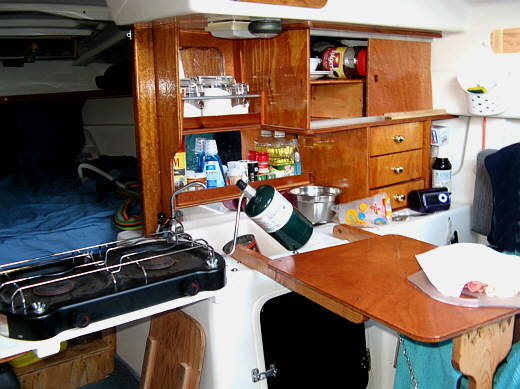
....... with the main food storage ahead of it.
........
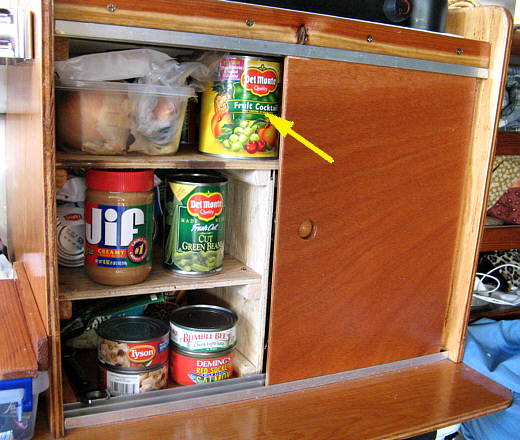
This storage unit also holds the stove on top of it and is where we can keep.............
........
......... a couple weeks food supply. Additional food is kept way forward under the very foremost storage area under the V-berth. When I designed this I kept the shelves far enough apart so that you could slide one of the large size cans (arrow) into the unit on any shelf. That has worked out to be a good spacing between shelves.
........
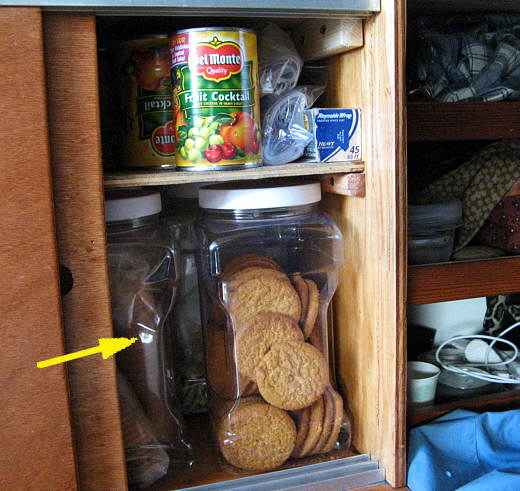
On the right side bottom there is room for 4 of these plastic canisters we got at Walmart. Two hold 2 different kinds of cereal and the other two hold crackers and cookies. More of these items are also carried under the forward part of the V-berth. After being out about 12 days on this trip we got into that area and replenished this storage compartment.
........
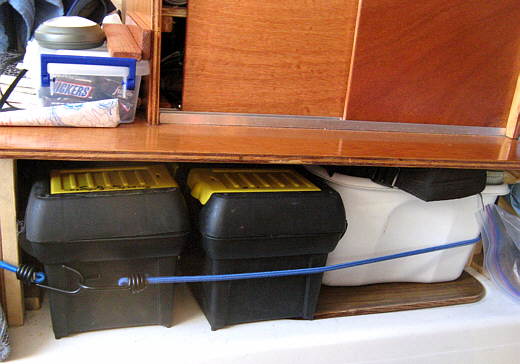
Under the food storage is a shelf where we carry two tool boxes and a tub that have SAE and metric tools, spark plugs, fittings, gas line bulbs, sail repair stuff, cleats, small blocks and lots of odds and ends we need to set the boat up with or that might be needed in an emergency. I carry a number of screws, bolts and nuts, especially ones to use on the mast or rudder in case something is lost there.
In another container that is back in the aft berth area we carry a screw gun/drill with two batteries and a charger along with a 12 volt to 120 volt inverter for the charger. I also have bits and a volt/ohm meter in that box. We can take care of a lot of emergency repairs that we might have to attend to while alone on these long trips.
........
The bottom left arrow points to our cooler that isn't as efficient, but easier to get in and out of with its split lid. It is very convenient here next to the starboard cabin seat. Right behind it and out of view is our better 5 day cooler that we usually pack with extra ice and move it to the other one as needed. Above and behind the second cooler (top left arrow) is a shelf for sail storage and where the pop-top cover is stored. Here the pop-top cover inside of its storage bag has been pulled forward over the second cooler to help insulate it some. The bottom right arrow points to where we keep the companionway hatch during the day and the top right arrow points to the VHF marine radio that we can get to from either the cabin or cockpit.
........
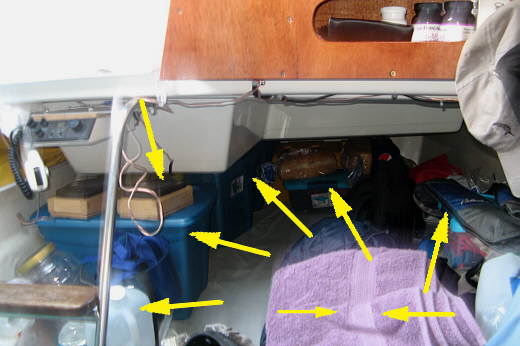
The aft berth has a number of things stored there. We try to keep the light stuff back this far.
Starting at the left is a tub that we keep 2-3 1 gallon water containers in to fill water bottles and such. We fill these every couple days with our transfer pump that is also usually used to transfer water from 4 and 7 gallon water containers to the one that is hooked to the sink.
The second arrow up on the left points to a tub where we store up to 4 trash bags in supermarket plastic bags. We carried 3 of these tubs on this trip, but were able to empty trash at Dangling Rope and could of made it just using this one. The others were stored way behind the sail storage on the starboard side.
The arrow pointing down on the left side points to a yellow ex-bulk laundry soap container that has a good snap on lid and is where we store the full Double Doodie bags (Wag Bags) from the head in the main cabin. There will be more pictures of this stuff later in the trip.
The third arrow up on the left side points to a container for heavy clothing and the two arrows at the bottom point to the pile of clothing we start and end the day with when it is cooler along with towels for drying when we wash in the morning. To the left of that tub and under the sail storage is a smaller tub with the Double Doodie bags and toilet paper and deodorizer.
The fourth arrow from the left points to the container with the drill and other small storage tubs for dingy stuff and misc. items.
The last arrow to the right is where we store the table (see next picture) and the gin pole and support rod used with the rear mast support when trailering and the privacy companion hatch cover.
All of the items from the coolers over to the port side can be moved out very quickly if for some reason we wanted to sleep in the aft berth, such as the boat riding up and down on big waves while anchored, since the up-down motion wouldn't be as great as it is in the V-berth. We still have never slept in the aft berth though to this point.
........
Earlier in this journal the table was in a picture where it was back on the stairs coming down from the cockpit. It also works resting on the edge of the sink equally well. We are very happy with the way the cabin is set up with the stove, sink, moveable table and storage for the food, pots and pans, plates, bowls and other eating utensils all very handy. There are no further changes planned here.
Later there will be more interior pictures describing the head area, but for now on with the voyage.....................
........
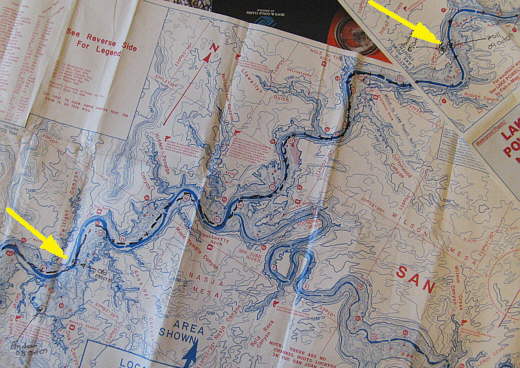
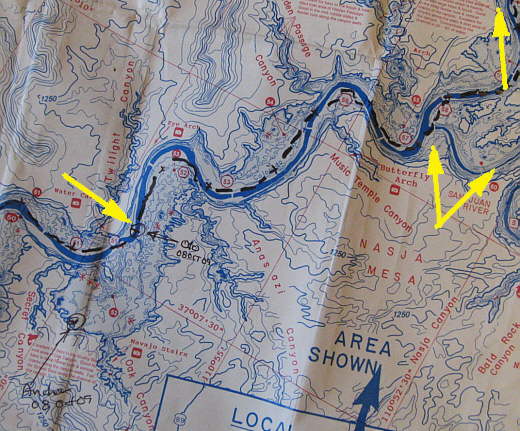
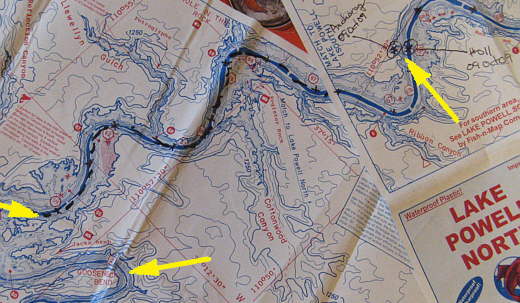
This picture show the days progress from waypoint #10 (lower left) up past the San Juan Arm (middle) and on to the next map and waypoint #11 were we spent the night.
........
From #10 to the mouth of the San Juan Arm and ...............
........
........from there north onto the Lake Powell North map and waypoint #11 (days end).