..................
..........................................--- Onboard Generator Part I ---
I use a CPAP machine for sleep apnea and it uses 6 amps at 12 volts and I'll use it 6-7 hours a night, so that is about 39 amp hours a day and we run the depth finder all day while sailing and I'm not sure what it uses and also play the tape deck a couple hours a day. With these daily demands and the need for a sure battery charge for the CPAP machine we decided that we needed a generator to supplement any solar panel that we would use on the boat. I looked at the options and felt a dedicated 12 volt generator made more sense than buying a 110 volt and then hooking up a charger to it that could take hours to charge the battery vs. a car alternator that is designed to charge batteries. What follows is the build of that generator.
On our Idaho/Canada trip where we were on the boat overnight for 28 days (water -- 24 days and trailer --4 days) we ran the generator on the average about 30 to 50 minutes a day. We are now (Aug '09) also adding a 40 watt solar panel to the boat and hope that will allow us to run the generator less, but it won't be going away as it is nice to know you can top the batteries off any time that is needed and I don't thing the solar panel will give us all the charge capacity we will need to keep up with the demands of the CPAP machine.
First here are two good sites to read if you want to make your own 12 volt generator:
...............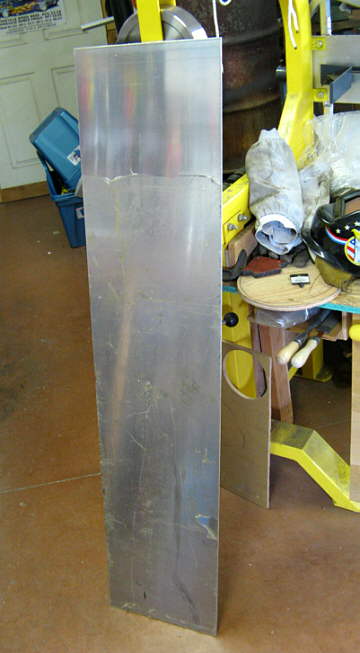
I started with this sheet of aluminum I had got at a scrap yard and cut a piece for the base.
...............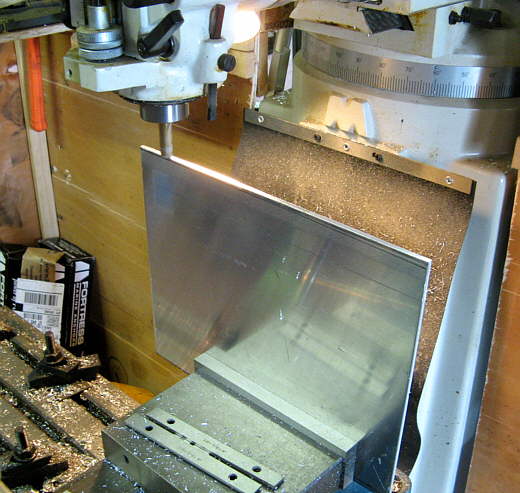
I used the plasma cutter and then finished off the edges on the mill.
...............
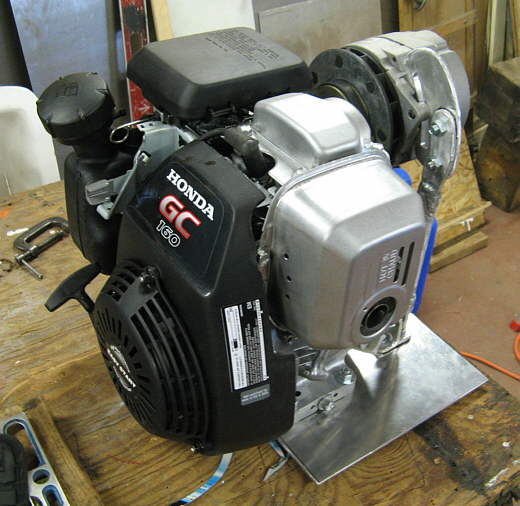
The motor is a Honda 5.0 HP GC160 3/4" that puts out 5.0 HP and uses 1.26 Quarts Per Hour with Max Torque of 8.4 lbf / 2500 rpm and has a displacement of 9.8 cu in. The best price I could find at the time was $222 from Tulsa Engine Warehouse (http://tewarehouse.com). They had it in stock and the shipping was free and it came right away. I considered smaller HP motors and Harbor Freight ones for about a $100 less, but when I read one report where they had over 13,000 hours on a Honda in 15 years I decided that was the way to go. With this engine the complete generator mounted to the base plate weighs about 45 lbs.. I could of bought a cheap 110 generator for what I have in this one but then I would have had to run a 6-10 amp charger off of it and not had the charging power I have now. We just didn't need the 110 voltage on the boat. I run the engine about 1/2 throttle, but will experiment more when I get an amp meter up and can see what the charging amps are at different throttle setting. On our 28 day trip I don't think I burned more that 2 gallons of gas total running it 30-50 minutes a day. It is very effecient and uses less gas than I thought it would. When looking for these engines be aware that some don't have a manual throttle and the choke can be different. There are different variations of this engine new. The link above will get you to the one we used.
The pulley (sheave) is a BROWNING AK56 X 3/4 Fixed Bore One Groove Sheave, OD 5.45 Inches, 3L Belt Pitch Diameter 4.86 Inches, 4L or A Belt Pitch Diameter 5.20 Inches, Type Spoked, 3/4 Inch Bore Size, Cast Iron. You can find it at Grainger (item 3X789). I had the local auto parts store order one from Grainger from me and paid about $45 delivered and got it the next day. I would only use a cast iron pulley in this situation. The aluminum ones will deform to quickly.
...............
Angle for part of the alternator support.
...............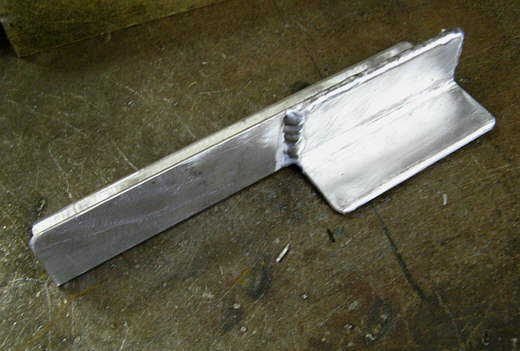
Cut and welded together.
...............
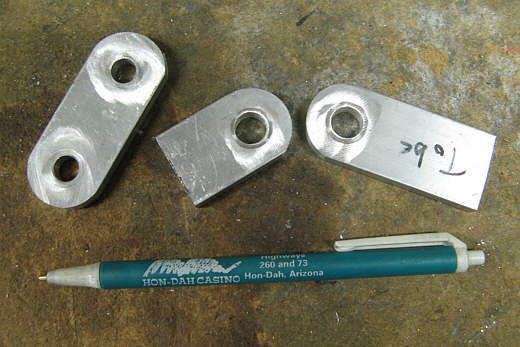
The pattern on the left was made and then transferred to some aluminum which....
...............
was drilled and.....
...............
shaped to.........
...............
........its........
...............
.......final size and shape.
...............
Two of these were made to support one side of the alternator.
...............
They were placed over the angle pieces and welded to them.
...............
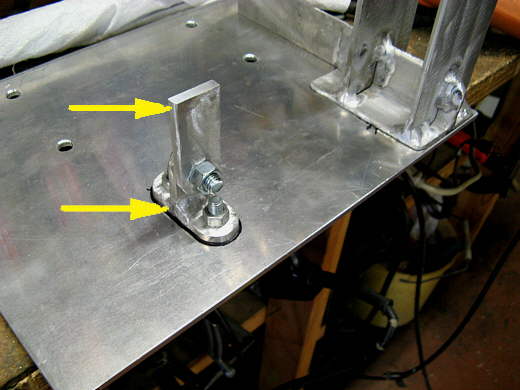
One side still had to be supported and this side needed to move in a slot for belt tensioning.
...............
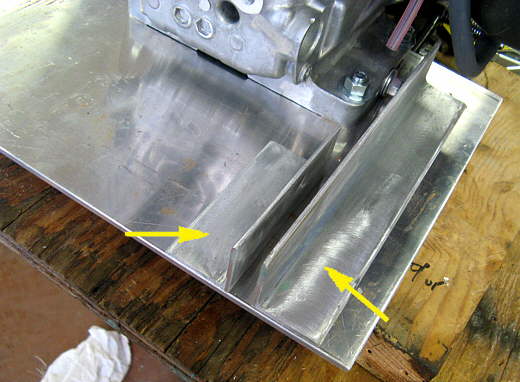
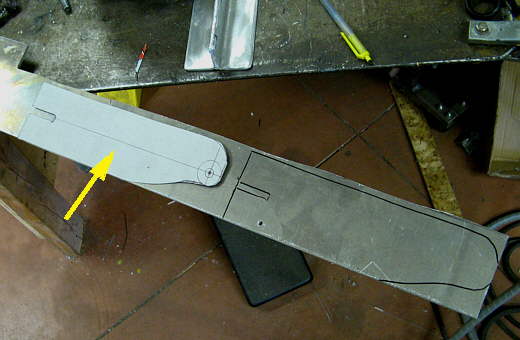
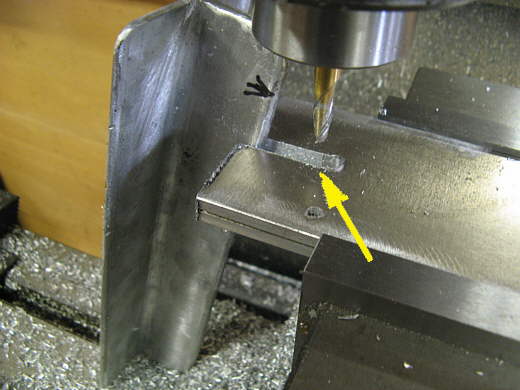
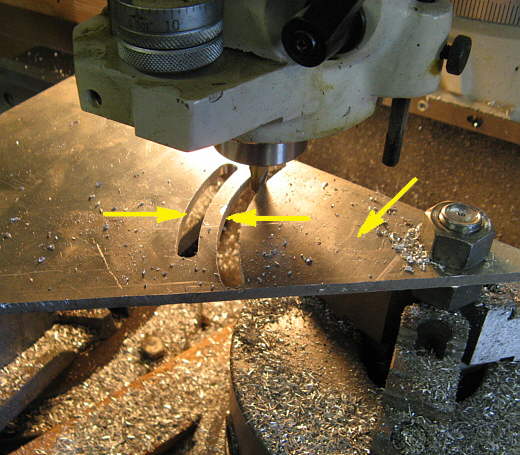
By trial and error another pattern was made that provided the slot (middle arrow) and provided clearance with the alternator (bottom arrow). The top arrow points to the outer shape that wasn't critical.
...............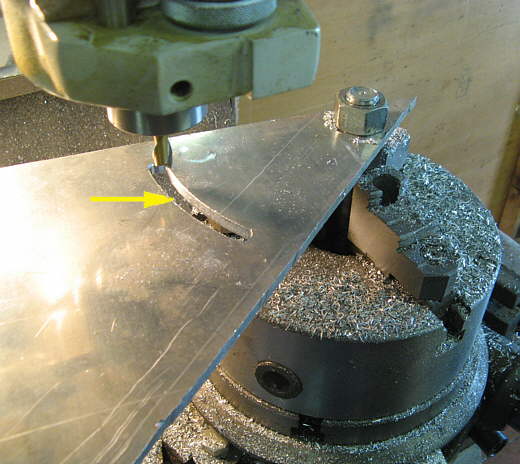
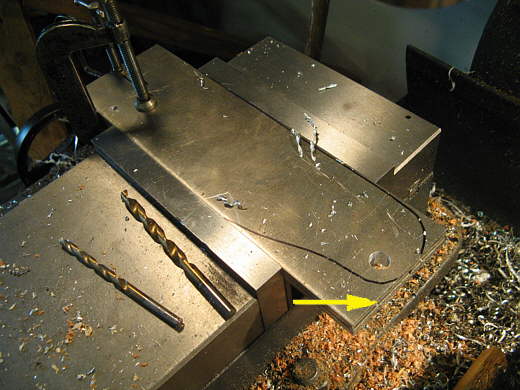
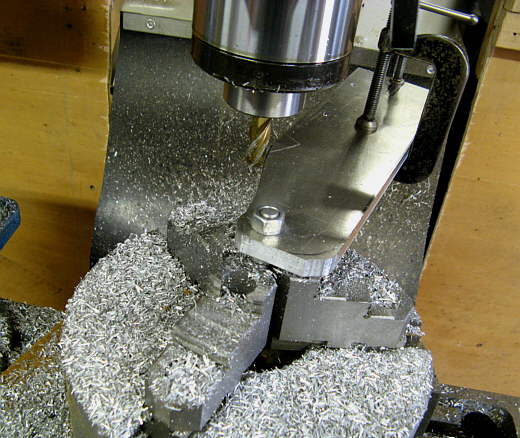
Here the slot is being milled in using the rotary table and....
...............
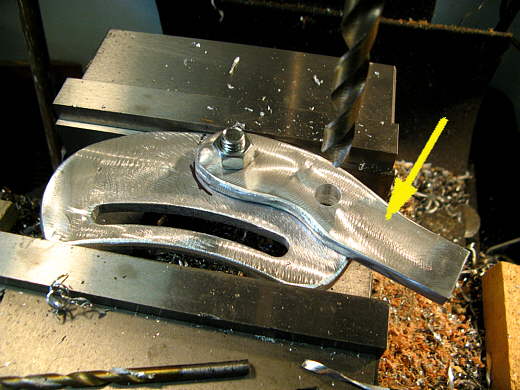
then the clearance side was made. After this step the left side was cut free of the right side (right arrow piece).
...............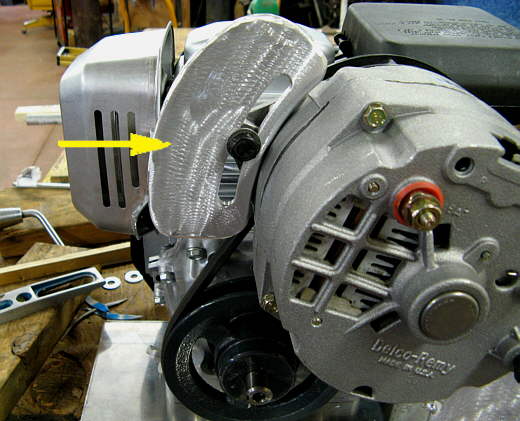
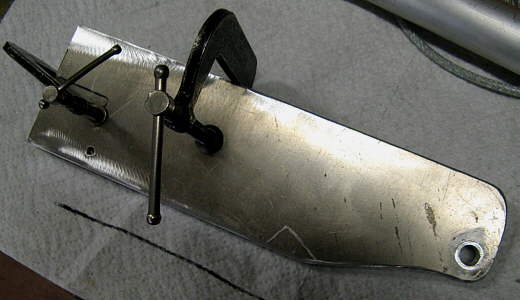
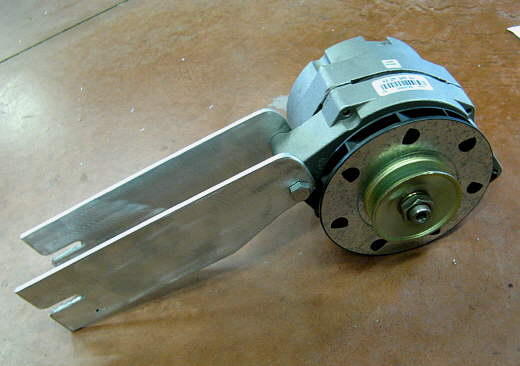
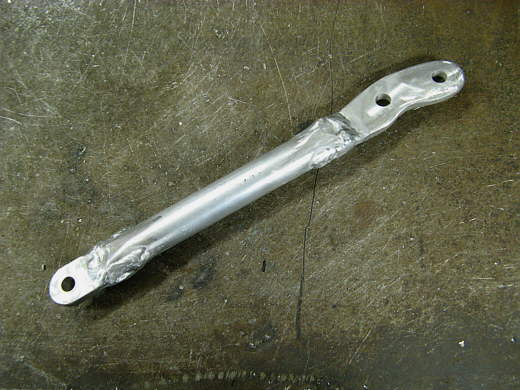
Here is the finished piece attached to the alternator where I want it mounted.
...............
Various..........
...............
.....pieces were..........
...............
...........made.........
...............
........to finish...........
...............
......the support for the left side.
...............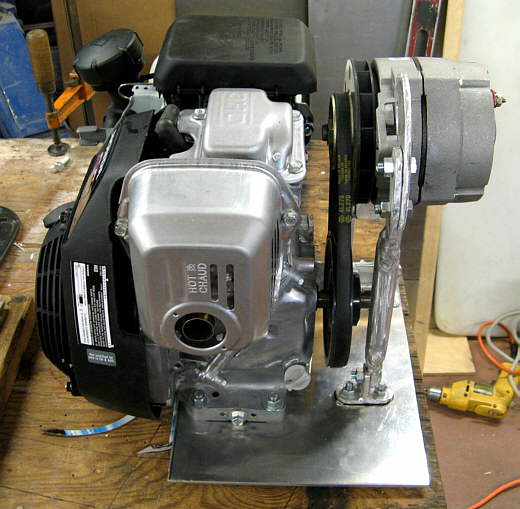
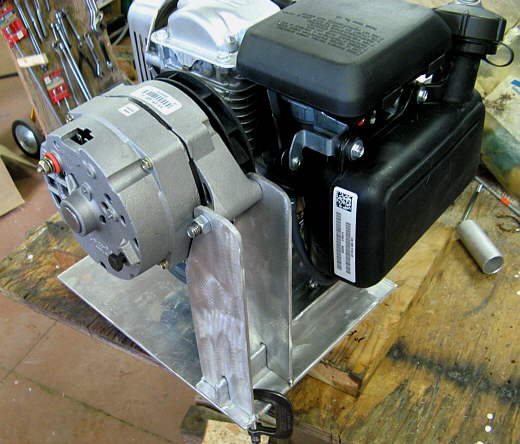
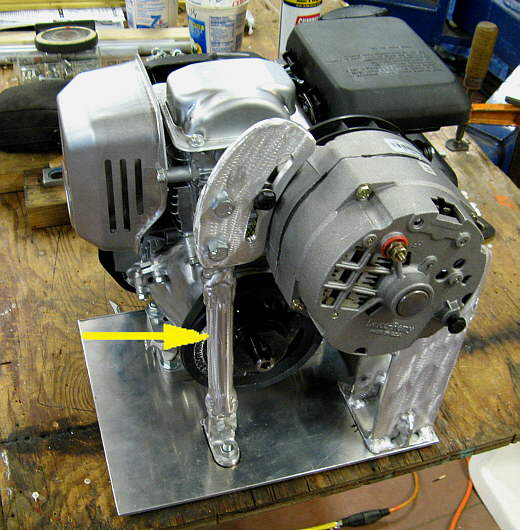
I considered a direct coupling between the alternator and the engine, but this is actually a more compact setup.
...............
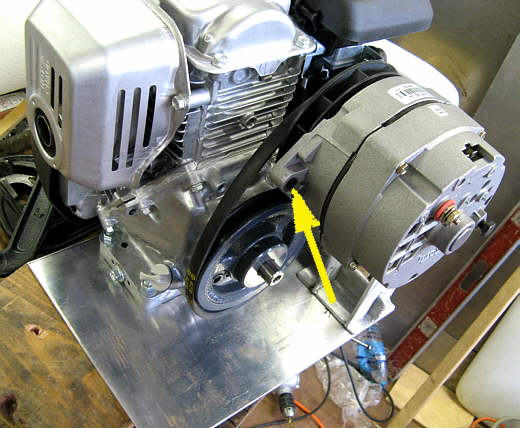
The way this is setup also results in the alternator turning in the same direction it would in a car. The alternator will generate 12 volts regardless of the way it rotates, but won't cool if it turns the wrong way. The pulley on it actually pulls in air from the backside and through the alternator and out the front.
...............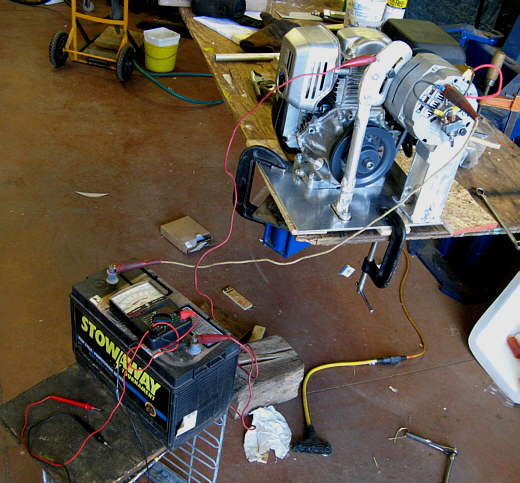
Here I'm doing a trial run to make sure things are working. All is fine, so it is on to mounting this to the boat.