..................
......................................--- Onboard Generator Part II ---
...............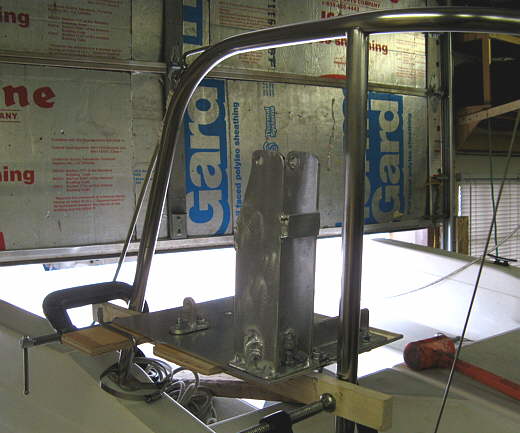
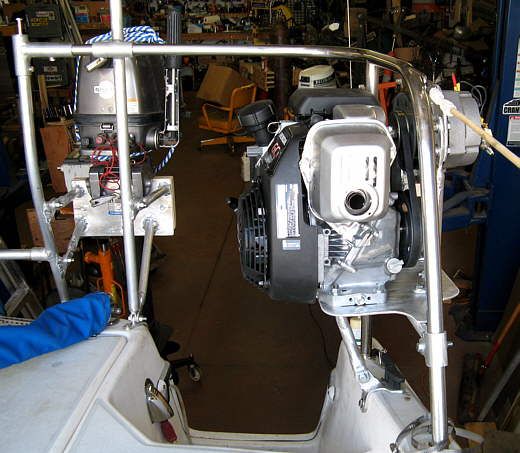
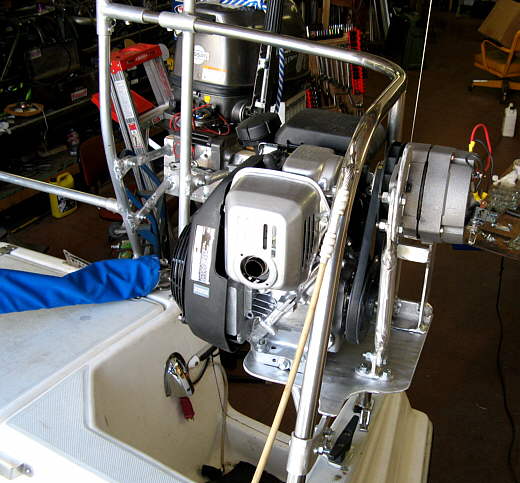
I decided to mount it on the port side under the pushpit rail and above and to the left of the outboard as this area is pretty much free of use.
...............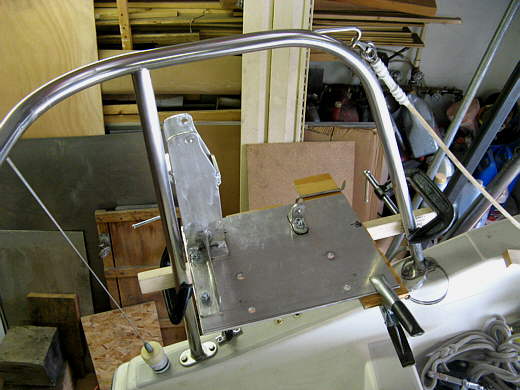
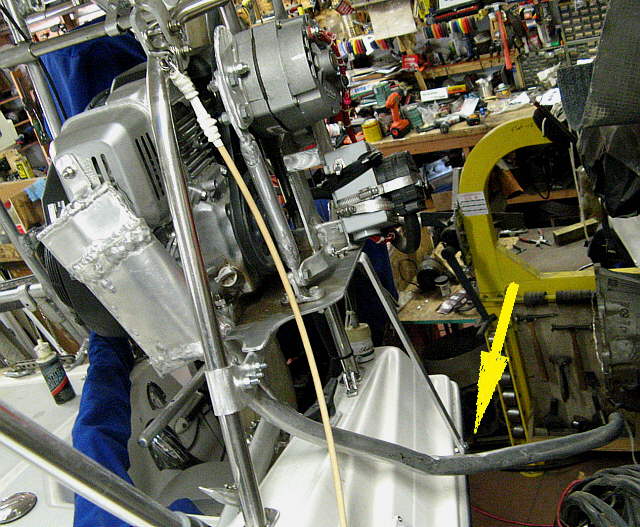
The engine plate was mocked into position using wood and clamps, first with the engine/alternator on it and then without.
...............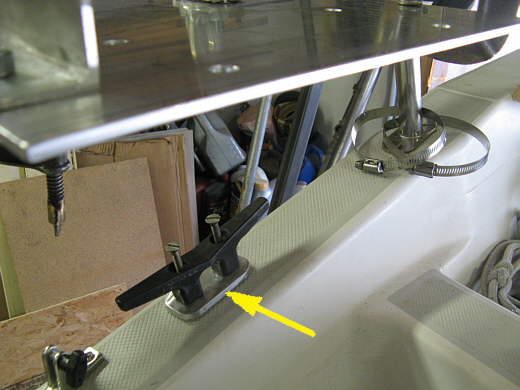
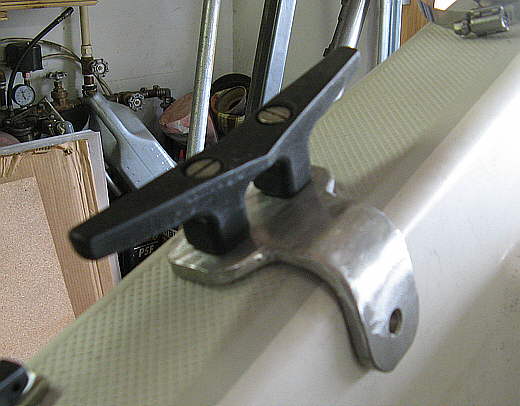
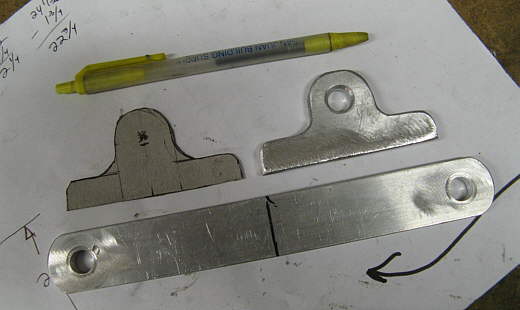
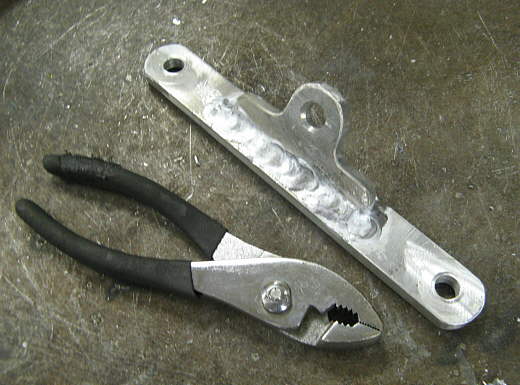
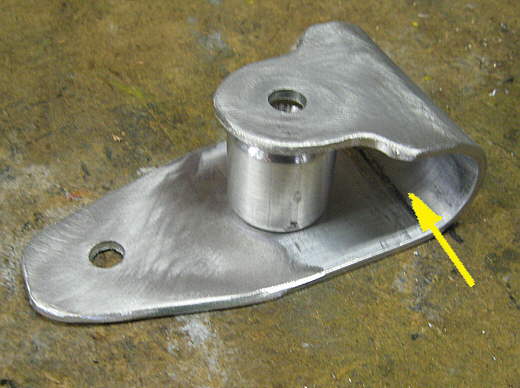
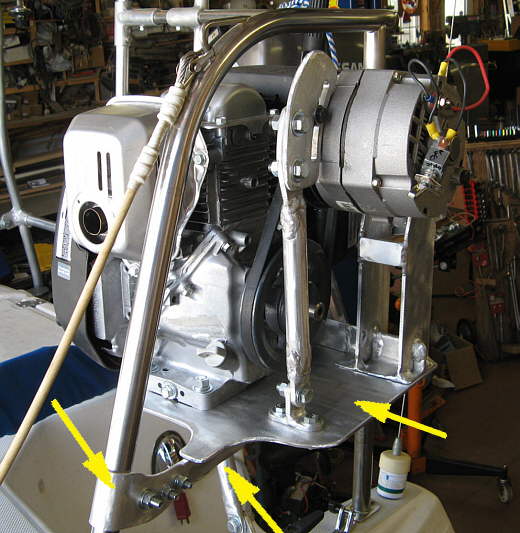
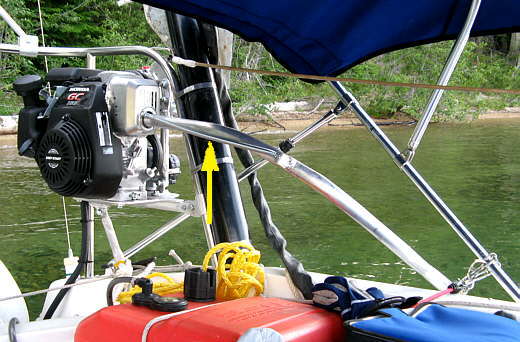
For one of the mounts I used the bolts that go through this cleat and into the lazarette. It is a pain getting to the bottom of them though. The arrow points to the first piece that was made.
...............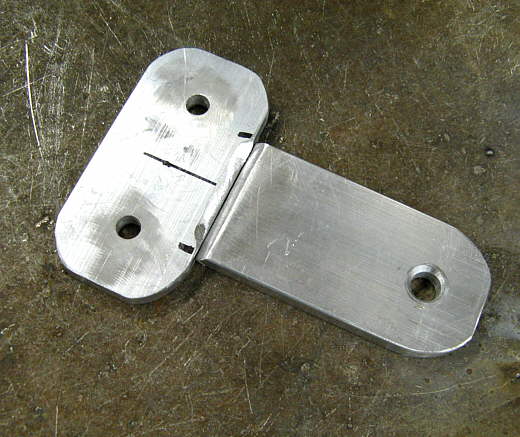
It was then added to........
...............
......put into place and marked for cuts.......
...............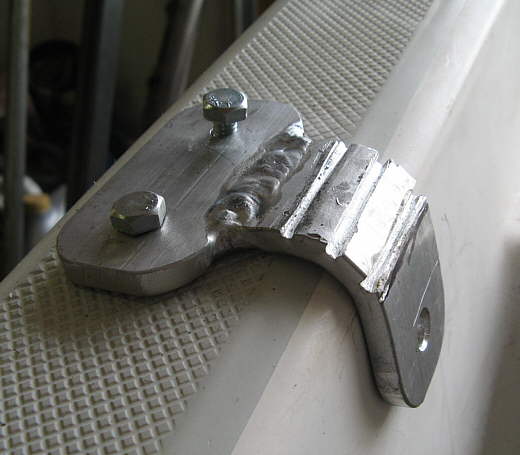
.........and bent to follow the hull.
...............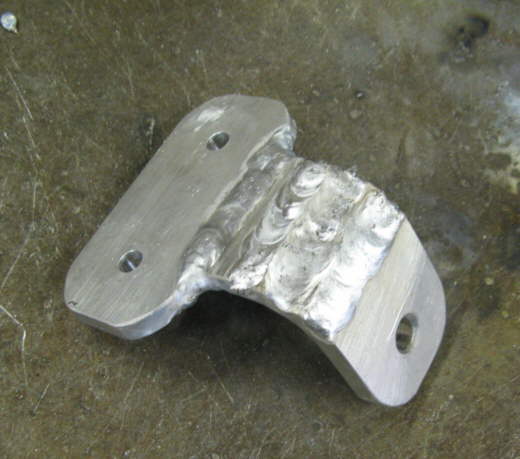
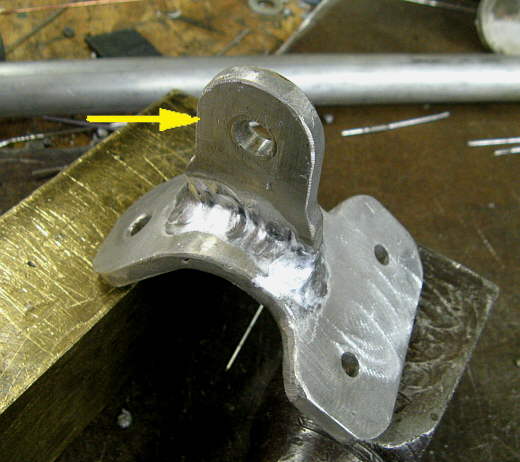
The relief cuts were welded closed......
...............
.......and ground down. The bottom hole adds another attach point.
...............
More..............
...............
.........mounting pieces...........
...............
...........were made.
...............
Tubing was use to go between the mounts.
...............
After some thought I ..............
...............
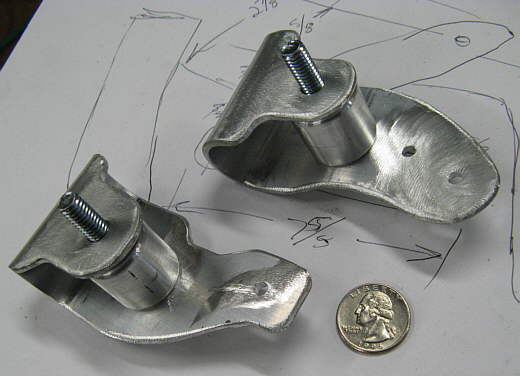
..........made these..........
...............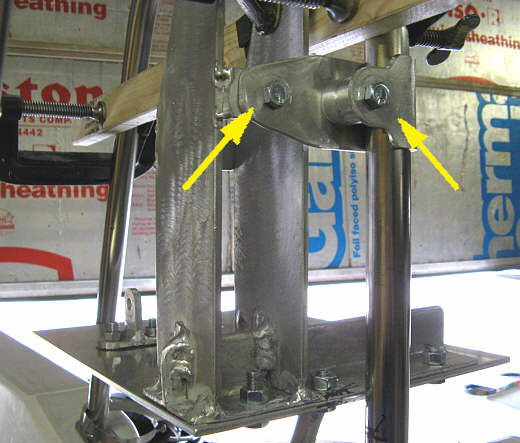
........brackets that allowed me to attach mounts to the pushpit stanchions.
...............
...............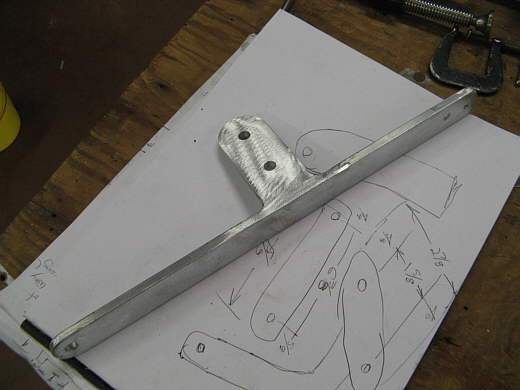
The side to support that goes under the motor plate.
...............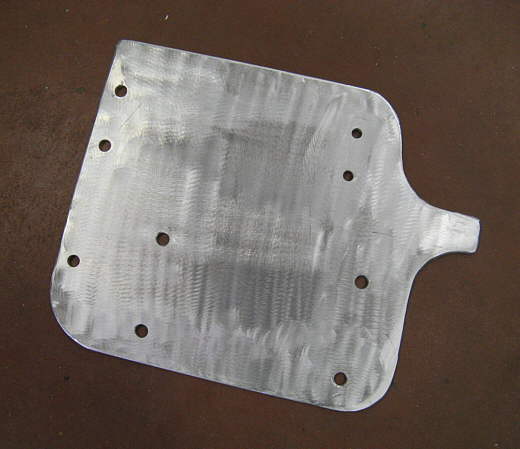
The motor plate reduced in size to clear the bimini support that is on this side.
...............
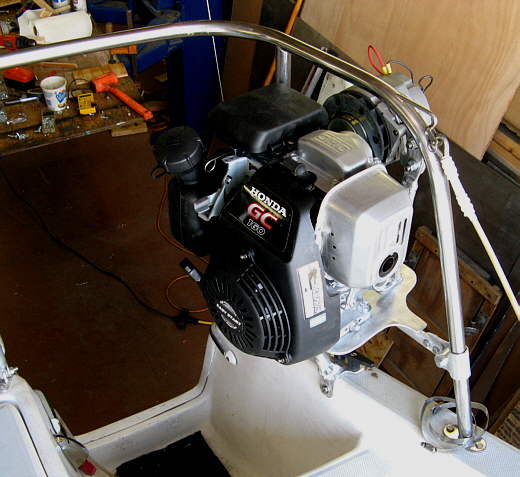
The end of the mounting process..............
...............
..........
...............
.................
...............
...............
...............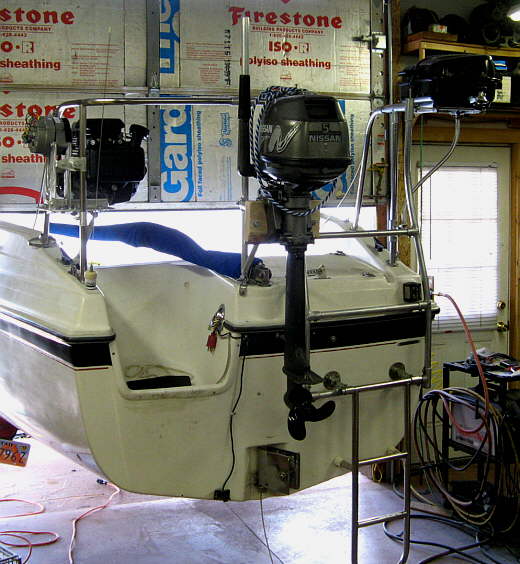
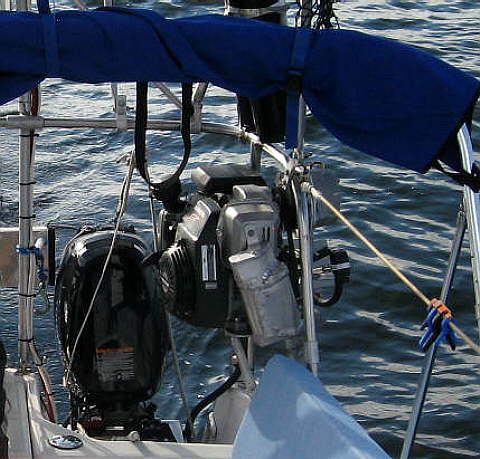
The finished generator isn't much larger than the top of the Nissan 5 HP dingy outboard.
...............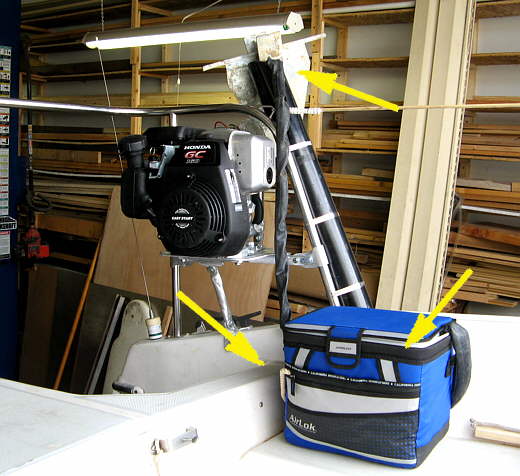
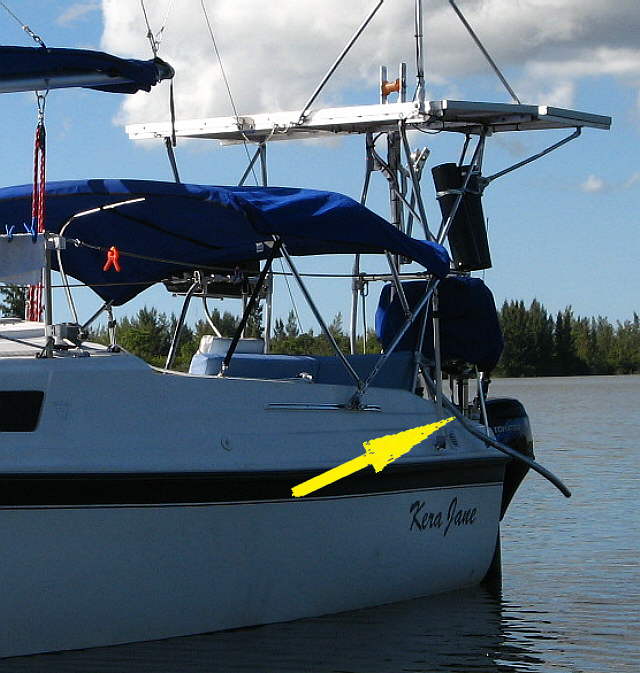
Also in this area is our stern anchor with it's road bag.
...............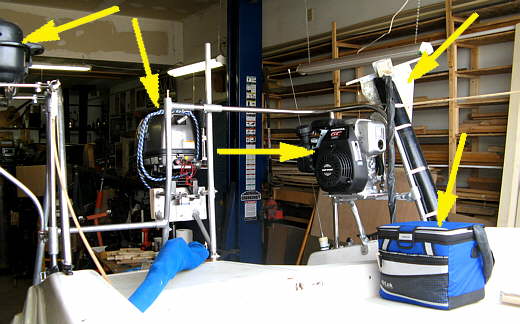
There is a lot going on at the back of the boat and we won't ever be racers. This boat is all about long multiple week trips on board.
...............
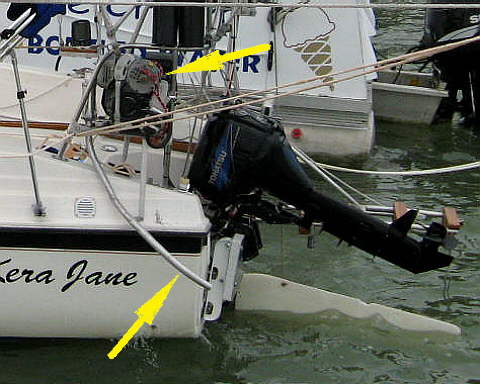
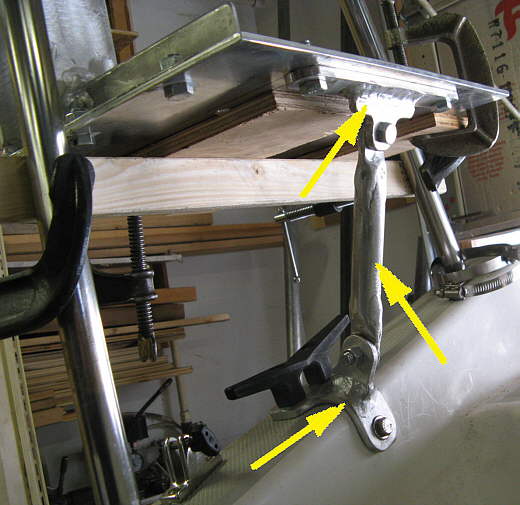
Exhaust pipe is held in via spring (arrow). Attach spring to hole on the motor. Pull pipe out and then let it go in over stock short pipe (a couple seconds to do this).
...............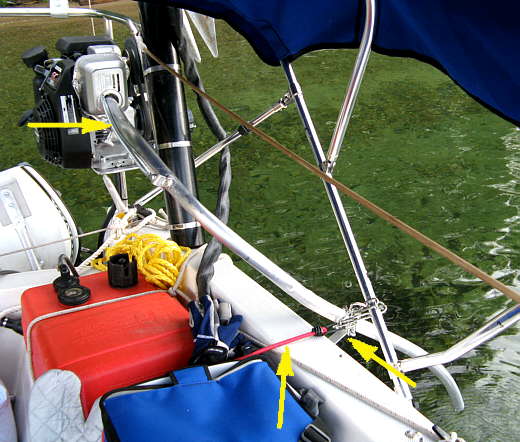
Upper arrow shows spring holding pipe in and against motor. Lower right arrow points to a piece of flat stock welded to pipe that fits into the Bimini slide track (just rests in there). Left arrow points to bungee cord pulling pipe towards boat so that the flat stock on the pipe stays in the bimini slide track without vibrating around. You can see the ripples in the water as the pipe extends almost down to the water. The pipe takes away fumes that you can smell without it and directs most of the exhaust noise away and down. I'm a little concerned about having it exit under the water as I don't know if the motor is designed to take the back pressure that could create.
Motor/generator noise in cockpit isn't too bad, but louder than a Honda generator. In the cabin the motor vibration noise is more noticeable. The quietest place is actually sitting right across from the generator. I might experiment with metal/rubber mount studs to hold the motor on to see if that cuts out some of the vibration, but we can live with it as is.
My CPAP machine that I use while sleeping uses 6 amps at 12 volts and I'll use it 6-7 hours a night, so that is about 39 amp hours a day and we run the depth finder all day while sailing and I'm not sure what it uses and also play the tape deck a couple hours a day. On the average we ran the generator about 30 to 50 minutes a day on our Idaho/Canada trip where we were on the boat overnight for 28 days (water -- 24 days and trailer --4 days).
We are now (August 09) adding a 40 watt solar panel and an amp meter that should cut down on generator time, but we need the generator to be sure we can keep the batteries up on cloudy days for the CPAP machine.
.......................................
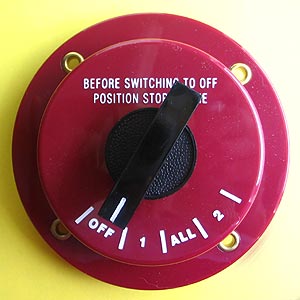
Right now I charge one battery at a time using the above switch that I bought from Duckworks. When it's charging voltage gets to 14.1 or higher I'll switch to the other battery and top it off to the same point. I wanted to add the amp meter so that I can monitor the charging amps and if they get down to 1 or 2 stop charging as I'd be at the point of diminishing returns.
We are quite happy with the generator and would do it again.
NOTE: An update since adding the 40 watt panel. The 40 watt panel really helped and on our 19 day lake Powell trip if I remember right we used the generator on the average of 15-20 minutes a day and it went the whole trip on one tank of gas (the tank on the Honda). We have bought (spring 2010) a second 80 watt panel to mount and if I can figure out where to put it we will add an additional 40-60 watt panel for a total of 120 watts to 180 watts. The reason for the added panels is we bought an Edge Star 63 quart frig (true compressor type) and I'm also building a computer/chartplotter that might be on quite a bit in Florida. I think the 80 watt panel will cover most of the frig's electrical needs and if I can add even another 40 or 60 watt panel that should cover the computer/chartplotter as it should draw less than 40 watts total.
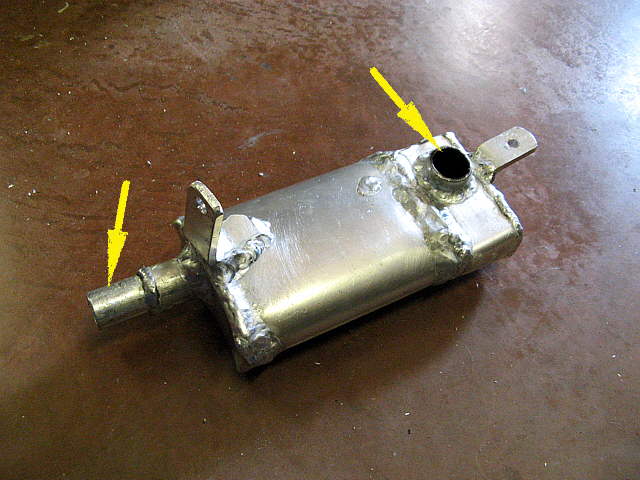
NOTE: A further update......this is something I'm not real sure why I even did. The muffler on the Honda does a pretty decent job, not as quiet as Honda's 1000 and 2000 110 generators, but not all that bad. Well anyway I got messing around one day and threw together another muffler...
.......
... that attaches to the stock one, so they are in line. When I say designed and made let's use those terms loosely. I used pretty thin aluminum for the body more as an exercise in seeing if I could weld it without it all ending up on the floor. The welds aren't pretty, but I finally got it to the point there were only 2 holes in it. The inlet, right arrow, and exhaust, left arrow.
.......
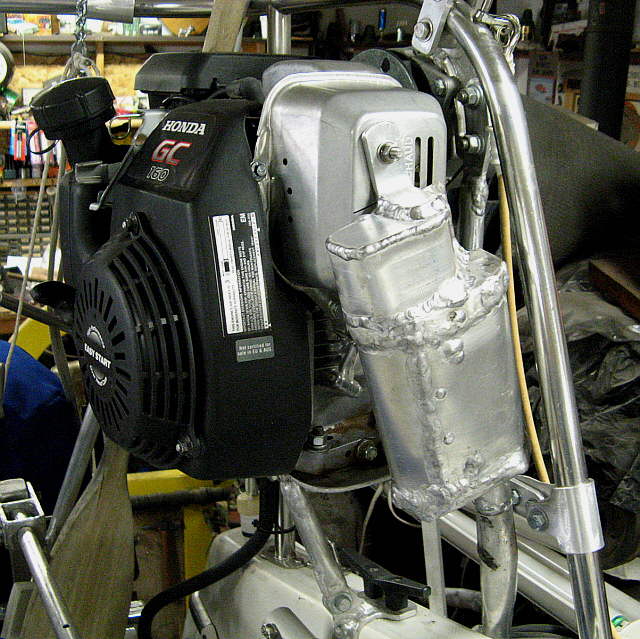
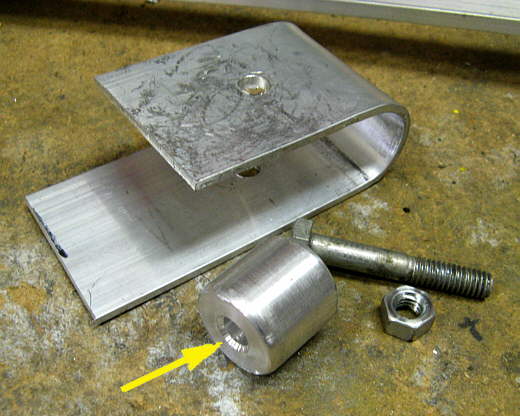
The inlet slides on the exhaust of the stock muffler and a bolt through the heat shield holds it....
......
.... in place.
.....
A long piece of strap, arrow, holds the exhaust pipe in place. On the water I later replaced it with a bungee and length of chain so that I could quickly put it in place or remove it so that it wasn't always over the side. I did that after we found that we didn't need it very often with the 180 watts of solar we had added to the boat.
......................
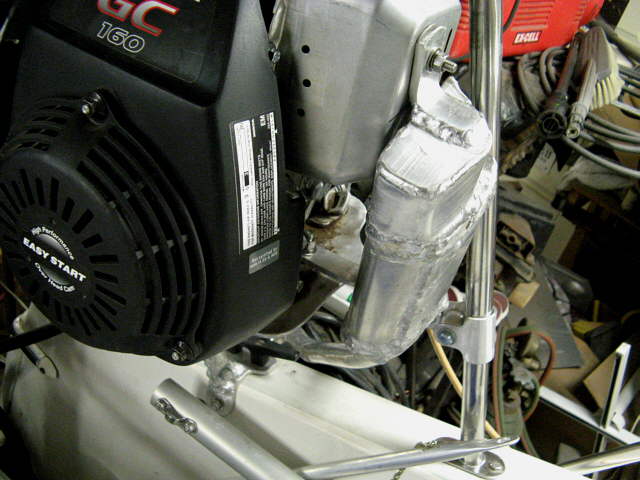
Above is a picture with the muffler/pipe in place.
......................
One showing the exhaust pipe when we still had it in place most of the time.
.....
The cover Ruth made for the gen-set will still go on over the muffler/pipe. Did the muffler help? Yes it did quiet the exhaust considerably to the point that now what you here is the noise coming from the vibration due to the mounting and the resonance of the hull. I'll work on the mounting issue when I find time. It isn't a very high priority now that we have all of the solar and the gen-set doesn't get used that much.