.............Our MacGregor Index Page.....Mac 26S Rigging Mods Index Page
............................. Previous Page............................... Next Page If There Is One
=======================================================
--- Topping Lift/Raise Gooseneck/Bolt Rope Fix ---
=======================================================
We had ordered a Bimini for the Mac and since I'm 6-1 we wanted it to sit as high as possible and still clear the boom. Well the boom was way down low at about 24 inches, mostly do to bolt rope stretch. I don't know why they call it that as to me it looks as if the rope in the bolt rope shrinks. At the same time I wanted to put a topping lift for the boom, so it would be easier to reef the main and also to pull the boom up out of the way while anchored. I started with the topping lift.
...............
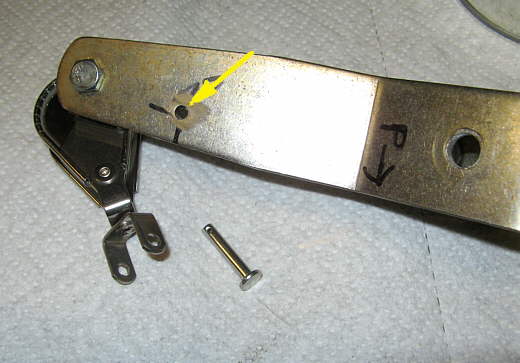
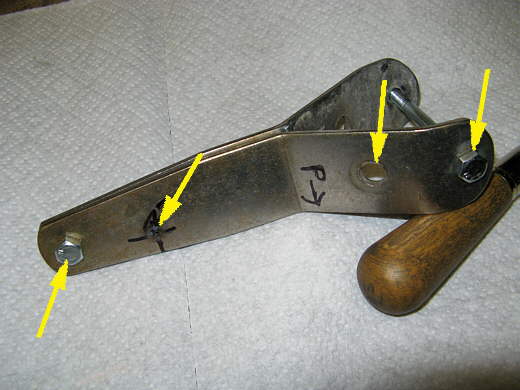
I took these two pieces off of the top of the mast (don't know what they are called). The right two arrows point to the bolt holes that holds these pieces to the mast and the left arrow points to where the back-stay attaches to the top of the mast. The bolts through that hole and the hole on the right are just in there to located the two pieces together while I drill a hole for the topping block. The Middle hole points to where I want that hole. I find it easier to drill through stainless if I can first burn a hole through with the plasma cutter and I did that first.
...............
Then I drilled that hole out to 3/16 th's for the pin that will hold the block (left) to these pieces. I almost screwed up as I thought the block would fit inside the pieces, but the "U" shaped piece at the top of the block fit on the outside in order for the pin to fit through. The hole was almost too high. The block came from Duckworks and is their RL-305-B - 3/8" - $12.65. (NOTE: Further down the page you will see where this block was later swapped out for one with 2 sheaves.)
...............
Here the block and two pieces have been reattached to the top of the mast with the mast down and in a horizontal position.
...............
Here the mast is back up with the topping rope going through the block.
...............
The topping rope attaches to the back of the boom on one end. Here I just tied it on, but I'll but a snap hook on it.
...............
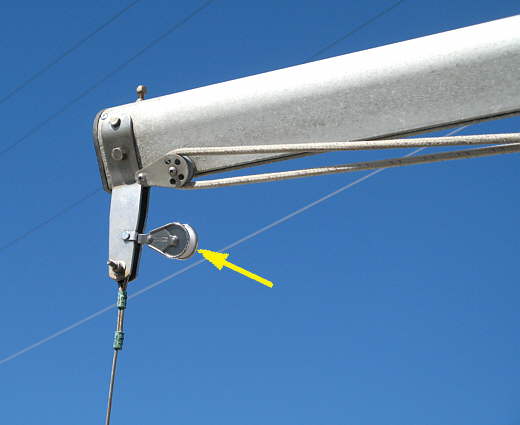
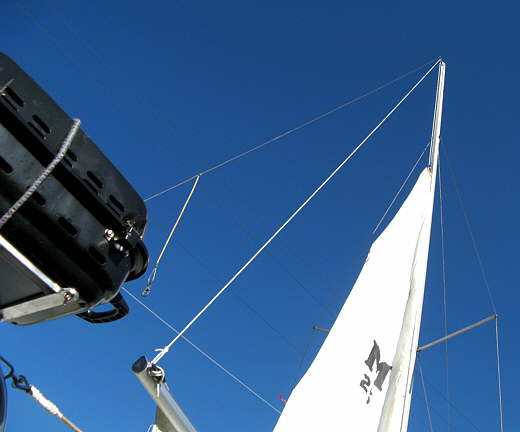
Here you can see the line going up from the back of the boom to the block that was installed at the top of the mast. The nice thing about this is that it will hold the boom up while raising and lowering the sail and the sail isn't captured at the end of the boom like it was when it was hooked to the back stay with the line just to the left of the bottom arrow. This is much safer in heavy wind.
...............
Another view......
...............
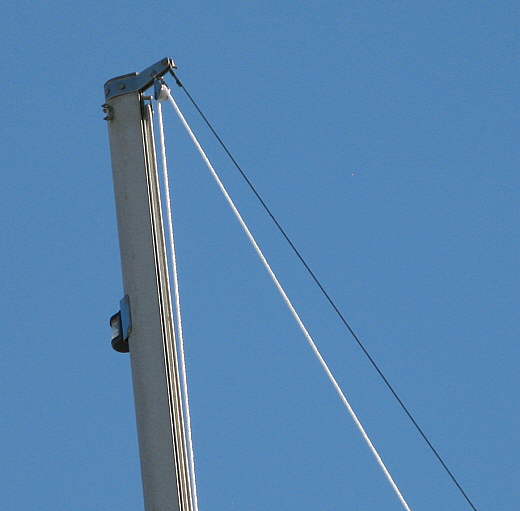
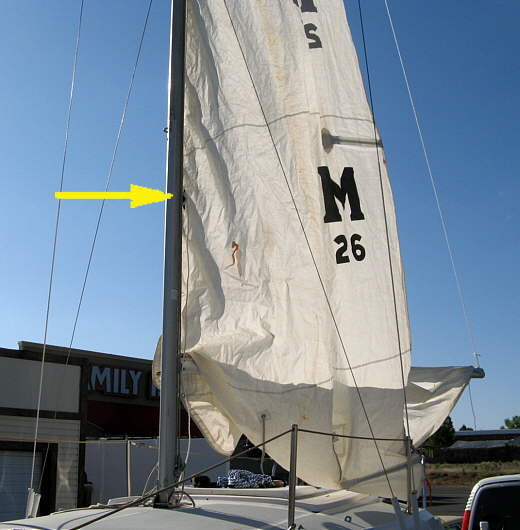
After the line goes up and through the block at the top of the mast it comes back down along side of the mast and for now I cleat it off on the cleat where the arrow is. Latter I might cleat it somewhere else, but for now I have to go to the mast to raise or lower the sail anyway.
...............
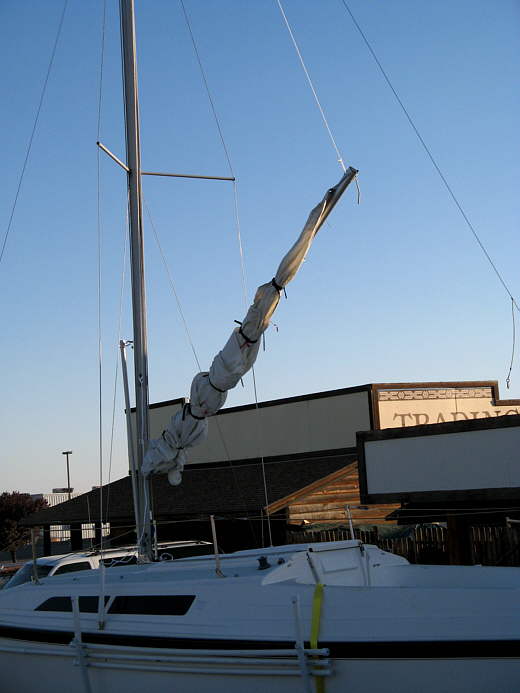
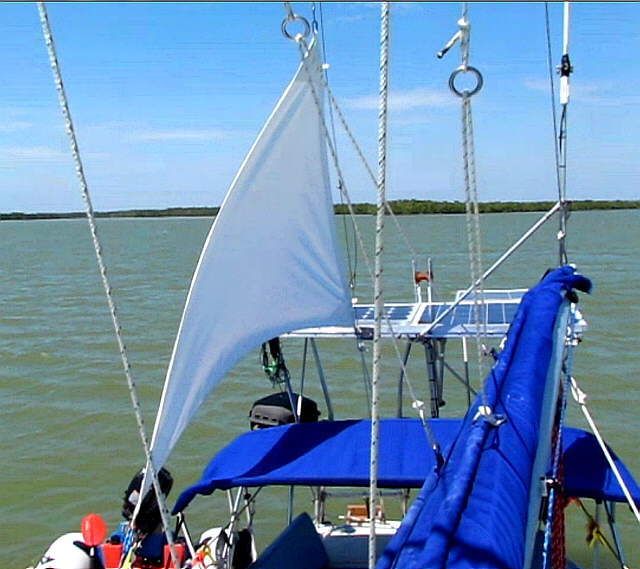
Another feature that I'm sure we will really like is the ability to lift the boom out of the way while anchored and we can also use the topping lift by itself or with the boom to lift the solar shower into place.
...............
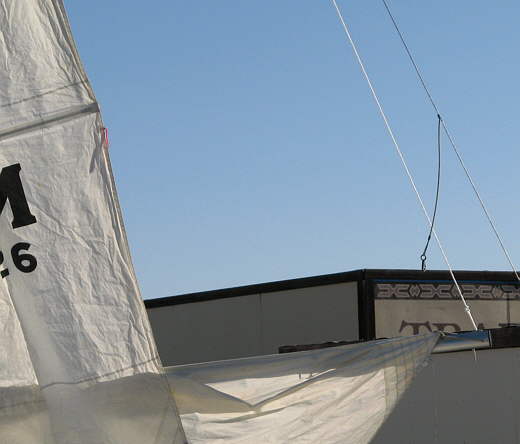
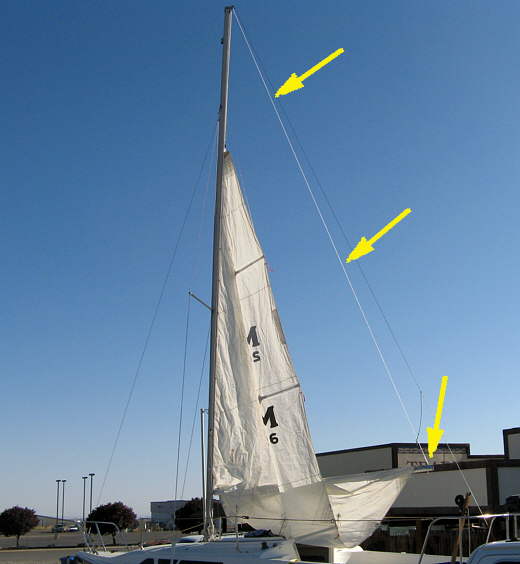
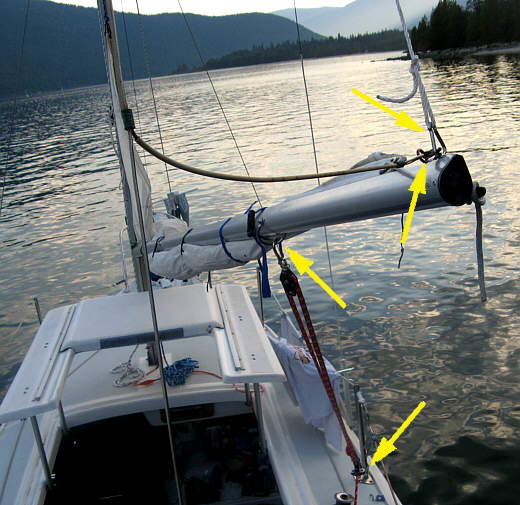
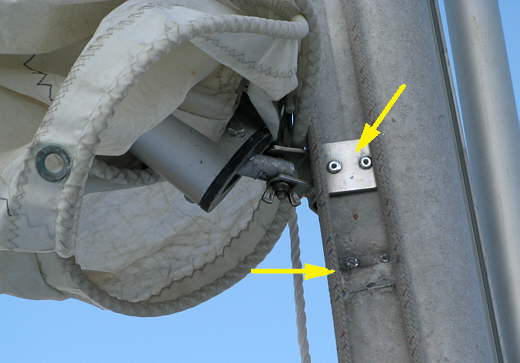
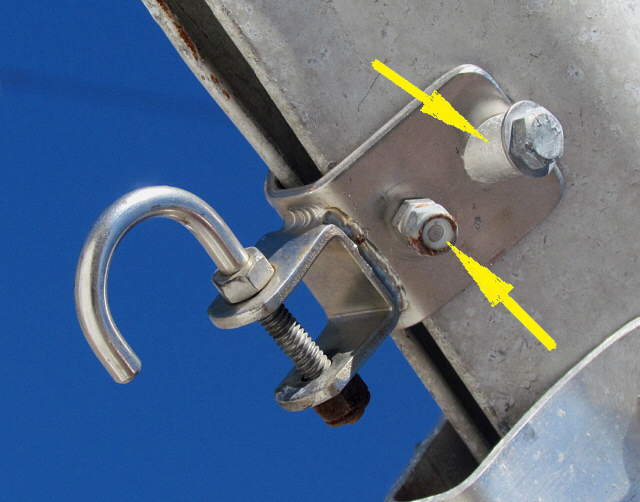
On anchor we hook the boom to the backstay with the clip that came there (second arrow down on right) and then pull it up against that clip with the topping lift (top right arrow). That keeps it from swinging all around, but there is still some movement so we started keeping the boom control line hooked up and we hook it to a carabiner that is hooked to the stanchion base next to the cabin/cockpit bulkhead used by the life line (other two bottom arrows). We pull The boom control line (main sheet) snug and that keeps the boom in one place as the boat swings back and forth on anchor.
..
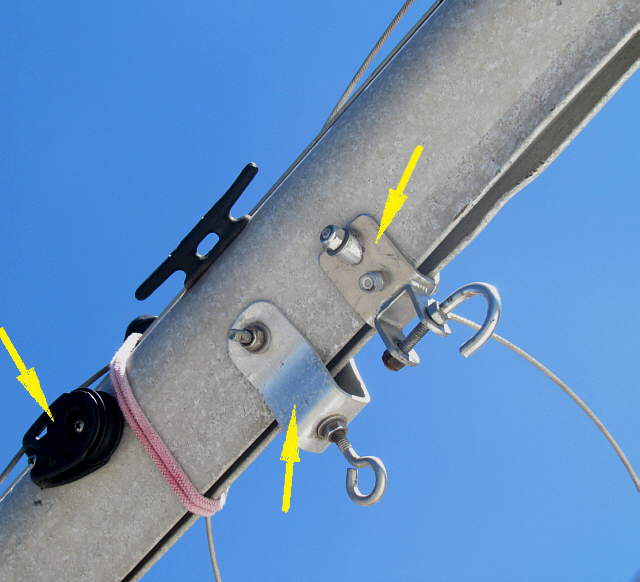
Latter I added a masthead VHF antenna and changed out the topping lift block to one with two sheaves (bottom left arrow) vs. the one further up this page. The picture above was taken with the mast down on the trailer, thus the backstay by the bottom left arrow isn't taught. Also there is a black bungee around the windex on the VHF antenna to stop if from spinning going down the highway.
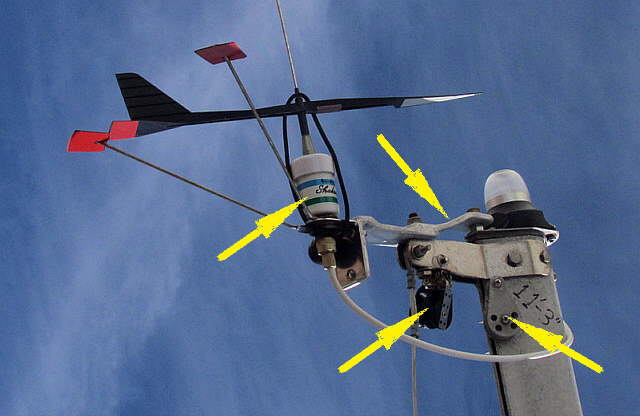
The top left arrow points to the VHF antenna with the windex mounted on it. The top right points to a 'drop' in the antenna bracket to lower it below the anchor light, not too evident from this camera angle. The bottom right arrow points at the main halyard block. The bottom left arrow points to a double sheave block that replaced the single sheave one that was used further up this page. One side is for the topping lift and the other side is for the ....
.
.... anchor sail up-haul. On anchor we now hold the boom up out of the way to one side with the topping lift, which holds it up and using the main sheet on the traveler, which holds it over to the side and with one of the preventer lines snapped on the boom bail to keep it from swinging around.
=======================================================
==== MOVING THE GOOSENECK UP THE MAST ====
Now the above didn't fix the low boom and Bimini clearance at all as it is not recommended to run the topping lift to raise the boom while sailing. So the first thing.....
...............
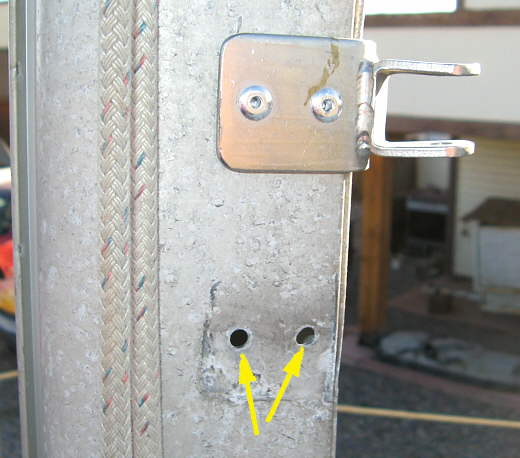
........... I did was to raise the gooseneck about 3 inches. I drilled out the rivets for the bracket (two arrows) and moved the bracket up to right at the bottom of the channel where you feed the sail/bolt rope into while raising the sail. This moved the boom up about 3 inches and is possible as there is more than 3 inches between the head of the sail and the block at the top of the mast that the uphaul halyard goes through to hoist the sail.
...............
Another view showing the lower old position and the new upper position. This was fast and easy to do. If you do this and your setup is similar to mind those are 3/16 th's inch pop rivets and not the more common 1/8 th inch ones.
...............
On our Idaho/Canada trip in 2009 the aluminum rivets that I had used sheared and I had to do an on the water temporary fix. There is more about that and pictures ( HERE ). With that in mind I wouldn't use aluminum pop rivets even though that seemed to be what MacGregor used.
........
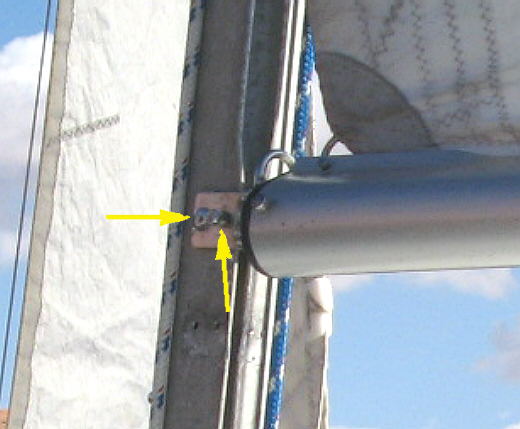
I next had a combination of stainless screws (right arrow) and steel pop-rivets (left arrow) that we used with no problem on our Lake Powell Trip, but wanted something better yet, so...
........
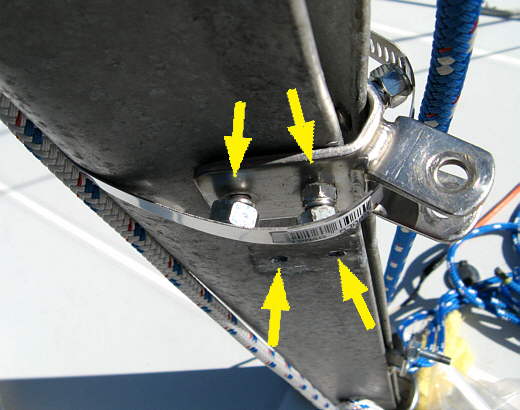
...put a through bolt at the back of the gooseneck bracket. The bottom left arrow points at the block that is part of the single line reefing and the middle bottom arrow points at the bracket that holds the front of the full cockpit bug net enclosure.
........
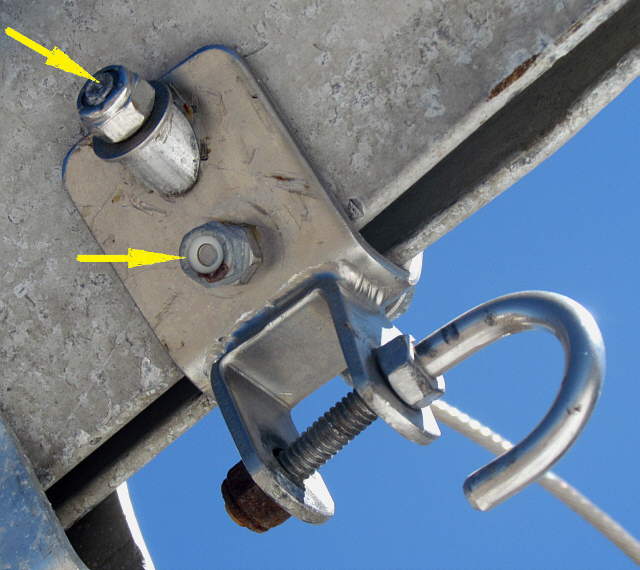
The front of the gooseneck bracket is held on by two screws, bottom arrow, that are inserted from inside the mast out through the bracket and then held in place with a locknut. One on each side. The back of the bracket is held on by a through bolt, top arrow, that goes all the way through the mast and out the other side.
........
Here you can see the other side of the through bolt, top arrow and the single screw, bottom arrow. I drilled some solid aluminum rod and cut it at an angle to use behind the head and the nut on the through bolt.
========================================================
...............
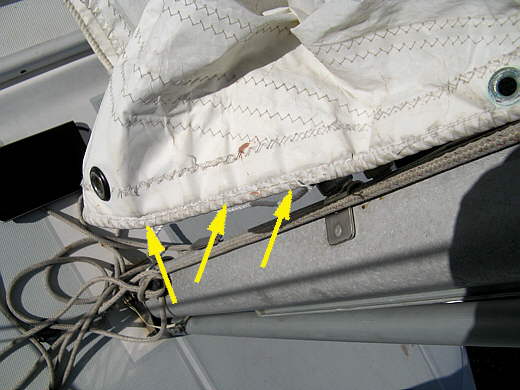
Next I cut the bolt rope loose where it was sewn to the bolt rope channel in the sail. Mine was sewn for about 6-8 inches at each reef point and right above the tack at the bottom of the sail. The arrows point to the stitches by this reef location.
...............
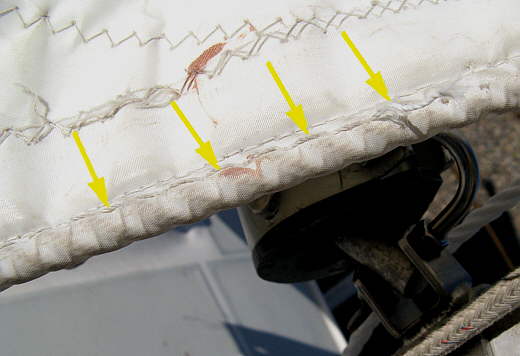
This is a close up of the stitches that I had started to cut out (see right arrow). This doesn't take long at all. After cutting the stitches I pulled the sail up by hand and it seemed to raise the outboard end of the boom 4-6 inches in this case. There is no real consensus as if you should sew the bolt rope again after doing this. We will sew about 4-6 inches down at the bottom, but probably won't sew it back to the sail at the reef points.
We have plastic slugs and shackles ordered and they will go on the sail when they arrive.
=======================================================
.................................................................................. Next Page If There Is One