..................
....--- Water Tank Installation & Transfer Pump---
On a previous page I had made a storage space for two 7 gallon Reliance water containers (there will also be some 4 gallon ones stored under the v-berth) for a total of 7 to 30 gallons depending on how long we think we will be out.
...............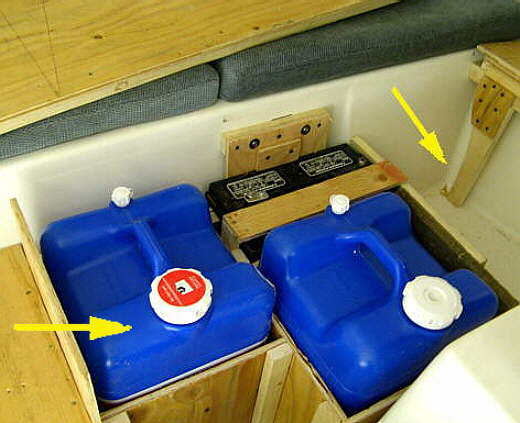
I wanted to hook the left one in the picture up to the sink and use either an electric pump or the stock hand pump to pump from it to the sink.
...............
I got several PVC fittings from the store and decided to use the one on the left in the picture. It is actually used as a plug, but I like the way that it screwed into an other fitting. The one the arrow is pointing at will have the center drilled out and will go inside the tank and stick out the hole where the right arrow is.
...............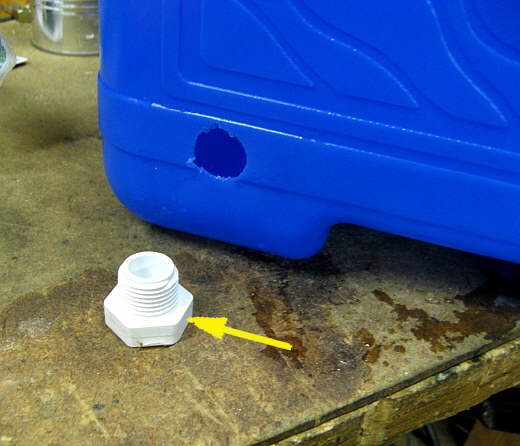
Here is a close up showing the fitting and the hole in the bottom of the container.
...............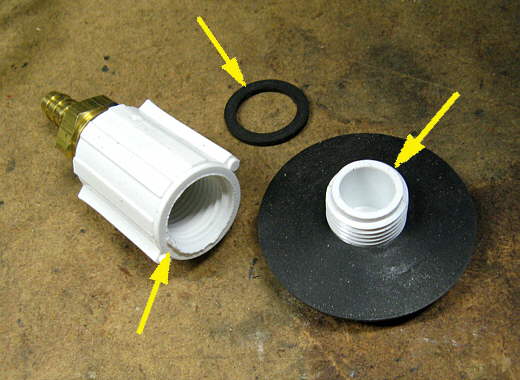
The parts to make this work. On the right is the plug with a fairly soft rubber washer. The plug will stick through the hole with the rubber washer on the inside of the container. Then the auto fiber washer will go over the threads on the plug on the outside and the coupling on the left will screw onto the plug and sandwich the inside and outside washer against the sides of the container. The coupling has a brass barbed fitting with Teflon tape screwed into it. All of this came from the local True Value Store.
...............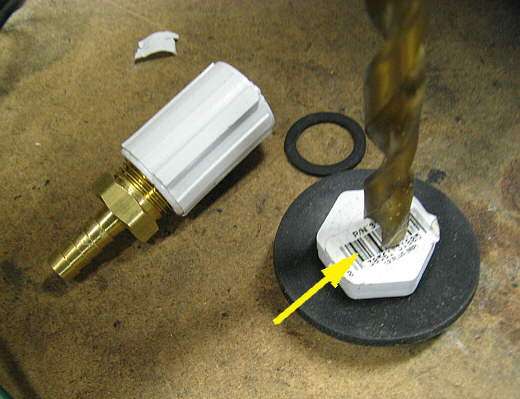
Here you can see the other side of the plug and a drill bit to drill it out.
...............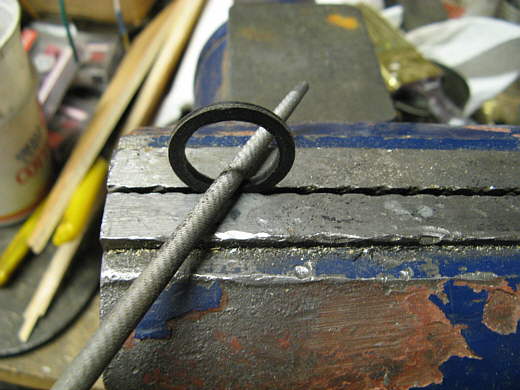
The fiber washer was a bit too small to screw on, so I took the file to it.
...............
Now I had two small problems. I couldn't reach down inside the container to put the plug through the hole or to hold it. I took a piece of scrap plywood and outlined the plug on it on one end.
...............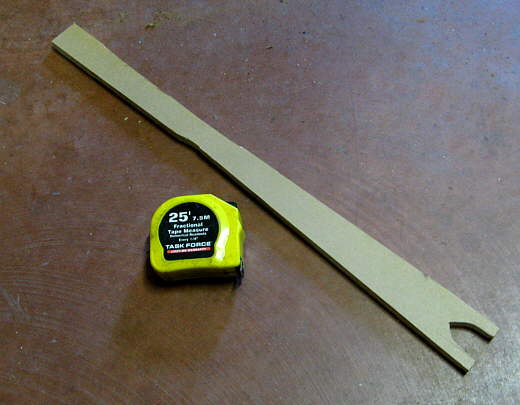
Then I cut the end out and had a long open end wrench that would hold the plug once it was in the hole.
...............
To get it in the hole I took a length of wire and threaded it through the hole from the bottom and out the top. Then I just put the plug with the rubber washer on it and dropped it down the wire. It slid down to the hole and I grabbed it with some pliers and pulled it through. I had worried about this, but it was the simplest part of the whole deal. Next I put the ......
...............
.... fiber washer over the threads on the plug and wrapped Teflon plumbers tape around the threads and screwed the coupling on until it was tight against the container holding the fitting inside with the long open end wrench that was made.
In the picture is also the electric pump that might be use (I had it from a teardrop trailer project). For now we are going with the hand pump. I have an electric in the teardrop and like if because of the long distance from the water tank in the back up to the sink, but feel I waste some water with it as you turn it on and then water comes out pretty fast until you reach over and flip it off.
If you want the same pump it is a TMC TECHNOLOGY 12-VOLT ELECTRIC WATER PUMP that I got from J.C. Whitney and is there part number 1JA 158445. There is a link ( HERE ) if it is still good.
...............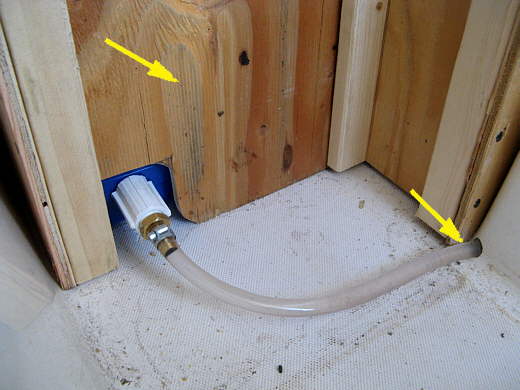
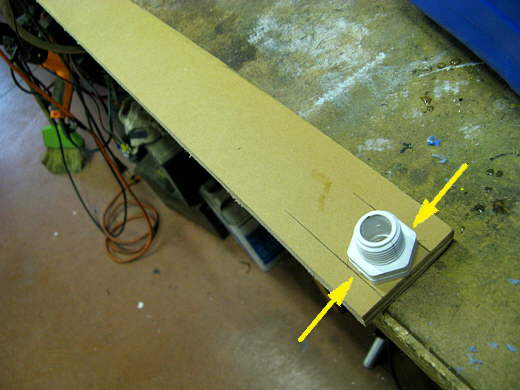
Here the container is installed in the boat. The left arrow points to a piece of plywood that I cut the corner out of for the outlet and this piece just slides down into place . The right arrow points to a hole I drilled in the back corner of the sink area for the hose to go from the passage way in front of the v-berth to the area under the sink and up to the hand pump.
...............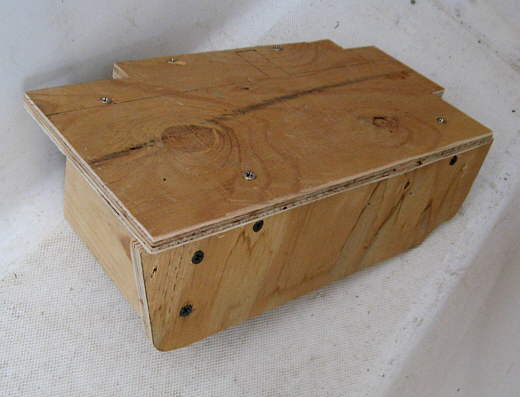
To protect and hide the outlet from the tank and hose to the sink I made this small platform that....
...............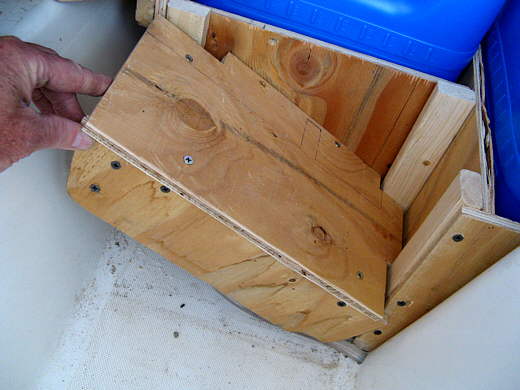
.... just drops down into place and ......
...............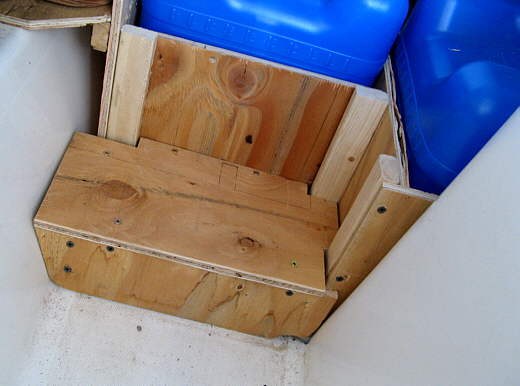
...... is captured there by the way it fits into that area. The water container was filled to the top and we have experienced no leaks at all from the bottom outlet. We used it this way for our first 5 day cruise and as I write this it has been in for about 1 1/2 weeks without leaking, so I feel good about it.
...............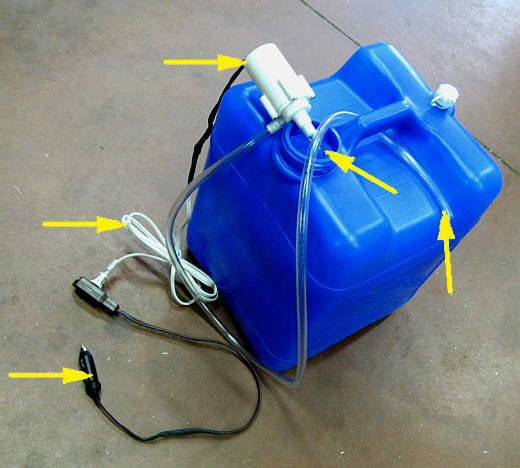
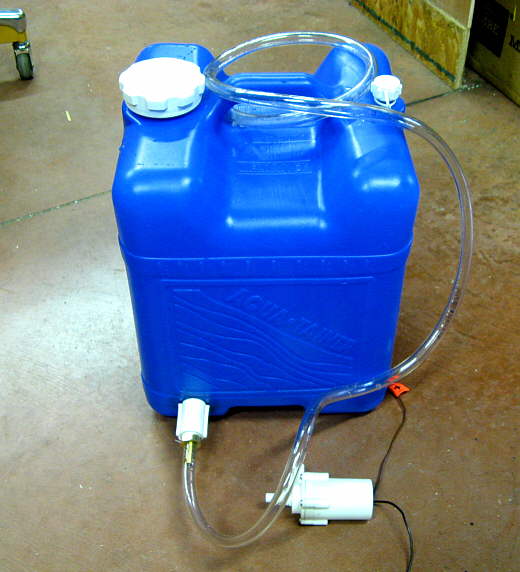
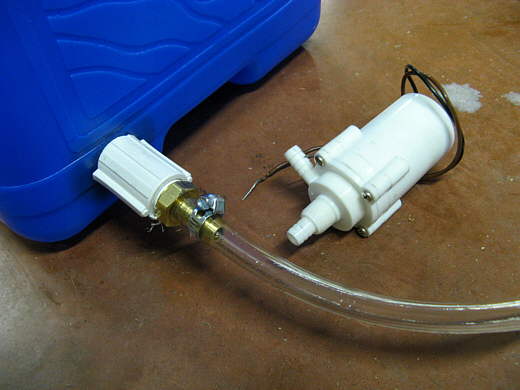
Here is the transfer pump setup I made. I use it to transfer water from the 4 gallon containers under the v-berth and the other 7 gallon container to the one that is hooked to the sink and documented above. It consists of a 12 volt pump (top middle arrow). The pump wiring is connected to an extension cord (middle left arrow). The 12 volt cigarette plug is attached to the female end of an extension cord (bottom left arrow). The plug goes to one of the 12 volt outlets on the boat either by the sink or in the v-berth. You could wire directly from the pump to the plug if you wanted. This way I can use the plug for other items if I want. The top right arrow points to the inlet hose that drops to the bottom of the water container. The bottom right arrow points to the outlet hose from the pump that goes to where you want the water to go to. In our case we periodically transfer water to the tank that is connected to the sink and also fill 1 gallon water containers for drinking so we don't have to pump at the sink for those. To get the pump primed and started I'll suck on the outlet hose for a second. When not in use I keep the pump, wiring and hoses in a zip-lock bag to keep those items clean.
We average about 1 gallon of water per day when out unless it is really hot and we drink a lot. The gallon on the average covers drinking and dishwashing. I'm very frugal when washing dishes with the water, something I learned while backpacking. One key to using little water is wash the dishes immediately and I hardly ever use soap since the food comes right off if you do it right away. Don't let food dry on plates, pots and utensils and you don't need much water.