..........--- Life on Board and Boat Mods --
.......................--- Monday - Nov. 29th ---
Day's Starting and Stopping Points:
Today's Starting Waypoint = 026°56.426 N -- 082°11.721 W
Today's Ending Waypoint = 026°41.160 N -- 082°14.384 W
Night's Anchorage: Northeast side of Pelican Bay
Anchorage = 026°41.160 N -- 082°14.384 W
If you are interested only in the trip then you might want to skip this page, but for anyone that is interested in taking a multi-day trip on a boat of this size this page and some others to come might be of help.
There are a number of major items that have to be handled if you want to be able to stay on board for any length of time without being tied to trips to marinas and the such. They are: electrical generation and storage, refrigeration, water, food storage, clothing/bedding needs, human waste storage, gas for the outboard and waste from packaging and such..
On this page and others I'll try and document what has worked for us. Also we are always looking for better ways to handle these needs and you will see how we sometimes over time have modified what we have done to make life easier for us and the trips more fun.
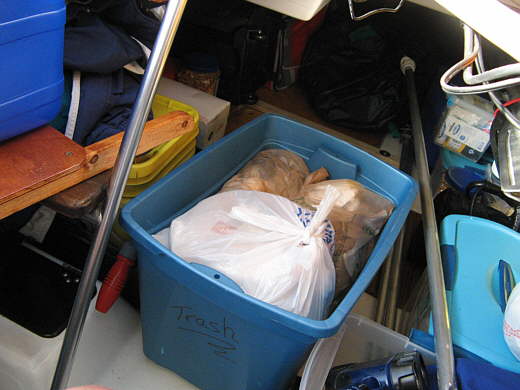
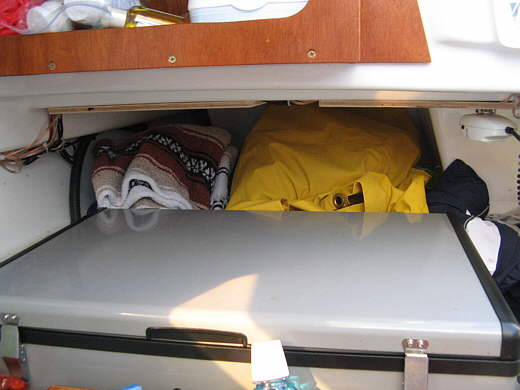
........We keep our trash in two blue containers like above. When the above picture was taken we weren't really 'compacting the trash and then realized that we might not make it 3-4 weeks without having to empty the boat of trash. Latter I'll show our trash 'compactor'. Also on this trip at about 1 1/2 weeks out we were able to get rid of trash ashore, but that might not always be an easy option.
........
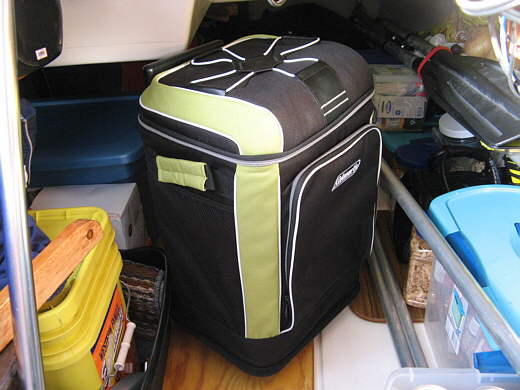
This trip we also took two large soft sided coolers on board like above and...
........
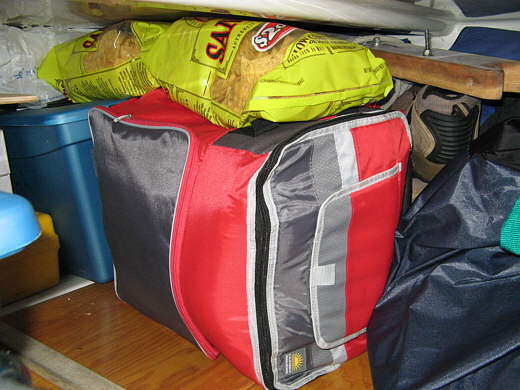
.. like this red one. We really like them and stored shoes in one and bedding in the other. They have inner hard plastic liners that give them shape, yet the soft sides are good as far as having they against other objects and you can kind of jamb them into spaces and wedge them so that they won't move around when the boat is heeling. The other real plus is that they have small wheels on the bottom and pull-out handles, so could be emptied and then taken ashore at a marina and wheeled down to where you could buy supplies for the boat. We didn't do this on this trip, but that might happen at some point in the future.
........
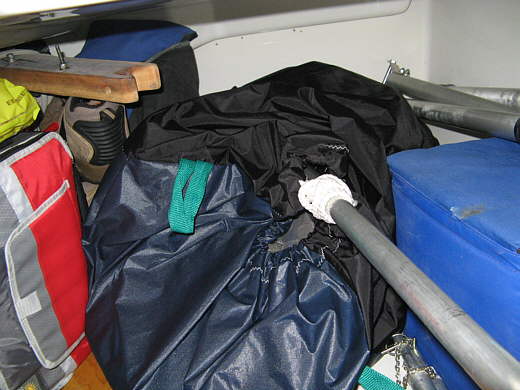
The bag above with the aluminum pole coming out of it is the netting enclosure Ruth made that covers the cabin pop-top and the whole cockpit. Leaving it on the pole makes 3-4 minute set-ups and take-downs possible. It was stored on the port side and towards the stern in the aft bunk area.
........
Behind the frig on the starboard side is this platform. Before we stored our sails there that we weren't using. This trip with the roller furler we used the....
........
...... top area to store the pop-top cover and other items. We did take our old main and jib and Genoa along just in case for some reason we needed them and they were stored at the very back of the aft berth area.. I still have a second forestay that can be rigged in a minute or less that we could use the hank-on sails on.
........
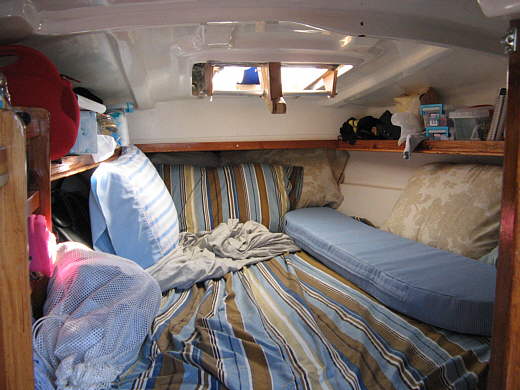
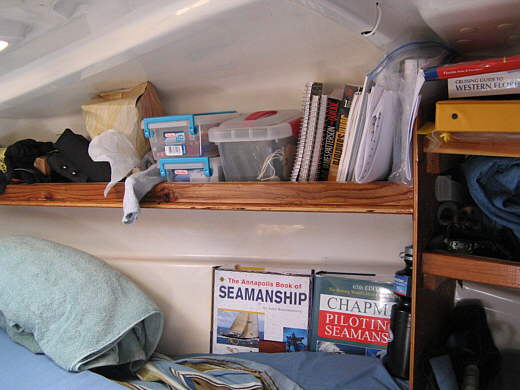
Here is the enlarged V-berth. The night time sheets and blankets have been rolled forward in front of those stripped pillows. The stripped blanket on the bed is there to help keep the cushion covers clean. At night the sheets and blankets are rolled forward. The blue cushion to the right is for the cockpit and goes right in front of the traveler there where you step down into the cabin.
........
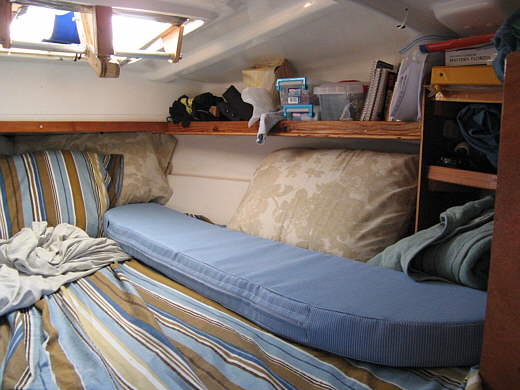
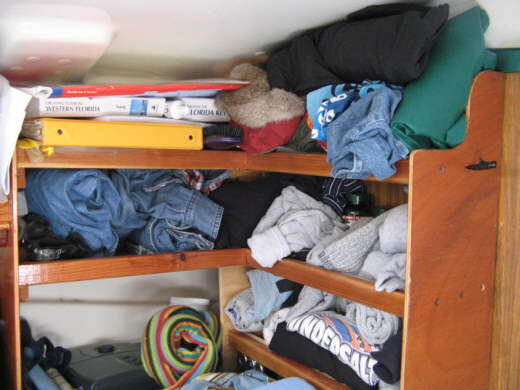
Sumner's storage is on the right side with a high shelf there and ....
........
.. these shelves for clothing and the CPAP machine at the bottom. In the navy I learned that rolling your cloths tightly let you get a lot of them into a small space. We also try and wash underwear and socks as the trip progresses.
........
You will find all kinds of places to store things, like the larger reference books shoved down between the mattress and inner hull liner.
........
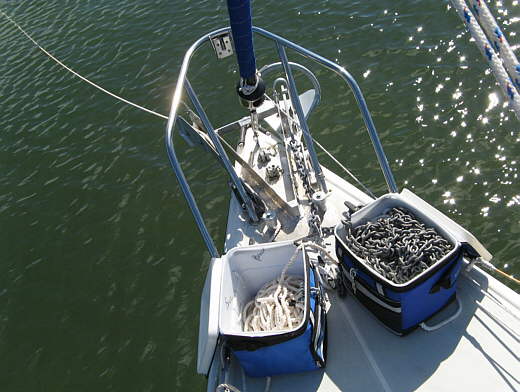
I'm gong to refer to anchoring a couple times on this trip as it is one of the most important things you will do safety wise and coming up with solutions that will work for you will make the trip much more enjoyable, especially on those nights that the wind goes over 30 mph in the middle of the night. We had two anchors on the foredeck, a 22 lb. claw, left above and a 25 lb. Manson Supreme on the right bow roller above. The claw as 30 feet of 1/4 inch chain and 200 feet of 3/8 3 twist nylon line and the Manson has 30 feet of stronger 1/4 inch chain and 200 feet of 7/16 line.
Anchored above only the claw was on the bottom, but we anchored on a Bahamian Moor with both anchors a number of times on the trip in some tight channels and the anchors never drug once and we had winds in the high 30's low 40's a couple times. We seemed to encounter mud bottoms on this trip compared to the rock bottoms we can have out west. If you only have the money for one good anchor get the Manson if you can afford it and then next the 22 lb. claw. Sooner or later you will encounter a night that you will be very thankful that you did. Also the 30 feet of chain is essential in making the anchor work.
........
We have switched to soft sided coolers that have the plastic liners and sell for about $20. I love them. The liners keep them open so I can stuff line into them as I pull the boat to the anchor or Ruth motors us there. You don't have to coil it or anything, just keep stuffing it in and it always comes out free with no messing.
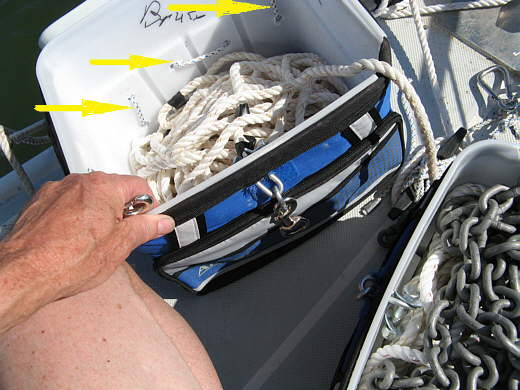
I punched holes in the bottoms of the bags with about a 1/2 inch round hollow hole punch and smaller holes in the backs (arrows) so that I could tie the bags to the pulpit and life lines so that they don't accidentally go over the side.
........
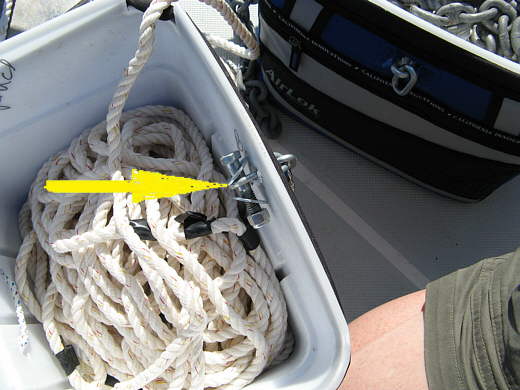
I have the lines coded every 25 feet so I immediately know how much rode is going out. I just take electrical tape and double a piece a few inches long back on itself so that it sticks to itself and then un-twist the 3 strand line and insert the tape and then twist it back. This is fast and simple and easy to replace if the tape wears. I put 1 piece at 25 feet, 2 at 50, 3 at 75 and 4 at 100 and start over again at 125 feet. This is much easier and faster to read than the tape that has the numbers stamped on it and is really cheap to do. You can see some of the markings down in the rode back.
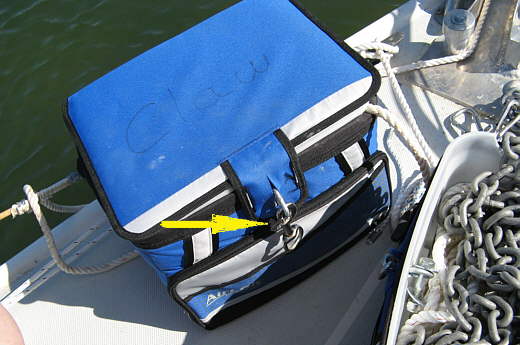
I don't trust the Velcro tabs on the top of these bags to keep the chain/line in during ruff water, so I put a few links of chain through the bag with a bolt on the inside (see arrow above). A couple links protrude out the front.
Also above you can see where I notched the top of the bag/liner so that the lid will close with the rode going out.
........
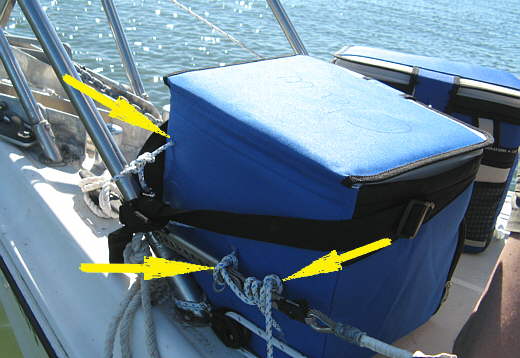
I slit the stock tab in the front (arrow) and the last link sticks through and then a snap hook is attached. Now I don't have to worry about the top of the bag opening and the chain spilling out over the side.
........
Above you can see the holes in the back of the bag with the line that ties the bag to the pulpit and life line. We now have a furler 135 Genoa with a Johnson lever on the bottom of the forestay. This raises the sail enough that the bottom of it clears the bags. With the old hank-on sails the sails would drag just a bit on the old bags we used without the plastic liners.
........
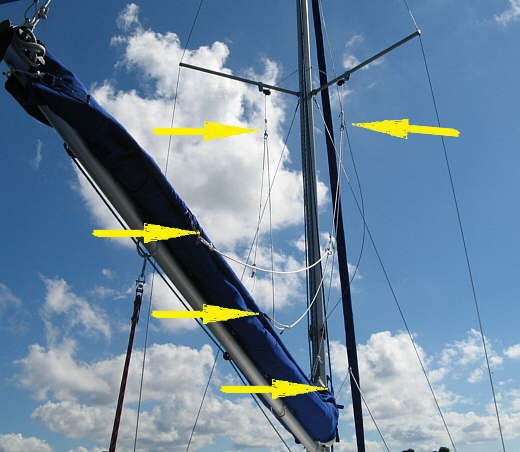
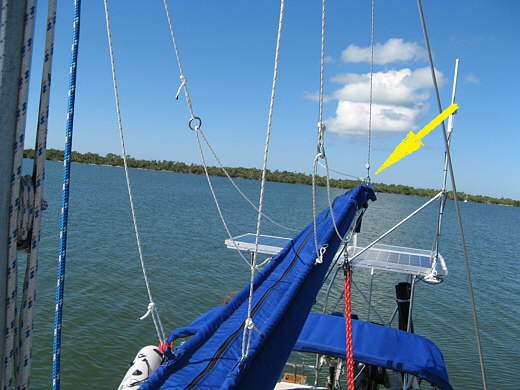
A couple notes on the lazy-jack lines (arrows) and how they are setup vs. the other pictures on the site.
........
Right before the trip I added the small cheek blocks to the mast (top arrows). Now there is virtually no downward load on the shroud stays as the blocks there just hold the lazy jack lines out some. I don't think there was much load before since...
........
.... we use a topping lift (arrow) that supports the boom when the sail is down, but if I was to forget that line and not have it adjusted right the weight of the boom/sail would be on the lazy-jack lines. Now there is no worries that I'm putting a downward pull on the stays.
O.K. back to the trip....