.............................................................--- Cockpit Cushions Part I ---
NOTE: We now buy our cushion material from the Foam Factory's Wholesale site ( HERE ) and cut it ourselves with an electric knife. They still have free shipping over $100 and you save a lot doing your own cutting and it is easy.
This page just documents cutting the Dryfast foam we got from the Foam Factory (see Note above). We wanted to try something that dries faster and just sitting on it it seems pretty good to us so far, time will tell if we like it or not, but the old cushions were shot and took forever to dry once wet. Part II will be when Ruth covers these cushion.
We bought the dryfast cushions form the Foam Factory in 2010 (see Note above) and the following is what we ordered and the prices at that time.
1 - 3" X 12" X 66" for $42.08 for use ahead of the traveler
4 - 3" X 11" X 32" for a total of 147.28 to be used as the seat back cushions
4 - 3" X 21" X 33" for the seat cushions.
Note they have free shipping. We have been very happy dealing with them.
Foam isn't cheap, but we really like this foam after using it for almost a month. It is firm with a ILD: 60 LBS, but not near as firm as closed cell as far as I can tell. We used the firmest foam they had for the V-berth and cabin cushions called Lux-HQ with a 55lb ILD and really like it for those applications. The dryfast is just a little stiffer, but as you sit on it you kind of sink in a little kind of like memory foam, but don't go to the bottom.
The first days out on our Florida trip we had dew on the cushions in the morning and it rained on them also a few times. If they became wet we just turned them over and used the other side. They always dried very quickly. We would buy this stuff again.
One other key to the quick drying was that we used Phifertex Plus Vinyl Mesh Dupioni Poolside that we got from Sailrite. We also wondered how it would feel since it is a vinyl mesh. We didn't sit on it with bare skin and the feel of it was fine for us. It isn't a cloth, but fine. It is open so you don't sweat on it and it helps dry the cushion great. We didn't know if we would like it or not so bought some really long beach towels that we could put on it if necessary. We never used them. When the cushions had been rained on hard we did turn them over and put the doubled up towel on them for a couple hours to keep our butts dry, but then took the towels off as the cushion dried. Our old cushions would of been wet for a couple days.
We really like having the multiple shorter cushions that you will see here vs. the long original ones. More options in how we use them. Some of the time we might only have one back one on one side. Ruth sometimes didn't like a back one at the tiller and I did working the sails. Also they are much easier to store below if we want to as they aren't as bulky. If it is going to rain and you want to make sure you have two dry ones in the morning you don't have to take as much below.One last thing. You will notice that the cushions were sized so that they will fill in the cockpit over the bed platform that is on the previous build page. We bought a 2 1/2 inch thick blowup sleeping pad that we plan on using over the cushions and that will cover what is left of the traveler..............
.......
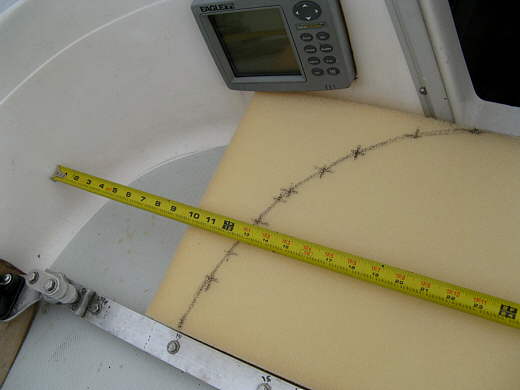
Here the curve of the head cushion is being marked. Measure in equal distances from the side and keep the tape parallel to the traveler and then connect the dots and ...
.......
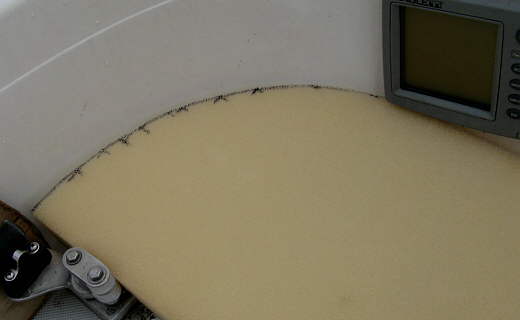
.... cut along the line with an electric carving knife and you have your curved end that fits pretty well. This is the first time I used the carving knife and I love it.
.......
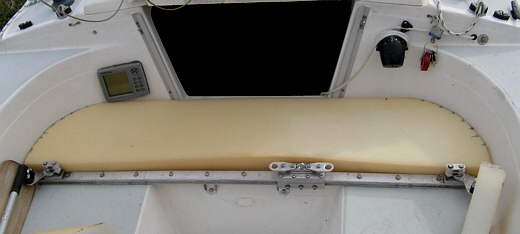
We decided to try a cushion here for a couple reasons. One was that it filled the area in when the cockpit will be used as the bedroom. Two is that you can sit on it with your feet in the companion way or the cockpit. We normally step over this area going down into the cabin, even Ruth with her shorter legs prefers to step over and onto the first step in the companion way. If we don't like it here we can always throw it below.
.......
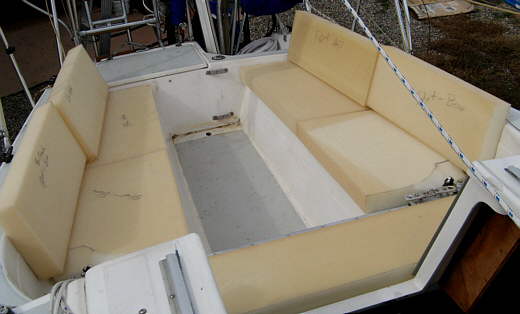
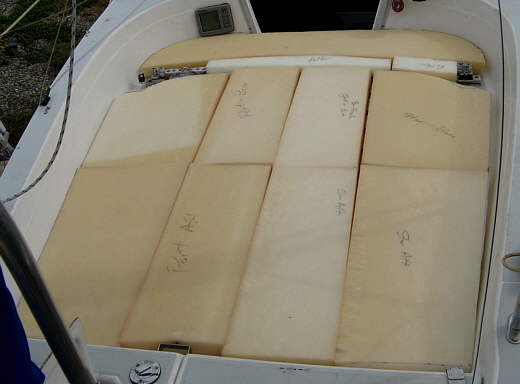
Instead of having single long cushions on each side like the stock ones we decided to split the side cushions into two parts for the bottoms and the backrests. We feel this will make them easier to store and make them more versatile on how we use them on the boat.
........
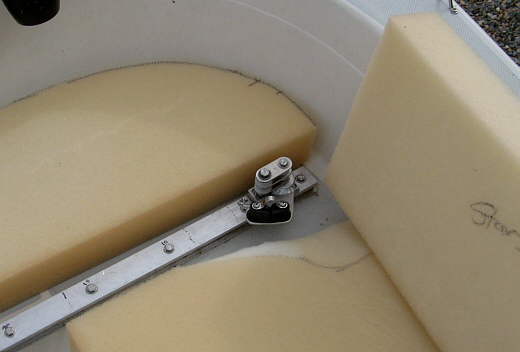
Here you can see how the end of the bottom cushion has been cut out for the traveler end control. It will be interesting to see if we can make the cushion cover to work with this.
.......
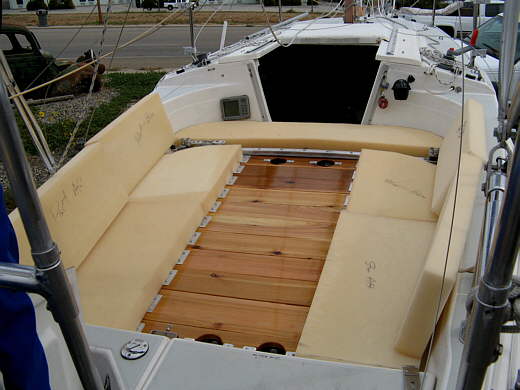
Here the bed platform slats are in place.
.......
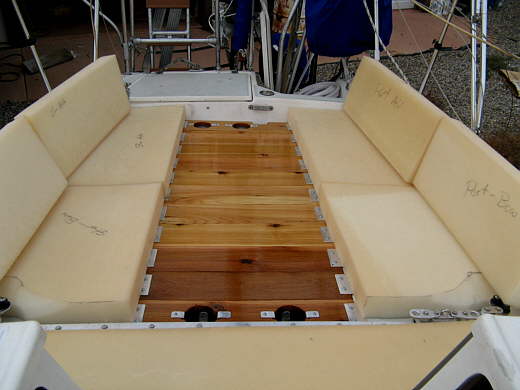
Another view...
.......
... and one from the stern.
.......
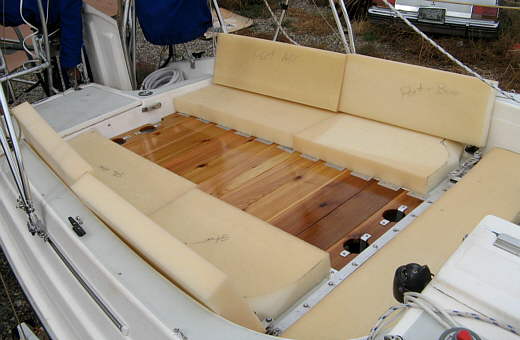
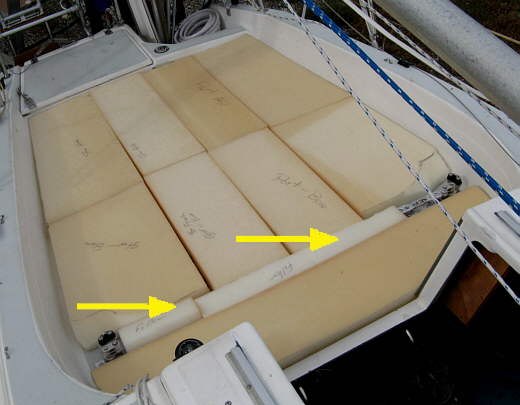
Here you can see how the cushions fill the area and .....
.......
... the arrows point to pieces that will be covered as one to fit across the traveler. All of this....
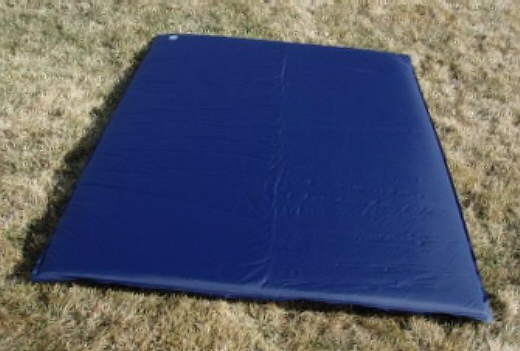
............ is covered by a Big Agnes Hinman Doublewide 50" x 78" x 2.5" pad that is insulated and self inflating and is normally used for tent camping. It is pretty darn comfortable and we got to sleep on it one night on our 2010 Fall Florida trip.
.......
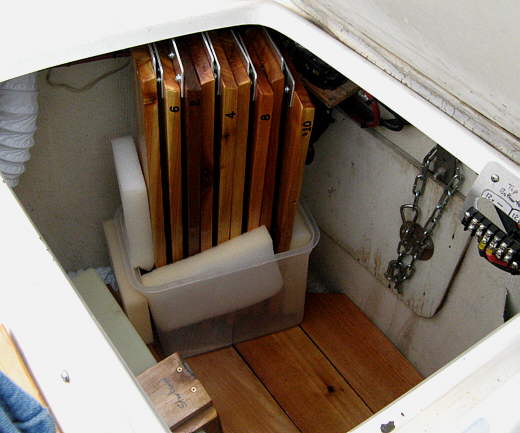
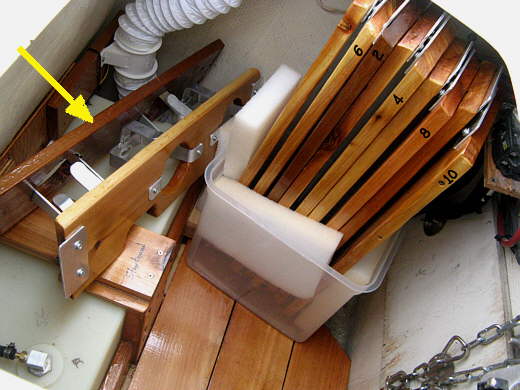
Here is how we will store the bed slats, at least for a while until Ruth can make a bag for them.
.......
The two that can hold cups will just lay in the laz probably on top of some of the other junk that normally ends up in there.