.....
................
The next project was building an island counter in the kitchen that would serve as a work space with storage and also separate the kitchen somewhat from the living room. Since there is no windows in the kitchen we wanted to also make sure that it didn't block the light coming in from the living room windows.
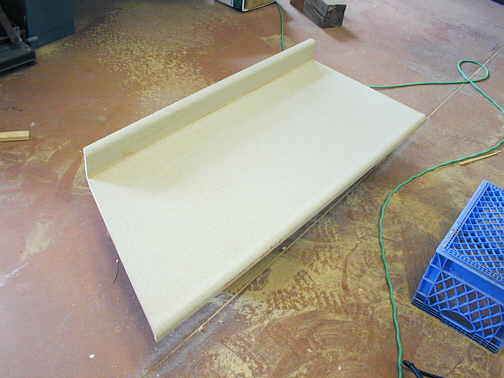
I started by cutting a piece of counter off of the piece I had left from the main kitchen counters. It is cut to 90 degrees on one end and angled on the other.
................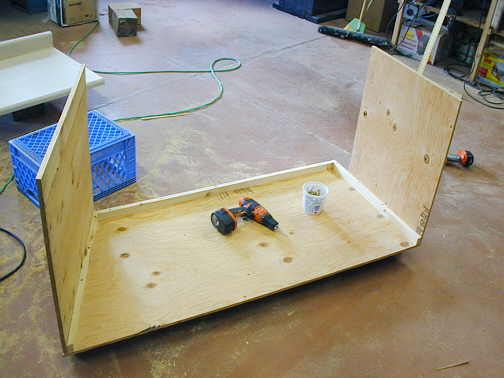
After I made sure the cut counter ends were straight I used the counter as a pattern to cut the base of the cabinet. It was easier making the cabinet fit the counter than the other way around.
.................
Before going any further I attached the counter to the sides and back to hold the counter in the proper position while I built the rest of it. I also made side and back splashes at this time.
.................
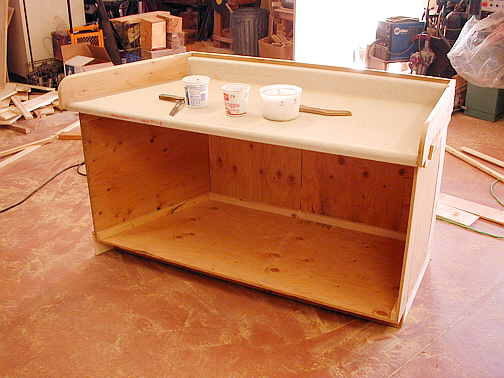
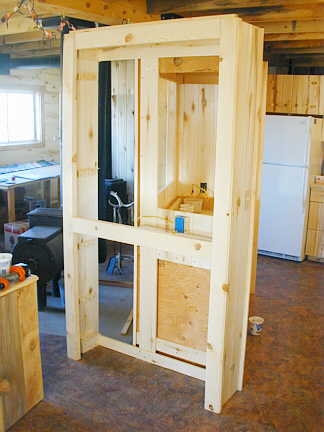
Next I put in a cross brace and removed the counter top and then added these two temporary cross braces to hold the counter in the correct position until I re-installed the counter top. Here you can see I bought a waste basket so I could make the space for it the right size and built two drawers for the right side.
................
Here is the finished base with the two drawers on the right, a door to their left and another door to the far left with an opening for access to the trash can.
................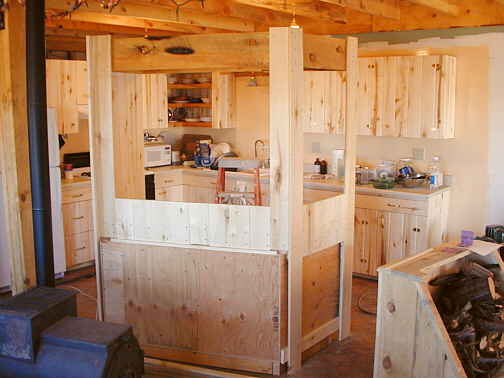
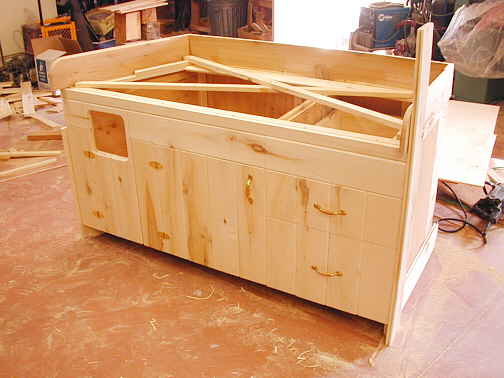
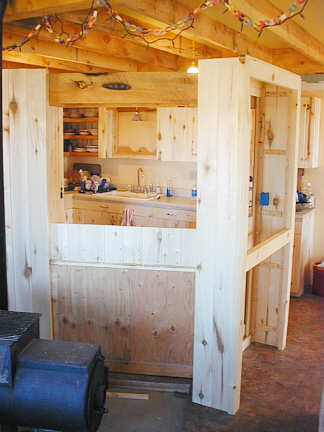
I moved the base cabinet to its final resting place and started to build the storage units on both sides. This unit sits at an angle to the stove cutout in the floor and that is why one end of the base cabinet is at an angle. This will let the wood box to the right in the picture fit at one end and be square to the room.
................
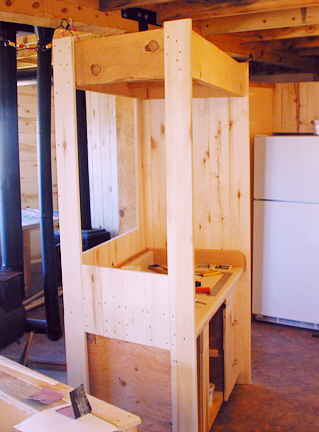
Next I framed in a top to the work area. This will get more work done to it later.
................
A view of the left end. The opening will end up being access to shelves.
................
Another picture of the top of the work area. Latter I will add a tongue and groove covering on top of these framing members.
................
Nest I started to finish the right side of the area by building shelves and closing it in. At this point I still have a number of shelves to go and also doors to finish it off.
................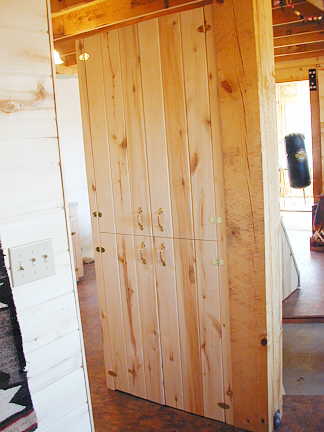
The finished cupboard on the right end with four doors.
................
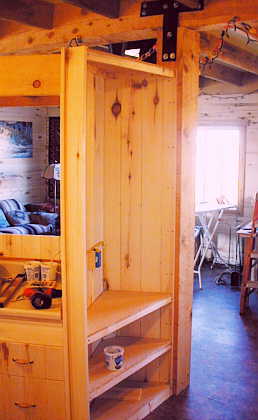
That left the left side yet to be finished. The wood box to the left will fit into the bottom of this area and the shelves will go on the top.
................
Here you can see this area a little further along. In the shelf area you can see an electrical box that will turn the main kitchen lights on/off from this side of the kitchen. I wired two outlet boxes into the area on each side of the counter and also an other switch for a light in the top of this area. All of these wires were concealed.
................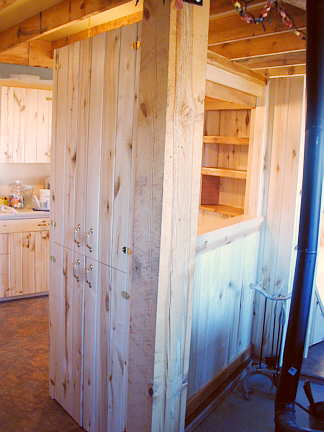
A picture of the finished divider/island looking at it from the cupboard end.
................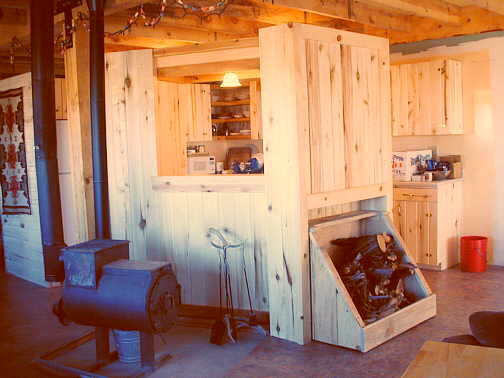
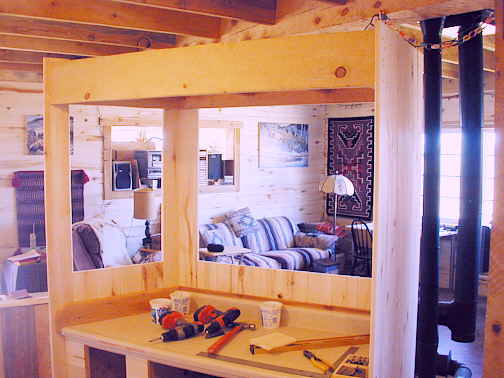
A view from the living room. Here you can see how the wood box fits into the end of the divider/island.
................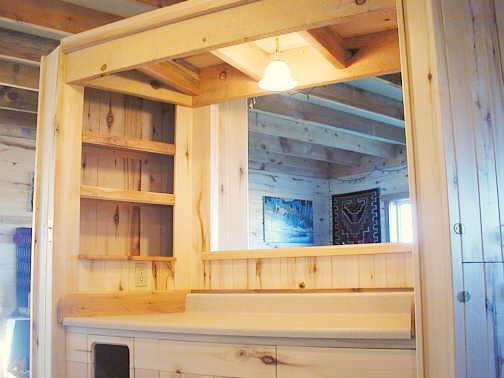
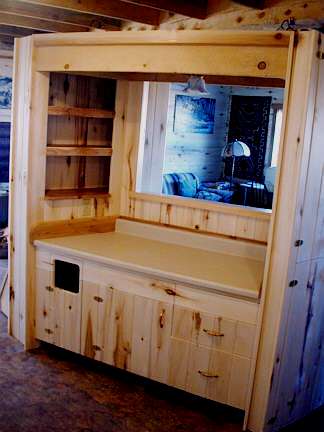
A view of the work area with the shelves on the left and the finished top with a work area light installed.
................
A final view from a little further back. This ended up being a little bigger project than I first imagined and took a little longer than anticipated also. I worked on it over an 18 day period, but not all 18 of those days. I didn't keep track, but I probably have about 50 hours in it from start to finish. We are happy with it and it will make the kitchen more functional.
................................................................Next Page
.................