.....
................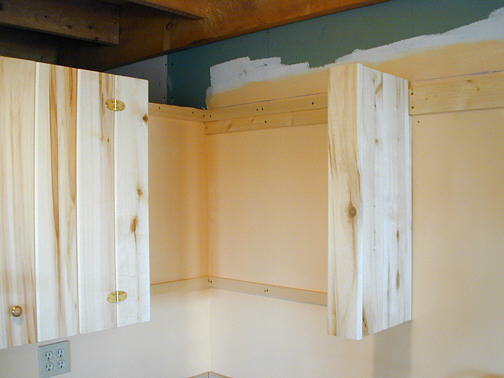
To finish off the wall cabinets I started in the corner to the left of the sink. We wanted some shelves in this area. I started with a 1 X 4 at the top that was screwed into the wall studs behind the sheetrock. It extended past the shelves to the next stud to give good support. I then attached a 1 X 2 to the wall at the bottom of the shelves. Next I made the end of the shelf by screwing a piece of 1/2 inch plywood to a 1 X 2 that was attached to the 1 X 4 and also to the bottom 1 X 2. Then I screwed the face aspen on from behind with screws through the plywood and into the aspen.
................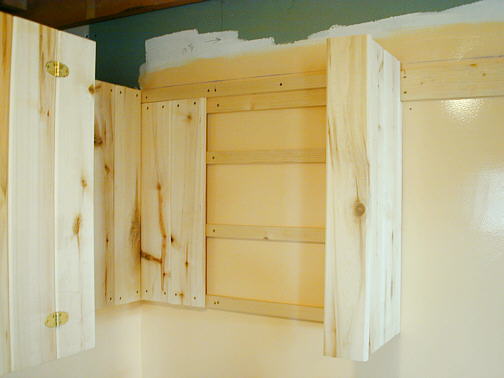
I also attached 1 X 2's to the other wall of the shelf area. Next I screwed pieces of T & G aspen to the 1 X 2's on the wall.
.................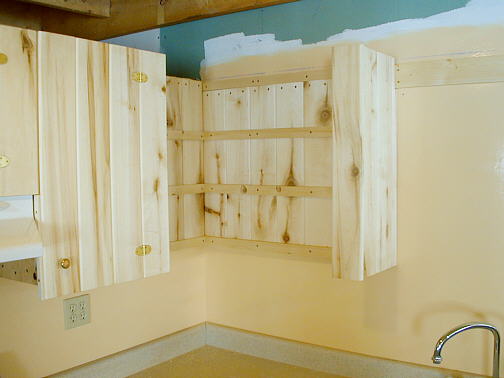
Then came more 1 X 2's on the aspen to support the back of the shelves.
.................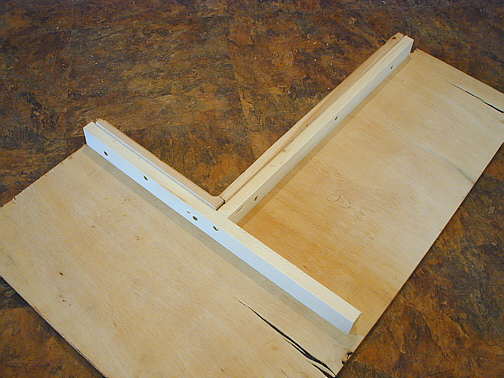
This is a view of the bottom of one of the shelves. The "T" shape created by two 1 X 2's help supports the shelf. The short one screws into the back wall and side wall and the other one screws into the other wall. They are faced with some cedar left over from trimming the windows and doors.
................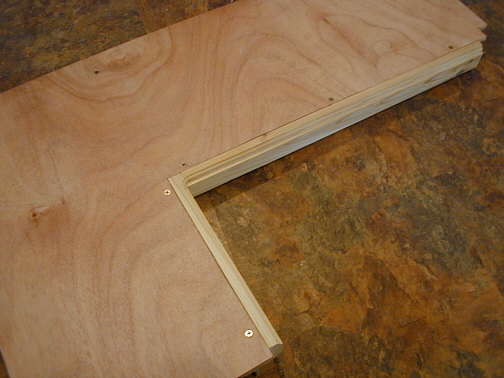
A picture of the shelf top and the cedar facing which comes up flush with the top of the 3/8's plywood that makes up the shelf.
................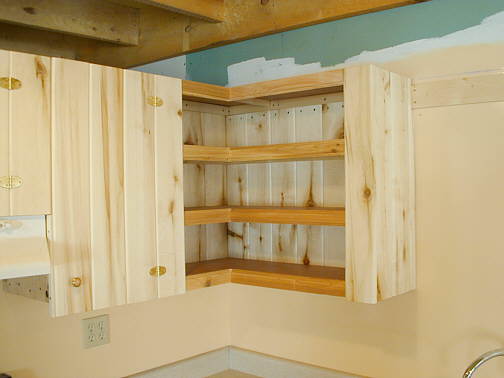
The finished Shelves. I also routed both sides of the cedar facing on the middle two shelves and the top of the bottom facing and the bottom of the top facing. I though these came out pretty good and represent probably about 8 to 10 hours.
................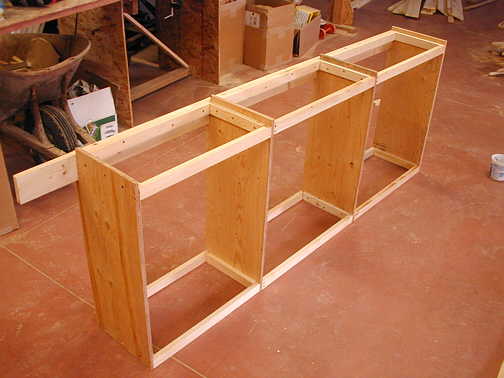
To the right of the sink will be 3 wall cabinets that were built as a unit in the shop. Again I used 1 X 4 for the back of the top of the cabinet. The 1 X 4 is wide enough that I can put two screws through it into the wall studs. I will also screw through the 1 X 2 at the bottom into the wall studs, but one screw at the bottom is fine.
Basically I just make the cabinets out of 1 X 2's and 1/2 inch plywood with grabber screws holding it all together. The board sticks out at the top to the left to reach over to where a stud is above the sink. The same stud that the 1 X 4 in the shelf area went over to. This just supported the cabinets by more screws that went into more studs. The 1 X 4 will be faced with cedar to cover it.
................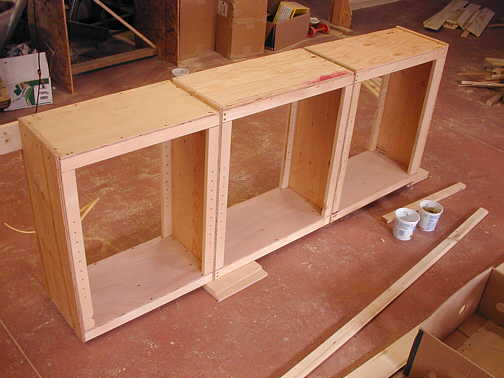
Here you can see I added the plywood to the bottom and top of the cabinets. I have also place 1 X 2's in the corners of each cabinet section with holes in them every 1 1/2 inches for movable shelf supports. At this point the cabinet is very ridged. The uprights on the sides of each section also give me a place to screw through from the backside and into the aspen facing. The facing on the ends is attached by screwing from the inside through the plywood sides and into the aspen.
................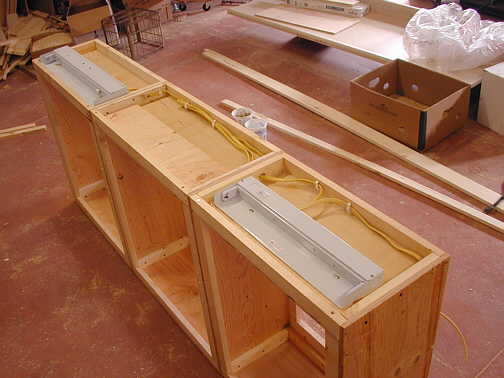
I turned the cabinets over and attached lights and wiring to the bottoms now while it was easy. The cabinets are short enough that when the facing is attached the lights will be hidden.
................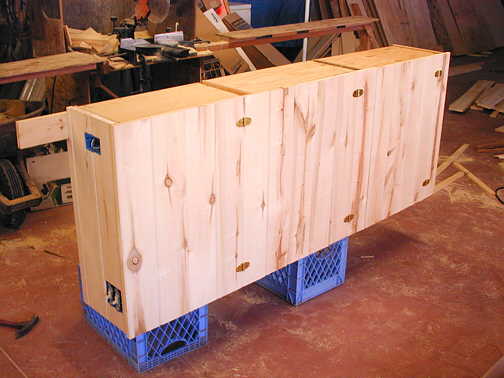
The finished cabinets (still need the door knobs) with the wiring in place. The two switches to the left will control lights. The one to the left is for the lighting under the cabinets. Those lights also have switches on them so they don't have to both be on at once. The right switch controls a light above the sink, see the next picture, via the electrical box at the top of the cabinets and on the left end. I probably have about 10 hours in these cabinets.
................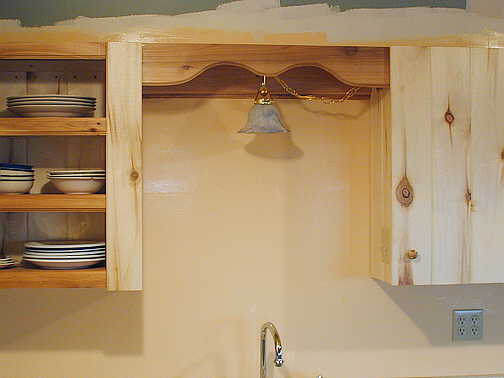
The cabinet section is hung in this picture to the right of the sink. Above the sink I cut a piece of cedar for a valance in the front and covered the support 1 X 4 in the back with cedar also. Then I made a little ceiling for this area with T & G aspen (you can't see it) and screwed a hook into this little ceiling and hung the light from it. I'll talk about these lights a little more on a page to come. The light is powered through a wire that goes through the chain and over to the outlet on the side of the cabinet.
................
A view of the finished east wall. The shop is on the other side of this wall.
................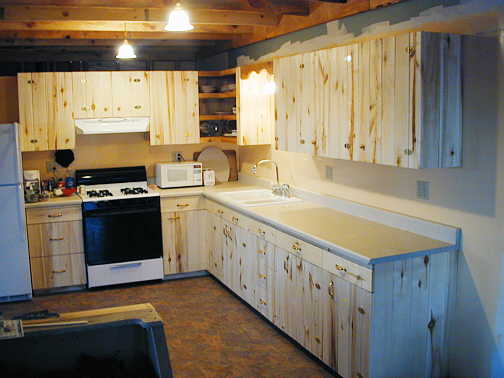
Another view of the kitchen. This area will still get T&G aspen above the wall cabinets (where the paint is now) up to the board that the ceiling joists tie into and also from the cabinets to the right over to the entrance door.
................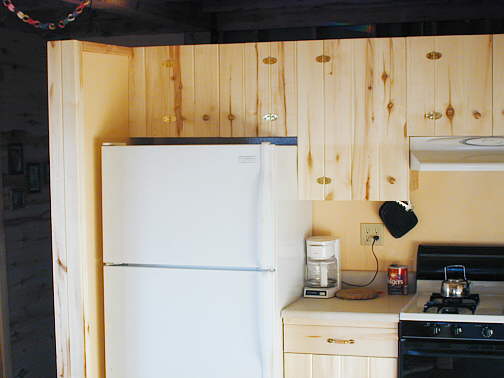
I still had an opening above the frig and to the left of the first wall cabinets I made (see previous picture). I spent a couple hours and made a cabinet for this area. I built this cabinet in place piece by piece.
................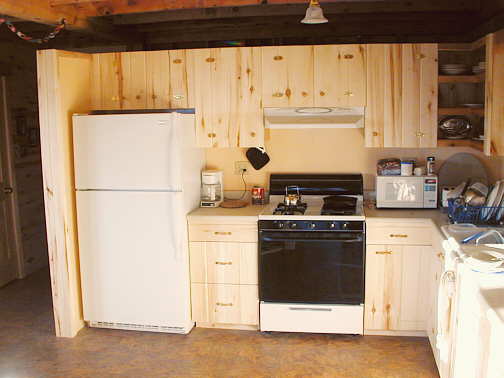
A view of the finished north wall. It is now the end of February and we moved in the house the first of November and have been washing dishes in a deep sink in the shop and fixing meals in the sunroom. Not exactly handy, but it hasn't been that bad and now we really can appreciate the kitchen. I still have to build a center island for the the kitchen and that will be next.
................................................................Next Page
.................