.....
It has been a long haul with about 18 months having gone by at this point from the time I started on the house. I've worked almost everyday on the house and I'm starting to get burned out, but the end is in sight. I have to finish the kitchen cabinets and one wall, the long hall walls and the sunroom walls and floor. I also have about a days sheetrocking in the shop and a few more days of taping and painting in there. I have started using the shop for some fun things along with working on house items like the following cabinets, so it has been well worth the effort and Julie and I really like living in the house.
................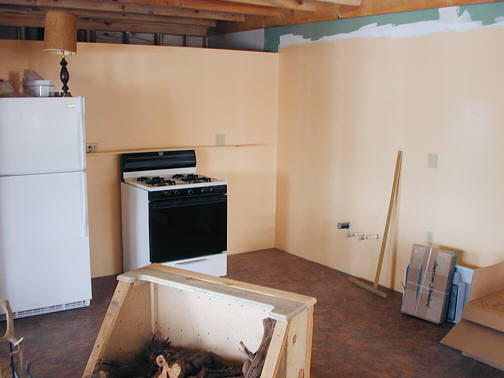
The kitchen walls in the picture above will get base cabinets and wall cabinets. The wood box in the foreground will be moved and there will be an island built there. The gas stove and frig are located in their final resting places and the first cabinet to be built will be for the space between the stove and frig.
.............................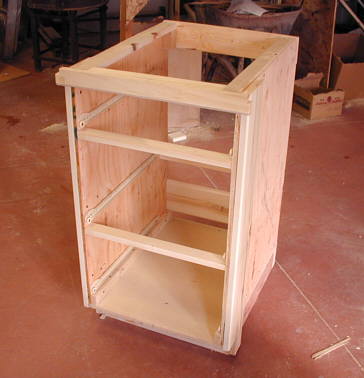
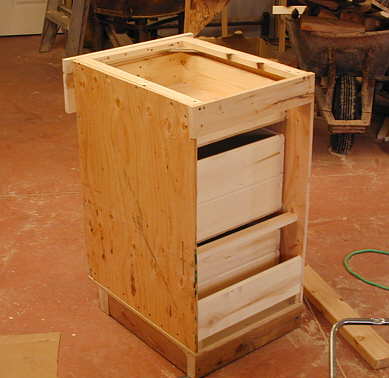
I designed the cabinets in my head and did a quick sketch to come up with some measurements. This cabinet between the stove and frig will be all drawers. I used 2 X 4's for the base with 5/8 "good one side" plywood for the floor. The sides are 1/2 inch CDX plywood. The bracing is 1 X 4's, 1 X 2's, and misc. width tongue and groove aspen cut to work. I'm using commercial drawer glides for the drawers.
...............................
The cabinet is all screwed together with different length "grabber" screws with no glue used. The first two pictures show the basic framework. The cabinet will be screwed to a stud in the wall by using screws through the wide board at the bottom back and also the 1 X 4 at the back top of the cabinet. The counter will be screwed on by screwing up through the 1 X 2's along the top of the cabinet.
...............................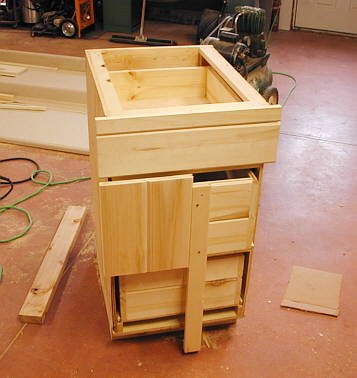
Here I'm facing the drawer fronts with the tongue and groove aspen. The drawers were made with 3/8 "good one side" plywood screwed to the bottoms of the drawer sides, which are tongue and grooved aspen I have been using on the walls. The board down the middle is temporary and is being used to line up the aspen fronts so that they are centered and vertical. I hold the aspen on with screws coming in from the inside of the drawer front. The cabinet was designed so that the width would be 4 pieces of the aspen.
..........................
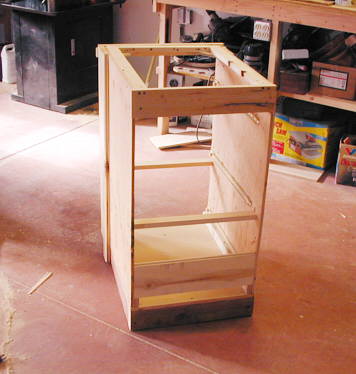
A view of the back of the cabinet. I also added one piece of aspen to the front of the sides on each side. This hasn't been done yet in these pictures.
.......................................................................................................................
................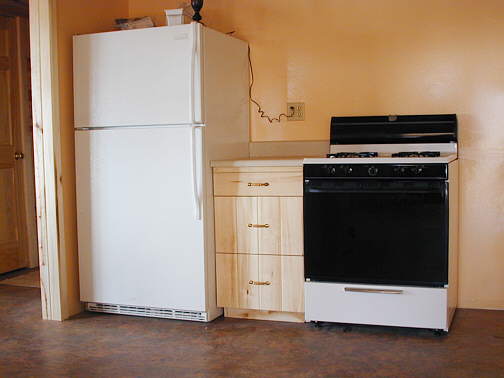
Here is the finished cabinet. I put two coats of "satin" polyurethane on for protection and I might lightly sand it in the future and add another coat or two.
I bought 2 12 foot sections of pre-formed Formica counters that are cut on a 45 degree angle for the kitchen. I cut a piece off of one end of one of those for this cabinet and glued end caps onto it. I'll cut another piece off of that same 12 foot counter for the island counter and the rest of that counter will fit between the stove and the wall to the right of it in the picture below. The other 12 foot length will go down the right wall in the picture below and will be a full 12 feet long.
................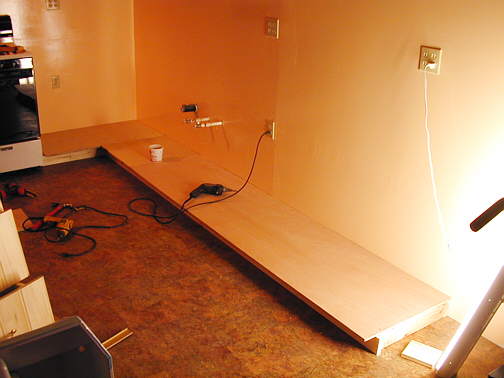
Next up is the rest of the base cabinets for the two walls in the kitchen. I'll build them in place. Above is the base for these cabinets. There will be more pictures as they are finished.
................................................................Next Page
.................