.....
The shop is basically 40 X 41, but is broke up into 2 parts. The
south part where the pickup is and to the right is about 26 X 41 and the other part is behind the wall to the left
of the pickup and it is divided into a 13 X 32 part where the pickup usually is parked and into a 8 X 13 storage
room.
...............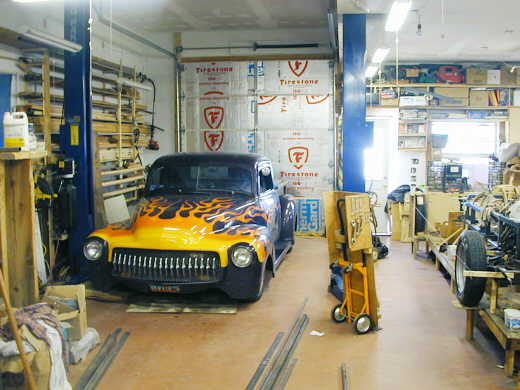
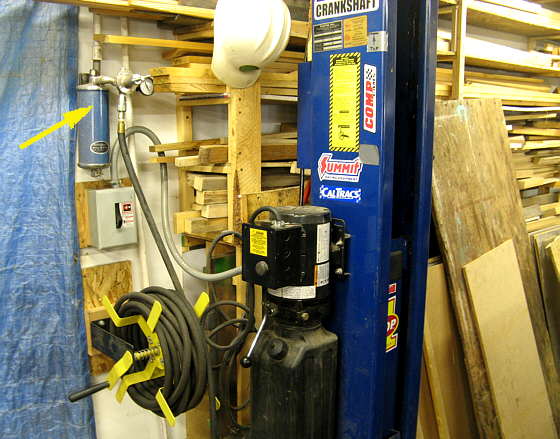
This is looking at the NE corner of the larger portion of the shop. I raised the ceiling in this area to 12 feet for clearance for the lift (Ben Pak 10,000 lb. -- about $2500 delivered -- I set it up). I didn't want 12 foot ceilings everywhere as I didn't want the exterior walls that high, so I got trusses that are kicked up in the center (see "setting the trusses"). I have the pickup parked in the other room of the shop and try and keep this bay open. One thing I found that is really handy with the lift is I clamp a piece of plywood to the legs on one side. Then if I want to work on something heavy I drag it over and onto the plywood then raise the lift to a good work height. This also makes a good place to cut sheets of plywood with the hand circular saw. But now changing the oil and other car projects like pulling transmissions are a breeze with the lift. To the left of the lift I built shelving for long pieces of metal and wood. It fits in behind the lift.
...............
Here we look over into the SE corner of the main shop. I've found that you need at least 13-14 feet in width to be able to work around a car and still have room on the sides of the room for storage. This is why the shop is 27 feet wide so I have 2 bays next to each other. The door at the back and two windows that are bright go outside. The door to the right goes into the greenhouse on the side of the building. It is hard to make out, but to the left of the right door is a band saw and to the right of that my radial arm saw. I have it set up where I can still rip long boards (why it is in the middle of the wall and not the end) and sheets of plywood. I use it a lot even in building the race car to mock up parts out of wood. If I could only have a radial arm saw or a table saw the radial arm saw would win hands down and I've had both. It also takes up way less room as it can be along a wall and doesn't have to be out in the middle of the floor.
...............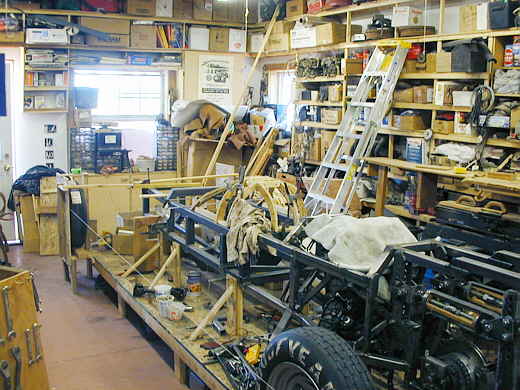
Here is a closer look at the SE work bay where I'm now building my Bonneville car. To the right of the ladder you can see a removable extension table for the radial arm saw. I also built floor to ceiling storage shelves in this area. You can't see it, but near floor level where the latter is there is a screened vent that connects the shop with the greenhouse. The vent lets cold air from near the floor from the shop into the greenhouse so it can be heated and returned to the shop.
...............
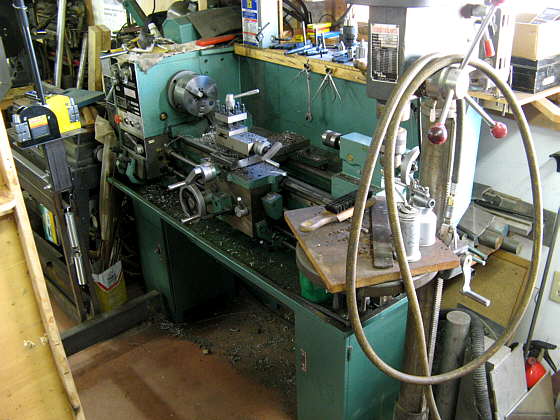
Here we are looking at the SW corner of the main shop. The greenhouse door is on the left and a window and outside door on the right. To the right of the greenhouse door you can see a fan. In the winter I run that during the day and it blows air from the greenhouse into the shop (remember there is a cold air return at the other end of the greenhouse). I also set this area up for the lathe as I knew I was going to buy one when I designed the room.
...............
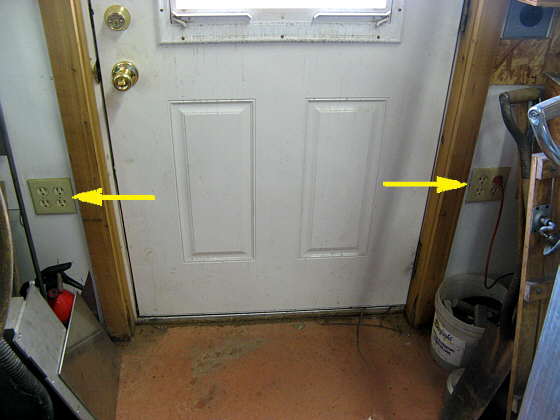
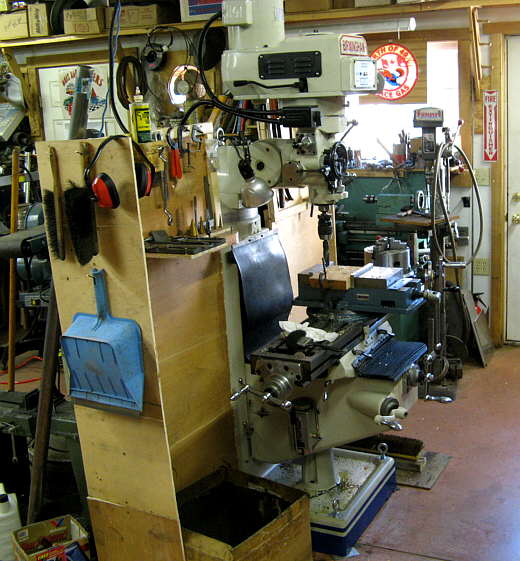
A close up of the SW corner showing the lathe, door and on the right side of the picture the mill. Since I knew I was going to get the mill and lathe when I designed this I wired 220 into these areas for them. I also have separate 220 outlets in the middle of all four walls for my mig welder, so there is always an out let nearby. I have tons of 110 outlets and find the place you need to put lots is by the doors as you can get to these later. I put two doubles on each side of any doors and more would be handy sometimes. The ones along the walls get hidden with junk quick. Here again I have storage anyplace I can find room.
...............
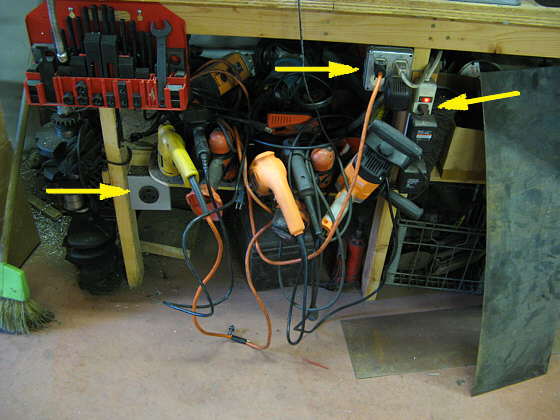
This is the workbench on the west wall just to the right of the mill. It is 32 inches X 10 feet. The extra depth is so I can have storage at the back of it. I wired 110 and one 220 outlet on the front of it so I have outlets that are handy. My vise is on the right end and just to the right of that is a deep sink. The sink in the shop is a real luxury for me. To the right of the sink is the door into the house and right inside is the bathroom, so it is handy to the shop. I have $8.00 florescence lights all around the shop. I like them better than built in as I can move them if needed. Also they are cheap. Make sure you get the ones that work with normal 40 watt bulbs. I have the shop divided into 3 main areas for the lights and also have drop strings on the lights so I can turn some off in an area if needed. There are also overhead incandescent lights that I can use to just walk through the shop. They are controlled by multiple switches at each exit door.
...............
Looking at the NW corner just to the right of the workbench you see a door on the left that goes to a storage room. Just to the left of it out of view is the door into the house. The door to the right goes into the separate shop room (13 X 32) that is north of the main shop. The stove is the original stove that heated my house in Wyoming before I built ( another one ). Above it is a fan that helps to blow the heat into the rest of the shop. I only end up using this stove maybe 8 or 10 times during the winter and it gets into the single digits here. The shop is so well insulated that it hardly ever goes below 55 even with no heat. The green house usually has it to 60 or over by noon. I only use the stove on really cold mornings to put a little heat in the shop or if it has been overcast for a while (that doesn't happen often in the 4 corners area).
...............
Here we are looking further to the east on the north wall of the main shop. The two curtains behind all the junk cover an opening into the north smaller shop area. The idea is that I can move large things between them without having to go outside. When the north shop is finished I'll also use it as a paint room and this doorway will let me take items to be painted from one shop area to the other. Here you can also see where the high ceiling drop back down (by light).
...............
Ok excuse the mess here. This winter I finished sheetrocking and taping and painting the north wall of this smaller shop/storage room. Now I move most of the junk to the left so I can finish taping and paint the other side. I normally have my pickup parked where all the junk is. The floor in this area is about 2 inches lower than the floor in the main shop so that I can wet it down if I want to paint or if I use water over here it will drain outside. The garage door goes to the out side and is normal height. The one in the other shop is taller so I can get our other pickup with a camper on it in without removing the camper.
...............
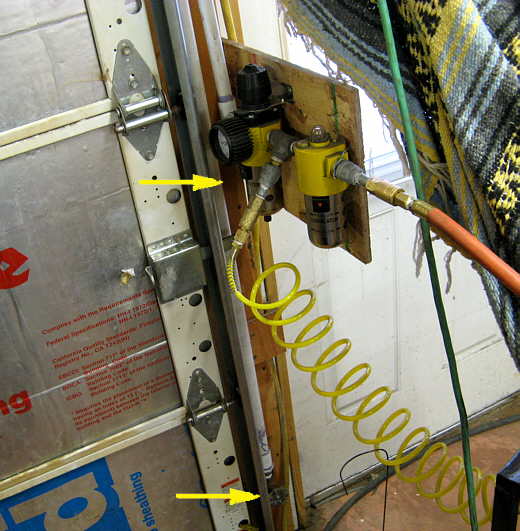
Here we are looking at the west end of this shop (13 X 32). I built in storage at only the one end so that I can cove it if I paint. You can see the doorway to the main shop to the left of the chest freezer. I keep paint in the frig (it is broken) and to the right of it is the air compressor in the corner (can't see it). It is in this room to keep the noise down in the main shop. Coming down the wall on the right is a box like enclosure built into the wall. We keep our potatoes, onions, carrots, and beets from the garden in it over the winter. There is a vent in it to the outside of the north wall. The vent allows us to keep the temps in the low 40's in the enclosure and keeps things fresh into the next summer.
Well that is a trip around the shop (both parts). If I had it to do again I wouldn't do anything different. I like the size, big enough to have a couple projects going at the same time and small enough that it is easy to heat and light. I like the way I have my major tools and work areas laid out.
One thing that is very important is insulation. There is 12 inches of blow-in in the total ceiling area over both shops and the store room. The outside walls are 6 inches and have 6 inches of insulation. The wall between the two shops is 6 inches and has insulation in it so I don't have to heat the smaller shop unless I want to. I also have the storage room separated from the two shops with a 6 inch wall and insulation. Insulation is cheap and 2 X 6 walls on 24 inch centers are as cheap to build as 2 X 4 walls on 16 inch centers. It is not just cheaper to heat and cool during the summer it is easier. Insulation will pay for itself many times over, use it.
...............
H
...............
H
...............
H
...............
H
...............
H
...............
H
................................................................Back to House Index Page
.................