............................... Previous Page.................................................. Next Page If There Is One
..................
....................................................--- New Side Bunks Part III ---
..........
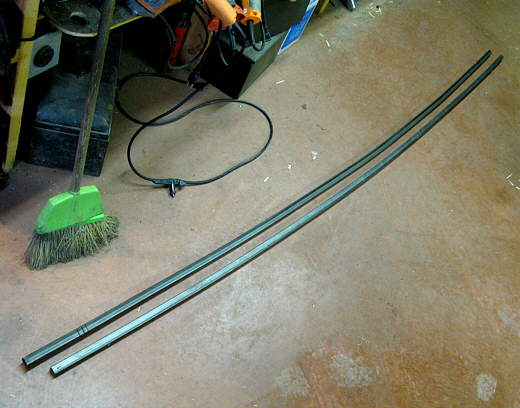
This page will pretty much finish the side bunks. Here are two pieces of the thin will 3/4 X 3/4 inch square tubing. I've crudely bent these to match the lines I want along the boat. These along with one that is almost 20 feet long make up one side. I left all of these a little long at this point. I drilled one hole in from the end and mounted them one at a time on the rear upright and marked where the front hole needed to be and next.....
..........
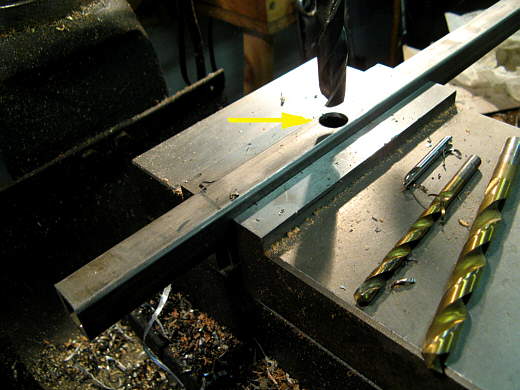
.... I drilled them for the attach bolts. I drilled a drill size larger than 3/8 inch all the way through and followed that up by drilling this 9/16th inch hole just through one side.
..........
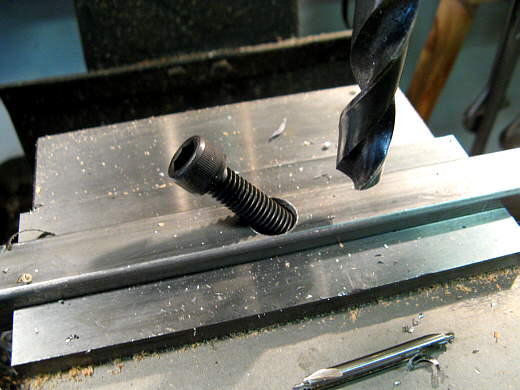
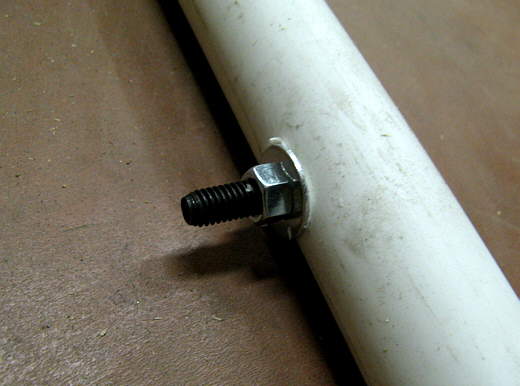
The large head allows the bolt to go into the tube and the head stops at the 3/8th inch hole on the other side.
..........
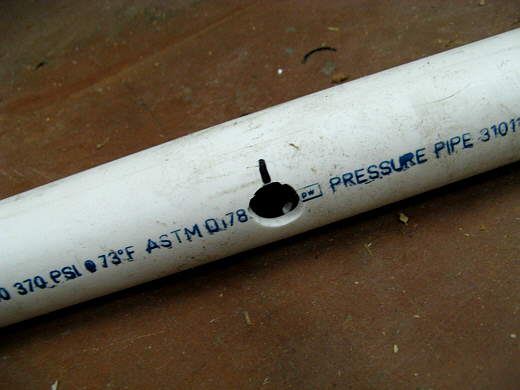
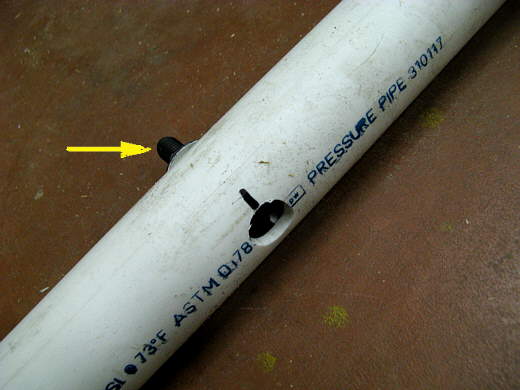
Likewise I did the same to the PVC pipe once I located where those holes should be placed. A 3/8th inch hole all the way through followed by taking the one side only out to 9/16th of an inch.
..........
The square tubing is inside the PVC and the bolt goes through the 9/16th hole in the PVC, through the 9/16th hole in the square tubing then out the hole in the square tubing and.....
..........
...out the other side of the PVC where a flat washer and nut sandwiches all of this together and it is ready to mount on the uprights.
..........
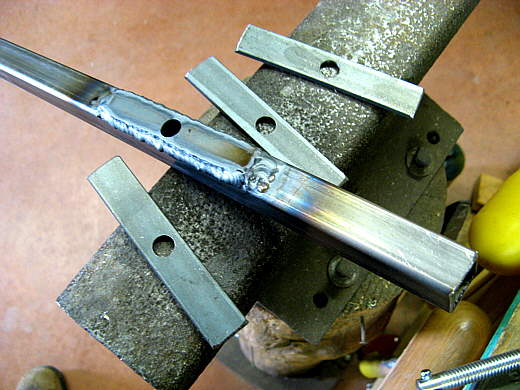
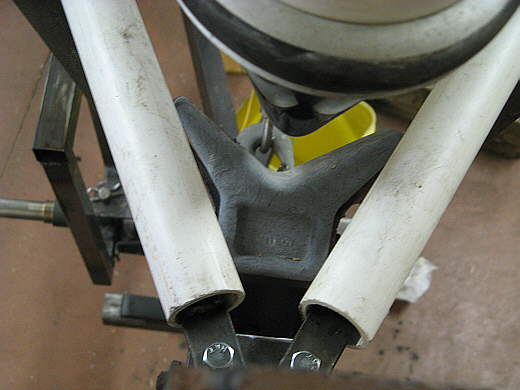
Once I was sure everything fit I pulled it apart and welded these reinforcement straps out of .120 X 3/4 inch strap over the 3/8th inch side holes in the square tubing. This reinforced these areas and I wanted to do this as there is no washer under the bolt/allen screw head.
..........
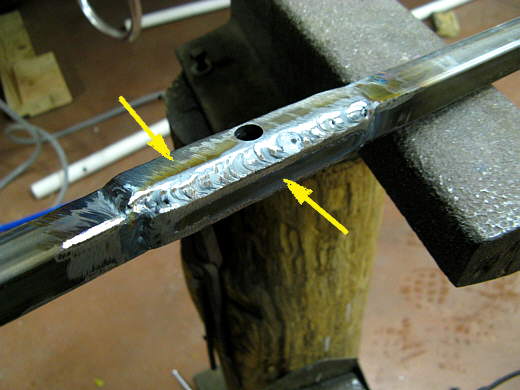
On the two pieces of square tubing that went all the way to the front of the trailer besides the reinforcement over the hole (top arrow) I added a side piece to reinforce the area by the hole. I didn't feel this was needed on the shorter bunk pieces.
..........
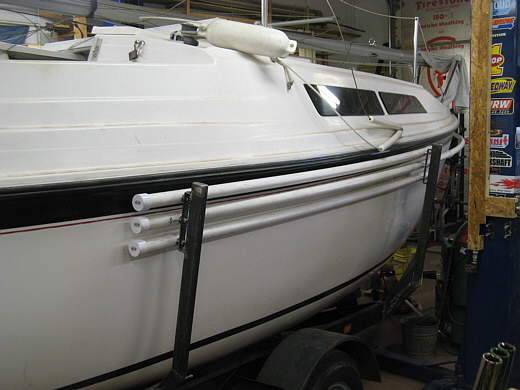
Here the pieces are in place on the starboard side of the boat, but they haven't been cut to length yet.
..........
This view shows how the long piece of square tubing goes all the way forward. Since the PVC came in 10 foot lengths I had to add a coupler and an additional pipe to reach the bow area.
..........
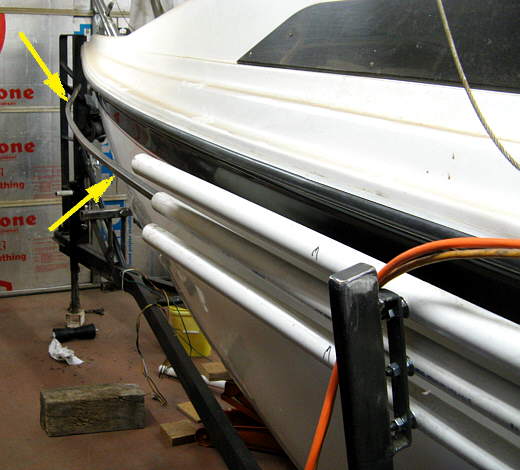
A plate was welded to the ladder (left arrow) at the front of the trailer and each long side bunk (2 right arrows) attaches to it. Here I had some short pieces of PVC in place to check for fit. The finish ones.....
..........
....go almost all the way to the plate. You can also see here that the boat isn't quite up into the "V" cushion. When I had it up on the rear support and off the trailer I let it down, but couldn't get it all the way forward. I guess the "Mac bump" will have to be used when I get it outside.
..........
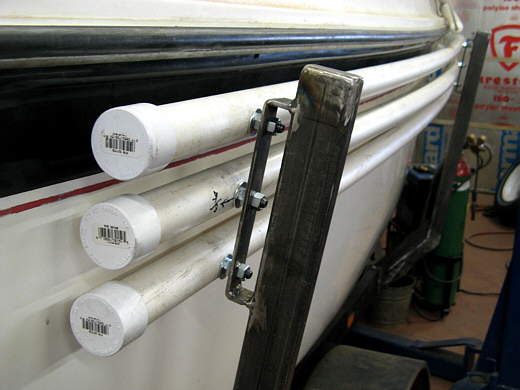
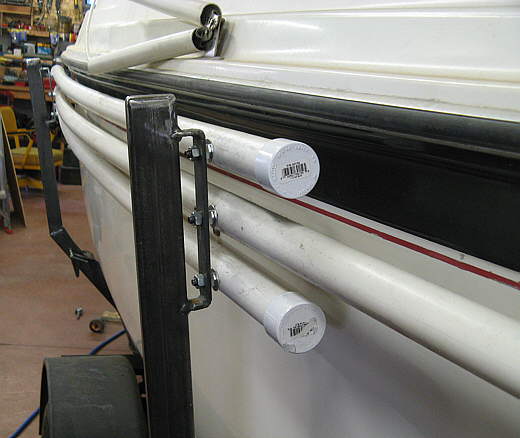
Here the pieces have all been trimmed and capped off. You can also see how the allen screws have been extended through the brackets on the upright and secured with a second nut.
..........
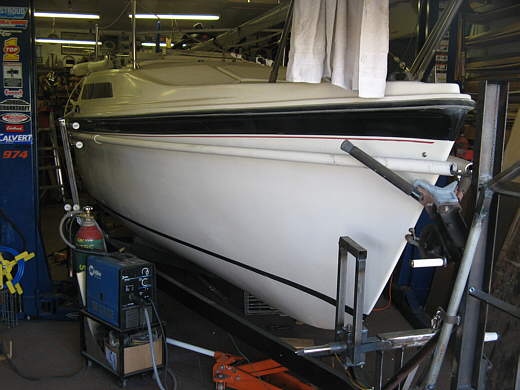
A view from a little further away. Hard to get pictures with the boat/trailer crammed into the shop, but I feel so fortunate to have it inside. I really have some respect for some of the guys who do all of this outside. I did that for years in Wyoming on projects and it is not fun.
..........
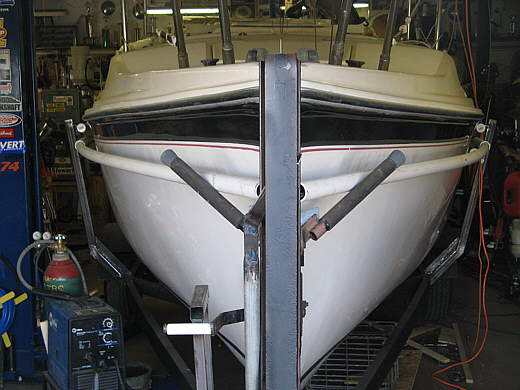
A view looking towards the stern from the forward upright.
..........
3/4's view from further forward and one....
..........
....last view looking back. Of course all of this is taking longer than expected, but I'm enjoying it.