............................... Previous Page.................................................. Next Page If There Is One
..................
....................................................--- New Side Bunks Part IV ---
................--- Launching/Retrieving (bottom of page) ---
To finish up the side bunks I wanted to add some little vertical bunks to the bottom of the back two uprights and extend the tops for marker lights and to help loading if the trailer is deeper in the water.
..........
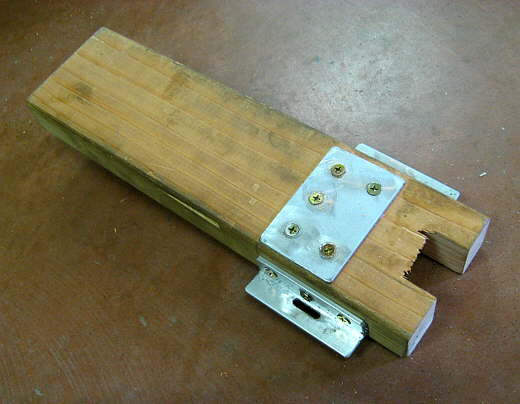
Above is a 2 X 4 piece of redwood that I cut a large notch in one end and a smaller notch in the other end. The aluminum brackets were made to allow hose clamps to go through these and to hold them to the upright.
..........
Here is a top view. The top plate is just there to reinforce the redwood and hopefully to keep it from possibly splitting length wise.
..........
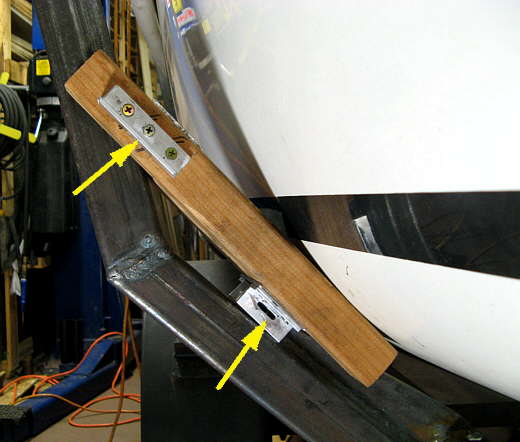
Here the piece is shown in place. I'm hoping that as the trailer comes out of the water and the boat settles on the Main "V" bunks on the trailer that these pieces will help to center the boat right on the main bunks and will also keep the boat from moving from side to side at all. The arrows point to where the hose clamps will go.
..........
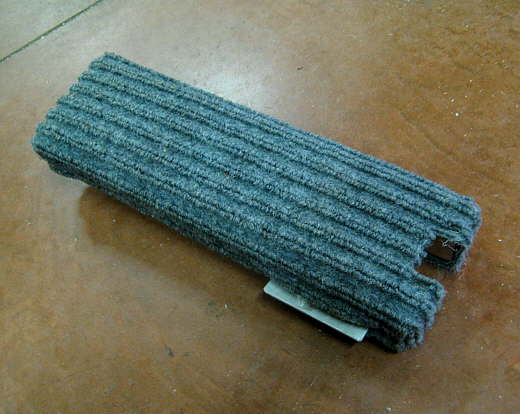
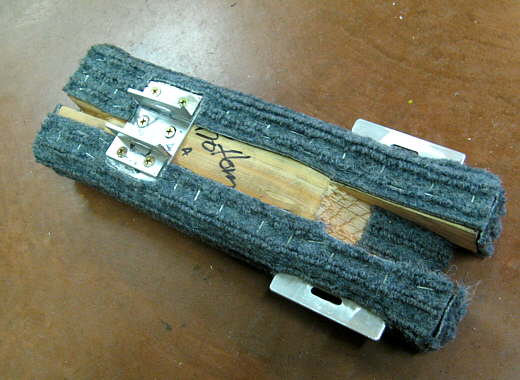
Next outdoor carpet was cut and stapled to the redwood.
..........
A view of the bottom side. This is going on the port side of the trailer.....and....
..........
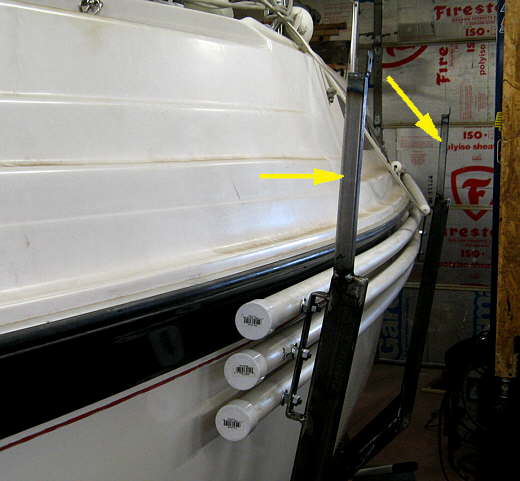
.... here it is clamped into place. The arrow points to the stock bunks on the trailer. The hose clamps are there to stop the new vertical bunk from floating straight up off of the upright.
..........
The starboard side was done in a similar fashion, but a different top bracket was made, top arrow, from a piece of square tubing and the hose clamp goes through the square tubing and around the upright.
..........
There is also a bottom hose clamp that goes on, but it isn't shown in this picture. The boat just rests against the two new upright bunks, but there is no real pressure on them when the boat is sitting on the main stock trailer bunks.
..........
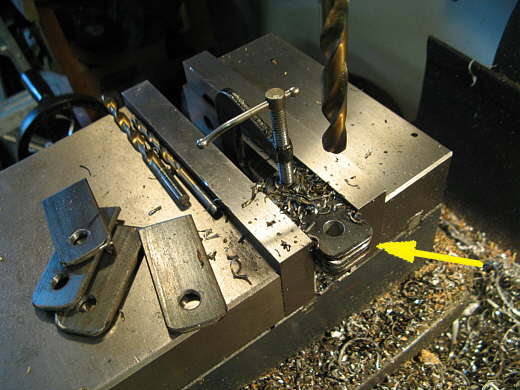
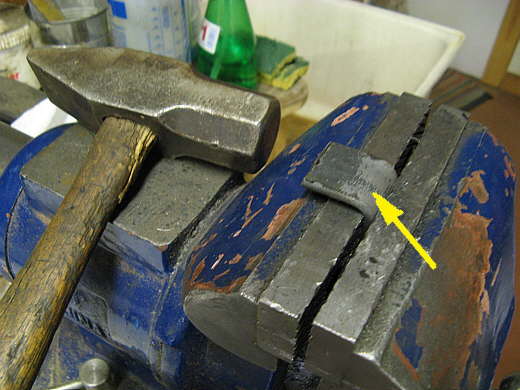
These tabs where made as part of the extensions on the top of the uprights where the clearance lights will go. Two tabs will be used on each of the 4 uprights.
..........
After they were drilled they were bent over to 90 deg. in the vise with a small sledge.
..........
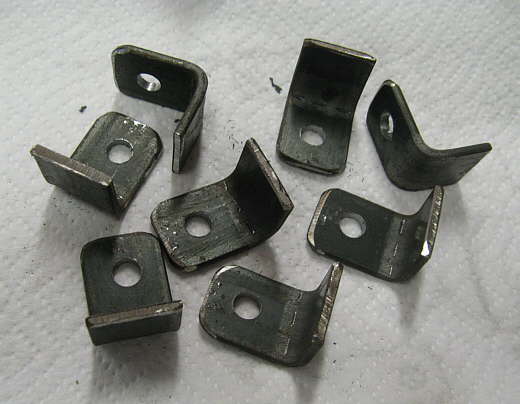
Here are the 8 finished pieces.
..........
4 of the tabs were welded to these pieces of .120 wall 1 X 1 square tubing about 12 inches long.
..........
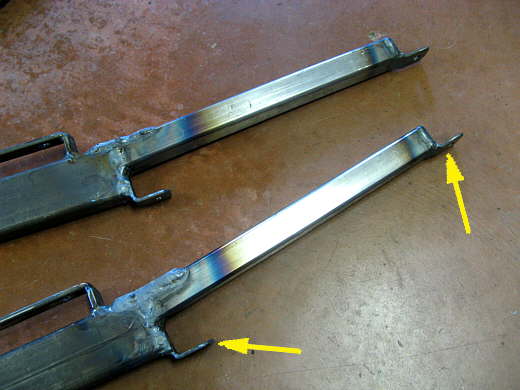
The square tubing was welded to the uprights and a piece of strap reinforces them on the inside edge by overlapping the new tube and the old upright. It is seen up above the bottom left arrow. The bottom left arrow points to the other tab that was welded on in this location. Later a piece of strap will span between the two arrows with a marker/clearance light attached to it.
..........
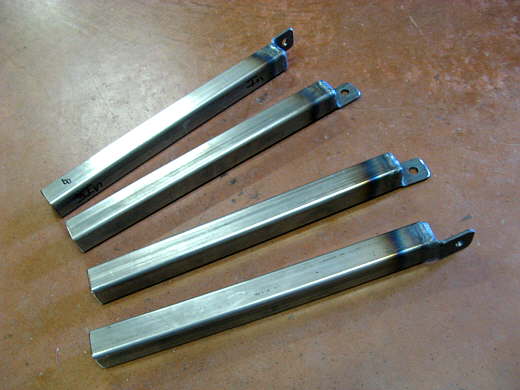
Here the uprights are back in place with the extensions on them I was going to add about 8 inches, but after some discussion on trailersailor.com I decided on about 14 inches.
..........
PVC was cut and lowered over the extensions. This picture was before the tabs were welded on.
..........
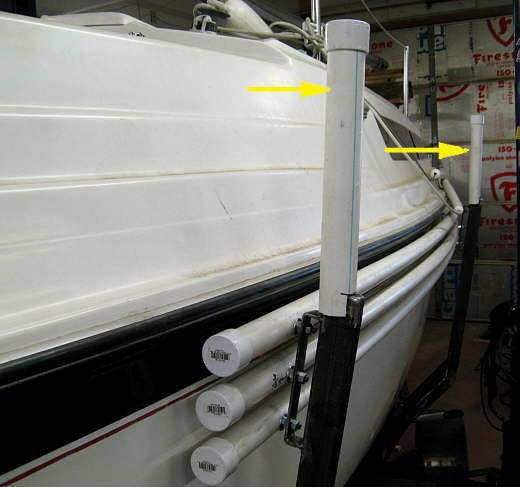
Here the tabs have been welded on and the uprights are painted. The top tab is inside the PVC. With the cap removed I can reach inside and put a bolt through the tab and a hole in the PVC. You can barely make out the bolt. Right now it is just holding the PVC to the extension, but later a bracket for the marker light will go from the top bolt/tab (upper arrow) to the lower tab (bottom arrow).
..........
Here you can see the rear upright and the front one with the piece of PVC with the square tubing inside of it going to the ladder at the bow.
..........
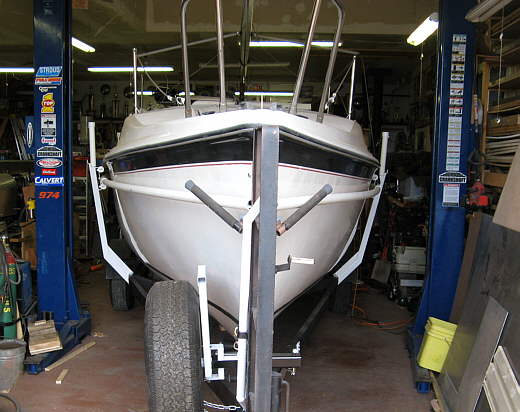
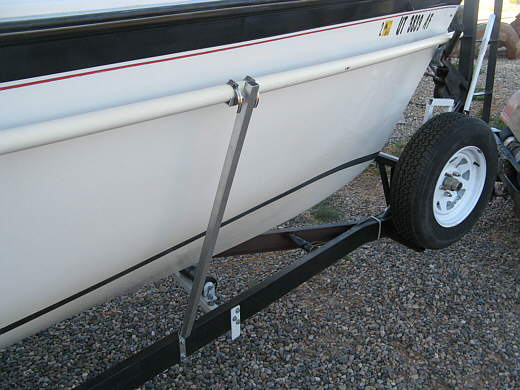
The painted and finished side bunks.
..........
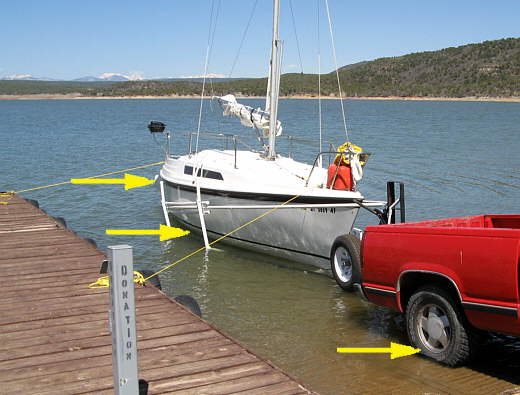
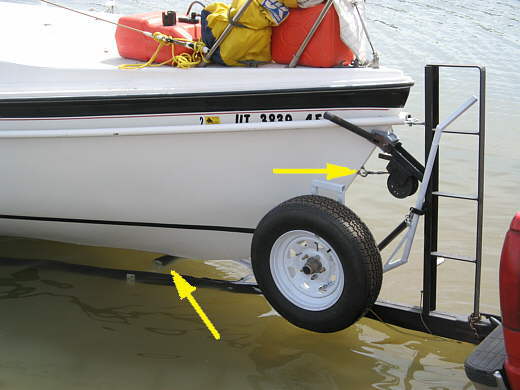
Here the Mac is being launched. The pickup was barely in the water (bottom right arrow) and you can see how much of the rear goal post (top left arrow) is above the water at this point. The boat is floating free and the water ballast hasn't been filled as evident by how high the boat is riding in the water (center arrow). The boat is free of the winch and we had it tied to the dock at this point. Right before this picture had been taken we had the boat out of the trailer and along side the dock where I tried to start the motor, but had problems with it. We then pushed it back and brought it back into the trailer (shown in the picture) and were ready to winch the bow back onto the trailer, so we could pull it back out of the water and remove the Honda outboard and replace it with the Zodiac's 5 HP Nissan long shaft.
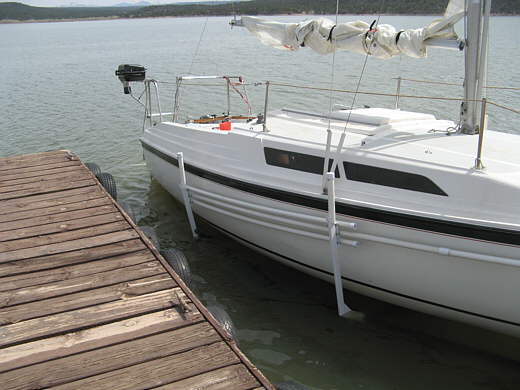
..........Here we are retrieving the boat 5 days later at the end of our first sail and you can see it is riding lower in the water since the ballast tank is full at this point.
..........
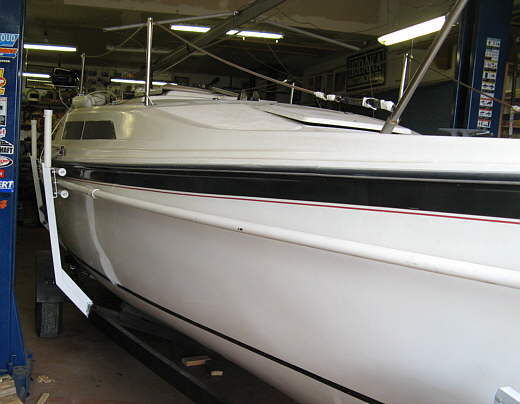
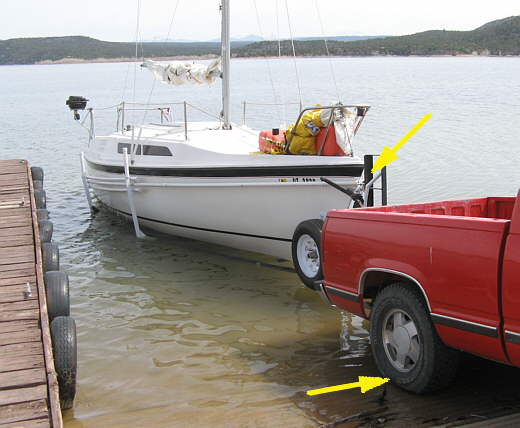
This picture shows the boat ready to come out of the water. It was really easy to bring the boat into and up onto the front of the trailer with the side bunks and bow roller making it very easy for us first time sailors.
..........
Here is a better view of the bow roller ( CONSTRUCTION HERE ) and also the winch which I had turned upside down at home.
..........
The boat came right up into the "V" block even though the front was way out of the water. The more vertical side bunks that I made further up this page put the boat dead center in the trailer on the main bunks right where it was at home when I made these changes to the trailer. We are really happy with these mods. The boat launches and retrieves great and is ready to go down the road as soon as the ballast water is drained. I do put a big strap around the back of the boat and strap it down to the trailer at the rear goal post as added security while towing.
..........
After using the trailer and having to tow it with the boat off while in Colo. I found one problem I wanted to address. With the boat on the trailer the long side pvc pieces with the square tubing that go all the way to the front of the trailer would ride without moving with the boat on the trailer even though the boat wasn't in contact with them. If the boat was off the trailer they would start to oscillate up and down to the point that I worried they would fatigue and break. We were planing a trip to Lake Powell where a friend would drop us off at Page, AZ and then pick us up about 100 miles up lake later, so he would drive the trailer home empty about 180 miles and that worried me.
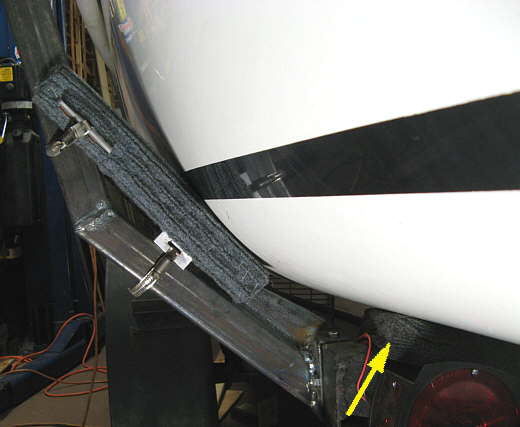
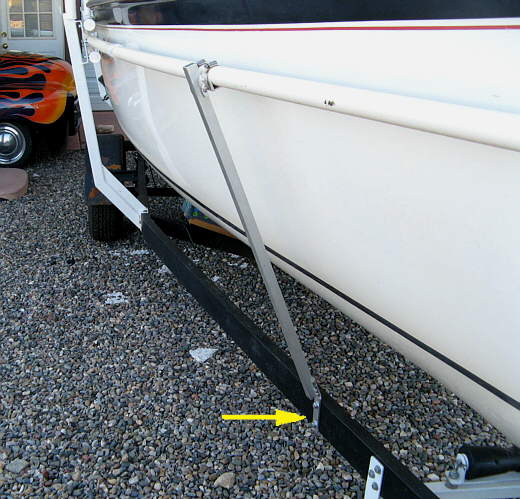
To take care of this I made a side support for the bunk rail on both sides out of aluminum and positioned them about 1/2 way between................
..........
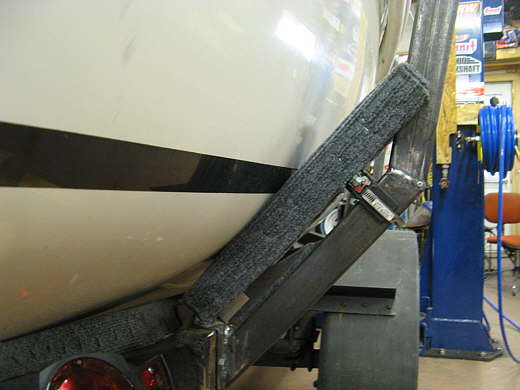
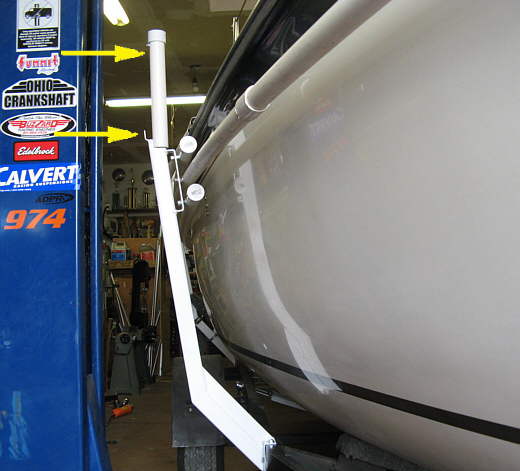
..........the bow and the first upright back from there. They bolt onto the trailer frame with two bolts (arrow).
..........
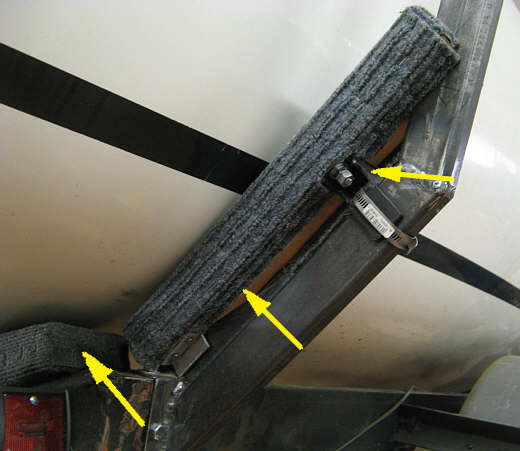
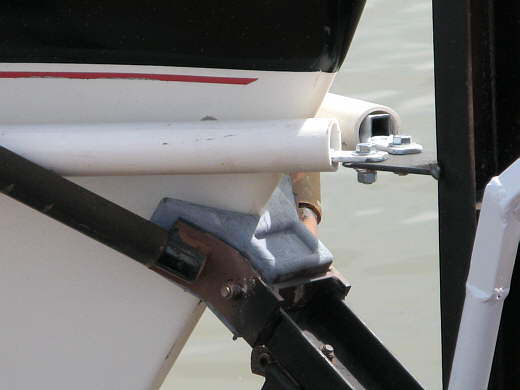
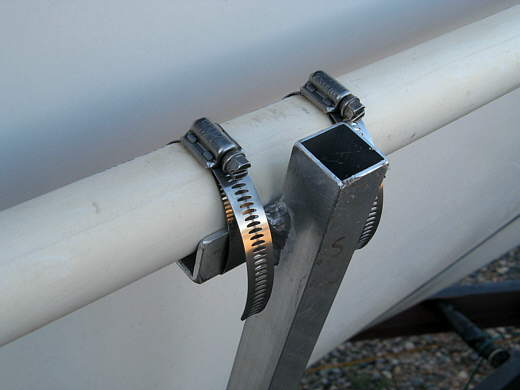
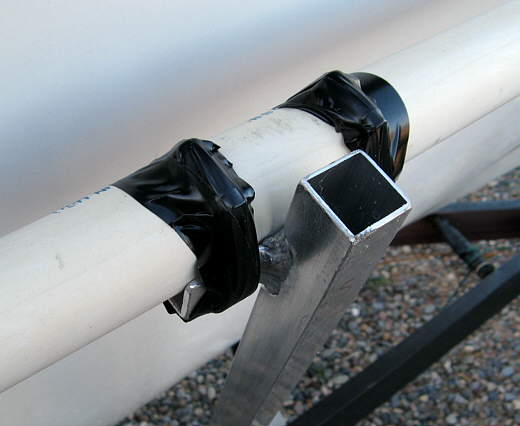
At the top of the square tubing I welded on a short piece of aluminum angle and then used two hose clamps to clamp the bunk tube to the upright and...........
..........
......... taped that just in case the boat came into contact with the bunk during loading or un-loading. On the trip this seemed to cure the problem.