..................
...............--- Swim Ladder Extension -- Pushpit Mod ---
...............................................................................--- Part IV ---
...............
On the last page four fittings for the ladder rung ends were made (the short ones around the tee).
...............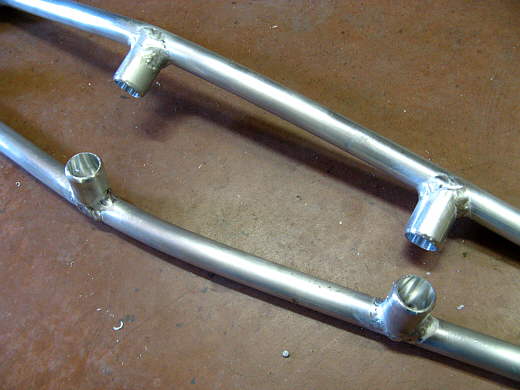
I placed the two uprights in position and determined where the rungs should be and tacked the 4 fittings in place and then finished welding them on my welding table.
...............
The left side of the rungs is the top and the right side attaches to the current swim ladder with a cross-member that isn't shown.
...............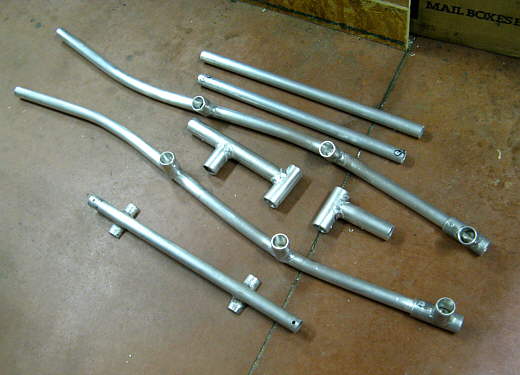
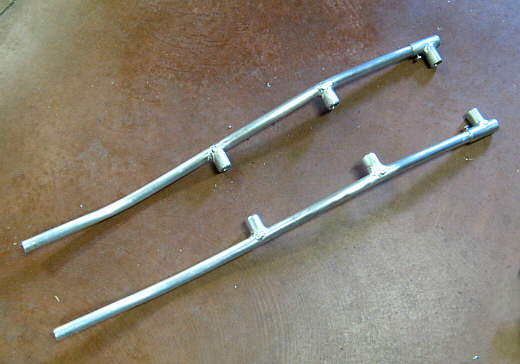
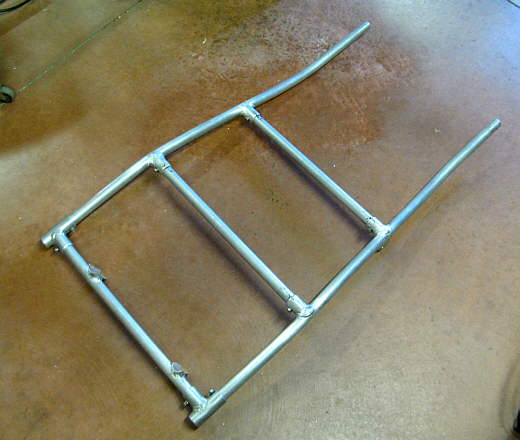
The pieces made to this point. Starting at the top, 2 runs, 1 upright, 2 connectors that connect the new ladder to the rail at the top of the pushpit, the 2nd upright and the bottom cross-member that attaches to the top rung of the current swim ladder.
...............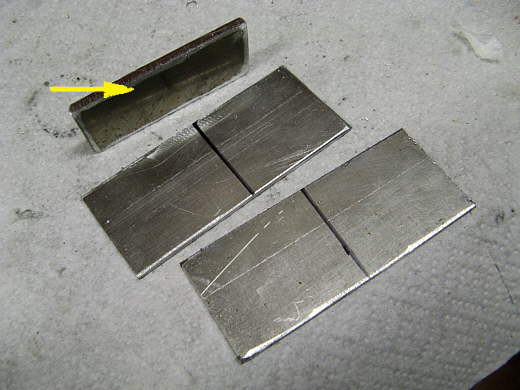
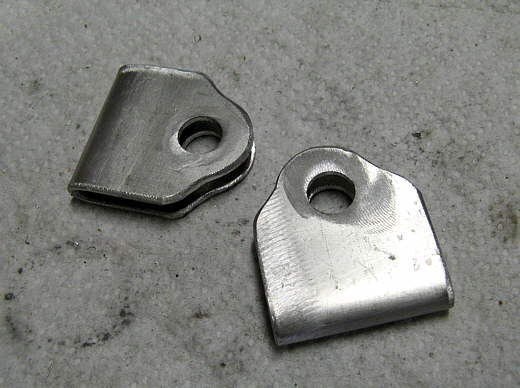
Next came some tabs that were needed to brace the ladder and to support a BBQ grill platform. The arrow points to a piece of scrape that is of the same thickness (.120) of a brace that will attach to the tabs. The tabs (2 shown here) were made from some .090 5052 aluminum left over from work on my lakester.
...............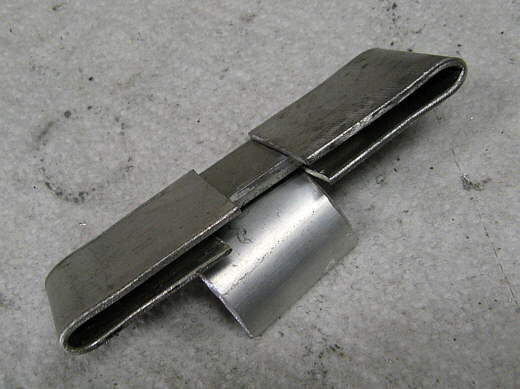
I bent the aluminum in the vise around the strap material into a "U" shape.
...............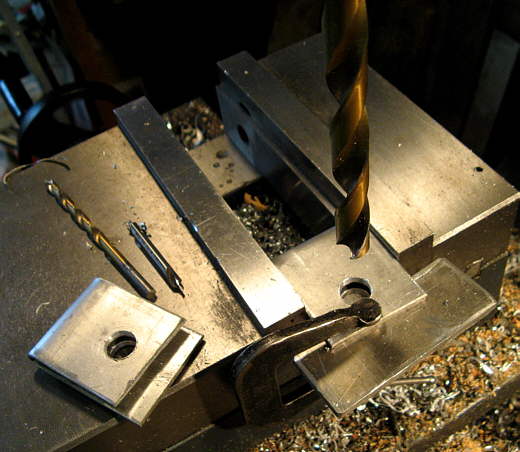
Next some 7/16 holes were drilled in them and then......
...............
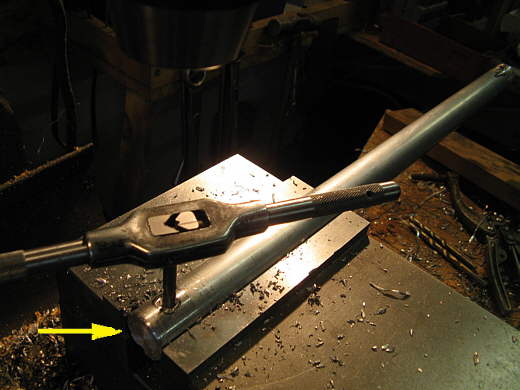
.... they were located in the rotary table on the mill table via a bolt that had the head cut off using a nut on top of and under the tab.
...............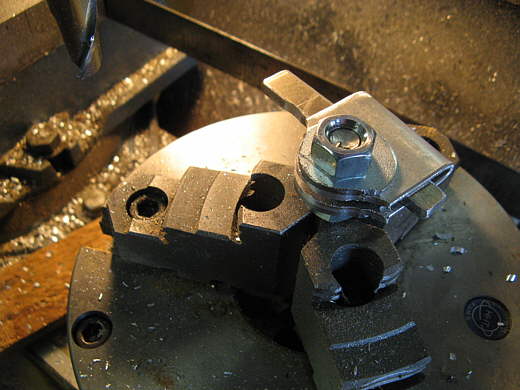
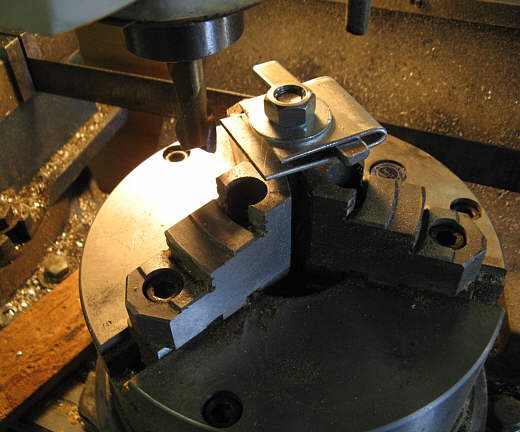
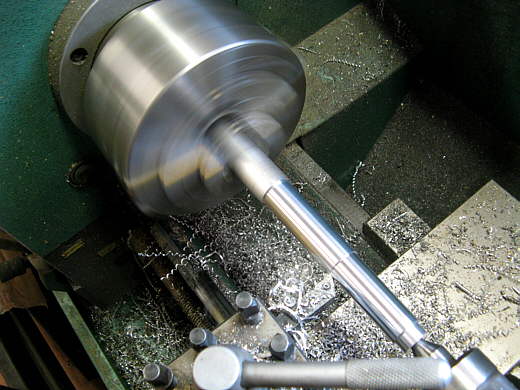
By running the tab into the rotating end mill (show on the left) and rotating the rotary table back and forth a radiused end was put on the tab.
...............
Here are two of the tabs dressed up with the air grinder. I made 5 altogether and used 4.
...............
Two were used on the top railing to hold a BBQ platform and the two at the bottom provide a brace to stiffen the starboard upright of the new ladder.
...............
Next came the new rungs. Some scrap round stock was turned down to fit inside of the ends of the tubing that made up the rungs.
...............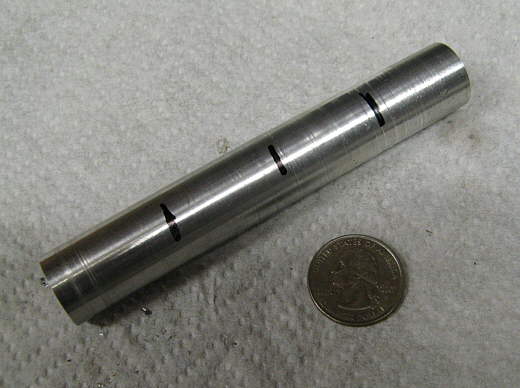
Here it is marked where it will be cut into 4 pieces to go in the ends of the rungs.
...............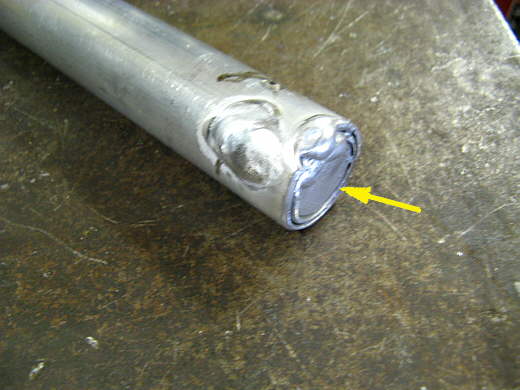
The rungs are 1 inch OD tubing with another smaller diameter tube sleeved in them for added strength. The pieces that were just made above go in the ends. Next the tubes were cross drilled down into the bushings and plug welded and also welded a little on the end.
...............
The rungs were slipped into the lathe and the plug welds on the ends turned down to the same diameter as the rest of the tube so that it would slip into the fittings on the uprights. Next the rungs were put into the uprights and marked for holes that were then drilled and tapped (above) for bolts that would bolt the rungs to the fittings on the uprights.
...............
Here all of that has been done and we have a finished ladder that extends above the current swim ladder. You can just see the 1/4 inch bolts on the bottom of the upright fittings that hold this all together. It is very stiff.