..................
.................................................................--- Bimini Part II ---
When considering in what you see here remember this is a 1990 Mac S. Your boat might be different, so before using any of these measurements make sure you see how things will work for you and make changes accordingly. Also I worked on getting the boom higher than it was with our worn-out sail by raising the gooseneck and working on the bolt rope. You might have to do something similar to use what I did here. Those changes only took an hour or so, so don't be afraid of doing them.
...............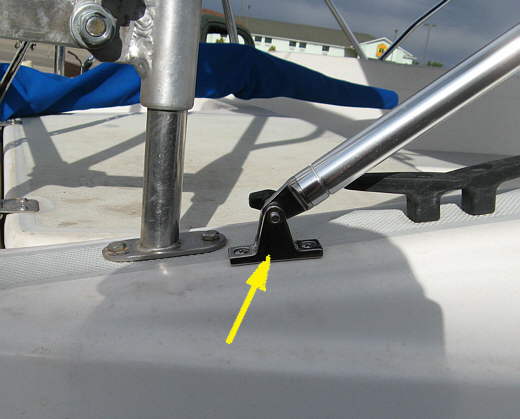
Here is the rear adjustable support bracket on the starboard side. I tried to mount is so I could still use the cleat you see there and......
...............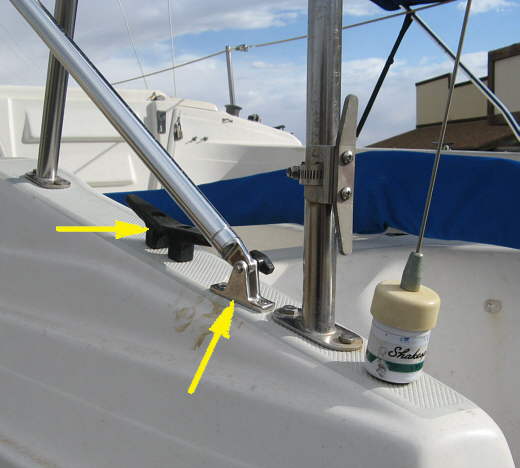
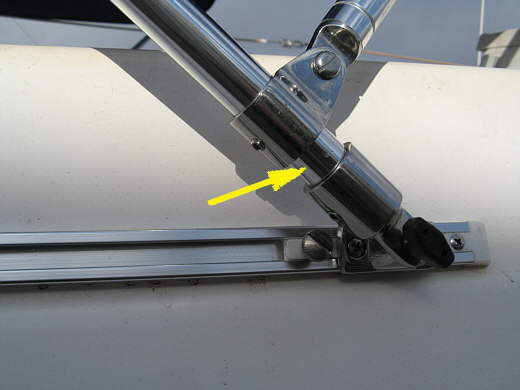
......... did the same on the port side. The right arrow points to how these brackets were mounted at a slight angle to go up to the bimini sides so that the pole wouldn't bind in these brackets. Have the pole attached to the bimini and the bracket and adjust the bracket so there is no bind before drilling the pilot holes for the mounting screws.
...............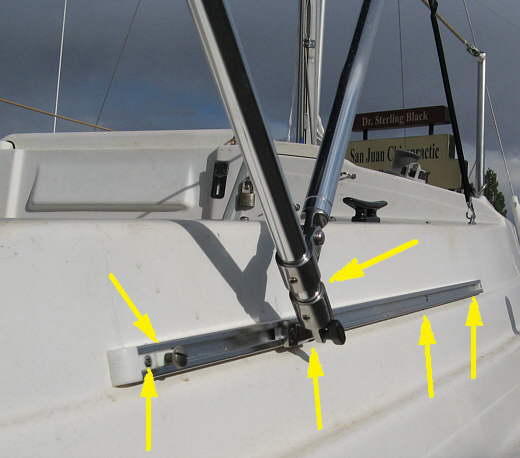
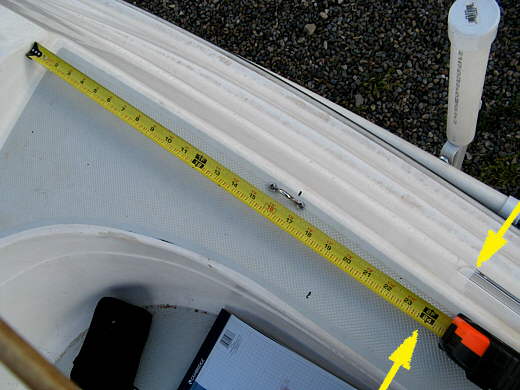
The bottom 4 arrows point to the screws that hold the slide track to the hull side. The hull us slightly curved here, but that didn't present a problem. It is curved more below this point and that might present a problem. The top left arrow points to an adjustable thumb screw stop that can be slid along the track. I use it when the bimini is all the way forward right behind it, but not when it is back in this location. The top right arrow points to where I cut the bottom of the main bow with a hacksaw and then remounted the bottom mount. The hardware comes with top and side mounting hardware and extra if you also order these tracks. We paid extra to have all of this hardware in stainless.
...............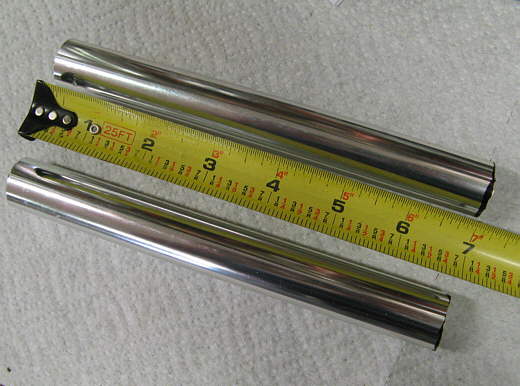
This is how much I cut off the bottom of the bow on each side. They said to leave at least 1 1/2 inches below the fitting above the bottom I left 1 5/8 inch. It is easy to cut these aluminum tubes. This kit was two tubes thick in this area. There is a second tube slid up inside of these. Some bimini's only have one tube thickness here.
...............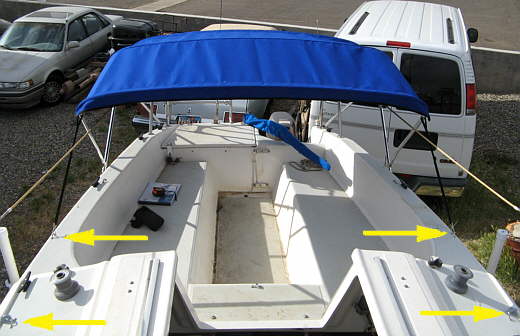
The arrows point to the 2 sets of eye straps on both sides where the front bimini straps attach when in the back or forward positions.
...............
The arrow points to the part of the main bow where I cut the bottoms off.
Ok now some measurements and remember your results might be different, but one good thing is that with the slide tracks the mounting isn't as critical as it would be if the bimini was mounted in just one location.
...............
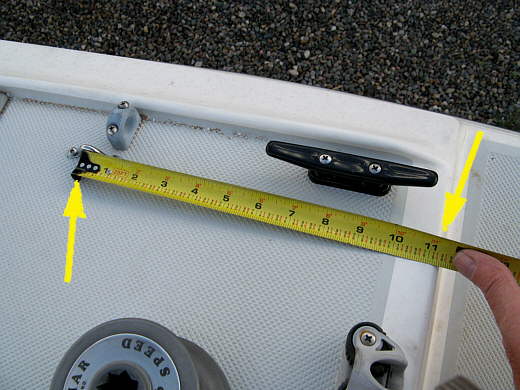
Here is the forward eye strap and it is 11 inches in front go the cabin/cockpit bulkhead. The fairlead was on the boat when I got it, but I added that cleat to tie the inflatable to when anchored along with 2 more aft of it on the side coaming. All of these measurements are the same for both sides.
...............
The other eye strap was mounted 16 inches back of the cabin/cockpit bulkhead. I tired to mount these eye straps so that the strap on the front of the bimini wouldn't have to be adjusted, but it is easy to adjust.
...............
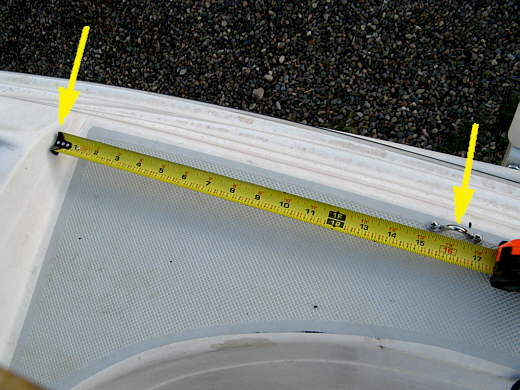
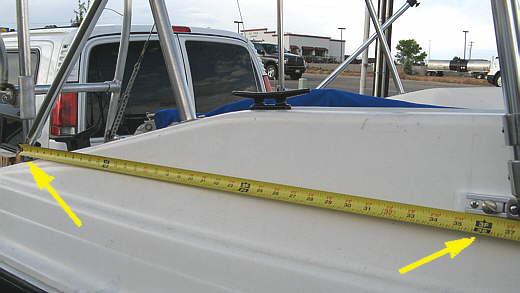
The front of the track is 24 inches back of the cabin/cockpit bulkhead. I marked a line at the top and went straight down and that is where I put the front of the metal track. The plastic stop at the end of the track is ahead of that. The photo is at an angle and it doesn't look like the end of the track is at 24 inches, but it is.
...............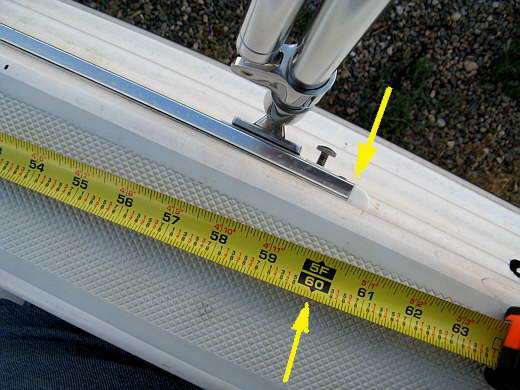
The back of the track is at 5 feet which makes sense since it is 3 feet long. There again the photo was taken at a slight angle.
...............
Sorry about the blurred picture. For the adjustable pole support brackets I measured forward from right above the forward side of the nav. lights.
...............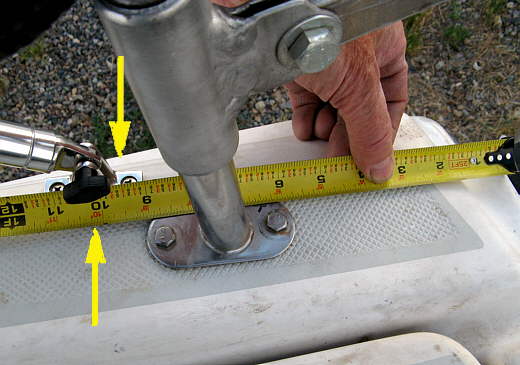
I went forward a little over 10 inches and mounted the bracket center there. The top arrow is there to remind you to angle these a little so that the support poles are not in a bind in the brackets.
...............
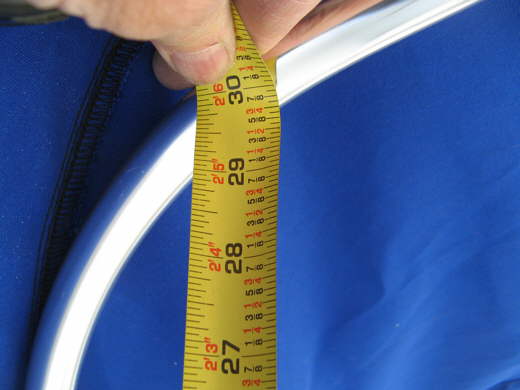
The bracket was a little over.....
...............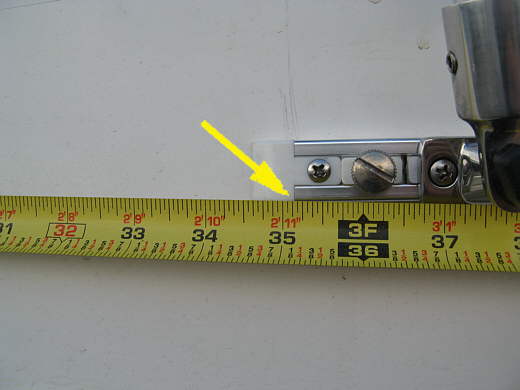
...... 35 inches from the back of the slide track.
...............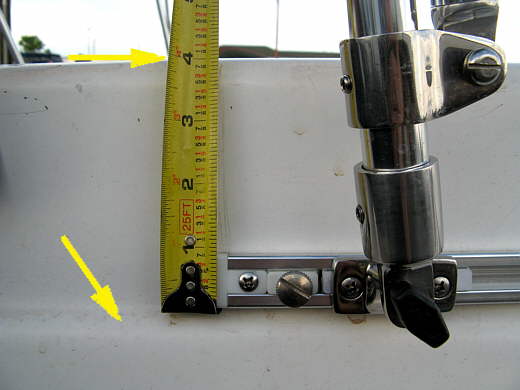
The bottom of the slide tracks were mounted about 4 inches down. The arrow points to a radiused area in the hull there. I moved the track up above it slightly so that it was flat on the side of the hull.
...............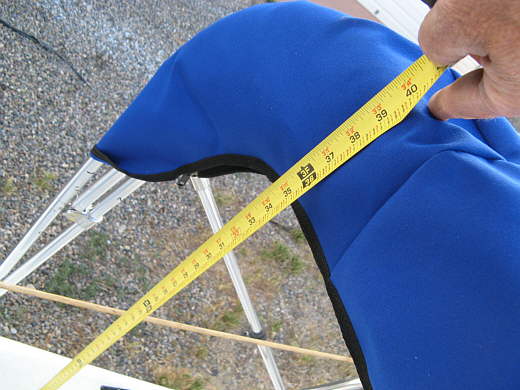
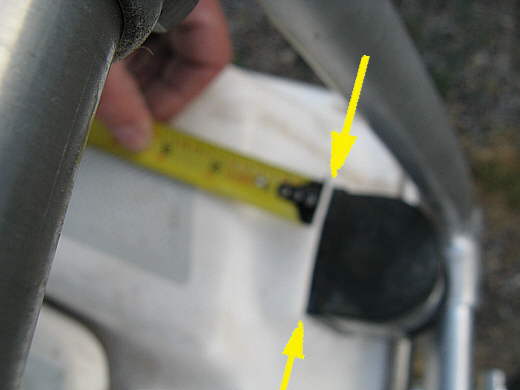
With the bimini stored in the straight upright position it is over 36 inches to the bottom of the cover off the side of the hull and much more off the floor of the cockpit.
...............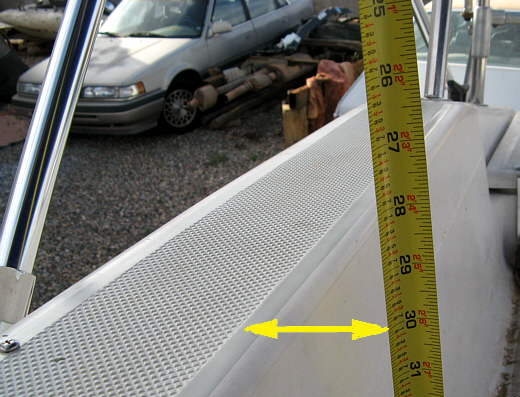
With the bimini in the normal position and in use the sides of the bow are 30 inches....
...............
........above the sides of the hull and higher in the middle.
You need to see where your boom sits above the cockpit and make the bimini work with that dimension. It might be different than mine and what I have done here might not work for you. Take the time to get the boom as high as you can and then determine if these measurements will work.
One last thing and I mentioned it on the last page, but it bears repeating.
...............
Eric on trailersailor.com/ noticed that the bottoms of my front bow were angled the wrong way. I wondered about how they were when I put the bimini together, but thought I was reading the directions correctly, but after swapping the bottoms side to side so....
...............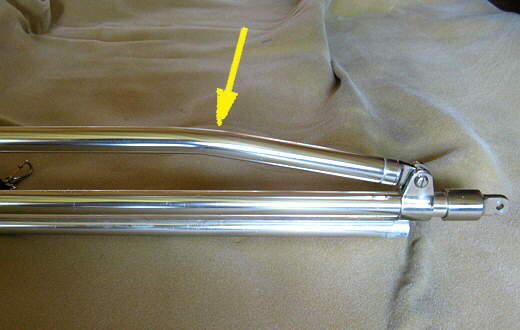
....that the bend goes the other way as in these two pictures I'm sure I was wrong. Everything worked the other way, but this way the legs don't run into one another. Thanks, Eric
...............
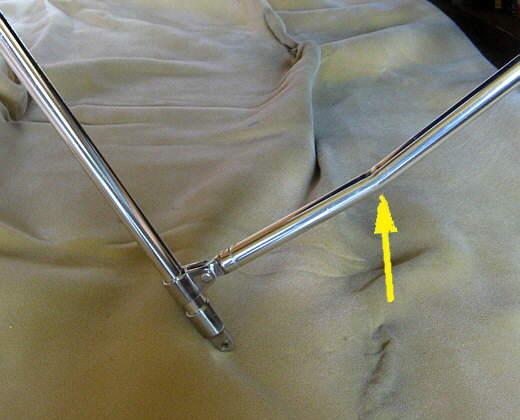
Someone (maybe Walt) mentioned that the stock slide track fittings would fail where the screws only grip the nylon/plastic inner slide and they did after our first outing of only 5 days. The screws just pulled out. Some of the problem is that with the tracks on the tapered sides of the boat the bimini support tubes that come down and are attached to the slides at the bottom arrow are not square to the slide and that puts a twisting movement on the slide and it's parts. I'm going to try and address that problem later and will post when I do. For now the fix was to mount the stainless hardware to the nylon/plastic slide in a different manner and we followed the procedure that had been recommended.
...............
The solution is to turn the screws over so they hold all of this together with a nut on them and not the threads in the bottom piece. You need to countersink the hole at an angle (top two arrows) for the head of the flathead screws (bottom two arrows) so that they will go into the slide and end up with their heads flush, so that the slide will still slide in the track. You also need to buy these stainless screws of the right length to do all of this from the hardware store.
...............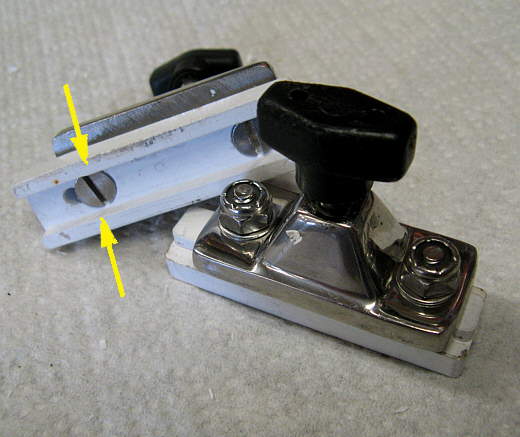
Here you can see the completed slide from both the top and bottom sides. I used stainless nylon insert nuts to complete this. The rest of the summer this worked fine with about 3000 miles of the boat going down the highway with the bimini on and over 30 days on the water. But finally out on our Lake Powell trip in September 2009 one of the slides broke where the two arrows are, so it was then just held on with one of the screws. The broke piece stayed in the track and the bimini stayed in place, but still a fix needs to be done (see below). I had two slides in the track at the time one in front of the other, so I moved the bimini to the other slide for the rest of the trip.
The problem is the boat is curved top to bottom where the track is and the bimini support side rod meets the slide track at an angle and puts a considerable twisting force on the above pieces. Get the swivel deck hinge when you order the bimini to take care of that problem. See the "Upgrade Page" listed next.
NOTE: Be sure and look at the Bimini Upgrade Page ( HERE )