........Our MacGregor Index Page....... Mac 26S Outside Mods Index Page.
......
...............................Previous
Page.......................................
Next
Page If There Is One
..................
.................................................................--- Bimini Part I ---
Since we get a lot of sun in the west and we will sail a lot at Lake Powell where the summer temps can go over 100 we wanted to get a bimini. Checking what others had we found that most Mac 26 S & D owners were using bimini's from a couple different sources. Ruth really wanted the Sunbrella Ocean Blue (#6079) color and I liked it also. The problem was that we couldn't find any bimini in that color except for Sailrite's do it your-self bimini and it was pretty expensive. A couple of the guys on the Mac boards suggested GMI for a bimini, but they didn't list the color either. For a while we thought about me making bows and getting hardware and Ruth sewing up one. We decide that was getting in over our head and it would of been, so I called GMI expecting to go with an alternate color to the Ocean Blue. For some reason I told them that we really liked that color. The gal there said that even though it was on the web site she thought they had some of that material and she checked and they did, so Ruth and I were happy and we put an oreder together.
The bimini alone comes in at a very low $225 price and we ordered the 5 foot long, 30-36 inches high by 73-78 wide (part number #57836) We decided to add some options and I'm sure glad we did. We got the Ocean Blue that was the same price as the other colors. We also added: 2 quick release pins; Stainless hardware on all the following and on the bows ( the bows themselves were aluminum); Adjustable Support Poles ; and 3 foot Sliding Tracks. I strongly recommend getting at least the last two items and you will see why below. With shipping this all came to $376 in April 2009. It was more than we initially wanted to spend, but we are glad we got what we did.
Since our sail is pretty much worn out which resulted in the boom hanging lower that we wanted I did what I could to fix that situation, but working on the bolt rope and raising the gooseneck for the boom. At the same time I also added a topping lift, but it was recommended to not sail using it to hold the boom up, but we did it for other reasons. Those mods are ( HERE ). The first two of those mods lifted the boom to about 30-32 inches above the side coamings. So the goal was to get the bimini to fit under the boom.
The bimini was suppose to be 30 inches high if the legs were cut down, so I thought I could mount it on the top of the side coaming and it would fit under the boom. In our case it didn't. Here is where you have to make a decision. At first I wasn't going to go with the sliding tracks and I tried to figure where the bimini would probably mount base on pictures I had taken from the Internet of other 26C's. At that location it looked like it was right at 72 inches and that meant I had to order either the 67-72 or the 73-78. Some of the other guys got the 73-38 and after talking to GMI I decided on that also. They said it could be bent in some at the bottom of the legs. Well I got it and assembled it and cut the legs as short as they recommended and in the house it was about 30 inches tall. Good deal well not really. When I mounted it on the boat in the slide tracks and got it just in front of the backstay it was narrower than 73 inches. It worked, but bowing the legs in caused the middle to bow up past the 30 inches and the boom hit it.
So now I had 4 holes on each side in the coaming (it is hard to just hold it in place and see what it will be like, so I mounted it). I then decided to move it down on the outside of the coaming and use the side mounts that came with it. That worked beautifully and that is where it is in all of these pictures. I used one of the 4 mistake holes for the eye for the forward strap and another for a cleat that I wanted anyway in that area to tie the inflatable to when anchored and put screws in the other 2 holes.
Ok on with some pictures on this page and some measurements on the next. If you are interested in coping what I've done great, but make sure this is going to work on your boat and with your boom and sail before you get too many holes drilled. This is a mod that I would do exactly the same again, minus the mistake holes, and would get the same parts from the same company. We are going to really enjoy this mod,
Sum
...............
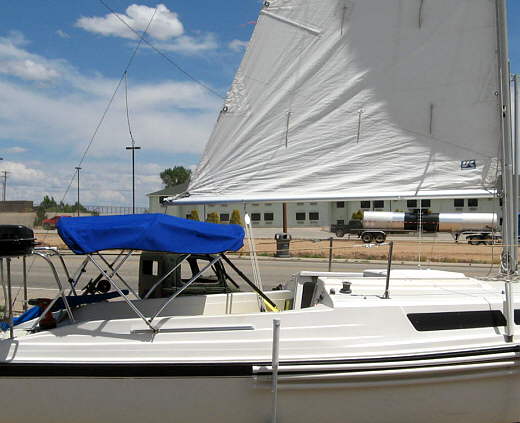
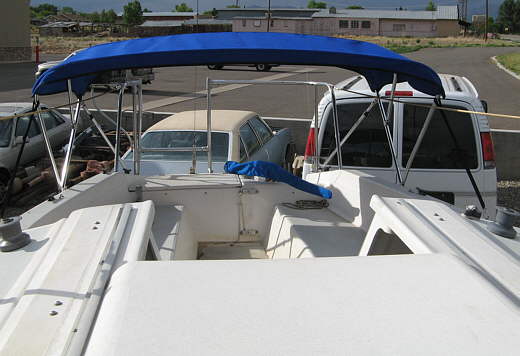
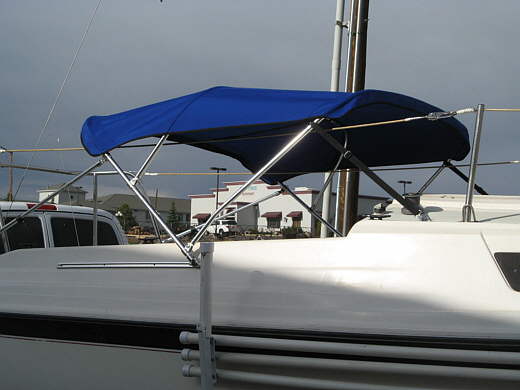
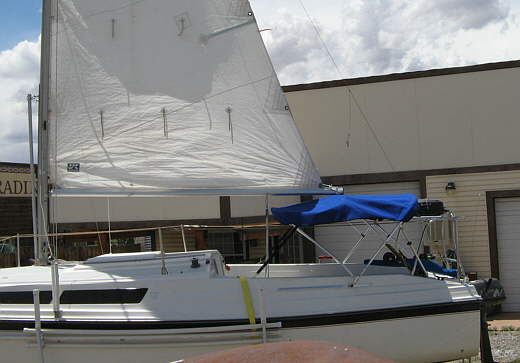
In the next three pictures the back poles were not yet hooked up, so the bimini isn't pulled down and taut. I was just checking the boom clearance with the bimini mounted down on the slide tracks on the sides of the side coaming after trying it on top and not having it work there. With no wind in the sail and just hanging it clears by an inch or two here.
...............
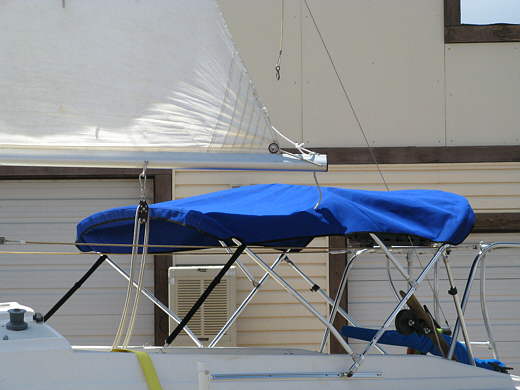
With just a little wind in the sail and pulled in it clears by 4-5 inches.
...............
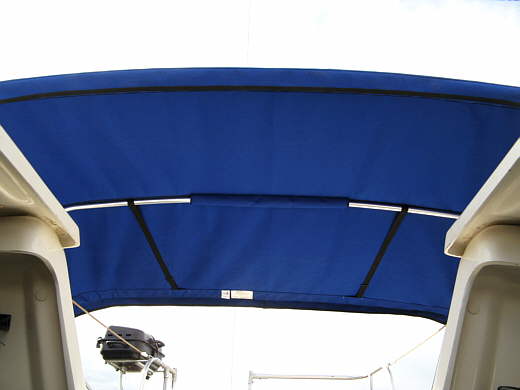
This about how much it clears the center by after the rear supports were hooked up (in the picture they still aren't mounted. At this point I lowered the sail and took the boom off as it was quite windy. In the rest of the pictures the top will be taut as I'll have finished mounting the rear adjustable support poles (don't forget these are an option and one I would highly recommend getting).
...............
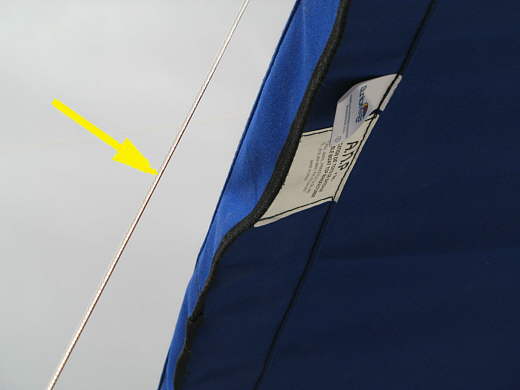
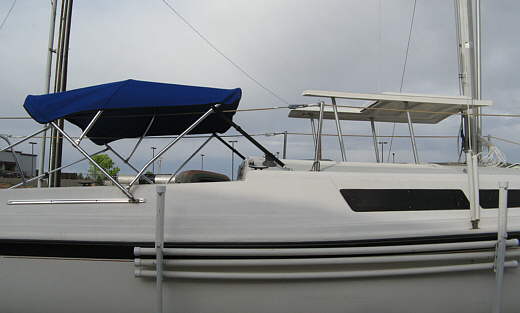
The bimini is on a slide track, so you don't have to worry so much about getting it just right to clear the back stay. With it about 5-6 inches forward on the track it clears the backstay by a couple inches.
...............
Another showing the backstay clearance....
...............
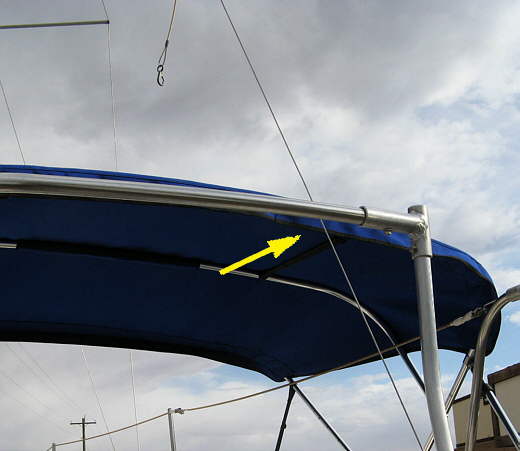
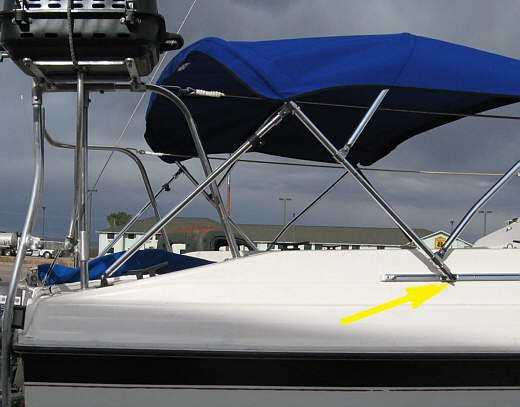
.... and another and here you can see where the bows are slid to on the track (arrow).
...............
One thing I really like about getting this wider bimini vs. the 72 inch one is that with it mounted on the side of the boat it is outside the lifelines and any rain runs off there. In fact in these pictures you will see rain clouds rolling in and just as I was done it started raining and no water came off of the bimini into the cockpit.
...............
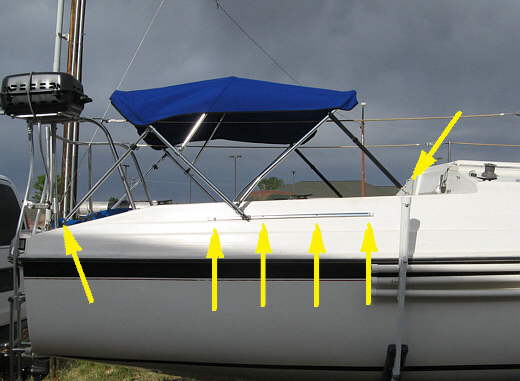
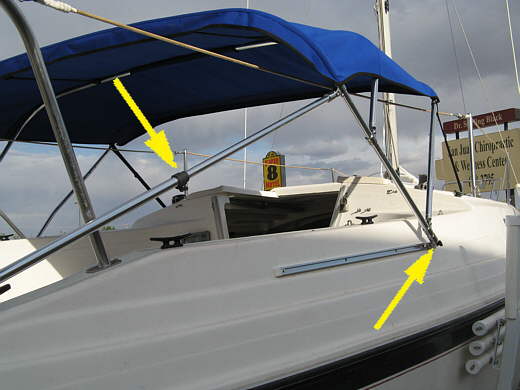
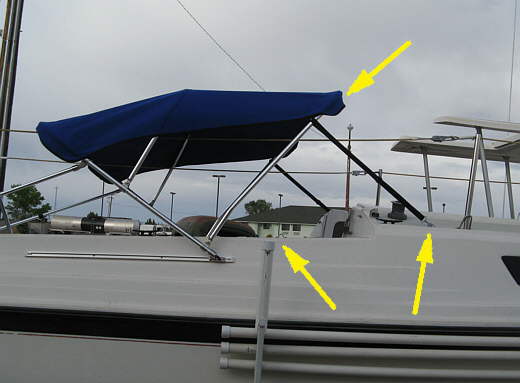
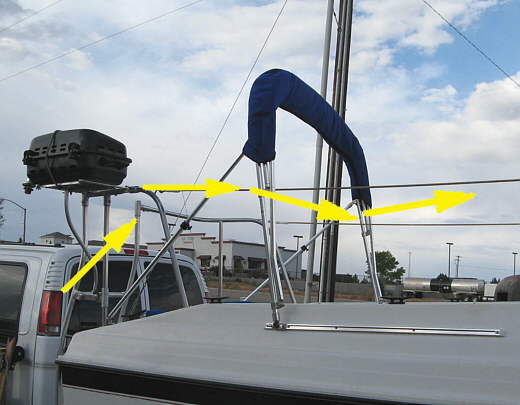
The bottom left arrow points to where the adjustable support pole mounts and the next 4 bottom arrows point to the 4 screws that hold the sliding track on. The top front arrow points to one of two eyes to hook the front straps to on each side. The one under the arrow is for when the bimini is slid back. There is another in front of the winch to the right of the arrow for when the bimini is slid forward. You will see it later.
...............
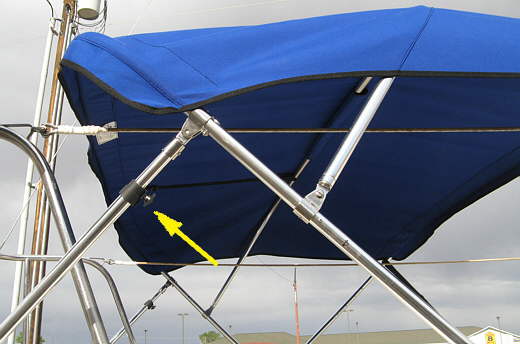
The arrow points to the knob you turn to release the support pole. It will slide in and out over about a 2 foot range and is longer than that.
...............
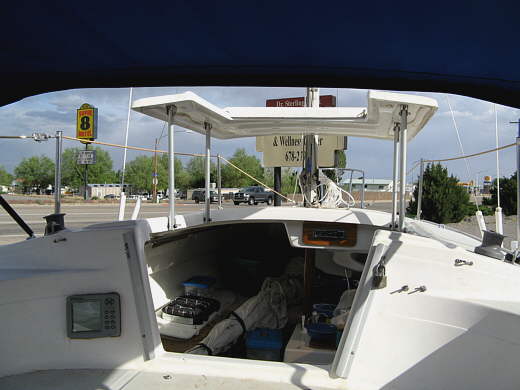
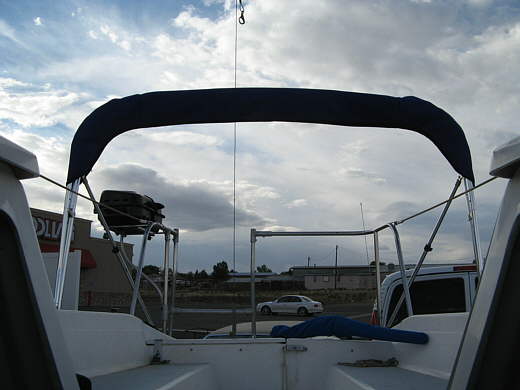
A view rearward. I had seen pictures of a lot of these, but just couldn't believe how much room there is under the bimini. I can see why so many people like these.
...............
A view looking out from the cabin with the bimini still in the rear position.
...............
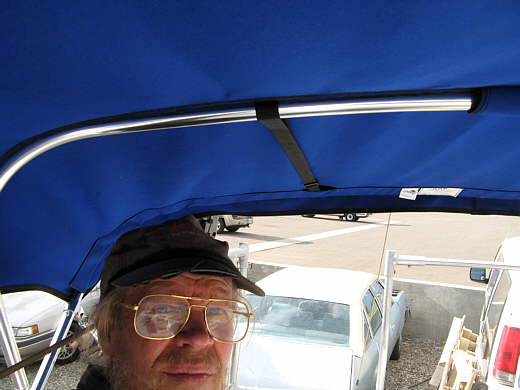
I'm 6-1 and sitting straight up here and still have over 4 inches of clearance over my head. We are really happy with the clearance we ended up with. The mods to the gooseneck and bolt rope really paid off. Hopefully next winter we will be able to purchase a new main sail and that will also help.
...............
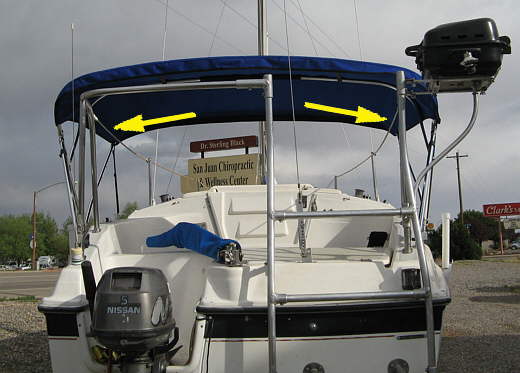
Ok now for why I really like the slide tracks and adjustable support poles. The right arrow points to the bimini now slid all the way forward on the 3 foot track. The left points to the adjustable support slid out about as far as you would want to go with it. There is still a couple inches in the slide. I wouldn't want the bimini held with just it at this point, but you can see that the front strap is now hooked to the eye on the top of the cabin near the winch. I positioned the eyes so that the strap is almost the same length regardless of which position it is in or which eye it is on.
...............
With the bimini forward it is very close to the cabin, which is what we wanted so that if it happen to be raining and we were anchored it would just be a step from the cabin to under the bimini. We might want it there also depending on the sun angles while anchored. You wouldn't want to sail with it here as the boom tackle would hit it.
...............
Another view with it forward.....and...
...............
....... a view from in the cabin. Notice how much closer to the cabin it is now compared to the view further up this page. I have no problem coming out of the cabin and under the bimini. I worried about that.
...............
Here it is with the .............
...............
....... pop top up. We are soon going to modify the stock pop top (watch for that hopefully in the next month) and will later make it so that a flap off of it could snap to the bimini.
...............
With the bimini all the way forward we found out that we can pull the pop-top cover at the companionway up to it and hook it there and get back and forth between the cabin and the cockpit in the rain and stay dry. Now this won't work in a driving rain but in a light shower worked just fine.
...............
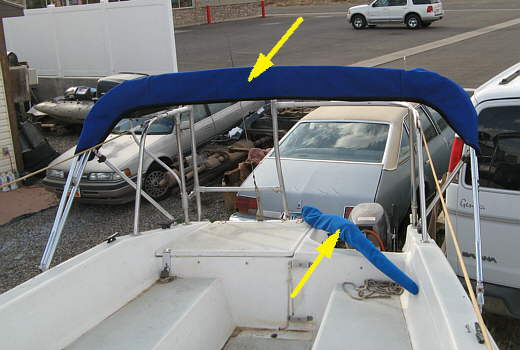
If you want to make it even easier to get out of the cabin and under it pull the back support poles in and tilt it so that it is higher in the front (top arrow). The two lower arrows point to the two eye straps that you hook the front strap to. The kit came with 4 eye straps, 2 for each side for front and rear straps. With no rear straps with the support poles I used all 4 forward of the bimini.
...............
Here the bimini is slid forward and folded forward. I looks like it would be easy to enter the cabin in the picture, but it isn't. You can, but it is a little awkward.
...............
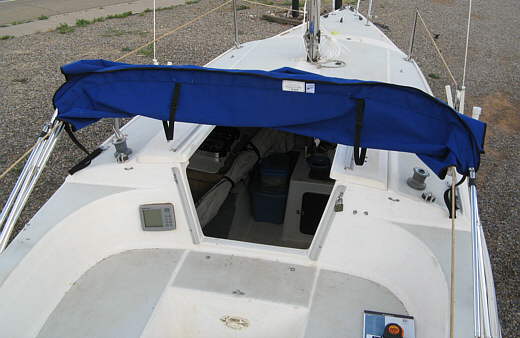
Here it is slid back to the back of the track and folded back. When I saw the cover (comes with it) I thought it was going to be hard to get the bimini in it, but it wasn't. The bottom arrow points to the tiller that has I believe a Pacific Blue color cover on it. You can see the Ocean Blue is a darker blue, but way lighter than say Navy. Ruth will sew a new cover for the tiller to match the bimini along with a main sail cover and a jib bag as she gets the time. The Pop Top cover comes first.
...............
Now with it folded back you can get by it, but it isn't real handy. The arrow points to how I modified the pushpit and extended the swim ladder. Without this mod and the resulting opening in the top of the pushpit it would be a real pain to get around the bimini, but with it it isn't too hard, but.......
...............
.......... the best way is to just tilt the bimini forward with those great adjustable support poles. Now we just come up the ladder and onto the lazarett. Then step down into the cockpit behind the bimini (even when it is slid back) and duck under it and go forward. There again I'm over 6 foot and it is simple to board and go forward even for me. There again the pushpit mod really pays off also.
...............
One final view and on the next page I'll give some dimensions of where I mounted all of this. Also see the next two pictures.
...............
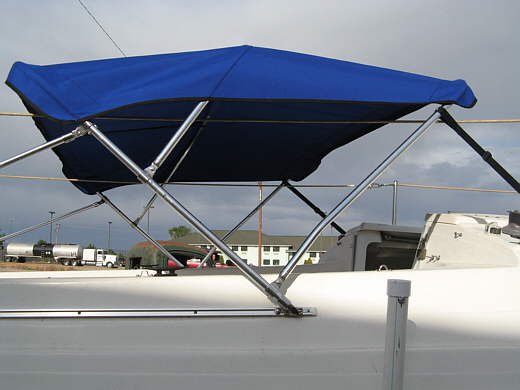
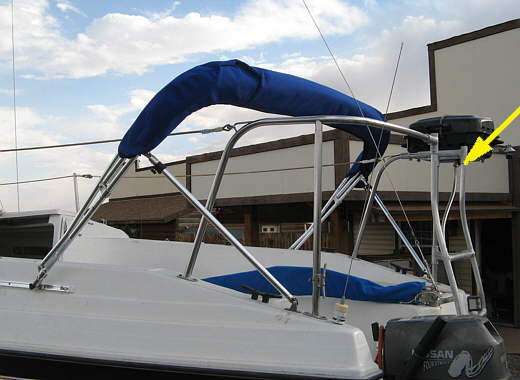
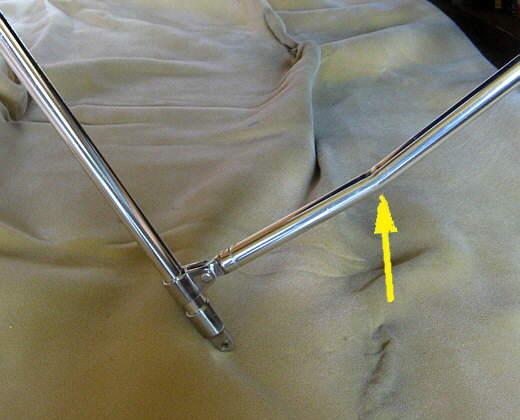
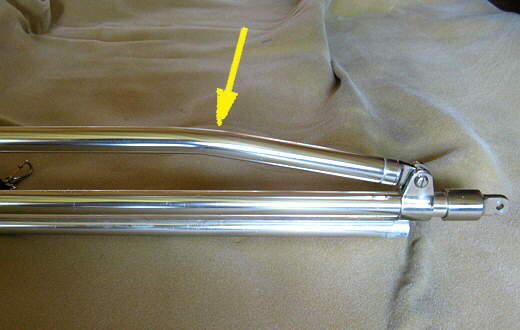
Eric on trailersailor.com/ noticed that the bottoms of my front bow were angled the wrong way. I wondered about how they were when I put the bimini together, but thought I was reading the directions correctly, but after swapping the bottoms side to side so....
...............
....that the bend goes the other way as in these two pictures I'm sure I was wrong. Everything worked the other way, but this way the legs don't run into one another. Thanks, Eric
NOTE: Be sure and look at the Bimini Upgrade Page ( HERE )
.................................................................................. Next Page If There Is One