..................
.................................--- Barbeque Pushpit Mount ---
...............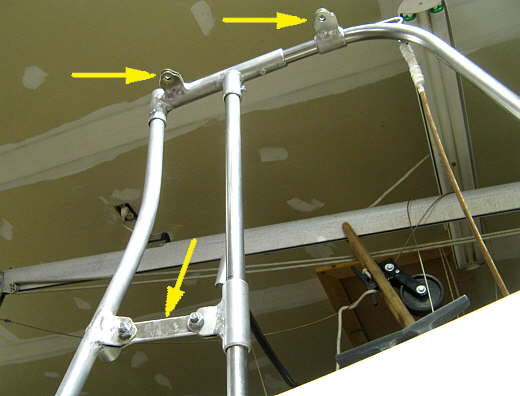
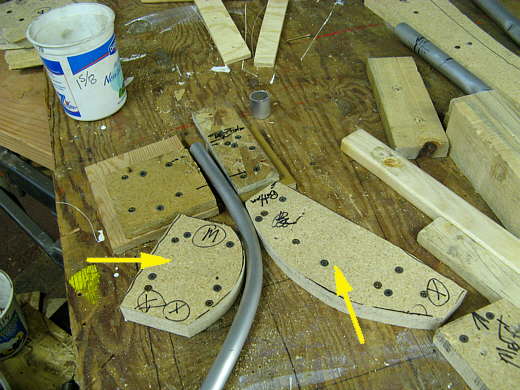
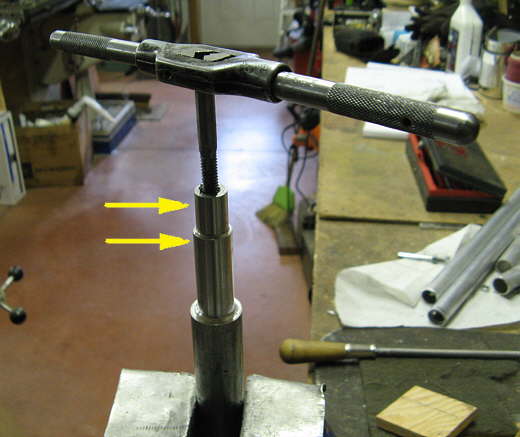
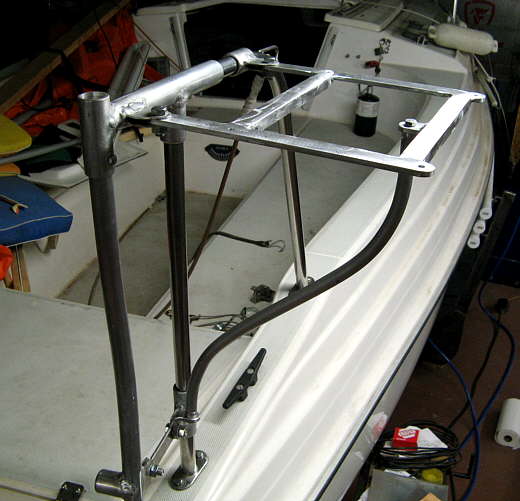
As I finished up the pushpit I decided to also make a couple mounting tabs (top arrows) to later mount a barbeque to. A support leg for it would also mount down by the bottom arrow. Well the next think I knew later was now and I decided to just finish it and be done with it. Our budget didn't allow the purchase of one of the nice round stainless barbeques, so we got a painted black square one from Walmart for about $30. A nicer one will have to wait a while or maybe forever.
...............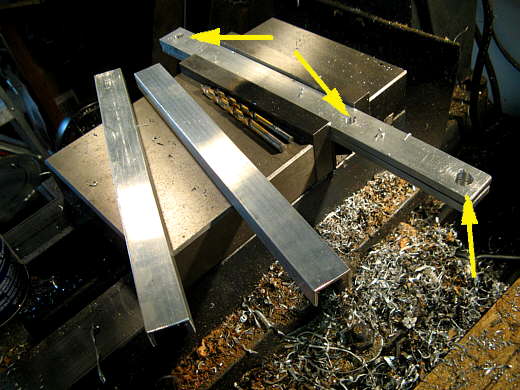
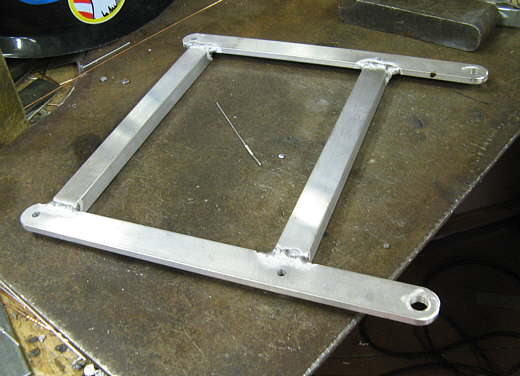
I went to the hardware store and a stick of 1/16 inch thick channel about 7/8'th inch wide and a piece of 1 inch by 1/4 inch strap all in aluminum. Two pieces of the channel and two pieces of the strap were cut to the length I figured would work and 3 holes drilled in the strap. One large 7/16 one to mount this to the tabs on the pushpit and two smaller ones to mount the BBQ to.
...............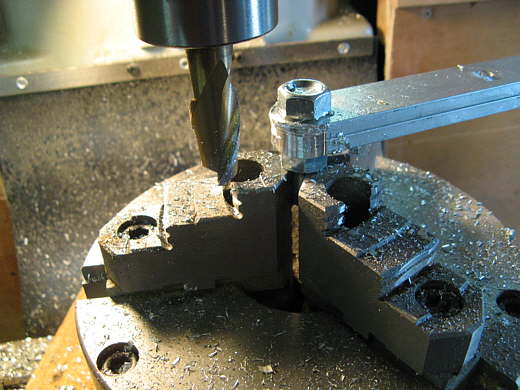
The ends of the strap were rounded together on the mill using the rotary table. Before lately I had always rounded these ends with just a grinder. This looks better and is just as quick.
...............
Here the four pieces are laid out as they will be welded together, which is.....
...............
.......... what was done next with the TIG. If you ever look at buying a TIG I strongly suggest getting the Lincoln 225 amp square wave. It is so easy to weld aluminum and steel with this welder I can't imagine anything being easier and has simple controls for a home welder. I'm a Miller guy and that is what my Mig is, but I like this better than the Miller in the same price range.
...............
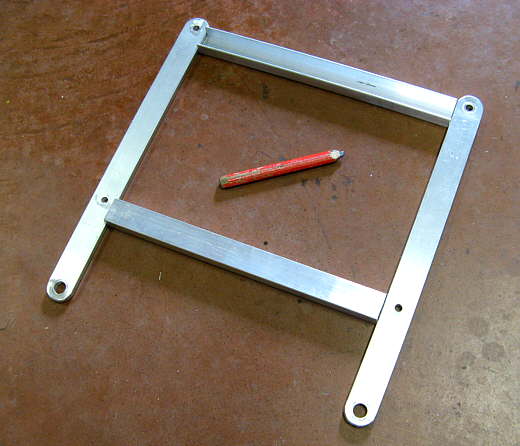
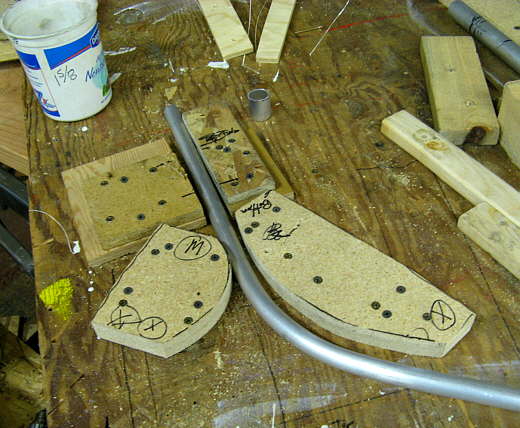
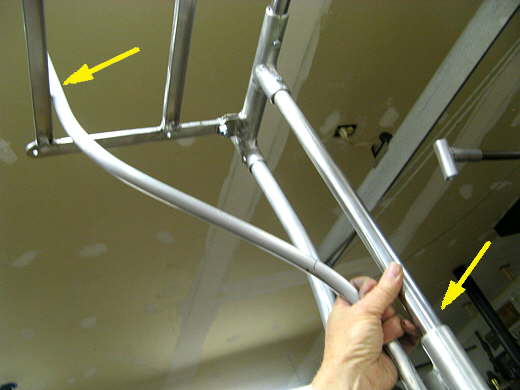
Here the welds have been ground flush. The arrows point to where this mounts....
...............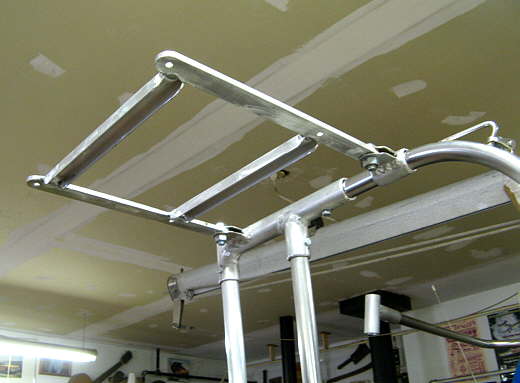
.... to the tabs on the pushpit.
...............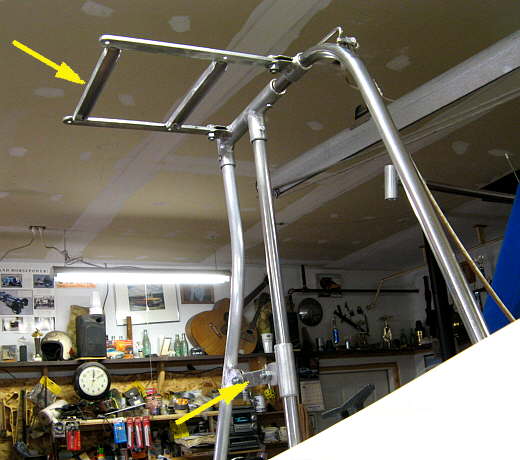
What is obviously needed though is a leg (support) to be made to go between the two arrows.
...............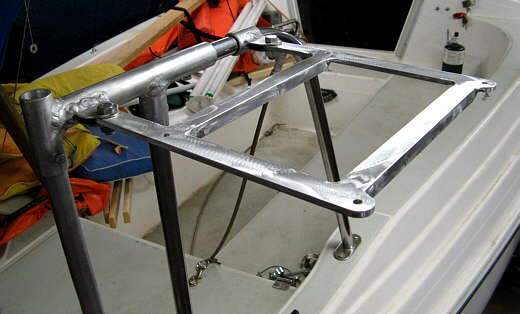
Another view from the top showing the four holes that the BBQ will mount to.
...............
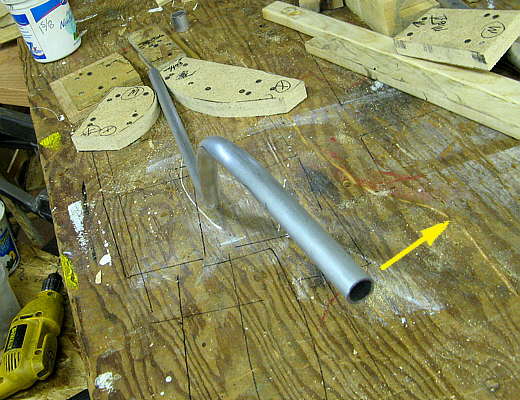
A piece of 3/4 inch thin wall tube was used for the leg support. I took a couple pieces of the particle board that I had used to bend the uprights for the pushpit ladder and drew some curves on their back sides (the side I didn't use) and cut those out on the band saw. This gave me two different curve radius's (arrows) that kind of matched the curves on a piece of welding wire that I had bent to connect the BBQ support to the bottom of the pushpit. Then I bent the tube using the ...
...............
.... two radiuses to get close to my wire pattern.
...............
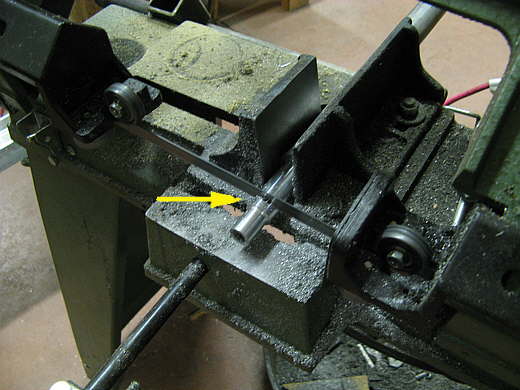
This tube also had to be bent on two planes and after getting the in/out plane close I held the tube in this position and bent the fore/aft bends.
...............
As it was bent I would check it for fit on the side of the pushpit. Here it is getting close as it is parallel to the upright on the pushpit at the bottom, but not the top. A little more bending was required. This went fast, but still you don't want to over bend as it is hard to unbend it.
...............
A tab from the same 1 X 1/4 inch strap was welded to the assembly for the leg to attach to.
...............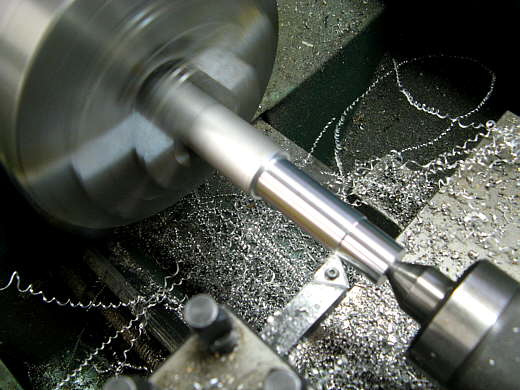
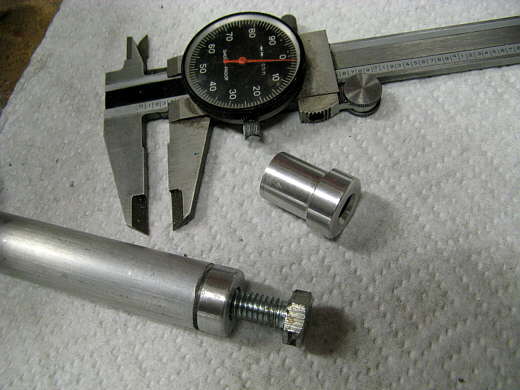
Next some bushings were made to go in the ends of the tubing to attach it at the top and bottom. Some 1 inch round stock was turned down to fit inside the tubing to a point and then rest on the tubing shoulder.
...............
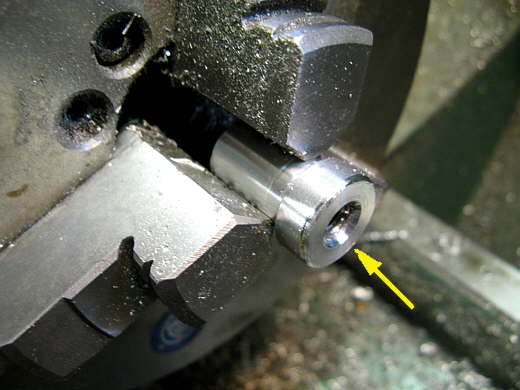
The top arrow points to the part of the bushing that will go inside of the tube and the bottom arrow points to the part that is the same OD as the tube and it will be cut off about where the arrow goes. The bushing is tapped at this point while I can still hold it in the vise. It was drilled in the lathe.
...............
Here the bushing is cut to length and then it went back....
...............
... into the chuck on the lathe to clean up the saw cut and to put a little counter sink in the end and chamfer the outer diameter a little. With the lathe a part like this can be made in just a matter of minutes. For quicker than going to the store or on the Internet to look for something like this.
...............
Here are the two finished bushings with one inside the tube. When the tube has been cut to final length they were plugged welded into the end of the tube and the weld ground smooth.
...............
The upright was cut where I wanted it on the top and the bushing inserted and it was bolted to the BBQ bracket. Then with the upright in place I determined where I wanted the bottom mount and the length of it. It was made out of two pieces of the 1 X 1/4 strap that were welded together at a 90 deg. angle. The holes were drilled in the two pieces before welding and the ends rounded with the mill/rotary table.
...............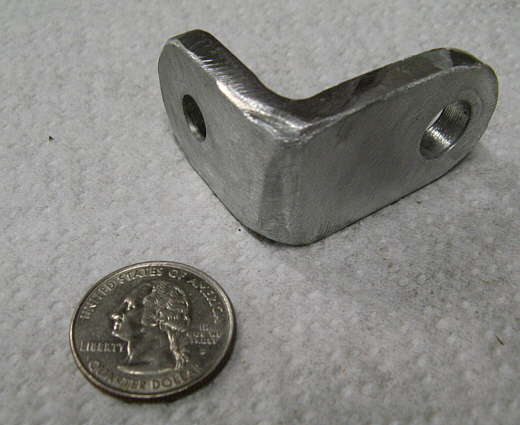
I left the weld bead on the inside, but ground it off on the outside of this piece.
...............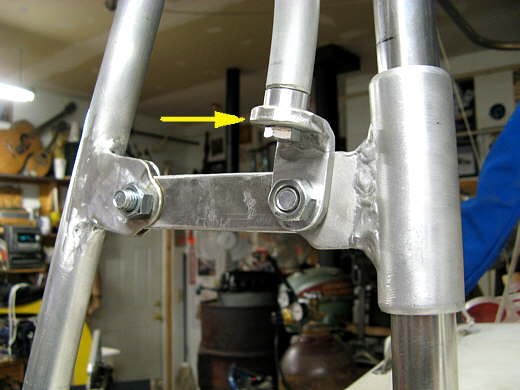
Here the bracket is in place and supporting the bottom end of the support leg with the threaded bushing in it.
...............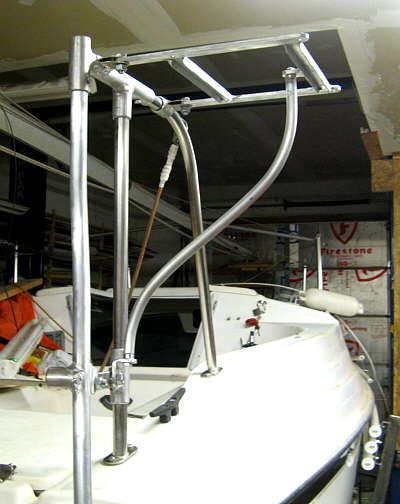
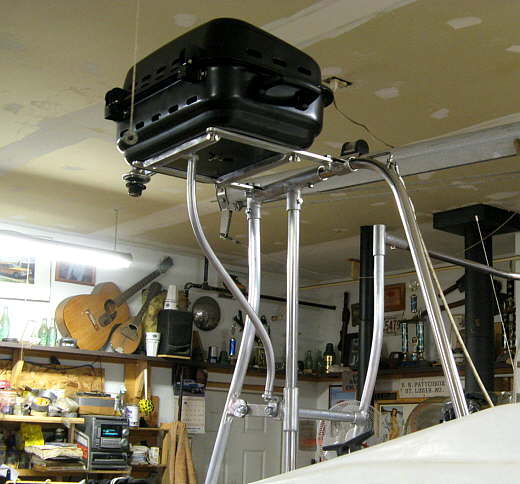
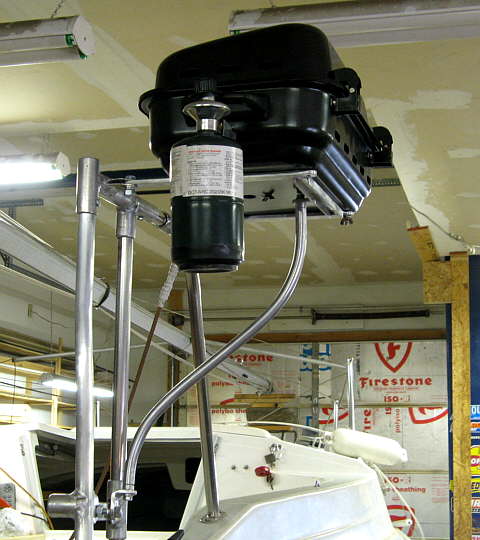
The finished BBQ support from the rear....
...............
......... a top view.
...............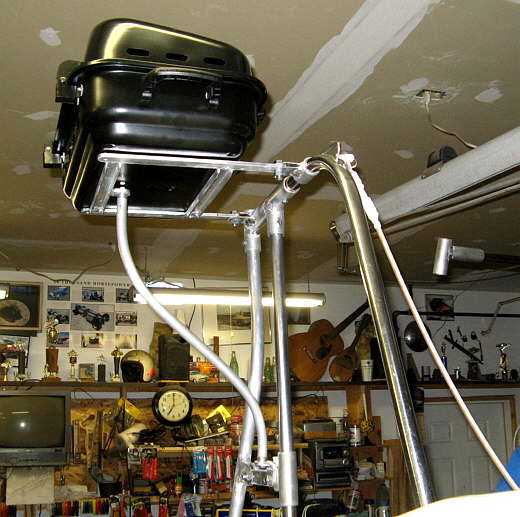
One with the poor man's BBQ on it. I still have to drill the holes in the bottom of the BBQ and it will be held on with 1/4 inch stainless bolts and wing nuts, so it will be easy to remove for cleaning.
...............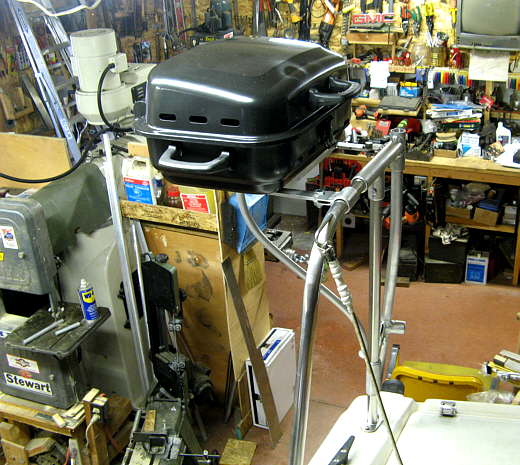
I spaced it out about 3 inches (looks like more) from the side rail as Ruth wants to be able to grab that rail coming on and off the boat. Also that should help with grease coming form under it, but I think I'll add a catch pan under it for that.
...............
This BBQ uses the small propane bottles and.............
...............
... they hang off the aft end of it. Now we just need some ground beef and we will be good to go.
...............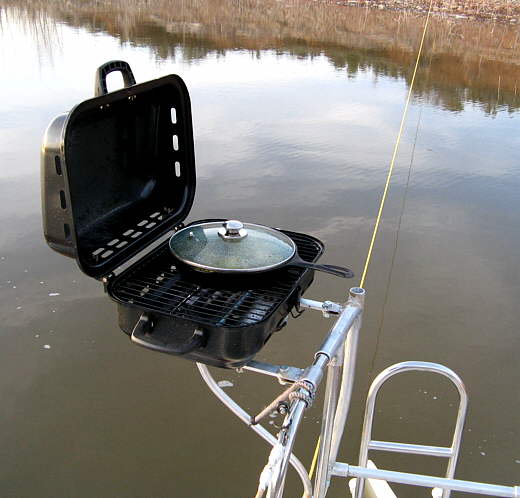
Here is the BBQ in use on our first trip. It saved us when after one use our camp stove decided to quit and we used the BBQ to heat/cook the rest of our meals for 5 days. We also did BBQ hamburgers on it during the trip and were very happy with it.