.................Previous Page........................................ Next Page If There Is One
..................................................................--- 12 Volt Computer Build ---
..........................................--- First Things First ---
Why did I want to build a computer when there are tons of laptops, notebooks, android tablets and of course the ever popular I-Pad? I feel each of the above are very viable options for some people and how some people use their boat. If they are for you then that will be easier than what follows.
We are on our boat for extended times and I needed access to all of the programs I have at home; a full size keyboard since, I touch type and tend to get wordy; a mouse; a large stand-up monitor; a DVD drive; lots of memory (using over 40 gigs now); a number of USB ports and at least one serial port. About the only thing that has all of that is going to be a real live computer.
Since we use the computer as a chartplotter with SeaClear for extended times during the day and I'm often on it a lot at night I wanted it to be as energy efficient. We have one other 'must have' on the boat and that is a 63 quart 'real compressor' type frig and it uses about 35 amp hours a day. We have a gen-set I made, but don't like to run it any more that necessary. We now have 200 watts of solar panels on the boat and had 180 watts on our last trip, spring of 2011 and will have 480 watts on the Endeavour, but don't want to run the diesel on it either if possible.
The computer below is based on the same Intel chip set found in thousands of notebooks that can run a long time on their batteries. The chip set is running on a different mother board though with lots more inputs/outputs than you will find on a notebook. The computer alone in idle mode with the monitor on has a combined draw of 1.8 amps and about 2.2 amps when the hard disk is being accessed. When the router and Bullet 2HP radio (for WiFi) are turned on the amps go to about 2.4 amps without the hard disk being accessed and about 2.8 with it, so max. wattage is about 33 1/2 watts. We are real happy with that. In over 7 weeks out during the last Florida trip the combination of the solar panels and the low computer draw allowed us to run the gen-set for less than 3-4 hours total on the trip. That was nice.
You can do a similar build with different processors, but remember that if you go to a dual core or very high speed processor your amp draw could double, so ask yourself if you really need all of that processor speed for what you are doing?
...............................................................--- Overview ---
I'd like to express a word of caution here. This page is not going to be a step-by-step build a computer page, but some info on the parts I used. Computers change quickly and some of these items might not be available at the time you read this, but I'm sure that if they aren't then there is probably something comparable out there.
If you have never assembled a computer or at least added components to one I'd shy away from attempting this build. If you are interested in having a low wattage computer like this or one that is similar have a friend help you or have a computer store build you one or order one from Island Time PC. They are sailboat people and will take care of you. The computer I built is very similar to their lower priced one.
We will start with a parts list and pricing in 2010 when I built the computer. I"ll give the part--the part number if possible--the supplier--the price and a link that was current when I wrote this (DEC 2011), but they will probably be out of date quickly. If you are interested in any of these parts I'd Google them and look for current prices and suppliers.
1--Mother Board--Jetway NF94-270-LF--(New Source for Board)--nowdirect.co-------- $118.281--Case--Blk Winsis Mini-ITX Case & 200 w Power Sup--Wi-01-BK--directron.com---- $34.99
1--Powersupply----------------------M3-ATX---------------------------------minibox.com------------ $69.95
1--320 GB Hard Drive----WD Scoripio WD3200BEVT---------------nowdirect.co------------ $51.19
1--2 GB RAM--Kingston 2GB DDR2 533 (PC2-4200) 200 pin Memory--directron.com-- $39.99
1--Logitech Wireless MK300 Keyboard & Mouse (920-000920)--directron.com----------- $33.99
1--Sony DVD Drive--Sony Optiarc AD-7700S---------------------------directron.com----------- $32.99
1--Windows 7 Home Premium 32-Bit (Old Version GFC-00564)--directron.com------------- 98.99
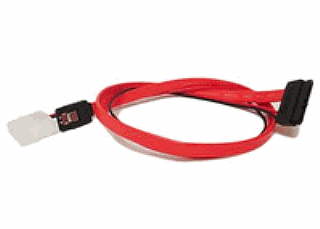
1--SATA Optical Drive Cable--Red Greatland 8" (GSA500-18)---directron.com------------- $4.99
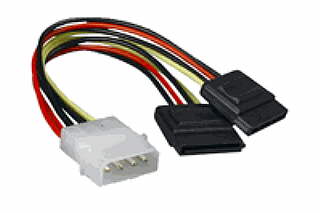
1--IDE to SATA Power Y-Cable (2XSATA)------------------------------directron.com------------ $2.99
2--USB Internal cable ----PWR-M3-ATX USB 5 pin to 5 pin---------minibox.com--------------$3.00
--------------------------------------------------------------------------------------------------------------------- ======
Total------(prices were at time of purchase in 2010)------------------------------------------------ $491.35
.........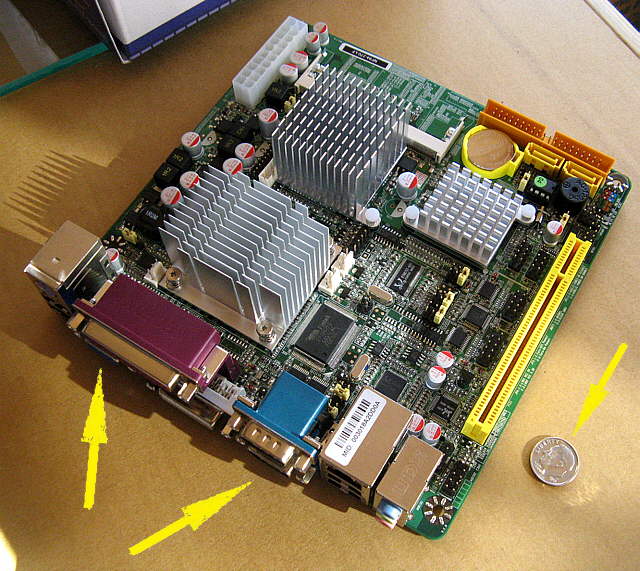
The heart and brains of any computer is the mother board and more specifically the processor on the mother board. The following is a description of the above board and compressor from Logic Supply:
"The Jetway NF94 is a fan-less Intel Atom-based solutions designed around the 1.6 GHz Intel Atom N270 and paired with the 945GSE embedded chipset. The NF94 is a versatile, Intel-based platform that features long-term support and a wide range of connectivity. It offers Gb LAN, VGA, DVI, LVDS, 2 SATA (3 Gb/sec.) connectors, 4 RS-232 COM ports/connectors, and support for 8 USB 2.0 ports."
The Intel Atom N270 has been the processor of choice in tons of notebooks for its small power consumption. I found it first in my search for a low wattage processor and then decided on this motherboard that utilizes it. You can also find other motherboards with it, but I didn't think they had as much going for them as this board does.
Notice the small size of this mother board (see quarter--bottom right) The bottom arrows point to some of the available ports.
.........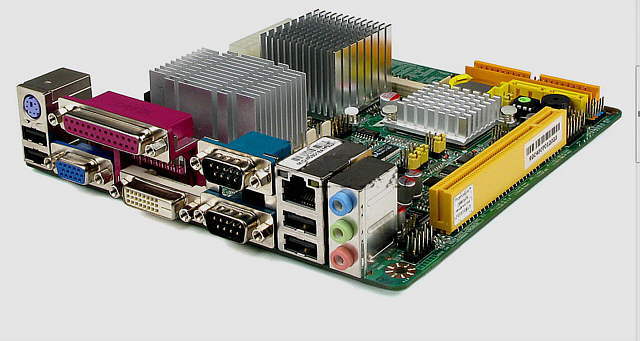
It has a number of USB and Serial RS-232 ports along with about any other port you could want. This board has a lot of versitility to it and I've been very happy with it. It isn't as fast as my desk-top at home, but I don't play games and for the work I do and the Internet it has been fine. In fact I'm typing all of this at home on it right now. I have it hooked to the 12 volt starter battery for the Endeavour which is on a charger. Using it at home and also on either boat we have means I don't have to keep track of files I add or edit and copy them back and forth between computers.
.........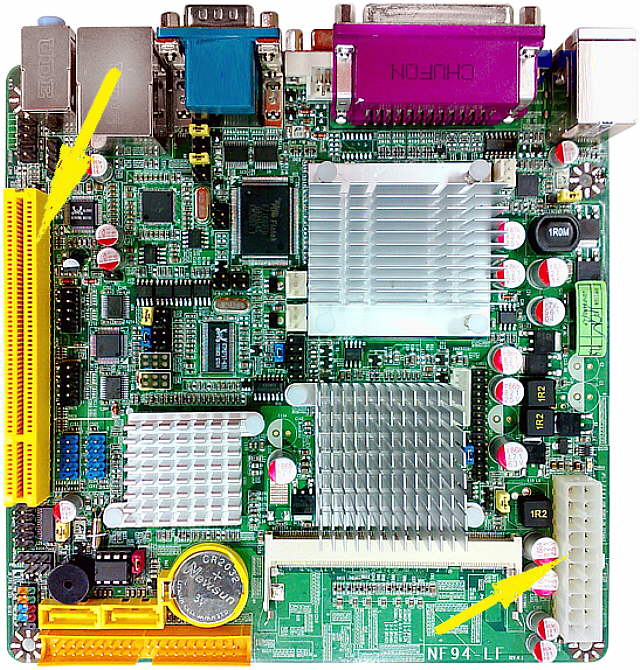
The top left arrow points to the one PCI expansion slot on the mother board, so I could if needed add a half-high board to the computer. The bottom right arrow points to where the power supply attaches. More on that below.
There is much more on the mother board ( HERE ). If you build a computer and don't what to use this board or it is no longer made keep looking for other options and pay attention to their draw.
.........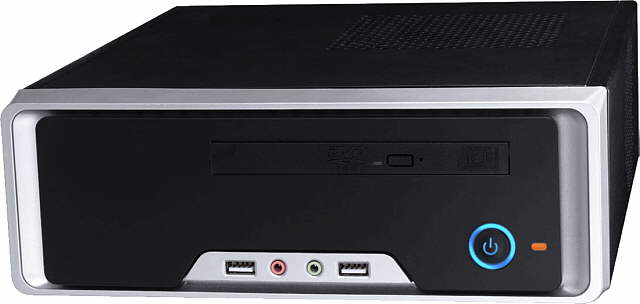
The second key ingredient was finding a case that was as small as possible since the MacGregor isn't that spacious below. I looked forever before finally settling on the case above. It is only 10.44" x 3.54" x 10.6" yet has an internal 110 volt (won't use it) power supply room for the optical DVD drive shown above along with room for a couple internal drives. Along with the rear ports there are front USB ports and headphone/speaker ports up front. It also has room to house a low profile (half-high) board using the PCI expansion slot on the motherboard.
.........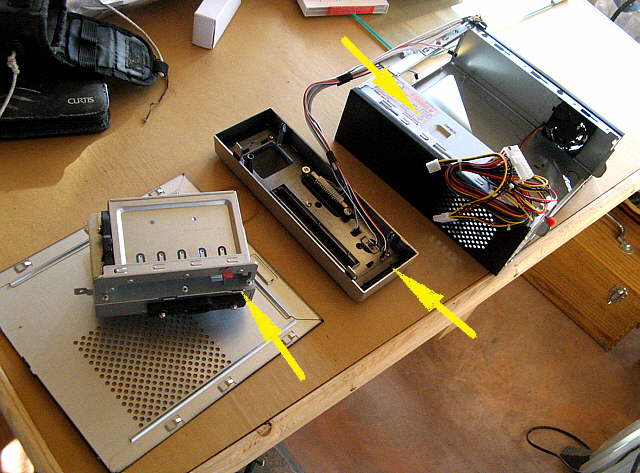
Above I have the case broke down. The left arrow points to the internal drive bay that will house up to one 3 1/2 and one 2 1/2 drive below the opening for the DVD drive. The middle arrow points to the case front the the top right arrow points to the 110 volt power supply. I left it in and ran the computer on first startup using that power supply. Once I was sure things were working and I had Windows 7 installed I unplugged the 110 volt power supply and put in the 12 volt power supply. I had the room so just left the 110 power supply in the case.
.........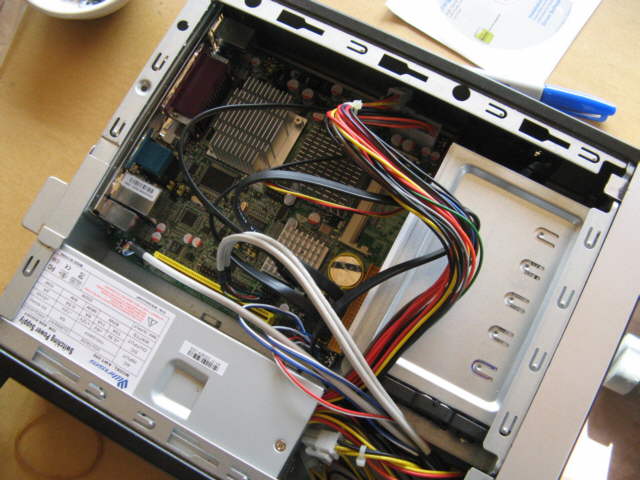
At this point the mother board has been installed along with the drive bay and you can see that the ......
.........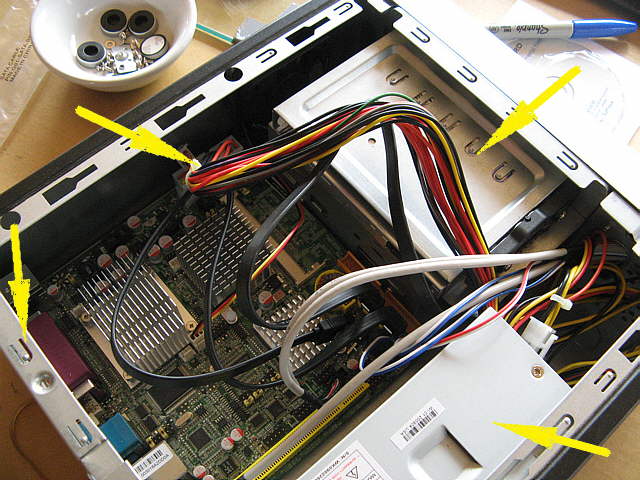
... power supply, bottom right arrow, has been connected to the mother board, top middle arrow. The top right arrow points to the drive bays and the far left arrow points at the back of the case. Things were tight, but there was no major problems. You do have to be careful that you don't generate static electricity and such while handling components.
If you want to tackle this for the first time take your time look at youtube. videos and some of the instructions for jumpers on the mother board can be confusing if you have never done this before. I had a computer business in the late 80's and built and sold hundreds of IBM clones before selling the business. Although a lot has changed since then a lot is still basically the same. I had background, but still was confused a few times on this build, so if you haven't done something like this consider getting a friend who has or a computer shop to help you. Someone like that could throw this together in an hour or two, so might not cost you that much if all they did was the assembly.
The next key ingredient is the power supply. All computers that I know of run on 12 volts and 5 volts (neg and positive voltages on both). The 110 power supply in your home computer just drops the voltage to these voltages. You think you might have 12 volts on the boat, but you rarely do.
If the engine is cranking and trying to start the voltage might drop under 11 or maybe even 10 volts. If the engine is running and you have an alternator on it charging batteries the voltage will usually go into the low 14 volt range. So even though you think you are hooked to a 12 volt battery in the boat the voltages can vary from maybe a low of 10 volts to a high of close to 15 volts. The computer has to not only run on this range of voltage, but not be hurt from either the highs or lows.
To do that I used a power supply that will operate on 6 volts to 24.....
.........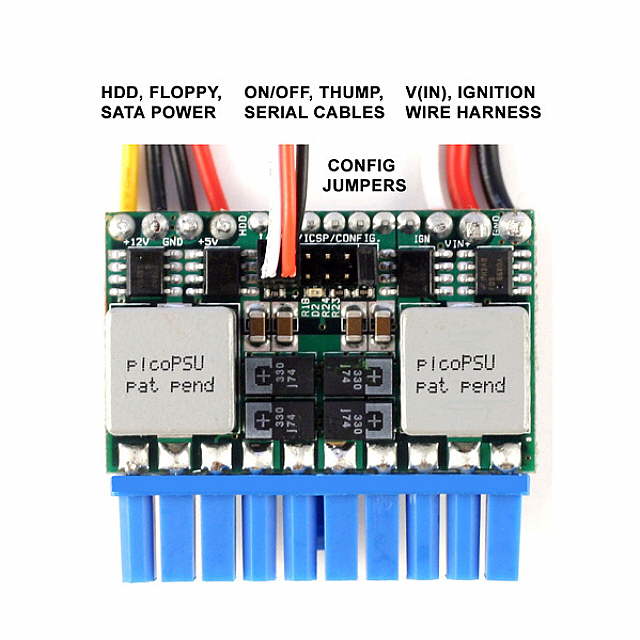
The power supply will work on 6 volts to 24 volts and is very small. It plugs into the motherboard where the 110v power supply plugs in. The difference is that the whole power supply is right above the plug not a separate box. There are also a number of other options with the power supply on how it boots up and down.
.........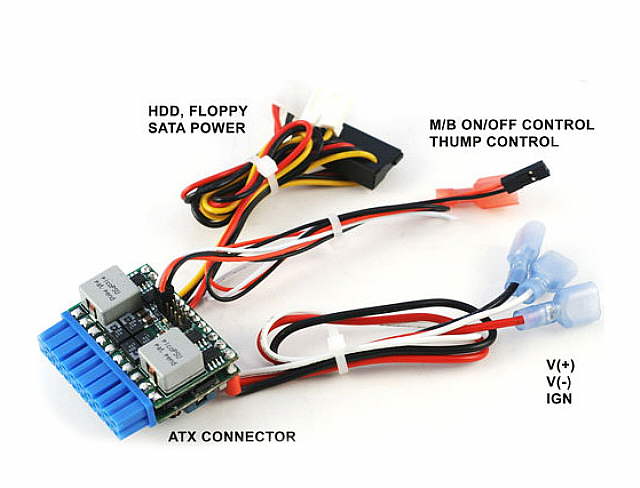
The power supply along with the supplied cords that go to the drives and also the input pos./neg. lines and optional ignition input.
.........
The power supply mounted on the mother board.
.........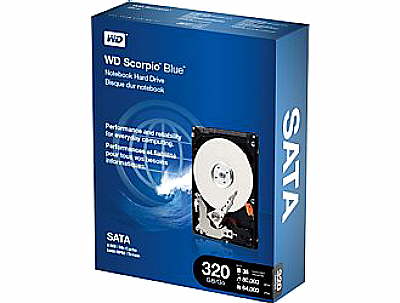
The 2 1/2 inch 320 gig drive.
.........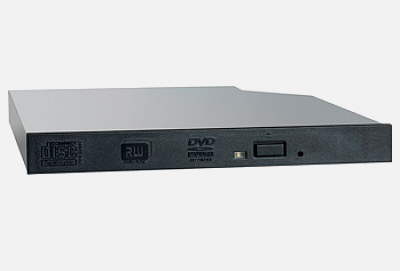
The internal DVD drive.
.........
Some of the
.........
....cables and ....
.........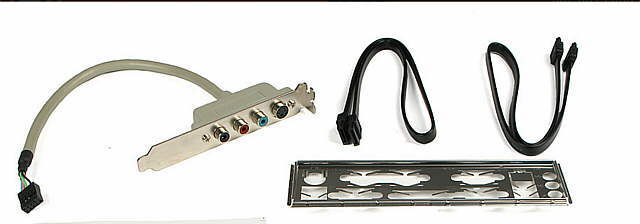
....cables and plate that came with the case.
.........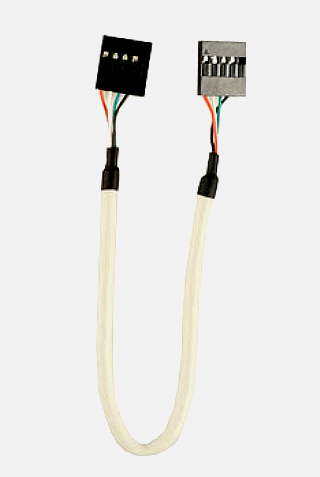
Another cable that I can't remember if I needed or not.
.........
Windows 7.
.........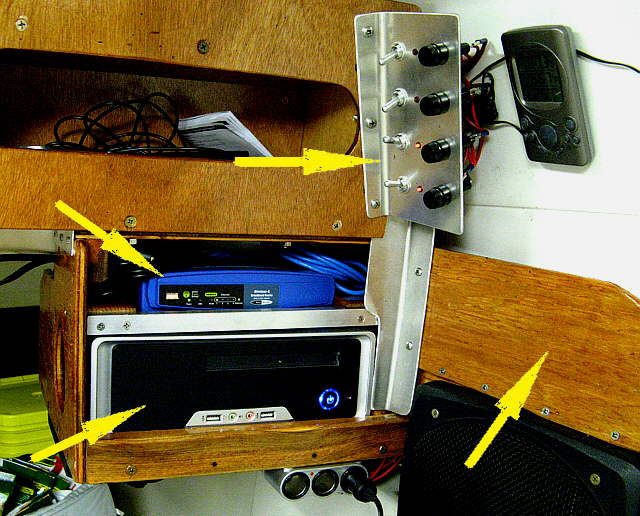
Here the computer is installed in the MacGregor. The computer, bottom left arrow, router above. The switch center, top right arrow. The bottom switch turns the computer on and the switch above it turns on the router and long distance WiFi radio. The bottom right arrow points to where the keyboard is stored.
The computer unplugs along with the router and is also used in the Endeavour and at home. That way I don't have to transfer files around. We have a USB harddrive for backup.
.........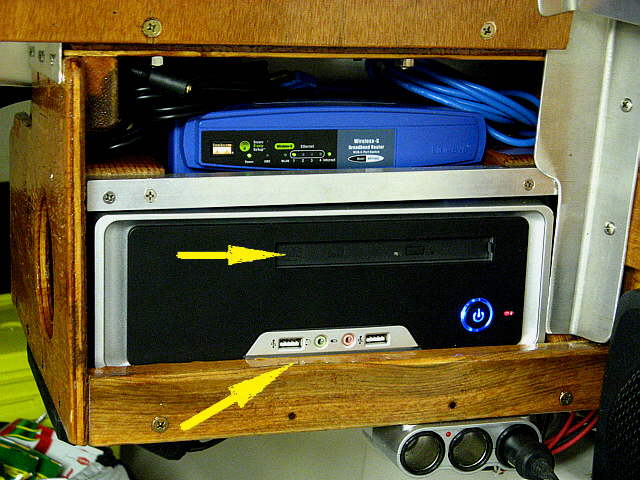
Top arrow points to the DVD drive and the bottom to USB and audio in and out on the front panel. Most of the ports are on the back.
.........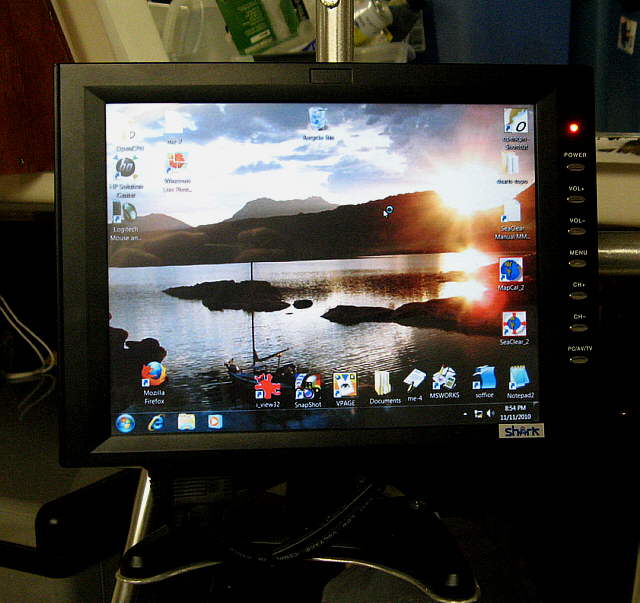
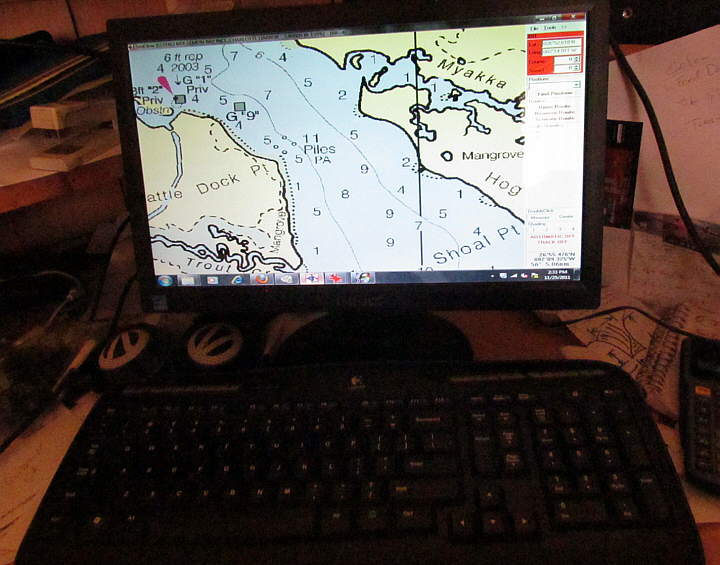
Above is the smaller 10 watt monitor that is used in the Mac for space reasons. We have a larger 16 inch screen...
....that is used in the Endeavour and it also draws 10 watts.