..................
..........................................................--- Ruth's Work Area ---
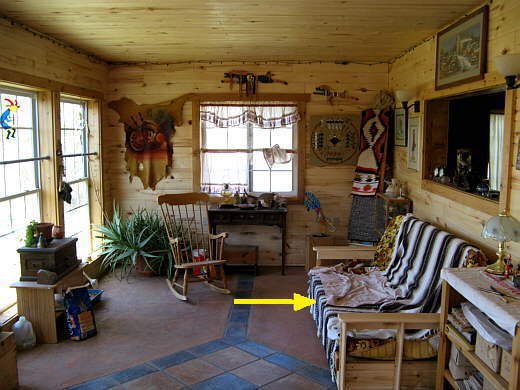
This page kind of documents Ruth's work area. When I built the house the purpose of....
.......
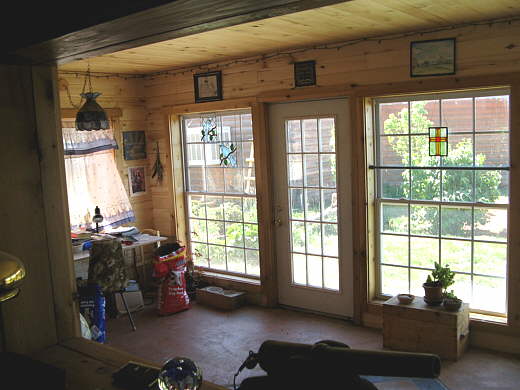
... the sun-room was to one heat the house during the winter and two provide a nice place to be. It has been great for both of those by providing our day time heat during the winter with the.....
.......
...... window wall facing south and it is also Ruth's favorite room in the house .....
.......
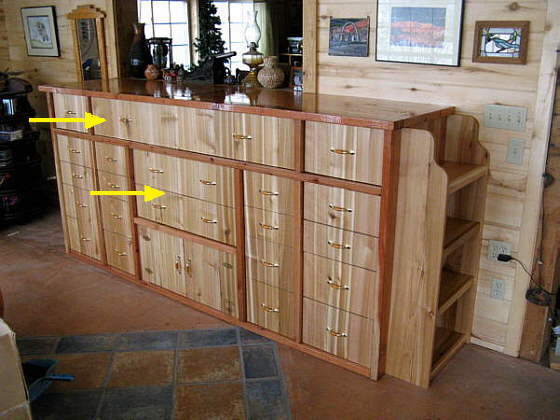
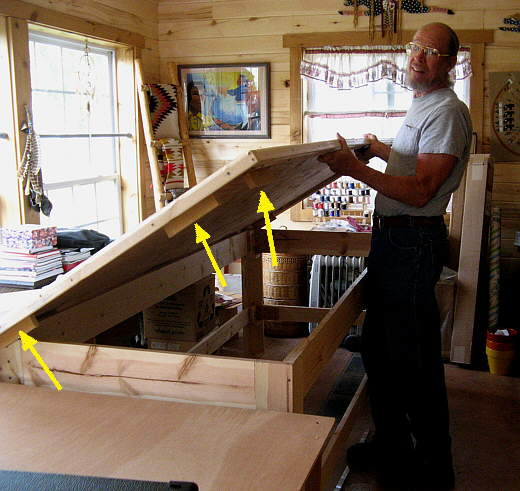
Ruth needed more storage for her projects (she has more than just the sailboat), so we took out the couch (arrow first picture) and I built the storage unit above for her ( More pictures -- HERE ). I incorporated one long drawer on the top (top arrow) for bolts of fabric up to 60 inches wide and two other wider drawers below that one for fabric. All manners of sewing, crocheting and other items that I have no idea of how they are used or their purpose are stored in the other drawers.
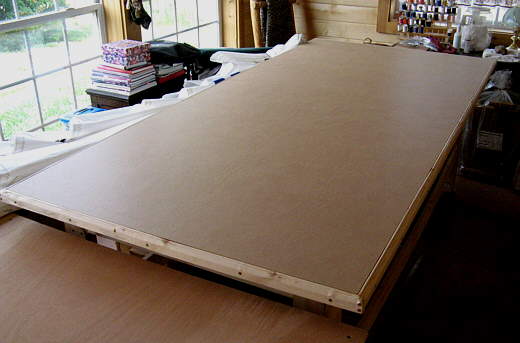
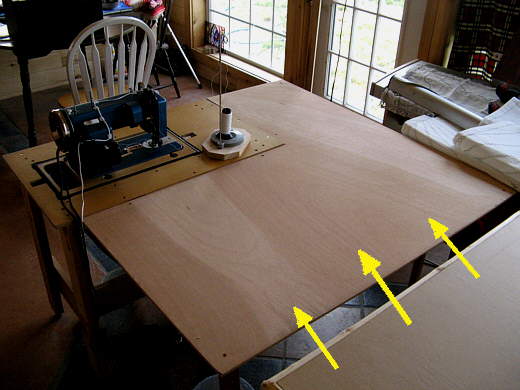
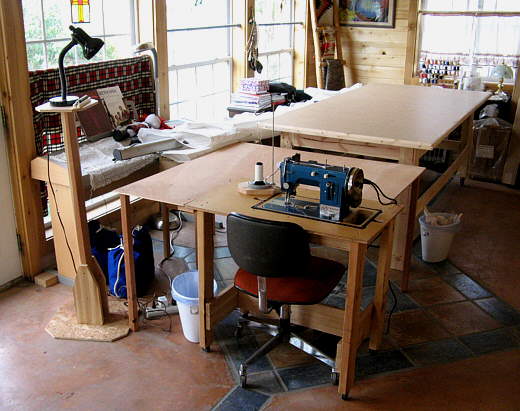
One thing that was lacking was having a large smooth work service. To take care of that I made....
.......
.. the table above. It is 44 X 96 inches. Now the sun-room is pretty large at 12 feet by 24 feet, but this table uses up a large amount of space, so I made it so that it could collapse into a relative small area when not in use.
.......
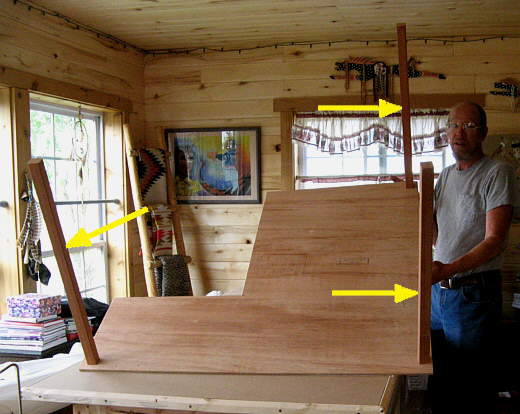
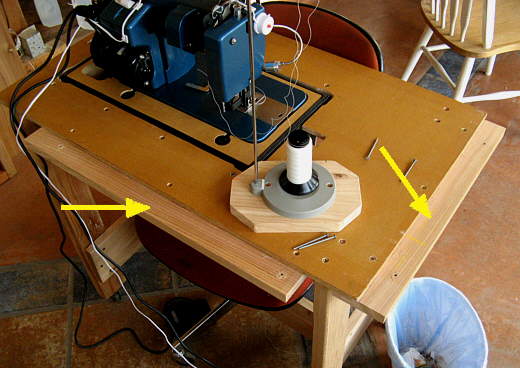
The top sits on the frame work and is located by pieces of wood (arrows). When not in use we lift it off and store it up against a wall in another room.
.......
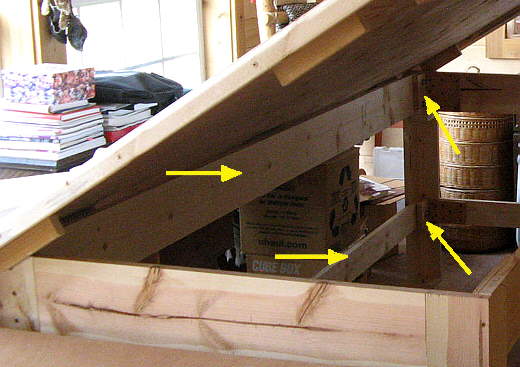
The two horizontal side rails of the frame in the picture on the left side (two left arrows) are removable. They slide into pockets at their ends (two right arrows) and a couple bolts go though the pockets and hold them in place.
.......
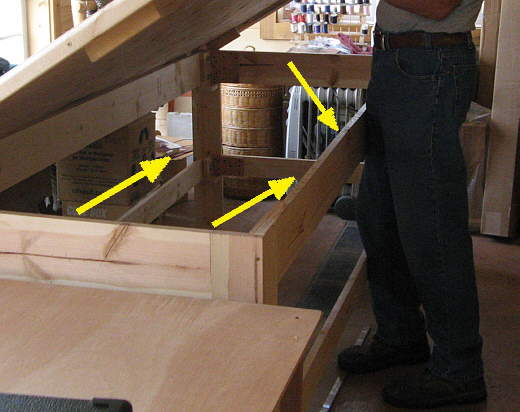
The ends are hinged on the opposite side from the removable frame members and fold in against the right side (arrows). With those folded in the table takes up less than a foot thickness of room space against a wall in the other room. I'll add pictures of that later. The legs on one end of the table have casters on them and to move the table while it is assembled you pick up the end without the wheels and wheel it where you want it. The top is 'signboard', plywood that has a paper covering and is what is used to create signs on the side of buildings and is what I used on.....
.......
.... my store when I built it. We will probably paint it later. You should be able to find 'signboard' at your lumber yard.
.......
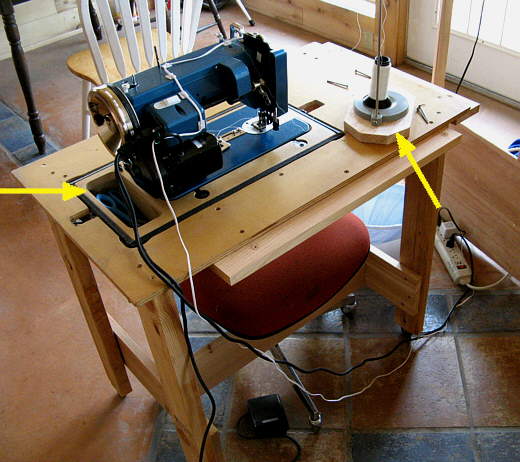
I also used a piece of signboard I had to make the top for Ruth's Sailrite portable sewing machine. I cut the top out so that we could leave the sewing machine in the portable case's bottom. When she isn't using the sewing machine the portable case's top covers the machine. The table is on casters, so she can roll it around. Later I'll mount the power strip on the side of the table so only one cord is on the floor and I'd also like to add a couple drawers for her.
.......
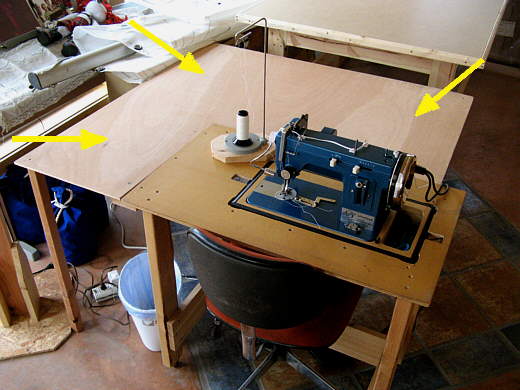
I also made a table that wraps around the sewing table to increase the work area if she is working on something larger.
.......
The large table can be placed near the sewing machine for really large work and it will slide off the large table onto the smaller/lower one.
.......
The extension cable is pretty simple with 3 legs (arrows). Later I'll make these legs fold up so that the table can also be stored flat against the wall.
.......
Besides the 3 legs I put support pieces on the back and one side of the sewing machine table.
.......
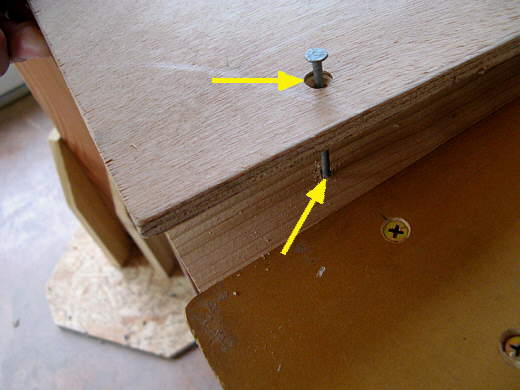
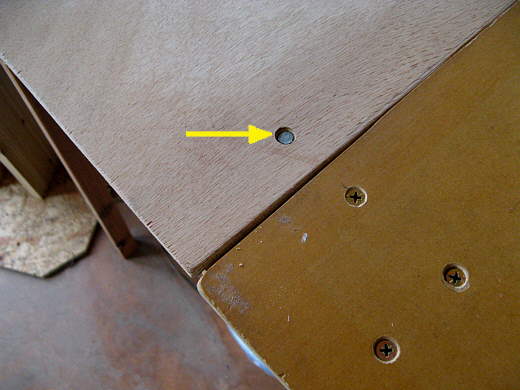
With the table resting on the supports I drilled a few holes with a diameter just a little larger than a nail. Then I counter sunk the hole at the top so that ....
.......
.... with the table flat on the support and pinned with the nail the nail's head was below the surface of the table. Simple and effective. I also use the same principal for extensions for my radial arm saw's table in the shop that I use when sawing long boards.
.......
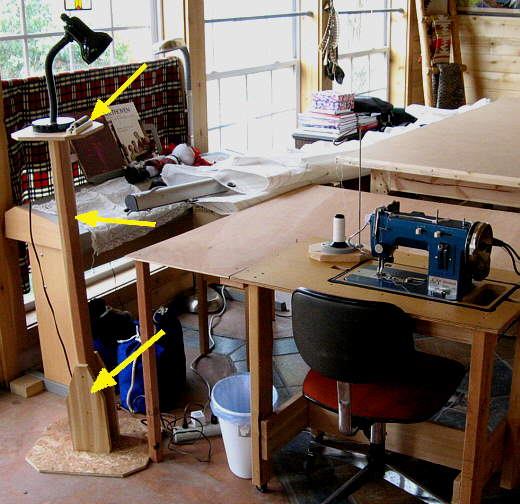
I also threw together a light stand for her (arrows) to help with the lighting situation. The light is screwed onto the top. I'm going to add some storage to the sides of the stand also.
.......
So there is Ruth's work area. We have our dinning table over.......
.......
..... on the wall at the east end of the room (to the left in the picture above) where I took the previous picture from.