..................
..............--- Sail-Pack/Sail Cover/Lazy-Jacks Part V ---
This page will mostly just be pictures so you can see the whole system in place.
.......
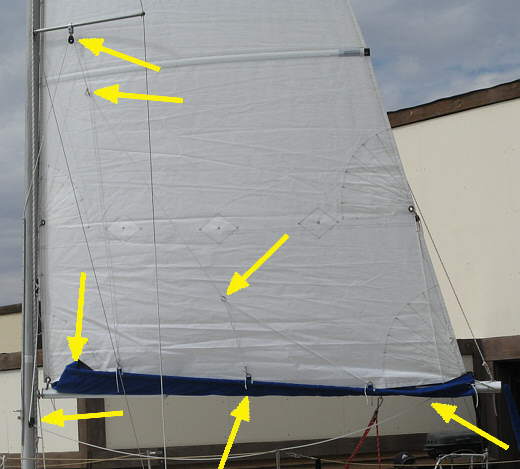
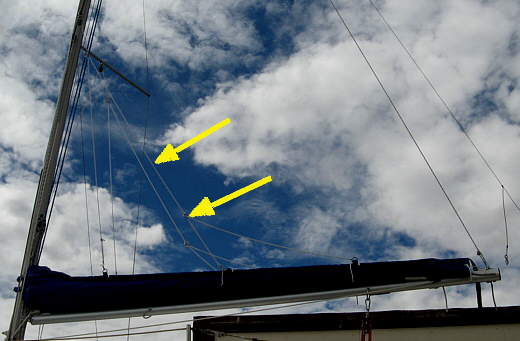
A lot going on here. The bottom right and bottom left arrows point to cheek blocks for the single line reefing that so far I like, but have just used it on the trailer. The bottom middle arrow points to where a bullseye fairlead will go. The second arrow up from the bottom on the left shows how the front of the pack is folded in while the sail is up and is what I was talking about on the last page in regards to an inside female buckle half.
The rest of the lines are the lazy-jack lines. Just cloths line at this stage. I'm going to move the lower right loop up just a little higher on the finished 1/4 inch braided line and try it there. If I did this over I might be tempted to try one more lazy-jack line at the very back, but the sail does flake down very nicely and the reefing pulls the back down and into the pack just fine as is.
The top arrow points to blocks that are spaced 12 inches out on the spreaders and can be moved in or out if needed. They seem to work fine there and I didn't have issues raising the sail on the trailer, the battens didn't snag the spreaders. I'll have another more detailed page on the lazy jack system and the single line reefing when I get time to put it up.
.......
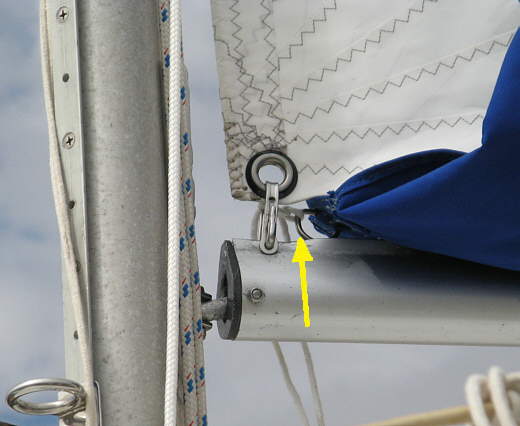
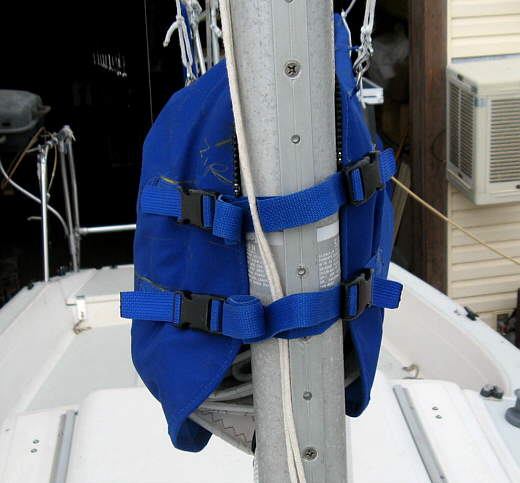
Above you can see how the front of the pack is secured to the front of the boom with a line around the D-ring and shackle.
.......
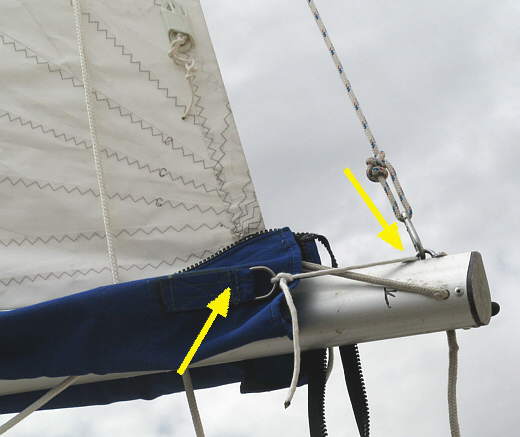
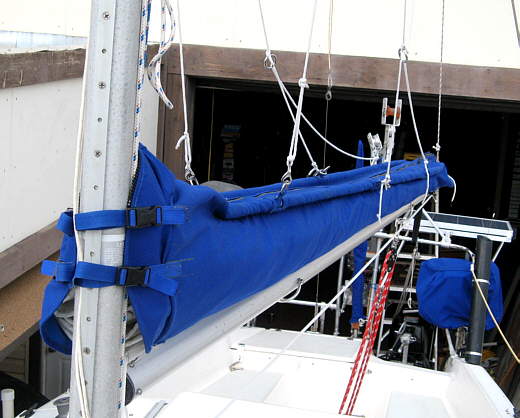
The pack's back attach points.
.......
Notice that even thought the back lazy-jack line is at a sever angle the D-ring, tab and tubing distribute the load over the pack nicely.
.......
I really like the way the front attaches. I didn't want to deal with a separate cover up here that had to be zipped or Velcro to the rest of the pack. This is nice and neat and tight and the sail is covered from the sun and elements. I have to give MadGuy credit for this!!
.......
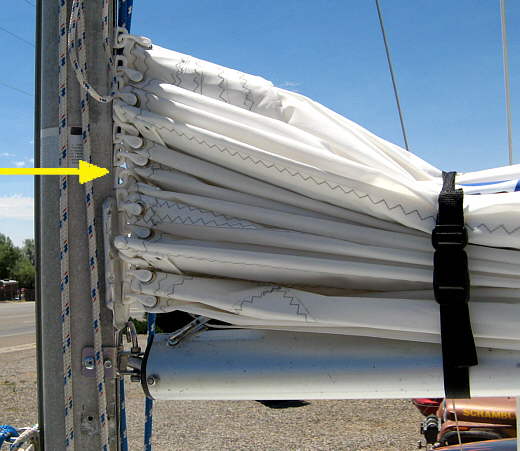
Again the secret to keeping the height down in the front is the....
.......
...... simple slug gate I made, since it gets the slugs ...........
....and sail right down on the top of the boom. It also helps get it down there when reefing.
.......
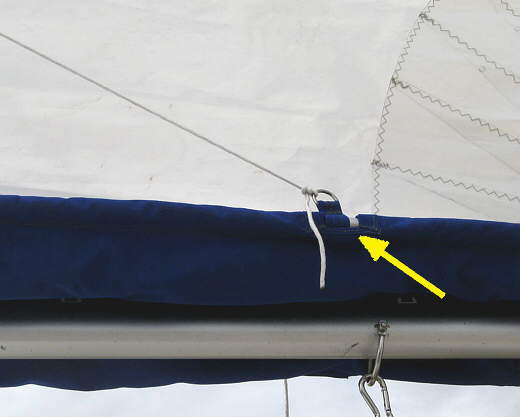
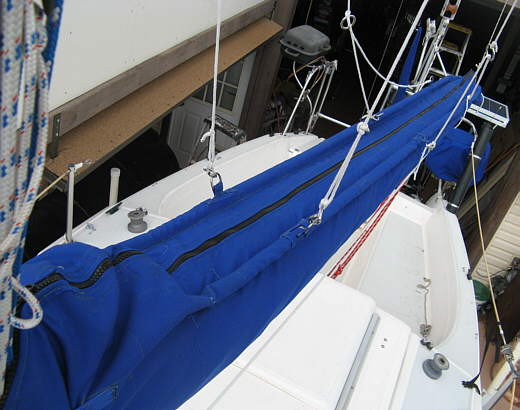
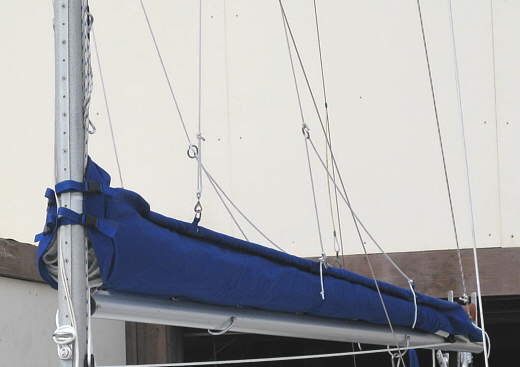
A top view showing the cloths line used to mock up the lazy-jack lines. It will be replaced with 1/4 inch braided line. Notice also....
.......
... that we have a topping lift. This is key and keeps the load off of the lazy-jack lines.
.......
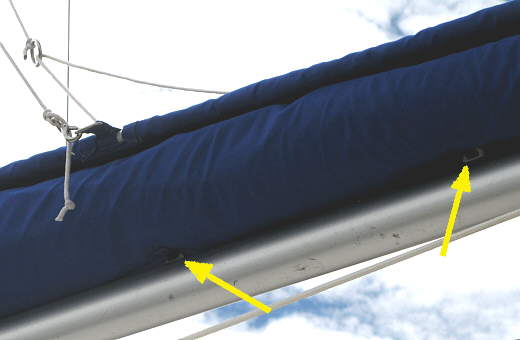
Above you can see two of the bottom slugs.
.......
Ruth did a great job on this and we really like the fit and looks and it seems to work as well or better than what we envisioned.
.......
Putting the sail away at night will be really easy and fast now and if we sit in one place for a few days it will be protected also.
.......
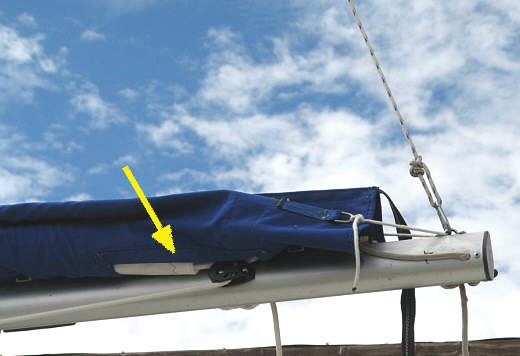
One final shot showing the reefing cheek block and the slot in the pack for the reef line. Our new sail only has one higher reef point, about where the second reef was on the stock sail. Martin recommended that and we went along as usually if we reefed we went straight to the second one right away. He said that if we weren't happy he would add a lower one. You can see the height of it in the first picture on this page.
Well hope this helps someone else make a sailpack and remember the Singer is for sale if you need a machine that will do it,
Sum and Ruth