.......Previous Page........................ Next Page If There Is One
..................
................................--- Final Pictures Before Leaving ---
..........................--- The Boat In Florida for the Summer ---
......................................................................--- May 2011 ---
The following pictures were taken right before we left the boat at Charlotte Harbor Boat Storage to head home to Utah with the MacGregor in tow.
..............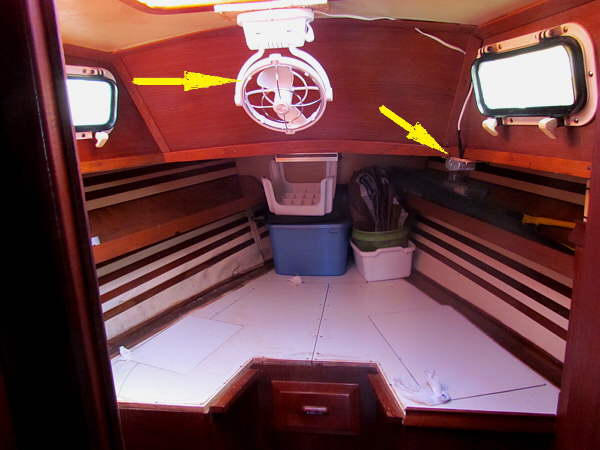
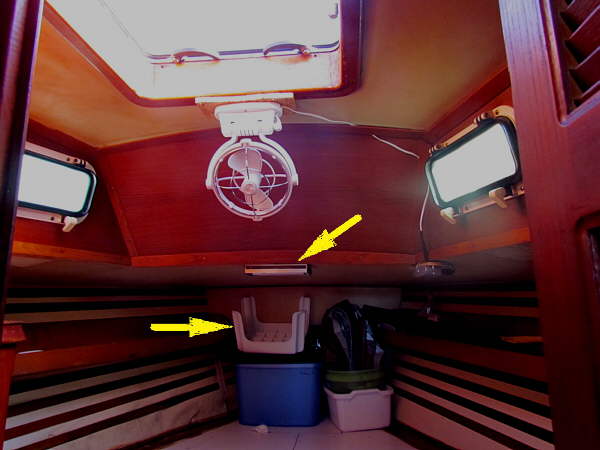
We had pulled the mattress in the V-berth so that we could take it home and replace it with one like we have in the Mac from the Foam Factory. The new one will be in 2 pieces with the seam between them going from side to side. That will allow us to just lift up one to gain access to the storage area under the v-berth.
There is a separate cushion for the area in the center above that drawer. We didn't like that when using the boat, so I'll fill across that area with a piece that hinges up and the main cushion will span that area.
I put 3 12 volt outlets in the forward cabin with one shown, right arrow. Also we had removed the fan from the Mac and put it into the Endeavour. We love these fans as they rotate to any position and have an auto timer that will shut it off after 2-4-6 or 8 hours and they use very little electricity and move a lot of air. West Marine and others have them. We have a second one that we can move to any place in the boat and it has a male cigarette lighter plug so it can be plugged in almost anywhere on the boat.
..............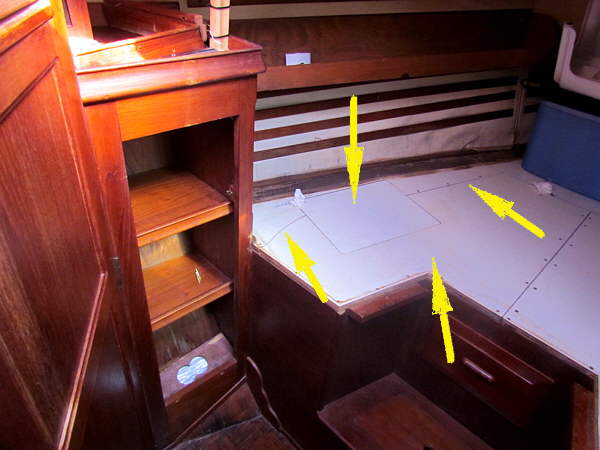
The head holding tank is under the port side of the bed, top arrow. I made addition cuts, right and left arrow with a cordless jig saw so now the whole panel, bottom arrow lifts out for access to the complete holding tank. The current one is about 14 gallons and I'm going to replace it with a 20 gallon one most likely. We are having the tank and discharge lines removed from the boat over the summer to get rid of some of the smell from the old lines/tank. I'll put new ones in when we go back and change the configuration to hopefully make for a better one that what was stock.
..............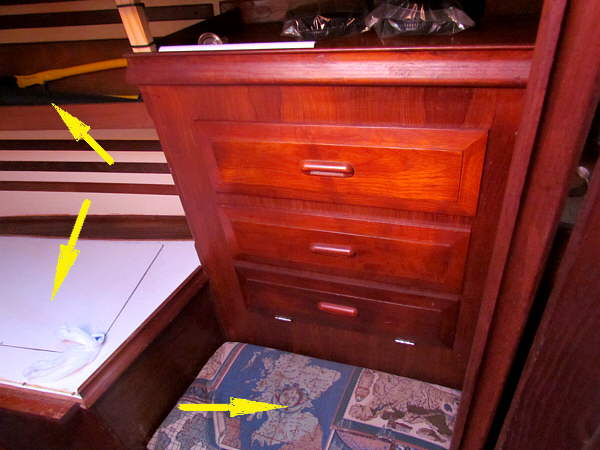
The top arrow points to a narrow shelf that runs down both sides of the V-berth and will be a good storage area for books and other small items. It is similar to ones I made for the Mac.
The bottom right arrow points to a cushion that you can sit on and if you lift it up there is storage beneath it. Above it are 3 storage areas.
..............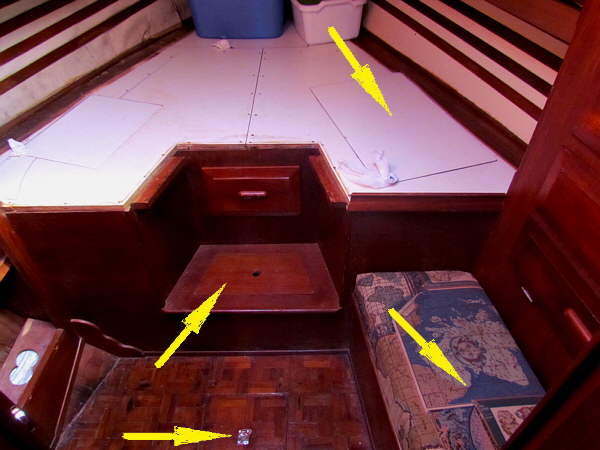
The top right arrow points to the access to the area under the berth and it is quite large under it going forward all the way to the bow and is also quite deep. As of now we have items stored there in large tubs.
The center arrow points to a lift out panel with storage below it that is closed off from the rest of the area under the berth and above it is another drawer storage.
The bottom arrow points to a lift-out panel and right below it is the valve that opens or closes the over-board discharge from the head, but not the holding tank. The way the boat is plumbed now the holding tank can only be pumped out. I'll change the head discharge lines so that they can either fill the tank or go overboard. There will be a second macerator pump that will be able to pump the tank out over an anti-siphon fitting and thru the valve and thru-hull below the panel. There will also be a deck pump-out for the holding tank.
..............
The items at the head of the berth were left on the boat. The step stool, left arrow, is needed by Ruth to get up into the berth as it is pretty high, even for me.
The top arrow points at existing lighting. There was also the same on both sides above the bed, but I took those out and used the wiring for 3 12 volt female cigarette type multi-outlets.
..............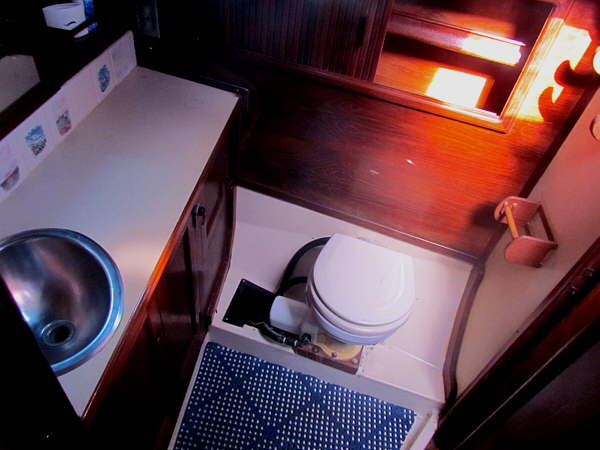
The head is actually pretty spacious. The toilet has a macerator pump on the bottom left side. It both brings in water from a thru-hull and pumps the waste to the holding tank or over-board. The button for the macerator is black and just visible on the front of the cabinet to the right of the sink. There is....
..............
...quite a bit of storage space in the head under the sink and along the ship's side. The bottom arrow points to a drain for the shower which I doubt we will use. There is a pump, don't think it is working, in the area aft of the kitchen that pumps the water from the shower and from the original 'ice box' in the kitchen. When I tried it the circuit breaker tripped.
Above we are looking into the head through a door connecting the head to the forward cabin, V-berth, but the left arrow points to another door that connects the head to the main cabin area.
..............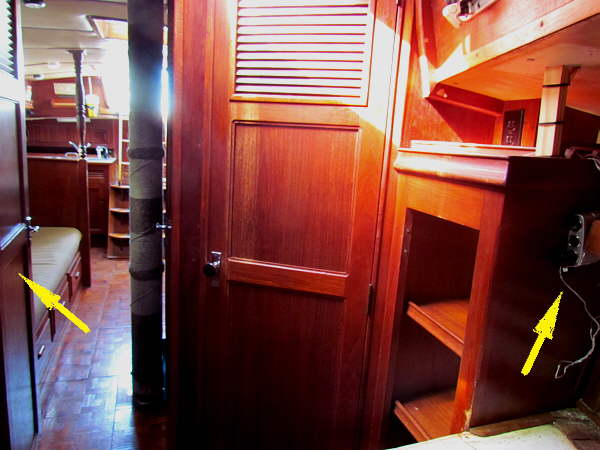
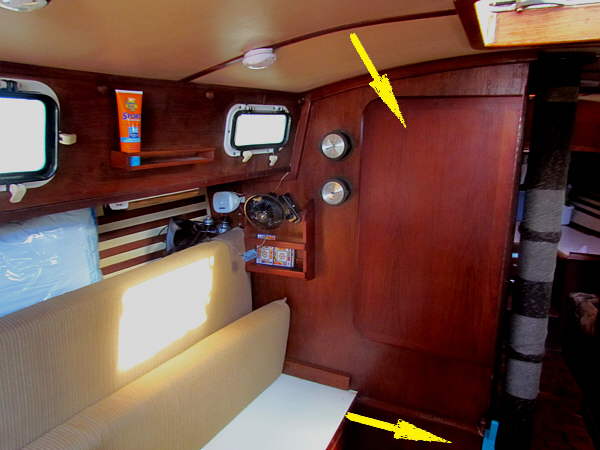
Here the door to the head from the forward cabin is closed. To the right of it are storage shelves and you can also see another of the 12 volt outlets I installed. Up higher you can see one of the many 110 volt outlets that are throughout the boat.
The left arrow points to the door that closes the forward cabin from the main cabin.
..............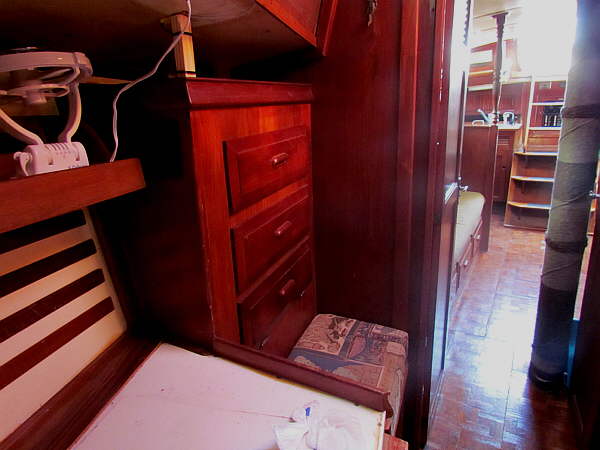
A view from the V-berth looking aft at the starboard side of the forward cabin and aft into the main cabin past the mast.
..............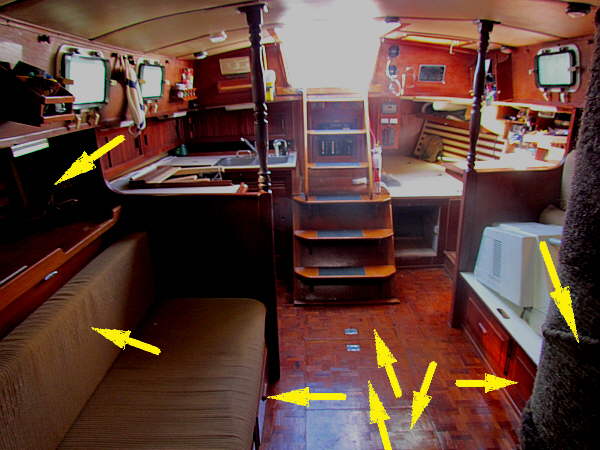
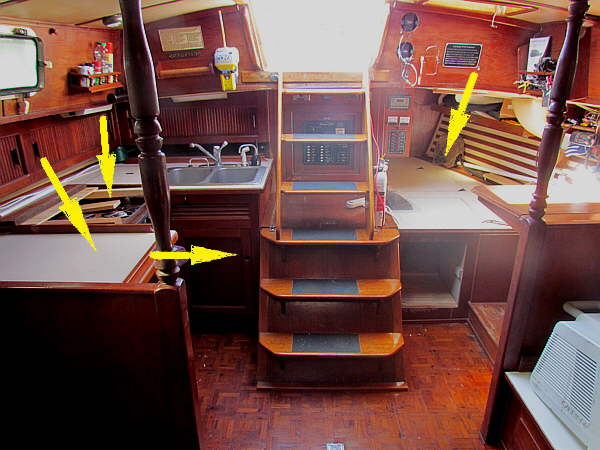
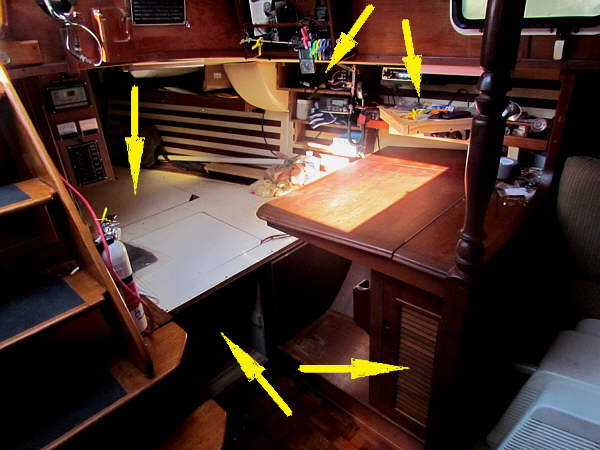
Here we have exited the forward cabin/head area and are looking at the main cabin. The cluster of arrows at the bottom center point to removable sections of the sole that give access to the bilge beneath, the water tank and the fuel tank. All very accessible by just lifting the panels out.
The bottom arrows point to the sides point to 3 drawers beneath the port and starboard settees and they are large and there is even storage under them and behind them if you need it. Cans store nicely under the drawers.
The right arrow points to the keel stepped mast that a former owner wrapped with yarn in a design. Must of taken a long time.
The bottom left arrow points to large storage areas, port and starboard behind the settee back cushions and the top left arrow points to large shelves above and behind the settee back cushions.
..............
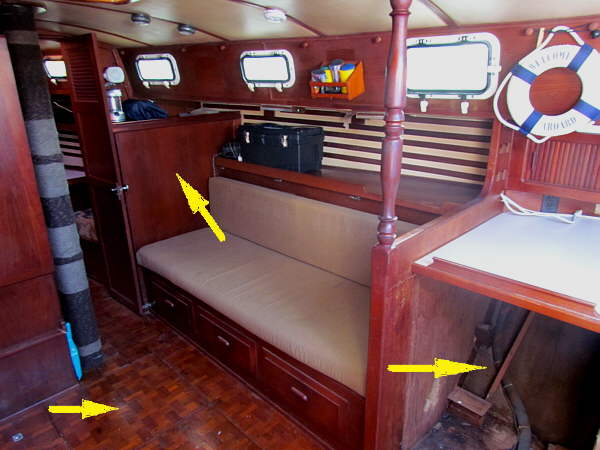
The port settee. The bottom slides out on the track, bottom arrow, and makes into a double bed. The bottom and back cushion make up the mattress. We slept on both the V-berth and this bed while the boat was in the water on the way to and on stands at Charlotte Boat Storage. We like them both. The bed makes up in just a minute.
The other arrow points to the very large table that folds up and has storage shelves behind it.
..............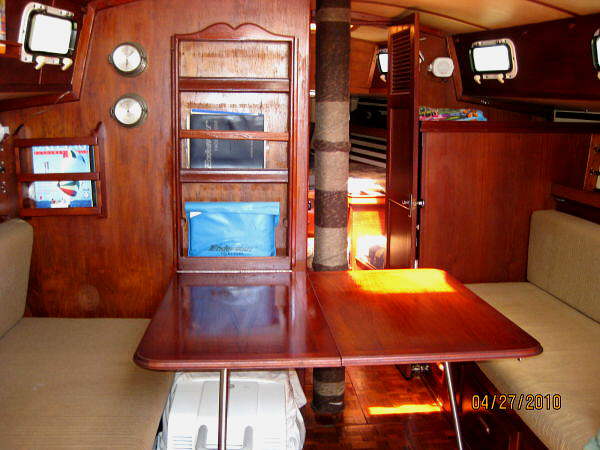
Here the table is down and you can see how wide it is. You can sit at it from either settee and if you pull the leg out on the right side that side will fold down if you only need to use it from the port settee.
To store it just lift up the left side and the right will fold down. Then fold the right under the left and fold it up to the wall where it is attached with a simple hook latch up on the port side.
To lower it just release the latch and lower it down on the port leg that goes into a simple socket and pick up the right side of the table if you need to and insert a similar leg there into a socket. Pretty simple and efficient.
..............
The bottom left arrow points to the last removable section of the sole for access to the bilge above the keel. The top arrow points to a large hanging locker. Since we don't have any gear that needs to hang normally I put shelves in that area and we stored 2 1/2 gallon drinking water containers and our two tubs with first aid supplies.
The right arrow points to where the 12/110 volt frig was before I pulled it out. It works and is for sale 'cheap'. It isn't too efficient since the cold air spills out when you open the door. Over the summer I'm making hopefully a 3 cu ft frig/1 cu ft freezer combo that will be a chest type to fit in about the same area that will be much more efficient. More on it in a minute.
..............
The top arrow points to the large cabin hatch. The boat also has 5 portals down both sides with screens and are fairly new. There is a lot of light that comes into the boat.
The top left arrow points to the portable hatch air conditioner. The other two arrows below it show how the bed platform pulls out. The air conditioner was a godsend in the muggy, bug infested boat yard. We won't take it on the water with us though.
..............
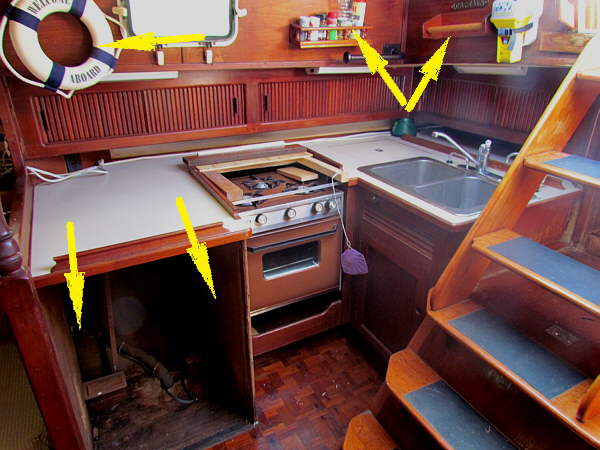
The top left arrow points to the 3 burner propane stove that works, but the bottle was almost empty so we used our stove from the Mac on top of it and will probably take it with us on trips just in case we have a problem with this stove or run out of gas. The line to the stove has an electric shutoff solenoid in it. When I put in a larger propane bottle back in the cockpit icebox area I'll probably run all new lines and a new shutoff for safety reasons.
The other two arrows on the left point to where the new chest type frig/freezer will go and it will extend out some ending up being even with the side of the steps in the companionway.
The right arrow points to the quarter berth/chart table area.
..............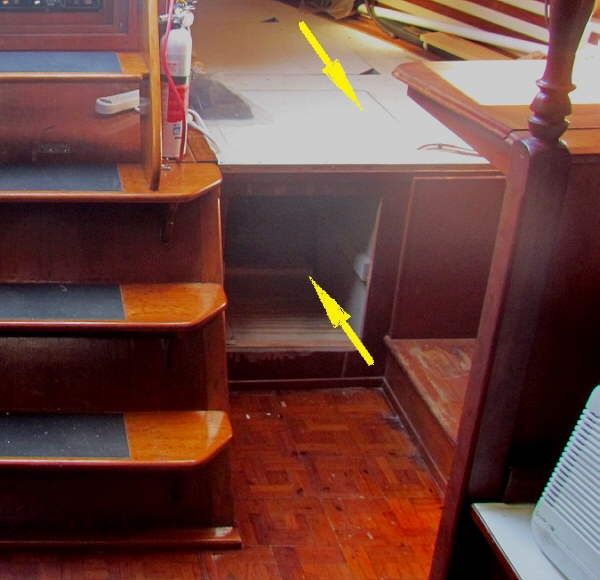
There were two drawers where the bottom arrow is and Ruth had a great idea that I followed up on. I pulled the two drawers and cut out the divider piece between them and now the Honda 2000 generator slides right into that area and is stored there. We saved the divider and drawers just in case we ever wanted to return the boat to stock.
The top arrow points to a hatch that allows access to that area and also the area to the right of that area beneath the quarter berth.
..............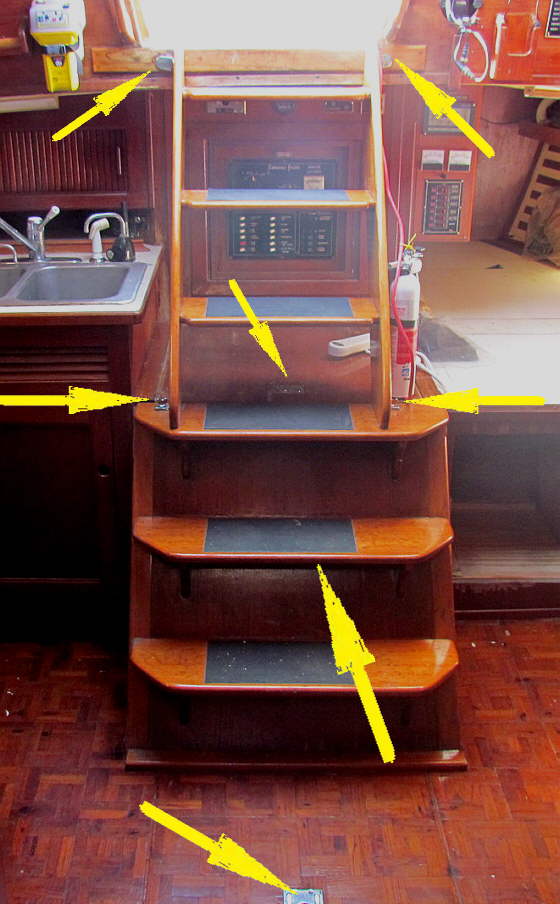
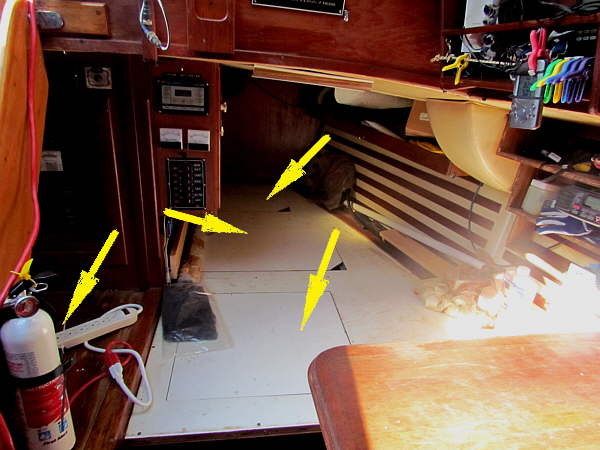
The 50 HP Perkins 4-108 diesel sits under the companionway steps and is really easy to get to for service. The top part of the steps is held in place by two top brackets, top arrows and two thumb screws, middle arrows. Just remove the thumb screws and lift up and out and the top steps come out and can be set down in the cabin. Then the bottom steps just lift up. Next lift the cover off that covers the top of the diesel, middle arrow and you have access to the diesel.
Also with the steps up you can lift up the sole hatch, bottom arrow, for acess to the fuel tank and bottom front of the diesel. This all takes less than 1/2 of a minute.
If you need to get to the back bottom of the engine it is accessible by going down into the engine/steering compartment via the starboard side cockpit storage under the settee there. This is also how you can get to the transmission, but you can check the trans. fluid level by removing the above items and reaching over the back of the diesel.
The panels above are all insulated and there isn't that much noise in the cabin with the diesel running.
..............
Left arrow points to one of 3 12 volt outlets I installed in the cabin area and I'll probably put in 2 more. We try and power everything with 12 volts and will have 480 watts of solar on the boat.
The top two left arrows point to where we will put a hanging locker for pots and pans that will go from the ship's side over to the post. It will be open under it.
The bottom two right arrows show how that countertop which will be the top of the frig freezer will be extended towards the port side.
I'll make and install a 90 degree storage area where the 2 arrows that are in a "V" above and below for dishes and mugs.
..............
The top left arrow shows where the hanging storage for the pots pans will attach to the ship's side between the portals there. It will be similar to the one I build for the Mac except it won't have the drawers, that will be open in that area as the frig/freezer access will be below the hanging storage and again will extend further as shown by the two bottom arrows above.
The boat has a nice a large double sink with pressure hot/cold to it. Hot only if you are hooked to 110 or run the diesel. Also there is a foot pump for water if you don't want to have the pressure turned on and there is a hand pump that is suppose to pump salt water/fresh water from the body of water you are sailing in. Both of those pumps don't work very well and will be replace, the foot with another hand pump like the one that we bought for the Mac.
..............
The quarter berth and chart table area. Bottom left arrow is where the Honda 2000 generator stores. Bottom right is storage under chart table for charts, but mostly safety (Coast Guard) gear is there now.
Top right arrow points to a shelf I put in where the 12 volt computer/chart plotter I made sits. It runs NOAA charts using SeaClear as the navigation program and we love it.
Top left arrow points to where the router sits that makes the long distance WiFi available to other computers on board via a wireless connection.
..............
The left arrow points to the removable cover over the diesel. The top arrow points to a hatch that has the starting 12 volt battery under it. The next arrow down points to the hatch that has the two 6 volt battery banks for the house electricity and the last arrow down points to the hatch over the Honda Generator and some wiring panels.
We are not going to put a mattress back into the quarter berth, but use this area for storage instead. We will have a new cushion on the leading edge that you will sit on while at the chart table/computer.
..............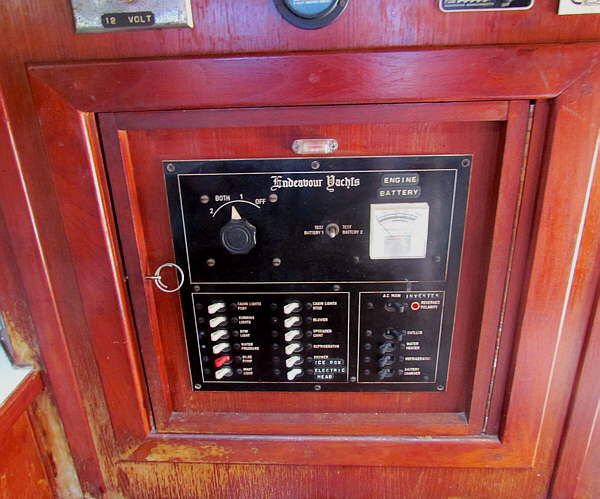
Here is the original distribution panel and it is still used for most circuits. I'm going to leave it in place for looks, but run the circuits through a new spade type fuse panel and switch panel. The boat will be wired very similar to how I wired our Mac.
..............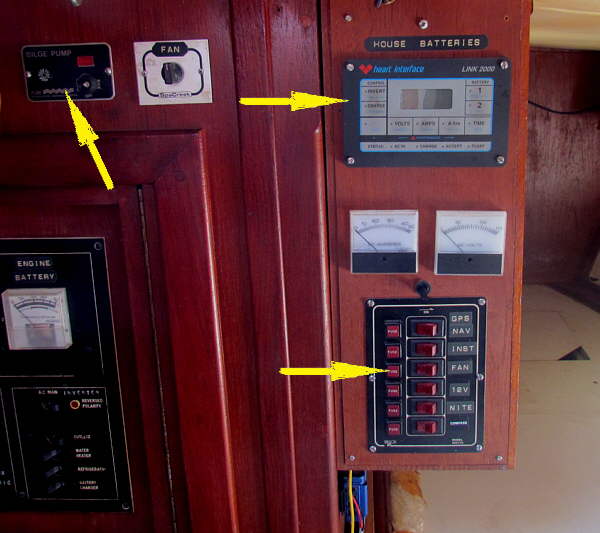
Top left arrow points to the bilge pump. I'll install a second one above the first and we will also carry a spare.
The top right arrow points to a very nice Heart Interface that shows, amps, volts and other usage. Until I can figure out where the current amp drain is on the boat I won't use it, but will instead have a digital meter that reads amps to .1 amp and a similar volt meter, again like what we use now on the Mac. It is very easy for me to see what is going on using them.
The bottom right arrow points to another fuse/switch panel. Some of it is being used also. I need to simplify the whole system so that it is easier to trouble shoot and use.
For this reason I will also for now or permanently disconnect the expensive Heart Inverter/Charger.
..............
A view looking down from the top of the companionway. Sorry for the poor picture.
..............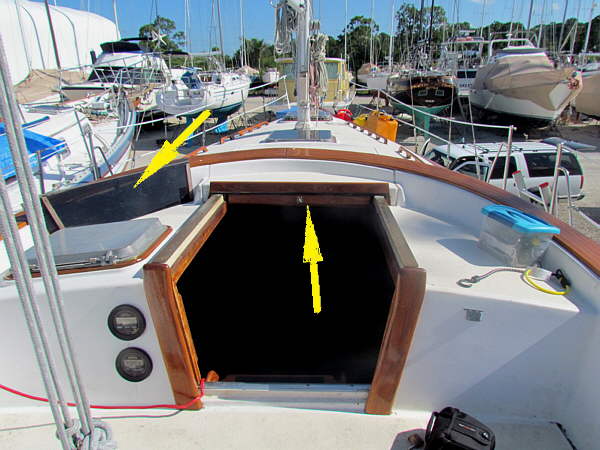
The left arrow points to the two companionway hatch boards, actually made from thick smoked plastic.
The other arrow points to the sliding companionway hatch. For a boat this size the companionway would probably do a pretty good job of keeping a large following sea from getting into the cabin and below, yet it is easy to use for both Ruth and myself.
..............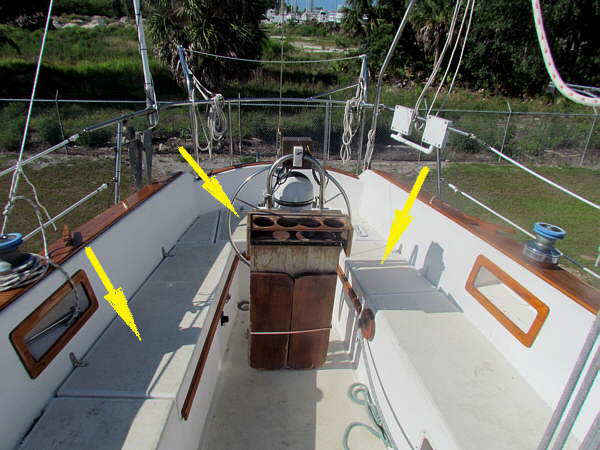
There are 3 storage areas in the cockpit. The starboard one, left arrow, is huge. In fact you go down into it and through a door to access the rear ship's systems compartment at the stern of the boat under the cockpit. There you can easily service the hot water system, the exhaust system, the drip-less stuffing box for the prop shaft, the transmission, the rear of the diesel, the steering system and other smaller systems like the water system pressure pump on the backside of the galley.
There is also a very large lazarette under the stern settee. On the port side is an icebox under a hinged cover there. That is where we will probably put a 20 lb. propane bottle after working on it a little. Forward of there is the quarter berth.
I have a feeling that the boats with the "A" plan don't have the large starboard storage area as a quarter berth there would come back into that area like it does on the port side of our boat with the "B" plan. I also then wonder if you would give up the easy accessibility to the ship's systems at the stern of the boat behind the cabin.
..............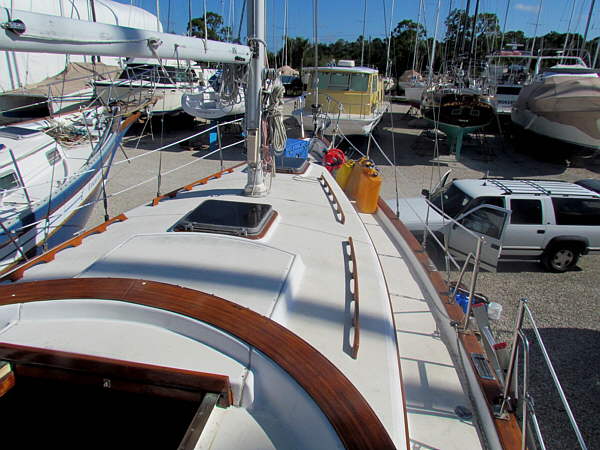
A final look forward over the nice woodwork before climbing down and getting into the waiting Suburban for the long rip back to Utah towing the Mac.