..................
..............................--- Bimini-Dodger Boatyard Install Part I ---
We finally made it to the boatyard (Charlotte Harbor Boat Storage) in mid April, but not being very smart didn't put the bimini/dodger up until late May. I guess I was worried they wouldn't work after making them 2200 miles from the boat at home and didn't want to start things off bad.
Well we should of put them up right away as they kept the cabin cooler during the day and stopped all but driving rain from entering the cabin if the companionway was open. We did run into one problem with them and I'll go into that first.
..............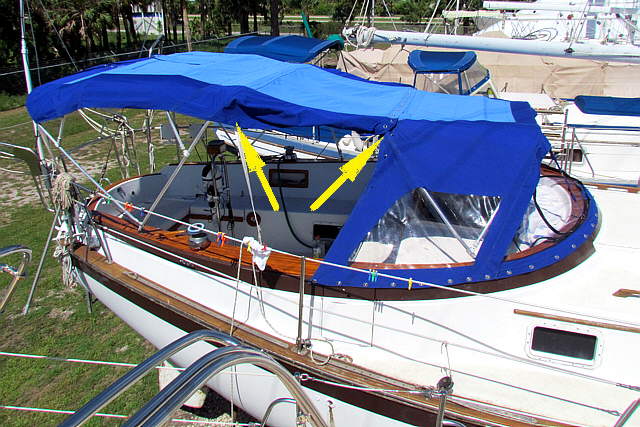
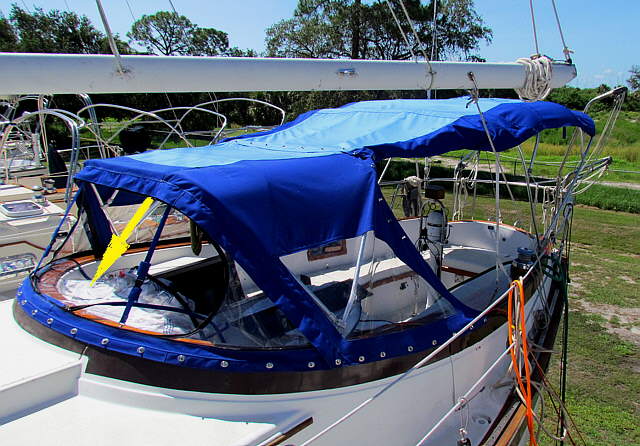
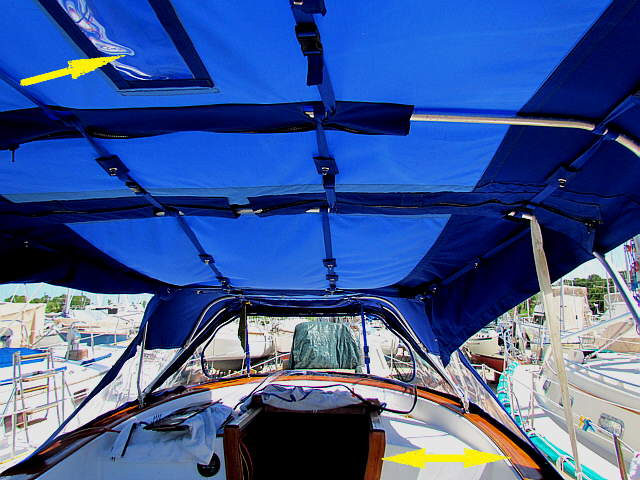
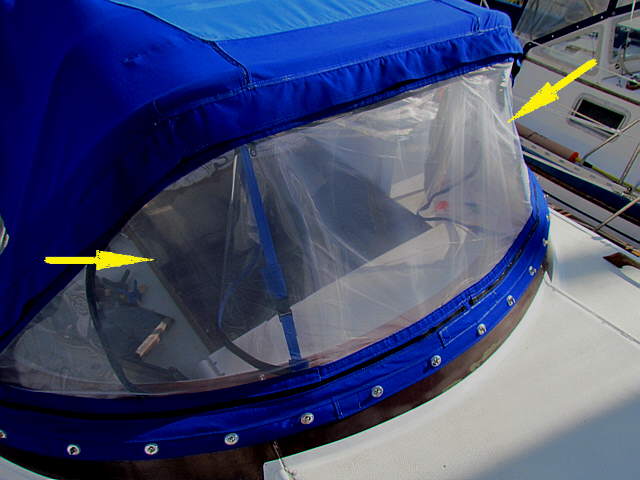
The problem was that the forward side skirts that are in the area of the two arrows and rolled up in the picture did not attach properly to the trailing edge of the dodger. This was due to the way...
..............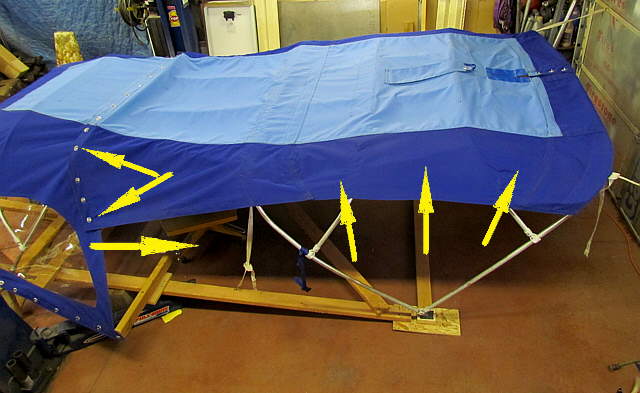
...I had setup the dodger/bimini frames at home in the shop. I had the transition from one to the other almost flat on the top at home. I should of raised the bimini (right 3 arrows) up some more so that it would of been higher than the dodger. The problem area was where the common sense fasteners are, top two front arrows. With the bimini frame higher on the boat it rotated that panel towards the rear, bottom left arrow, and away from the female common sense fasteners to the point that they would not work.
..............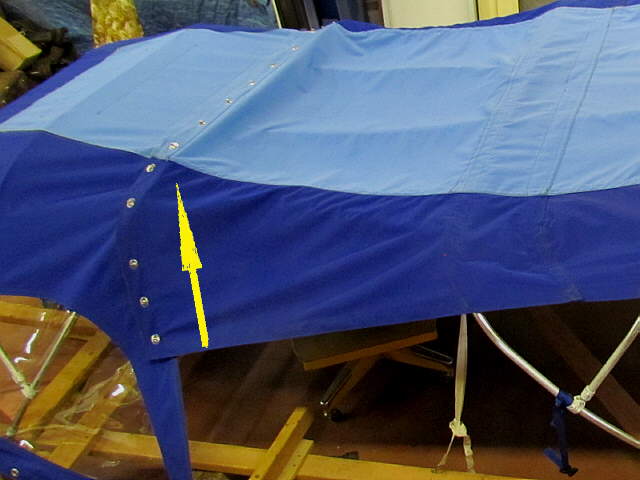
We didn't work on it at the boat even though we had taken the sewing machine along. When we go back we will cut the panel where the arrow is from the bottom upwards. That will allow us to rotate the leading edge back onto the common sense fasteners. Next we will sew in a panel, inner and outer, to cover the now pie-shaped opening in the side panel. It should be quick and easy to do and I'll post pictures after it is done.
..............
The old dodge use snaps to secure it to the cockpit coaming and we switched to the easier to use common sense fasteners. The female part of the snaps were held on with screws and they were removed. Next from the center outwards on both sides the male part of the common sense fasteners were put on to correspond to the female part on the dodger. The dodger was in place on the frame for this. It went smoothly, but I'll have some old screw holes to fill with epoxy. We want to change the color here from the brown to blue at the same time.
..............
The picture above shows the front window unzipped to the point that it is only held on at the bottom middle, arrow. I then just lays inside. The window section can be completely removed or opened to different openings, one or two of any size.
..............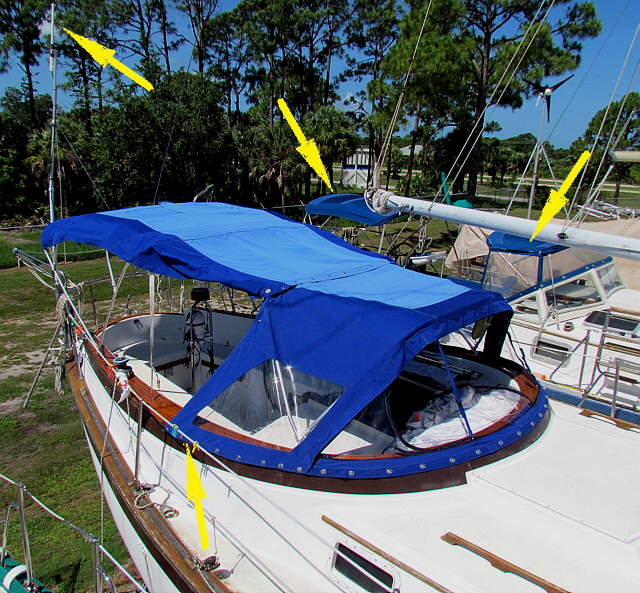
The upper left arrow points to the long distance WiFi radio (Bullet 2HP) and antenna. We were very happy with the fit of the dodger/bimini, but it still wasn't quite as nice of a fit as say the professionally made one on the boat in the background. Still we are proud of our work.
Also not in these pictures the woodwork in the cockpit vs. say the hand rails and along the deck sides. Ruth spent a lot of time stripping all of the old varnish from the whole cockpit area.
..............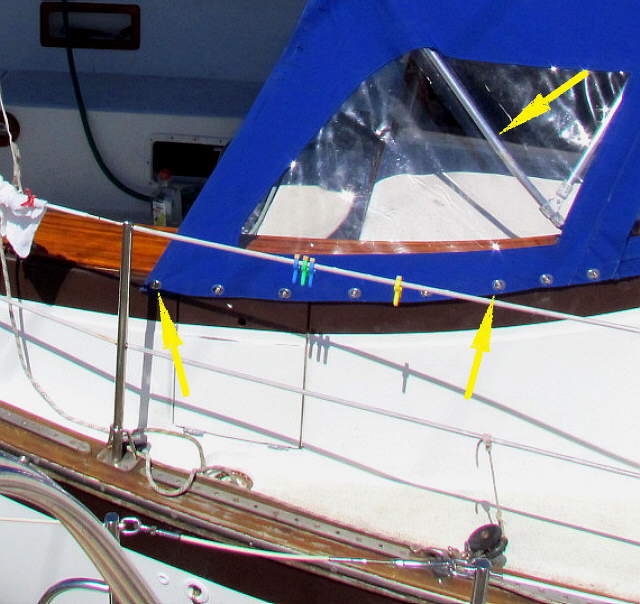
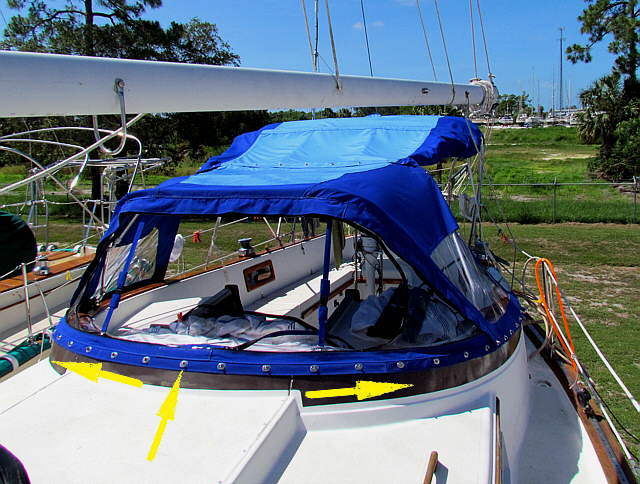
One thing to consider in using the common sense fasteners is that the male part attaches to the boat and they stick out some. We both hit our legs on them a time or two at first climbing into the cockpit from the side decks where the arrows are. It just took a time or two to be a little more careful there. The big plus to them is they are so easy to connect or disconnect and they shouldn't tear the fabric as easily as if we would of used snaps.
I had the dodger side fully in place for the picture above, but we usually had the dodger released back to the right arrow and then folded it and tucked it behind the dodger support there, top arrow. If the ran came it only took a couple seconds to reattach it to the coaming.
..............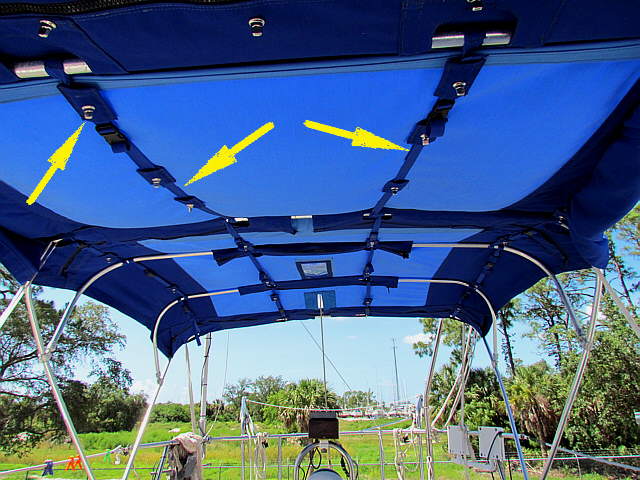
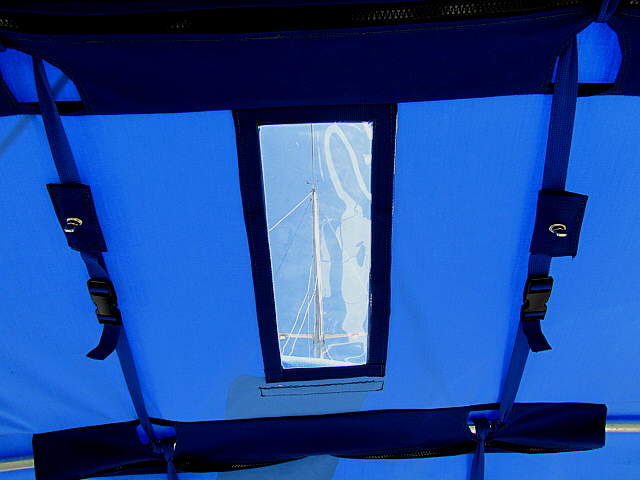
The interior straps, 2 middle arrows, performed three functions perfectly. One they let us pull the dodger/bimini support cross-members forward or rearward for a better fit and such. Two they take a lot of the load off of the fabric of the dodger and bimini, which makes them appear to not fit as tight, but should increase their life some. Finally the common sense fasteners, left most arrow, provide a means to hold the full cockpit bug enclosure up inside of the dodger/bimini. As you will see from other pictures that worked very well also.
..............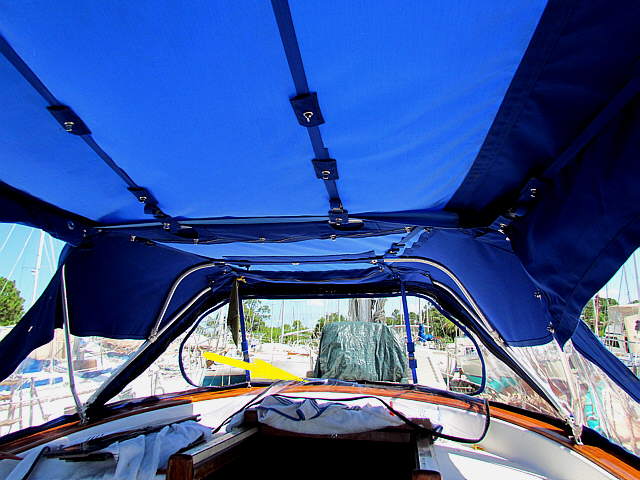
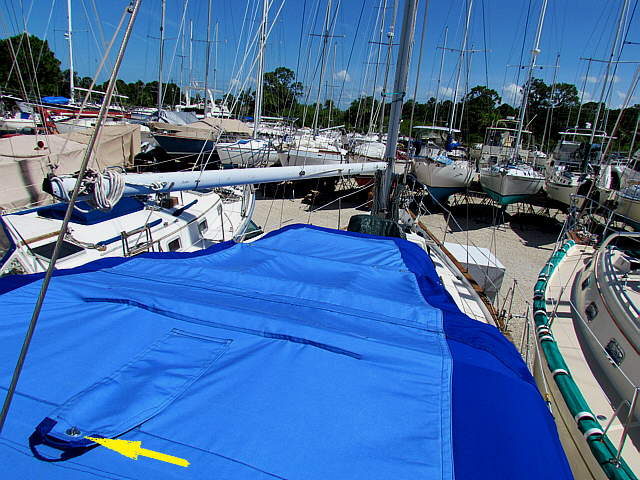
Above is a view forward with again the window folded down inside. The dodger now has great forward visibility as can be seen above. The green tarp ahead of the dodger is over part of the Cruisair carry on portable air conditioner that came with the boat. It really isn't big enough for this boat out of the water where the hot air can hit the whole hull. It did cool the cabin about 8 degrees on the average over the outside temps and that made the boat livable for the 3 months that we were on it up on stands. At night we just use the Caframo fan over the V-berth.
..............
The top left arrow points to the window that allows you to see the windex on the mast. The bottom arrow points to some of the woodwork that Ruth refinished while we were there. We learned that the Florida sun eats about any finish outside.
..............
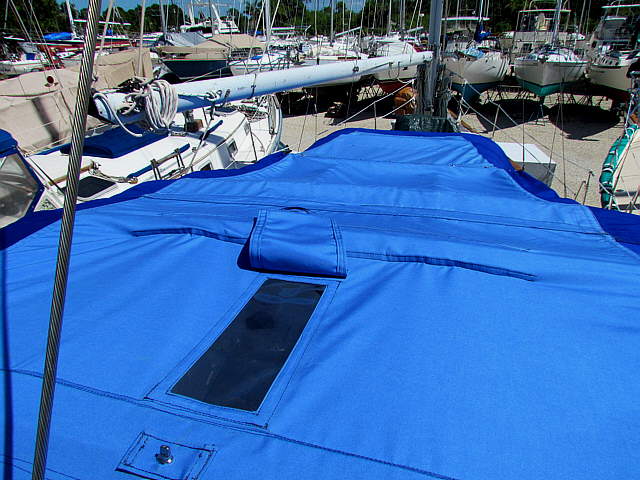
The padded slot for the backstay came out fine, but was another worry point at home as I didn't have a good measurement for where it intersected the bimini. The zippers you see allow the bimini and dodger to go onto or off of the frames in just minutes. We plan on pull them off when we are not on the boat and since the frames come off with just 4 bolts we stored them below with the straps attached to them. That all worked well.
..............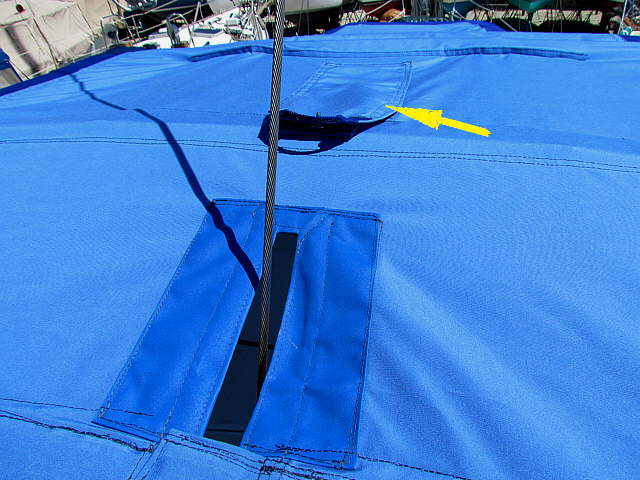
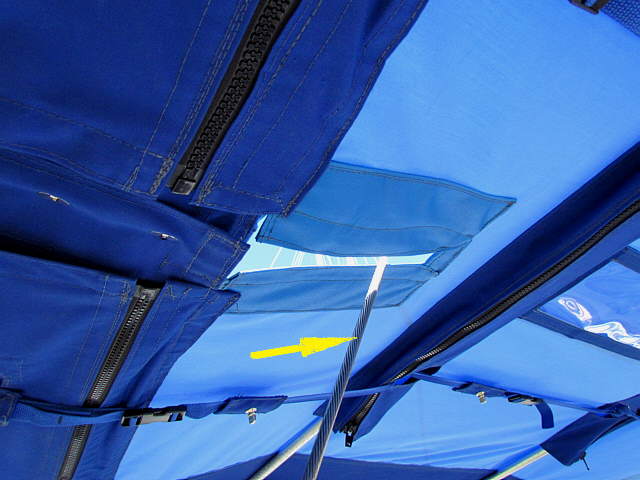
Above you see the backstay exiting the bimini and in front of it the window for the windex that has the cover held in place with a ...
..............
...common sense fastener. The strap behind the fastener is to attach a cord to pull the window cover forward when you want to use the window and a second strap to pull it towards the stern. At this point the framework for the six 80 watt solar panels is not in place.
Notice all of the sailboats at this yard ( Charlotte Harbor Boat Storage ). Most of the other boaters we meet said this is one of the nicest yards that they have ever used. Good rates, pretty good protection, you can work and live on the boat in the yard and the owners and employees are great. We couldn't of been happier. It is kind of remote and quiet at night, but still close to Home Depot, West Marine and a Mall and other services.
..............
Above the window is open and ...
..............
... a view up to the windex and ...
..............
... another from where you stand/sit at the helm. The window is narrow as there will be solar panels on both sides of it, but plenty wide and long enough to see the windex.
..............
The front removable bug screen was also zipped into place to see how it fitted and it was fine. Underway we will probably remove the screen for better visibility. It zips in or out in less than a minute.
..............
The arrows point here to the versatility that 4 zippers in the window give you. Above the zippers have opened the window on both sides for ventilation. There is more on how the zippers can control 2 openings or 1 at any place on the window ( HERE ).
We are very happy at this point with the dodger/bimini and think they will make the boat much more comfortable cruising.