...Return To Mine & Other Bonneville Car Construction Pages
.Previous Page...............B'ville Car Index Page.........................Next Page
........................................... Rear Frame - Part II
.........................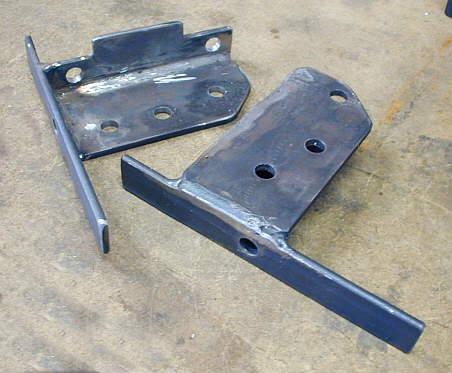
I had one more set of brackets to make before I could start constructing the rear frame. They would hold the center section of the Datsun rearend in place. I welded various piece of 3/16 inch strap together to make them.
......................... .
.
They will hold the pillow blocks in place for the carrier bearings and be welded to the frame.
................................... .
.
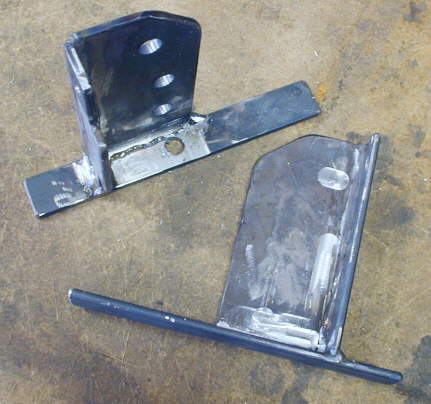
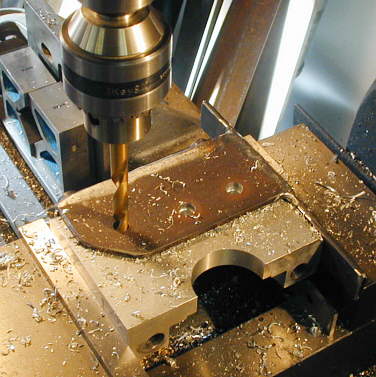
After making the brackets in the first two pictures I held them to the pillow blocks with the mill vise and drilled holes through them and into the pillow box. I then tapped the pillow block holes with a 7/16 inch fine tap.
............... .
.
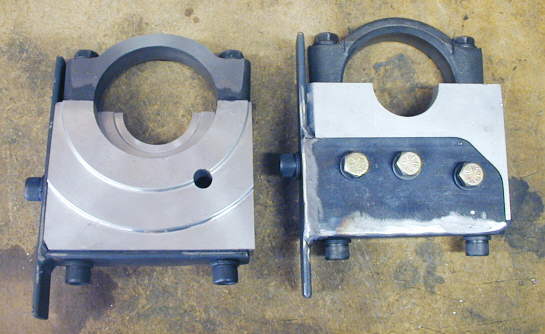
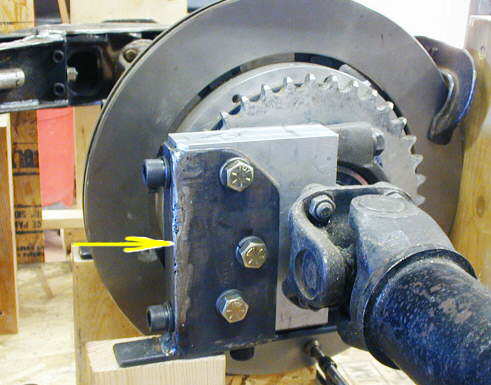
The finished product. You can see how I made the pillow blocks ( HERE ). There will be a hole in the finished frame rail to allow access to the lone screw on the left side, which is actually the bottom of the bracket. Another part of the frame will be welded to this bracket between the two bolts to the bottom. I also had to machine the corners of the pillow blocks so that they cleared the welds on the inside of these brackets.
..................... .
.
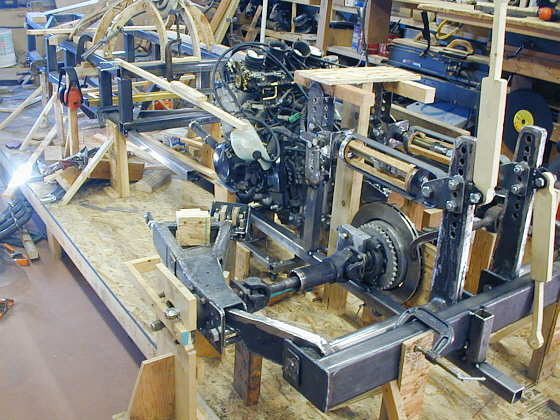
The bracket/pillow box attached to the center section and blocked to height. Now I'm ready to start on the frame. This will be welded to the frame along the bottom and also where the arrow is.
................ .
.
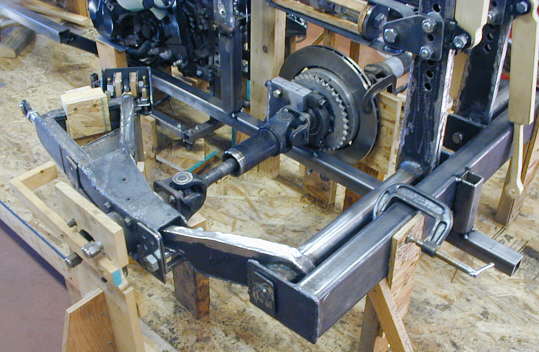
I started with the bottom frame rail on the left side of the car. It extends about 6 inches past the rear suspension crossmember and is attached to it. There is a 1 inch diameter hole in it under the pillow block to allow access to that lone screw that holds the pillow box to the bracket from the bottom. The rail extends past the motor and is tucked in pretty close to it to allow the rounded bottom of the body later to flow back from the cage area.
.............. .
.
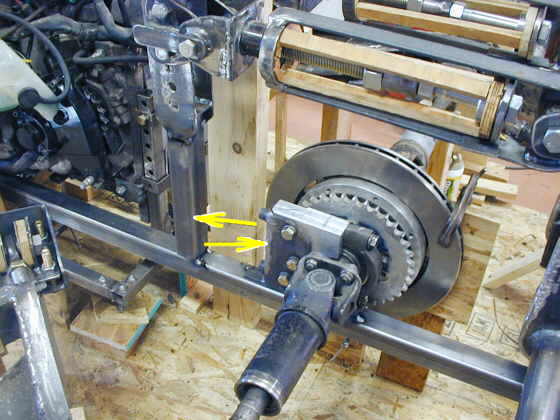
A closer view of the mounting of the center section of the rear to the bottom rail. You can also see where I have an upright tacked in to support the bottom of the bracket for the rear spring assemblies. There will be another short horizontal piece of square tubing going from the vertical upright over horizontally to the pillow block bracket (where the yellow arrows are). The pull from the chain drive will be trying to pull the pillow block forward. Later there will be more diagonal bracing added to what you see in these pictures.
.............. .
.
At the front of the motor the bottom frame rail angles up and then continues forward to tie into the back of the cage. There will be uprights and diagonals connecting all of this to the top frame rails that I will add soon.
.............. .
.
I will have to come off the frame rails with bracing to support the ends of the rear hub a-arms. Most of the tubing for in front of and back here behind the cage will be .120 X 1 1/2 X 1 1/2 square tubing.
Hope to have more finished here soon, but still a long ways to go..
..................................................................Next Page