...Return To Mine & Other Bonneville Car Construction Pages
.Previous Page...........B'ville Car Index Page...............Next Page
=============================================================
.......................-- Mounting Bellhousing to Adapter --..
=============================================================..............................
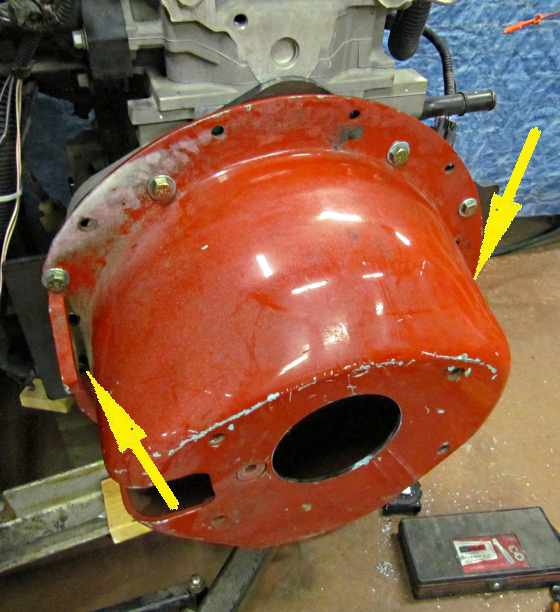
Next up was mounting a chevy SFI bellhousing/blowshield that had been given to me by a friend some years ago, Mike Horrie. At that time I was going to be putting a SBC in the car then switched to the motorcycle engine deal and the bellhousing sat on the shelf unused. So now I was close to full circle on the engine choice minus 4 cylinders. What I ran into was if I was going to mount it using bolts almost all the bolts ran into parts of the back of the 2900's block. The adapter is 3/8 inch thick so I could of probably cut them off an still had enough thread but really didn't like that approach.
So I cut the heads off of some grade 8 3/8 inch X 16 bolts and ran them in the adapter until they hit the block so they became studs. That probably would of worked also but I really wanted to just use bolts. I looked at the block and there was one mounting hole without block behind it and 2 holes were close to letting a bolt through and one could be drilled all the way through as it was low on the side of the back of the block by the pan and the hole would just go through into free air.
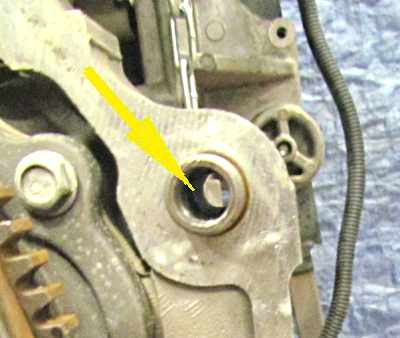
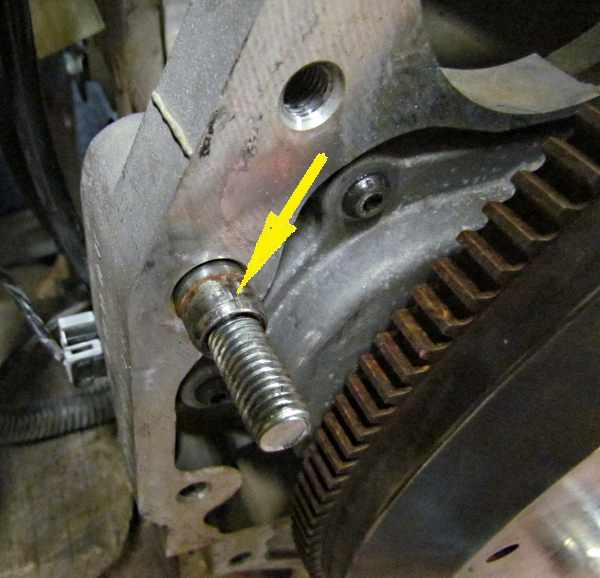
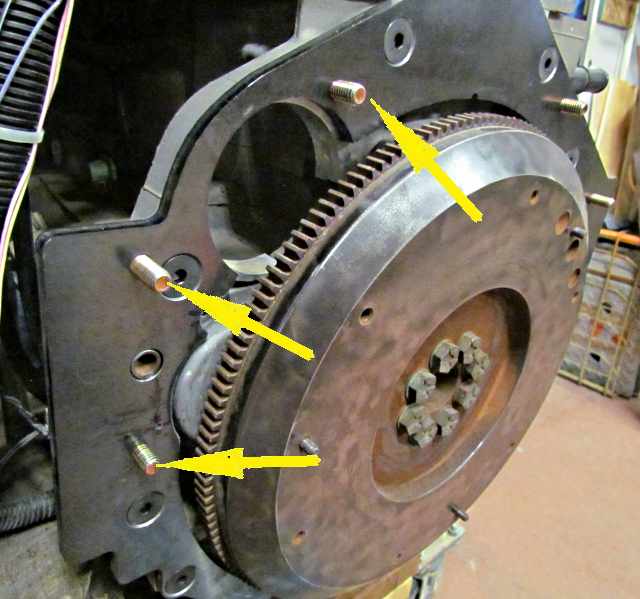
Before I tackled that though I wanted to pull the locating dowels out some so that the bellhousing would also locate on them. Later I'd get longer ones. Above you can see that the stock dowel locates the adapter but doesn't protrude past it to locate the bellhousing.
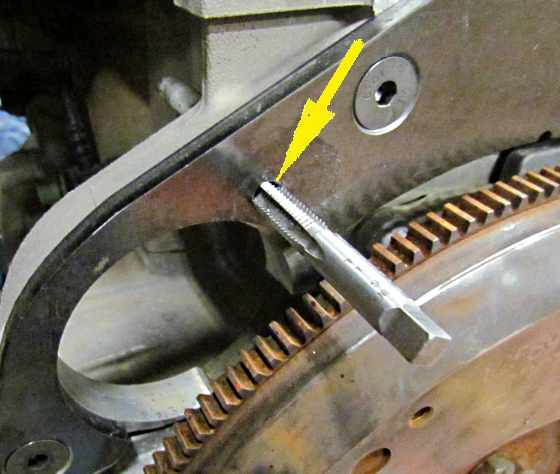
I couldn't punch the dowel out from the back side as it is in a blind hole with a shoulder inside, arrow and a smaller threaded hole going on through. The punch couldn't catch the back side of the dowl. I tried vice grips but they wouldn't move and I didn't want to heat the block so...
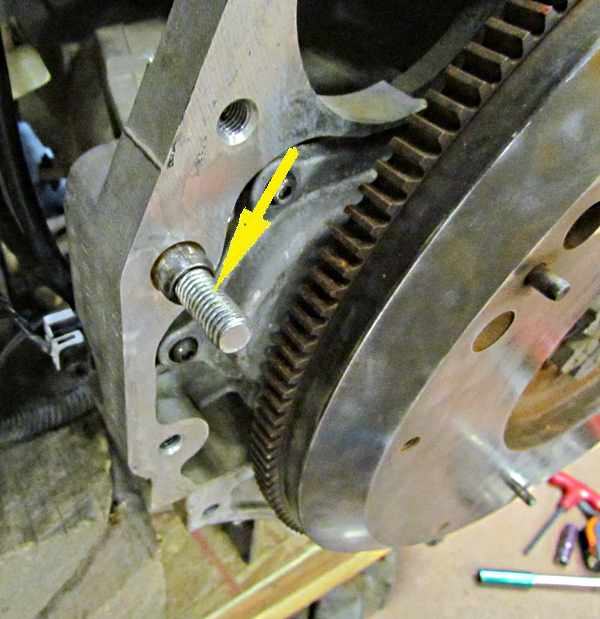
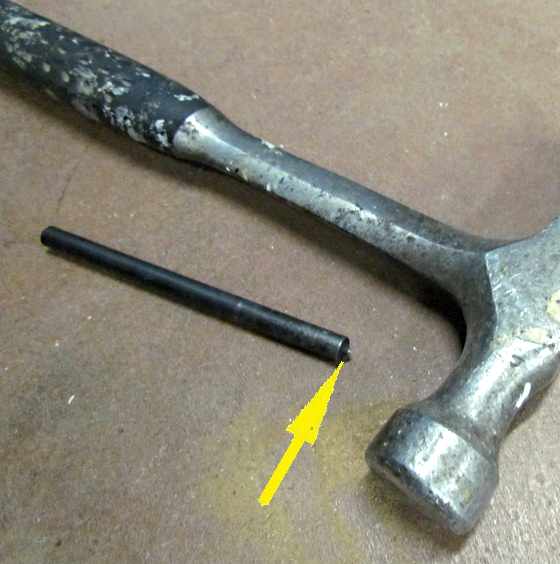
I tapped the inside of them with a 7/16 tap and ...
...cut the head off of a 7/16th bolt and threaded it into the dowel.
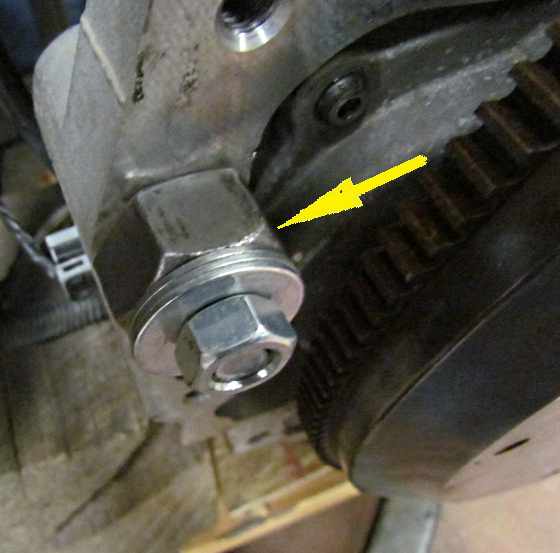
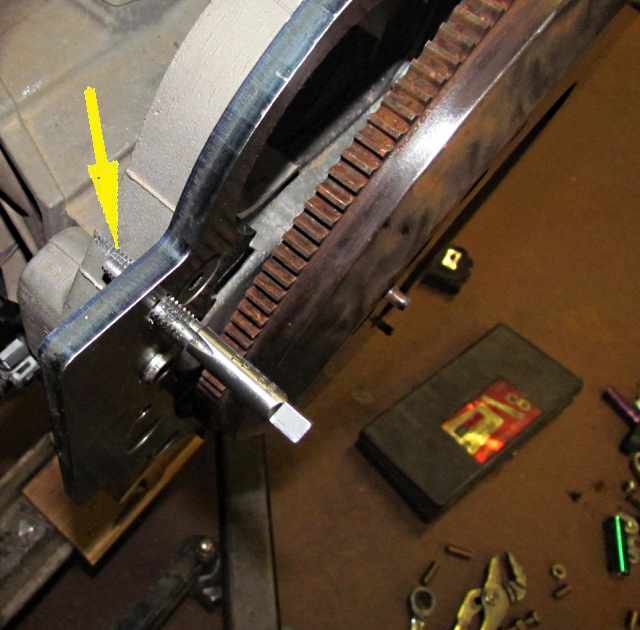
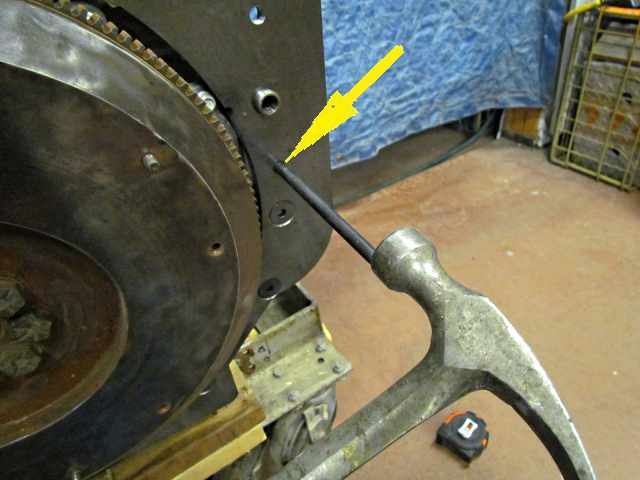
Next I put a large nut over the stud and the dowel and put some spacer washers and a nut on the end of the stud and....
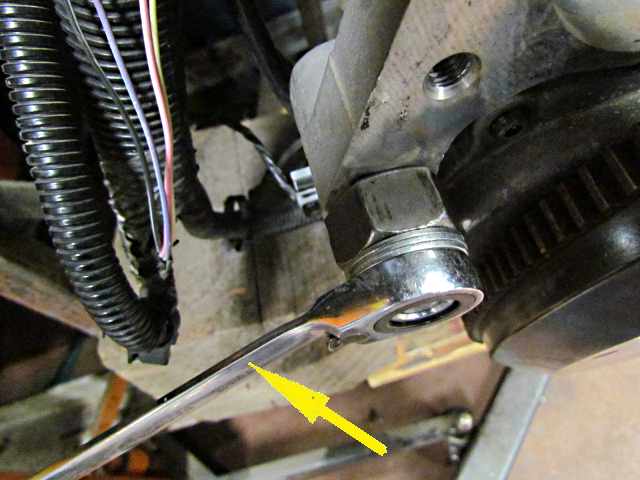
.... jacked the dowel out with a wrench on the nut/stud.
I left it in the block some, but now it was far enough out to index the adapter and the bellhousing.
Next with the adapter back on I started to clearance the holes for the bellhousing mounting bolts. For the hole above and one other the block barely interfered with a bolt going out the back side. I could of clearanced it with a die grinder but it was so close that I just bolted the adapter down hard on the block and ran a tap through the threaded holes in the adapter and .....
.... It clearanced the block by cutting threads in it.
The same was done to the first bolt hole off to the right side of the block just down past top dead center of the adapter.
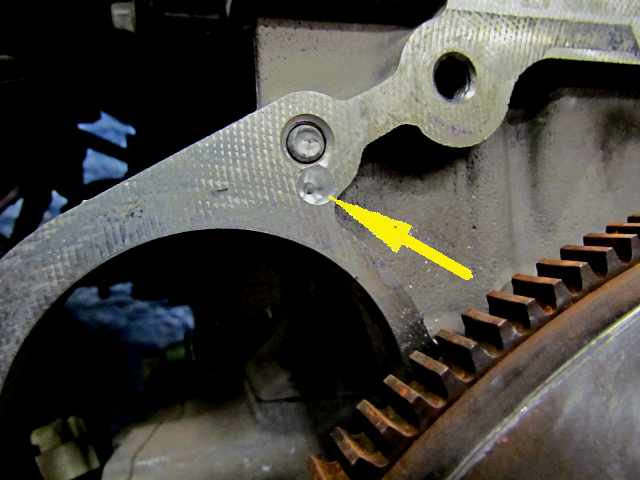
There was one hole I could drill straight through and 2 holes that I could drill into the block and either drill them oversize or tap them. To mark them I took a center marking punch just the right side to fit into the threaded hole on the adapter and ....
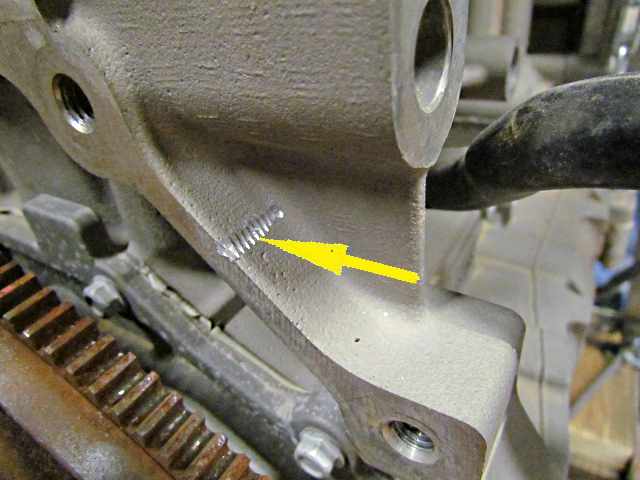
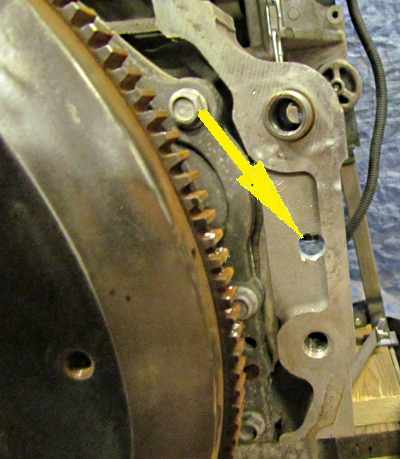
.... by striking the punch I was able to mark the center of the hole on the block. The hole marked above below the locating dowel was in a place....
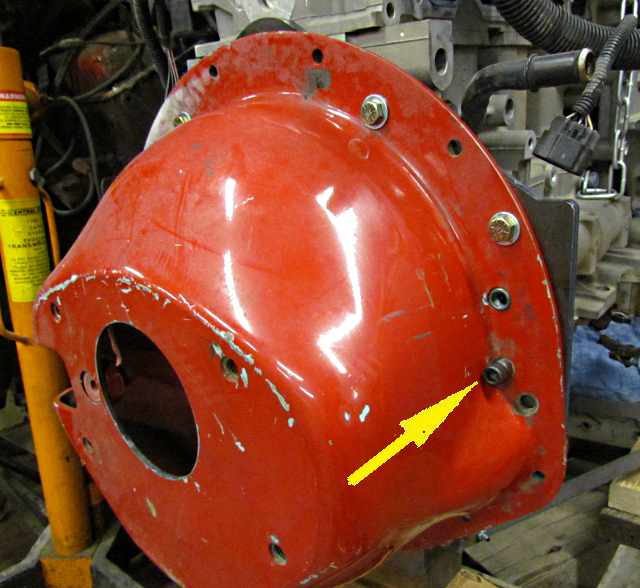
.... one can just drill a clearance hole all the way through, arrow above. On the other side you don't really want to do that but the block in that area is thick enough you can either drill a larger than 3/8th inch hole for bolt clearance or tape the hole. I drilled it slightly larger for a ways into the block.
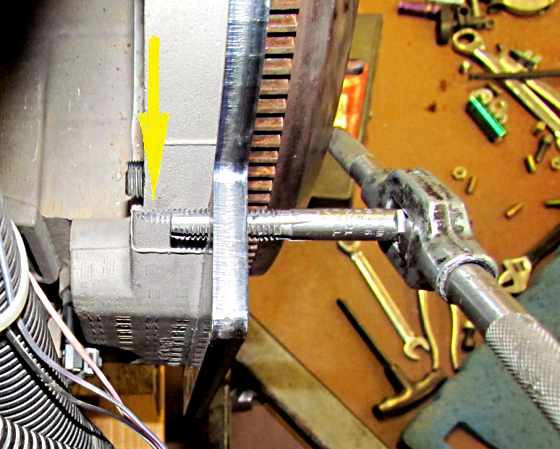
The one remaining problem hole is the one just off top dead center on the left side of the block and it is very close to the stock stud for the starter. To clear that stud I drilled the hole to 5/16th inch the correct hole size for a 3/8 X 16 tap and tapped the hole with the adapter back in place. Notice above that the hole is only drilled deep enough to be tapped and for a shorter 3/8 inch mounting bolt to just clear the back side of the adapter into the tapped hole.
Above that hole is being tapped with the adpter back in place.
There are 6 bolts used to hold the bellhousing on. Starting with the one below the locating dowel on the left it was located with a punch and drilled a small ways into the block a little over 3/8th of an inch. The next one up was clearanced with the tap. The next was marked and drilled slightly into the block by the starter stud and tapped. The next starting down the other side was clearanced. The next just above the dowel was clear on the back side and the final one below the dowel was marked and then drilled through oversized.
The two hole in the bellhousing below the dowel on both sides are so close to the 'bell' in the bellhousing that bolt heads rub and don't really clear. I turned a couple round spacers with 3/8th inch bores that cleared the housing then used allen head bolts in both places to deal with the clearance issues.
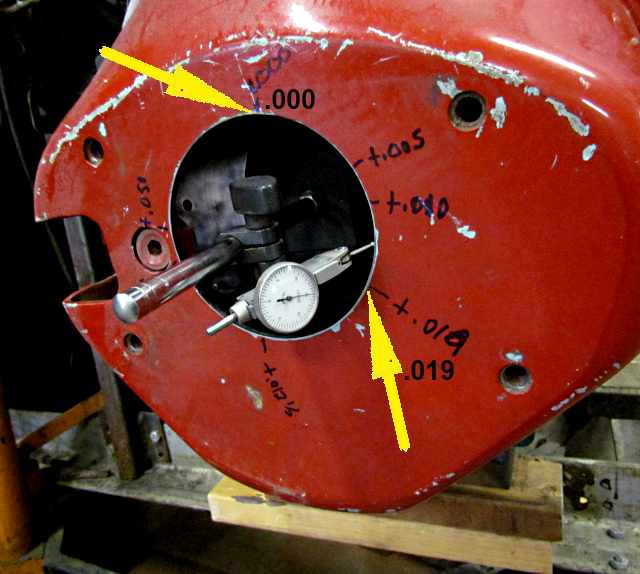
With that done I decided to check the alignment of the center of the bellhousing that locates the transmission. I found that it was .019 thousands out total or .009 1/2 thousands from the center. They recommend no more than .010 overall and .005 from the center. I'll get some .007 offset dowels and see if I can get it closer. I was surprised that the lowest (.000 on the indicator) and highest offset (.019 on the indicator) were not opposite each other. Some of this could of been due to the poor short dowels I was using. I'll do all of this again when I get the longer offset dowels. I will probably also drill out the back side of the dowel holes so I can knock them out with a punch if needed.
I never setup a manual before using the dial indicator but found a good youtube video on how to do it ( HERE ).
==========================================================
....................................................... Next Page