...Return To Mine & Other Bonneville Car Construction Pages
.Previous Page...............B'ville Car Index Page.........................Next Page
.................................... Doing Something Anyway
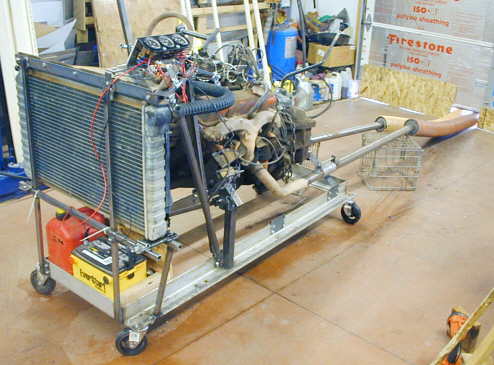
Well I've only gotten a little done on the lakester since August, but I haven't been totally dead in the water. Just as most of you know things come up. One of these things is I told my wife I would build a 383 small block Chevy and put it in her '72 Ford (she won't get rid of it) along with a 700R4 overdrive hoping to get better gas mileage. So I've been putting the 383 together and wanted to build an engine stand to fire it on before fitting it into the Ford. Since I want to build a few more sbc's I thought this might be a good thing to do and the rest of the time I can store a motor on it.
......................... .
.
When I built my house I bought a '73 chevy pickup for $350 and used it. It had a good motor, so when I made the truck into a trailer (threw the cab away) I saved the motor. Since this motor ran I used it to build the stand around along with the radiator/shroud that I had saved. I held the motor up in the air with a cherry picker and leveled it off the carb mounting area on the manifold front to back and side to side. Next I built the stand around it.
................................... .
.
The base is a piece of metal that was a protector piece around the top of the bed of a pickup I once bought. I cut it up and on the side pieces put three sets of 4 holes down each side for the front motor mount, a mid mount to be use if there is no transmission on the motor and a rear transmission mount. All of the mounts bolt to those holes, so if I ever put a motor other than a sbc one it I can just make new mounts and they are quick to make.
................ ....................
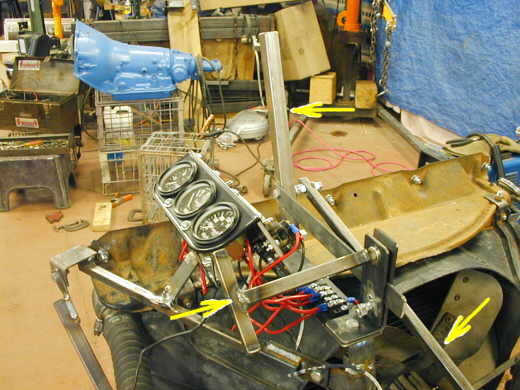
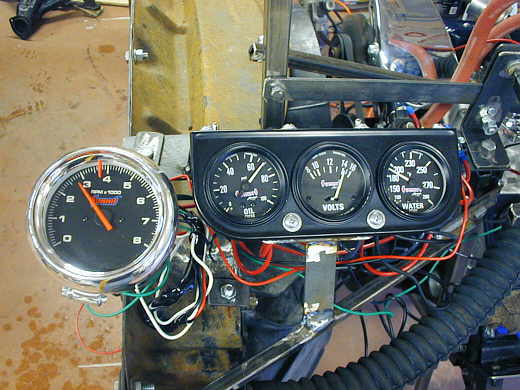
With the motor mounted I made the front radiator/shroud mounts and an instrument panel with water temp, oil pressure and voltage. I also mounted a throttle in this area. The top arrow is the throttle handle. The bottom right arrow is the linkage going to the carb. The left arrow is a "T" handle that when it is turned clamps a piece of strap that goes to the throttle handle. Using it lets me set the RPM. I can set the RPM with the throttle handle and then lock it with the "T" handle.
.................... .
.
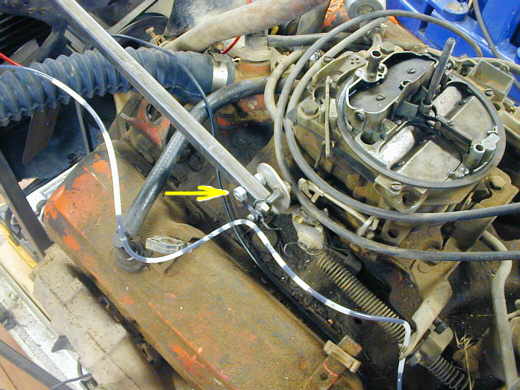
I used one of the open holes on the carb bellcrank and put a bolt thru it and attached the linkage from the throttle handle to it.
....................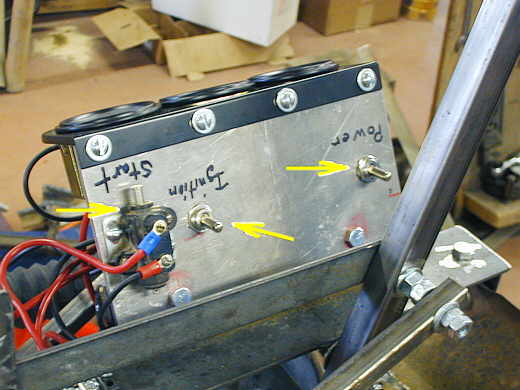
On the back side of the gauge panel is a main power switch (right arrow). Ignition switch (middle arrow). And a brake switch off of a Hodaka motorcycle that I use as the starter button (left arrow).
.................................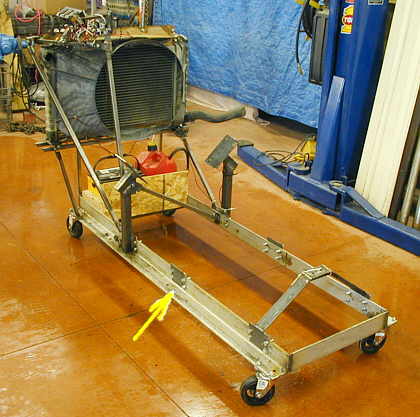
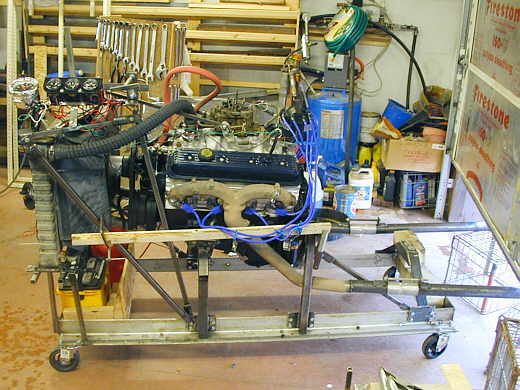
Here is the stand minus the motor and ready to mount the new 383 on. I triangulated the rad/shroud and the instruments with some 3/4 inch square tubing. I also ran a diagonal brace across the front motor mounts. Everything bolts to the base so it is easy to change anything. The arrow points to the middle motor mounts that I have yet to make at this point.
....................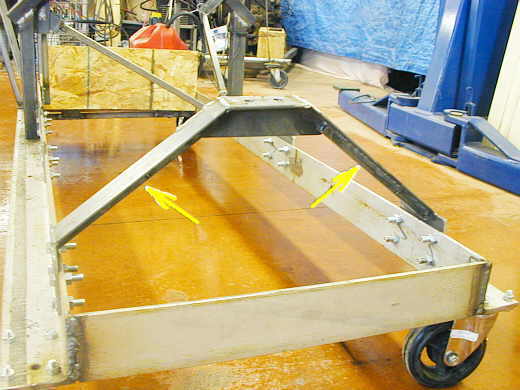
The transmission mount was made with some strap with square tubing welded to the undersides (arrows) to stiffen it up along with another plate across the top.
....................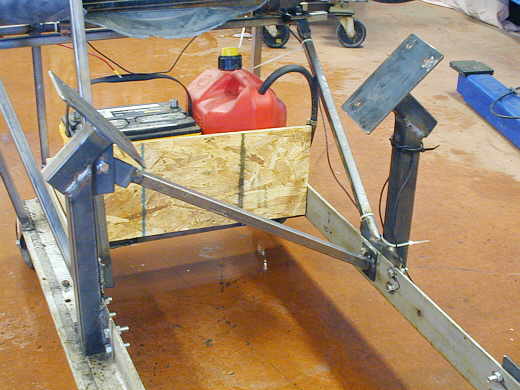
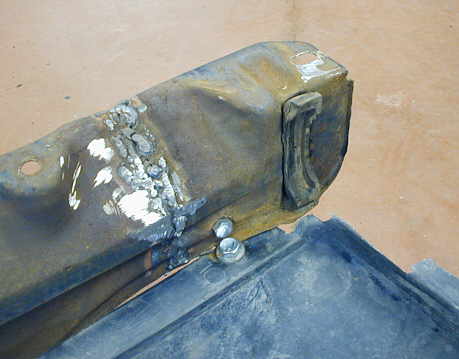
Here is a better view of the front motor mounts. With the motor suspended I just worked backwards off of it adding pieces and welding them together until I got down to the base. You can also see the battery and gas tank. The gas tank is a 2 gallon plastic gas can that I drilled a hole into (for a tight fit) and inserted the line that goes to the fuel pump.
....................
I used the stock chevy rubber radiator mounts. I welded up some crude pockets for them in the bottom support for the rad/shroud. The rad. sits in these.
...........................
Here is a picture of the top stock rubber mounts with the shroud bolted to the top crossmember. This picture was taken with these laying on the floor and it is not mounted to the stand.
.....................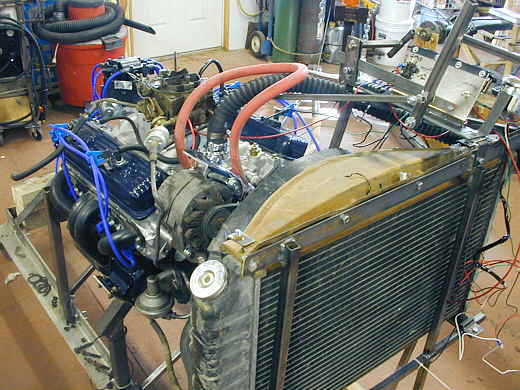
So after the stand proved itself with the old motor I mounted the new 383 to it here. I mounted the block hugger hedders so I could cut and fit the wires. Since I didn't have the short collector adapters yet that would mount the hedders to the rest of the exhaust I had to use the stock exhaust to break the motor in. I'm also using the q-jet carb off of the other motor at this point. I'll be rebuilding another to actually use on this motor.
.....................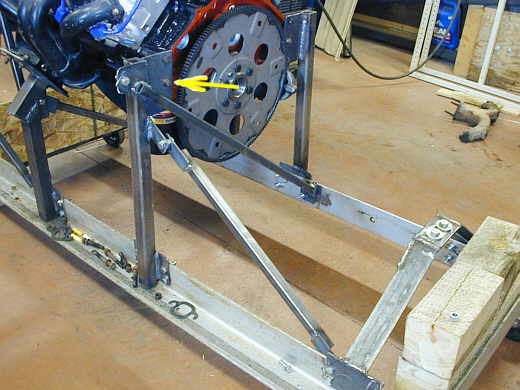
Since I'm firing the new motor without the transmission I made the intermediate mounts at this point. I put the motor on the front mounts with the cherry picker and then held the back up where I wanted it while I made the mounts. I started by making the plates that bolt to the back of the motor. I drilled a hole for the locator dowel and for 2 bolts. Then I worked from there down to the base of the stand. I triangulate this area also.
.........................
Another view showing the mounts and the block huggers (arrow) that were on just to fit the plug wires. The motor was very stable while being run.
.....................
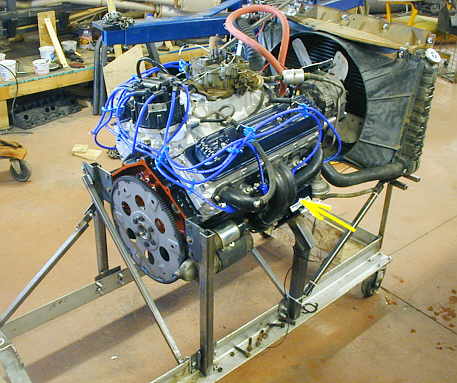
This shot was taken during the 30 minute cam break-in period. The tach will go into the pickup along with the motor and I have another set of these gauges to go in the truck also. The tach and gauges are Summits cheap ones. I varied the rpm between 2000 and 3000 during the break-in and the oil pressure was at 70 and the temp stayed between 185 and 190 right on the thermostat.
.....................
The rubber hose that was attached to the exhaust in the first picture at the top of the page didn't make it through the break in. It was fine for a few minutes, but then go too hot and I had to remove it. With the motor running I pushed it over to the garage door with the pipes sticking outside and that worked fine. I was so happy to hear this motor run. It is the first one I've built in years and I was NERVOUS. Just a note, it looks like the bottom of the stand is bent or curved, but it is straight. I was using the camera on wide angle.
................................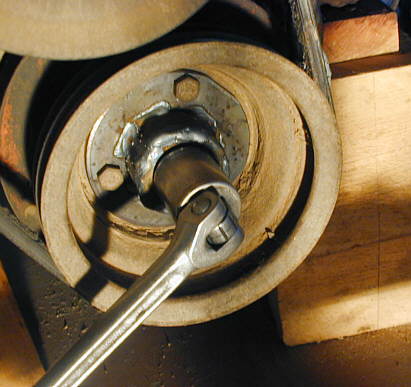
While building the motor I also made this tool to turn the motor over with when the harmonic balancer is in place. You can buy them, but I kind of like making stuff. If you are interested you can see how I made it ( HERE ).
...................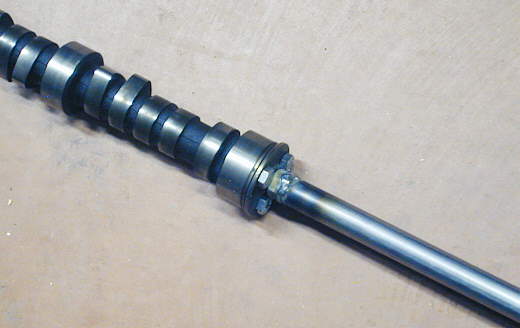
I also made a handle to help install the cam and you can see how it was made ( HERE ) also if you are interested.
I've got other stuff to still do before I can really get back onto the lakester
like cleaning the store out and putting the motor above into her pickup, but I'm going to try and start spending
at least one day of the week on the lakester so I feel like some progress is being made.
...Return to Tech Information Index...........................................Next Page