 ...
...
- Page Twelve........is This is the last page for now
...................Teardrop Trailer Page 13
...................................................-- More Pictures on the Lift Mechanism --
Over the years I've had people ask more questions about how the top of the teardrop lifts up. The pictures of how this works on page 5 aren't to good, so today (Aug. 2004) I took some new pictures. I hope these pictures and the following explanation help a little more. There is a lot of information here and for it to become clear you might have to read it more than once and study the pictures carefully.
....................................... ...
...
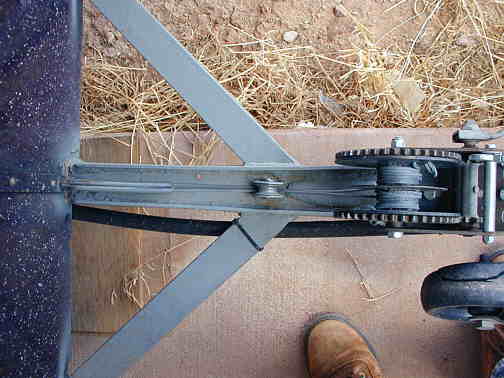
Let's start at the tongue. I have a hand cranked boat winch mounted on the tongue. I welded a piece of round metal in the middle where the cable spools on to keep the two cables separated. Actually I took a round piece, cut it in half, welded both halves in to make what looks like one piece. I did this after using the trailer for a while and finding that the two cables would cross over one another, which caused them to cut into each other and also not always wind on and off the same way.
So in the above picture you can see the two cables coming off of the winch and going to two tubes that act like a guide to guide the cables into the trailer body.
..........................................
...
Another picture of the front end. I also cut the winch handle in half and added a short piece to make the handle a little longer to give me more leverage to make it easier to turn. So far (35,000 miles and about 200 nights camping) no problem with the winch. I did have problems at first with the cable crossing each other and cutting into each other and I replaced the cables once or twice. After dividing the winch take-up reel into 2 separate spaces that hasn't been a problem. I still think if I had to do it again I would so up one size on the cables and also make all of the pulleys a little larger in diameter. I think this would make the top a little easier to go up and also help lower cable wear.
.......................................
...
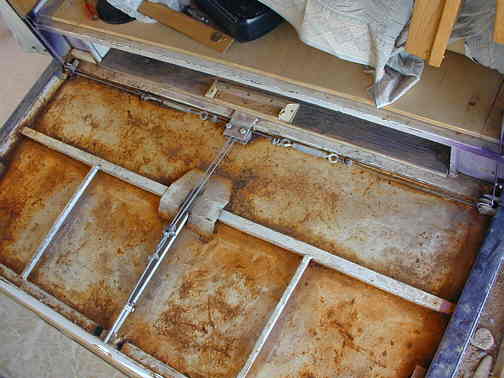
Once the cables get into the body one goes straight up to lift the front of the top and we will get to that one in a moment. The other cable goes past the front counter and above the bottom floor pan and just under the inside floor that you stand on. The rusted metal above is the bottom floor pan on the trailer and the rust is coming from I believe water that comes out of my ice chest onto the floor at times. I'll have to do something about that sometime. On my newest trailer the bottom floor pan will be aluminum.
So one of the cables goes back to just in front of the bed (back edge of the door area) and splits into two cables that go to both sides. The two cables lift each side of the top of. So the top is lifted by three points, each side by the doors and in the front center.
The plate under the cable is just there to give the cable something to slide on over the cross member. Right behind that the one cable ends in a loop that both side cables are connected onto. The side cables go through two pulleys and head off to each side.
..........................................
...
As they get to each side they are attached to a turnbuckle. The turnbuckle allows you to adjust each cable so that the two back cables lift the top at the same time as the front cable and also lift at the same time on each side. I get things adjusted close with the cable clamps and use the turnbuckles to fine tune things. I haven't touched these in a couple years.
After the turnbuckle another cable attaches to it and goes through another pulley that changes the cable from running horizontal to vertical.
.........................................
...
The cable then goes vertical up the side wall just to the rear of the door opening. It goes up the "fixed side" to another pulley that is attached to the "fixed side" and then back down towards the floor. It is then attached to a post that is the side of the door frame and also part of the top. So when the cable is pulled by the winch it runs to this point and lifts the post and thus the top also. This happen on both sides and also in the front of the trailer.
.......................................
...
In this picture you can see how the top comes down on both sides of the door. This way the door frame goes up and down with the top and if the door is closed (like at night) with the top up it has a complete door frame on both sides. At night I have panels I put in that fill the bottom under the door. They come up even with the mattress, which goes all the way to the front counter. You open the door and swing out like you would with most conventional teardrops.
.........................................
...
Another view of the cable running horizontal along the floor. Around a pulley that directs it vertically. Over the pulley up on the side and back down to where it is attached to the door frame.
........................................
...
A close-up of the top pulley on the side by the door.
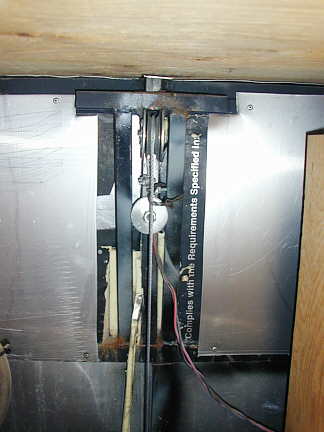
This is a picture taken under the front counter of the front wall of the teardrop in the center. The other cable off of the winch comes in the front center of the teardrop and under and around the front of a pulley at the floor. That pulley is out of this view. In the center you can see the cable coming up from that pulley.
You are looking at the bottom of the counter at the top of the picture. At the center of the back wall are two vertical pieces of square tubing and between them is another vertical piece that goes up through the back of the counter and you will see it in the next picture.
The cable comes up from the floor and over the fixed pulley, near the top of the picture, then back down. It is then attached to the vertical square tubing that goes up through the back of the counter. It is attached to that tubing where the round washer is in the middle of the picture. When the winch pulleys on the cable it pulls up on the vertical tubing in the middle, which is attached to the top, and thus raises the front of the teardrop roof. In the above picture the top is in the up position. If the top was down the vertical tube that the cable is attached to would be near the bottom of the picture.
Right above the fixed pulley at the top there are pieces of tubing that center the vertical one so that the top is guided straight up.
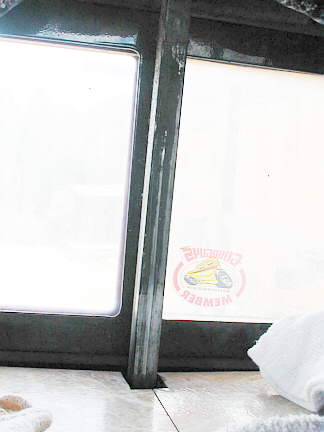
Here you can see the vertical piece that the cable is attached to in the picture above. This piece is attached to the framework at the front of the top. As it raises through the hole in the counter the top goes up.
The white area in the picture is the front windows. I had to overexpose the picture to show the vertical square tubing.
The surface at the bottom is the counter top.
.
.
.
.
.
.
...................................... ...
...
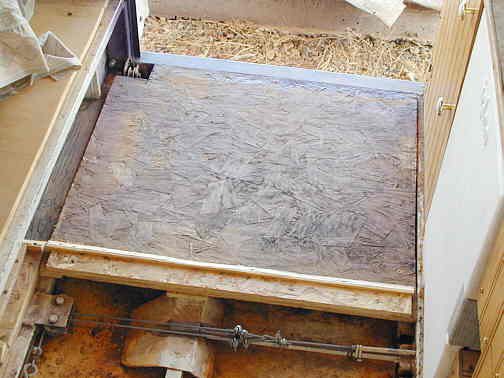
Another view of the back cable detail with the top up. Notice that now the turnbuckles are pulled in towards the center. The distance that they move before hitting the side pulley or middle pulley is going to dictate how much the top can be lifted with this system. Also notice that where the one cable becomes two is also pulled toward the front with the top up. That Plate in the middle helps the cable clamps slide over the cross member without snagging on it.
...................................... ...
...
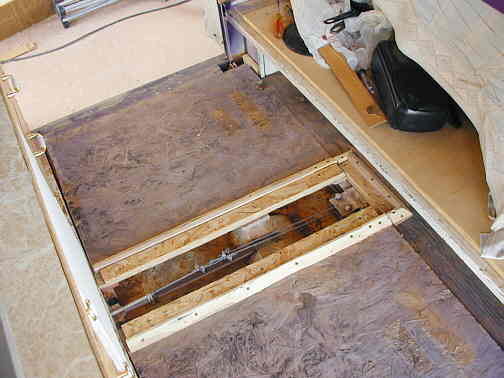
Here I have put one of the three floor pieces back in place. These are the pieces that you actually stand on while in the trailer. I wanted the floor as low as possible so that meant there would have to be a small hump in the center to clear the cable and clamps.
...................................... ...
...
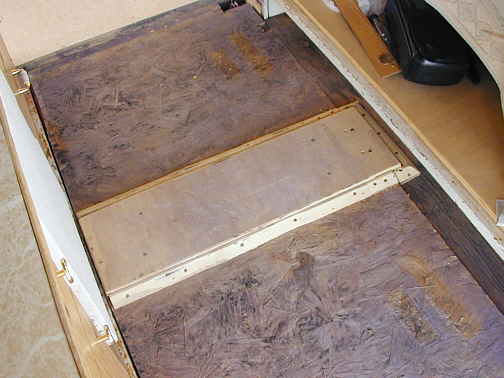
Here the other side of the floor is in place.
...................................... ...
...
The raised center section is in place.
...................................... ...
...
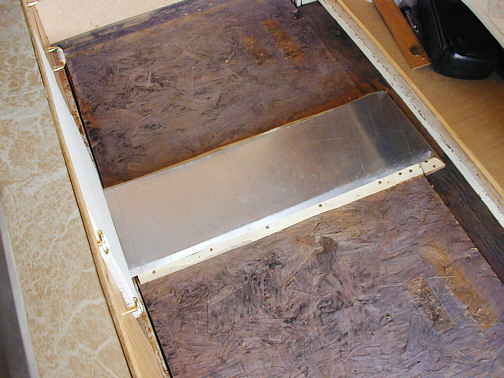
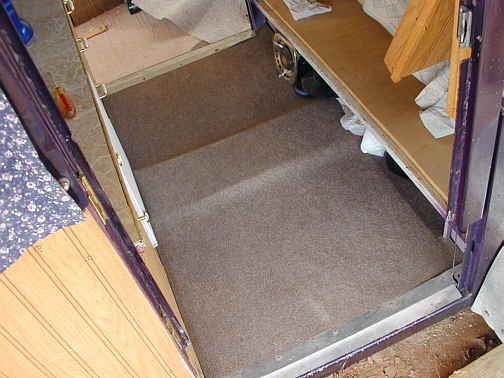
An aluminum piece lays on the top of the center section to help smooth the center section out so that the carpet wears better.
...................................... ...
...
The carpet back in with the sill trim places on. It just takes a minute to get to the cables. Remove the screws on the sill plates, remove the carpet and lift out the wafer board floor.
...................................... ...
...
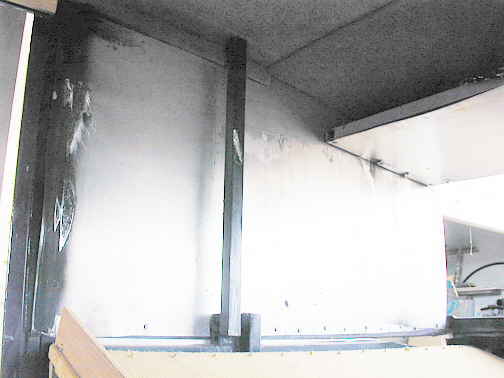
Here you can see one piece of square tubing that is attached to the roof at the top of the picture. To the right bottom of it you can see another piece that goes down into the fixed side. These pieces on both sides of the top at the back help to guide the top while going up and down. Not much is needed here to do the job.
...................................... ...
...
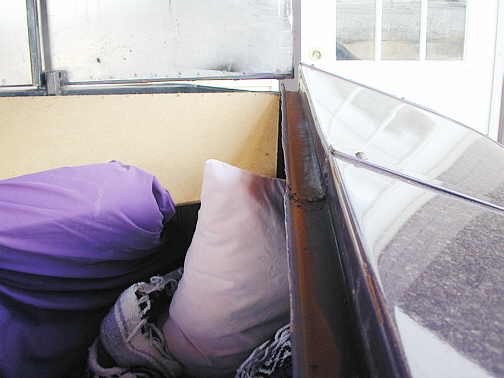
Here we can see the metal valley that goes across the back of the trailer to catch any water that comes into the space when the top is down or up and drains the water off to the sides. The back window/wall is up in this picture. When down it fits into this channel.
...................................... ...
...
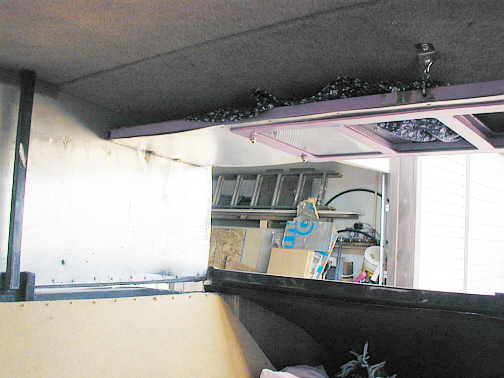
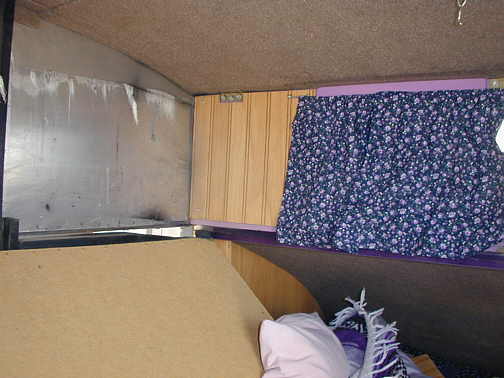
A view of the back window up as it appears after you first crank the top up. You crank the top a little higher than the final height so you can swing the back window/wall down with it clearing the inside lip of the channel.
...................................... ...
...
You swing the back window/wall down next and then lower the top down with the crank. The top sits on the back window/wall and some trim pieces up on the front of the counter. In this picture the top has not been lowered yet. It will still come down about 1 1/2 inches at this point. If you look where the back window/wall meets the top side wall you can see that the trailer sides in that area taper down. This is to allow clearance for the back window/wall when it is folded up and the top is down. This taper doesn't show from the outside or inside when the top is in it's final position.
........................................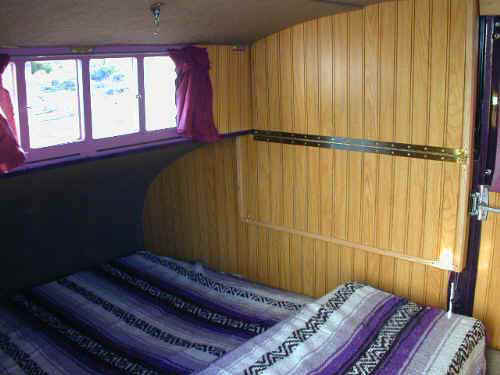 ..................`...
Here we see the inside finished sides folded up to cover the inside of the top side walls. They also help seal off the inside.
................................
The paneling that you see behind the sink has a couple 1 X 4's behind it. I put the back window/wall down and put that panel in behind the sink and another one like it in to the right of the front window.
Then I slide the paneling in to the left of the sink and another piece on the right side of the counter. These four pieces of paneling cover the walls surrounding the counter. I just carry them laying on the bed in back when the top is down.
Next I lower the top down and it sits on these supports up front and the window/wall in the back. The cables go slack.
It would be good if you went back to page 8c and studied how the inside looks with the top "up" and "down". I've slept in it in the down position and it is warmer that way if the temps are below 30 degrees. Since the finish sides in the back hinge down they take some of the interior room up when the top is down, so it would be hard to sleep two people with the top in the down position.
Well I hope this helps a little to explain things. If you aren't good at fabricating and figuring out problems as they arise I might recommend staying with a fixed top. I have been very happy with the pop-top and it was will worth the effort for me and has worked out great both going down the highway and while camped. I built this trailer from the ground up in about 6-8 weeks, while working my normal job. That didn't include the time to finish the inside and do the final painting on the outside.
It might look complicated to set up, but actually I can have it up and with the inside panels in place in about 1 minute.
..............
..............This is the last page for now