- Page Eight-B .................................... Page Nine
......................................... Teardrop Trailer Page 8-C
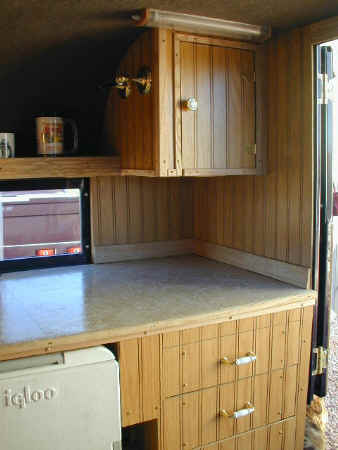
Kitchen Area --This is a view of the kitchen area at the front of the tear with the top in the up position.
To lower the top the panels on either side of the window and the panels on both sides of the counter slide out and are stored on the bed.
The counter is imitation marble tiles.
In the middle and to the rear of the counter is a window out the front of the trailer.
If you look at one of the earlier construction pictures you can see that the cabinets were framed with 1/2 inch square tubing and then covered with the paneling.
.
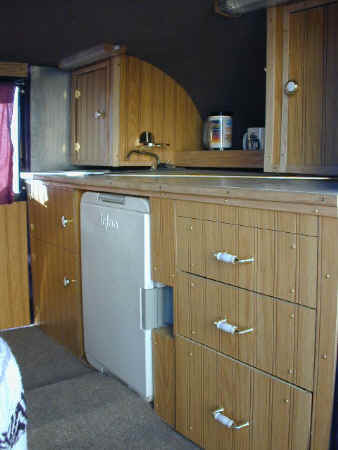
Below the counter I have three drawers on the right and two doors on the left.
The top door on the left gives access to a shelf under the sink and the bottom door gives access to the Port-a-Pottie.
In the center is the frig. It is electric, but I usually put ice in it. I cut off a small plastic waste paper basket about 2/3's of the way up and fill it with water and freeze it in the freezer and it will last 3 days in 90 deg. weather - about 15 lb. of ice this way. If I'm out longer than that I get ice and put it into the plastic container so the water doesn't run all over as it melts. I made a reinforced upper shelf in the frig for the ice as the cold air drops and it works better that way.
The three drawers on the right are for storage.
.
The sink on the left side of the counter has an electric faucet, which is hooked to a 12 gal. plastic tank behind the axle and under the bed in a compartment that also houses the 12 RV battery.
Under the sink and up against the front wall is a 10 gal. tank to hold the waste water from the sink.
You can also see the panels that slide out to lower the top. One is the 'L' shaped panel on the left wall to the left of the sink (paneling with the trim molding across the bottom).
Also the piece to its right that looks like the front wall and is in front of the sink and below the cabinet slides out also to lower the top. There are also the two corresponding pieces on the right side of the counter area.
.
.................
...
A view of the right counter area and cabinet.
You can also see the shelf that goes across the front above the counter and connects with both top cabinets.
.
.
.
.
.
.
.
.
...............
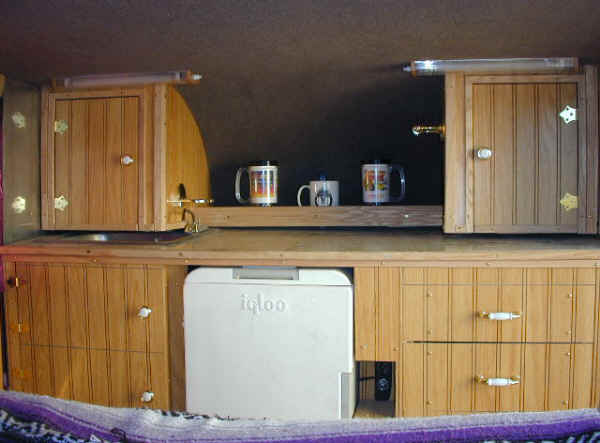
This view shows the inside with the top in the down position. You can see the reason the faucet for the sink is offset to the right as if it was in the middle it would end up flat. The two lights at the top are florescent and provide light for reading at night when you head is at this end on the bed.
I had the headliner installed in Phoenix at an upholstery shop before I finished the interior.
The cut out area to the right of the frig gives you a place to open the door and also you can see an electrical outlet that will accept three cigarette lighter type plugs. The top one is for the frig. There are two toggle switches in the top of this opening. One is a on/off for the frig. The other controls all the electricity to the trailer. When the switch is in the center position all appliances/lights are disconnected from power. In the forward position they are connected to the battery which is also connected to the tow vehicle for charging. In the back position on the toggle switch they are connected to the battery, but the battery is not connected to the tow vehicle. I also carry a charger that I can plug into one of the female sockets and charge the battery if I'm in a campground with electricity. While the battery is being charged the lights and/or the frig can be in operation.
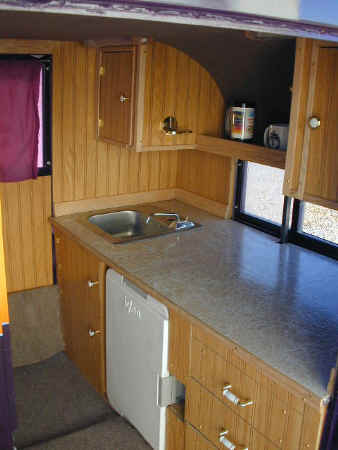
.............................A view in the right door with the top in the down position. You can still get inside the trailer with the top down and I could sleep in it with the top down, but since it only takes a minute to raise it I never have.
The sides and the top of the trailer are insulated with 1" building board type insulation inside the metal 1X1 square tubing framing, so the tear stays quite comfortable inside in hot or cold weather. With all the windows and two doors there is good ventilation when you need it.
.
.
.
.
.
............. 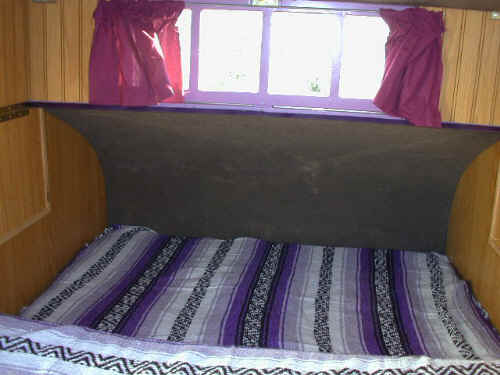
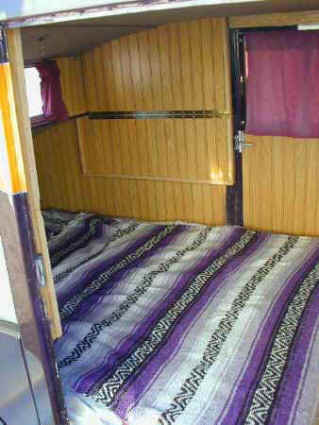
This is looking back from the kitchen area into the sleeping area with the top up.
The headliner wraps all the way down to the floor area on which the mattress sits.
It is wide enough in the back for a full size medium density foam mattress 54 inches wide and 4 inches thick. I cut about 18 inches off the length of the mattress. That piece is the cushion in the above picture (foreground) and in the picture below on the front of the bed. At night it becomes the front part of the bed (see pictures below).
.........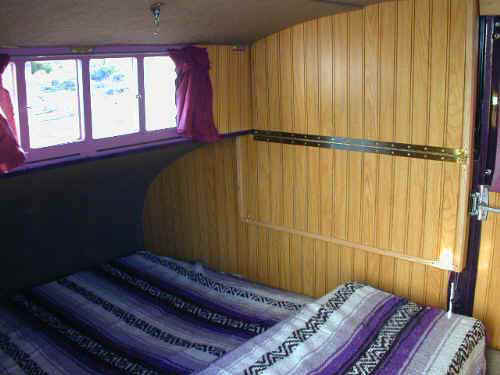
Here is a better picture of the cushion that was cut from the mattress and becomes the front of the bed at night.
This is also a better view of the sides that hinge down. The box type area under the piano hinges is where some of the side raising mechanism lowers into when the top is down. The upper back wall with the window in it hinges up to allow the top to descend. It still needs to be painted to match the rest of the trailer in dark purple.
.........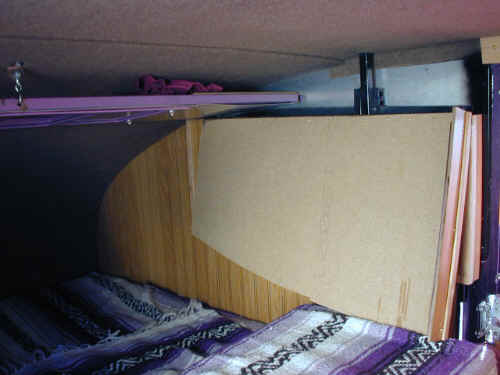
A good view of the sides folded in and the rear window folded up with the top in the down position.
The hook at the top left of the picture in the headliner holds the window/wall up against the ceiling when the top is down.
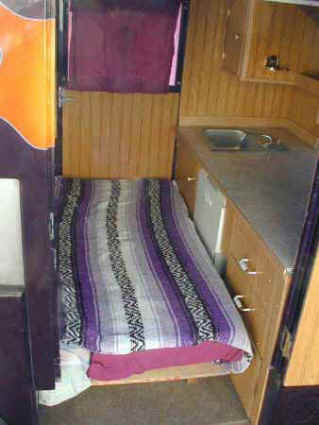
The two pictures below show the bed in the nighttime position. There is a section of plywood that slides forward and forms the front of the bed. The cushion in the above view is then moved into that area to complete the bed mattress.I also have fillers that close the areas below the doors at night. With the doors closed their bottoms are even with the bottom of the mattress.
.......... ......
.......................... That is all for now. If you have any questions e-mail me.
................................................................................ Next Page