.....
.................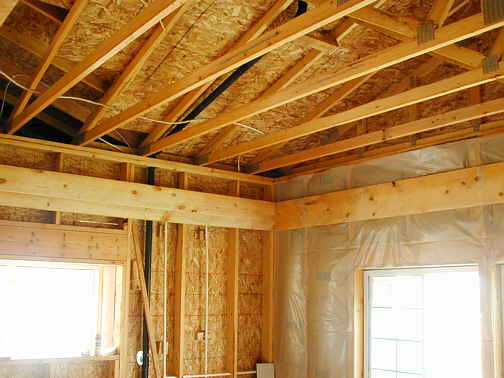
The shop has 10 foot ceilings and I wanted lower ceilings in the living quarters so I built a ceiling under the trusses the top of which is 9 feet. I could have dropped the trusses at this end of the building, but I didn't want the roof line to have two different levels and I also wanted a ceiling with exposed beams and rafters.
Down the center of the living quarters I have posts and beams and wanted the same look for the walls. I wanted the walls to look like there were beams embedded in them. To do this I placed 2X12's at the same height as the main beams around all the walls in the house. In the picture above you can see some of them in place.
.................
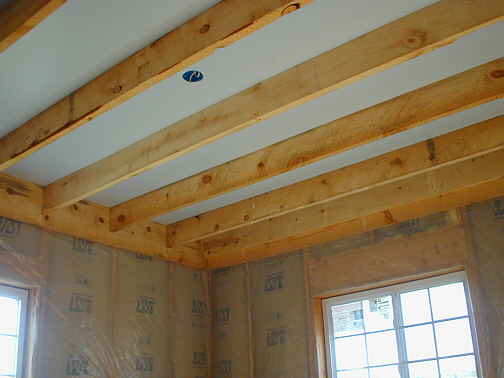
Next I started putting up ceiling joists that connected to the center beam on one end and the 2X12's on the walls on the other end. Notice how this ceiling will be about 1 foot under the roof trusses.
.................
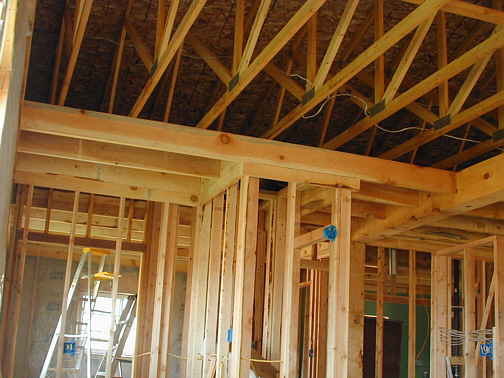
Another picture of the joists attached to one of the main beams that run down the center of the house.
.................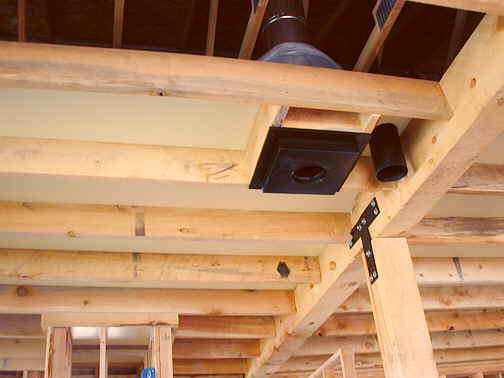
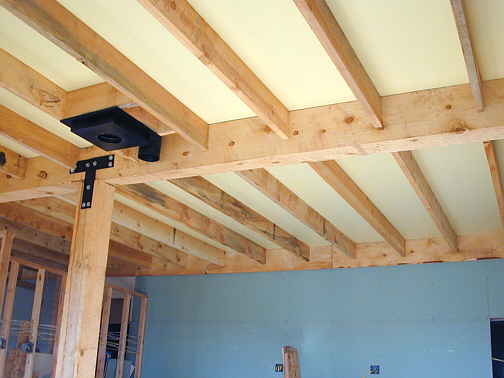
This is the ceiling jack for the wood burning stove framed in. The pipe to the right of it extends a couple feet into the attic and will be attached also to the stove. It is a fresh air intake for the stove so that the stove doesn't need heated room air for combustion. This stops a lot of cold air from having to enter the house for the stove.
.................
The triple wall Simpson Dura/Vent pipe for the stove in the attic. The plastic is the vapor barrier in the attic and will be pulled down flat and off the pipe enclosure as more sheetrock is laid down.
The round metal enclosure is around the first section of the pipe to keep insulation away from the hot pipe.
.................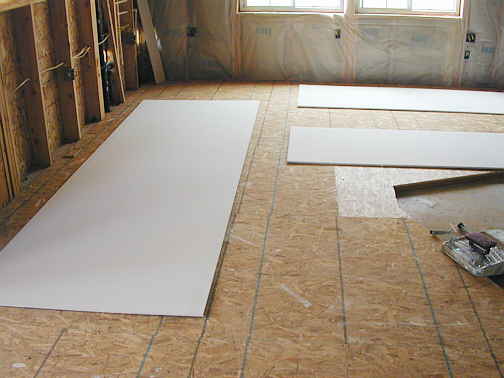
I would put up some ceiling joists and then Julie and I would lift pieces of 1/2 inch sheetrock up into the attic and slide them over the joists. I painted the sheetrock on the floor first with a primer coat (shown above) and then a coat of either blue (bed/bath ceilings) or yellow (rest of the ceiling). This way I didn't have to try and paint them once they were up. I also planned the living quarters to be a little over 24 feet wide total. With the joists being on 2 foot centers I could use 4 X 12 foot pieces of sheet rock and I didn't have to do any taping. The joists, main beam and 2X12's on the walls covered all of the seams.
.................
A picture of the finished ceiling in the kitchen/living room area.
.................
The bedroom ceiling.
.................
Another picture of the living room/kitchen ceiling with the kitchen/shop wall in the background.
Next the walls.
..........................................................................Next Page
.................