.....
.................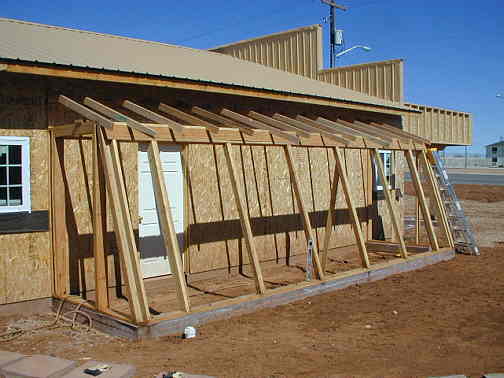
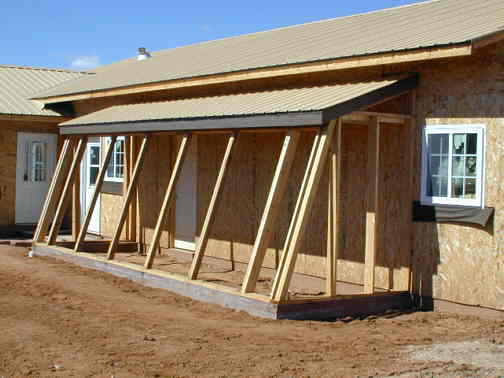
The ground finally dried up enough for me to get back to the greenhouse. The first thing to be done was the rafters. I ran a board across the wall on the shop at the right height for the rafters to set on and then made up a rafter to use as a pattern. I would trial fit it every 2 feet and then cut the real one for that location to the desired length using the pattern rafter to mark the angle on the top and the notch on the bottom where it sets on the front wall.
.................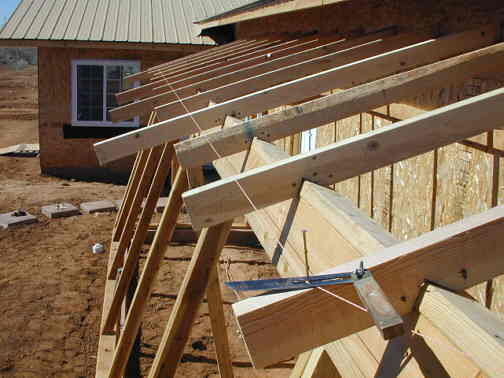
If you ever do this it is a good idea to leave the tails (left end of the rafter in the picture) long. That way you can mark both ends of the roof at the length you want to cut them off and then run a string from one end to the other and cut them all on the string line. I use the angle finder in the picture to mark them all on the string line before cutting. You would think you could just cut them all to begin with, but you would be surprised to see that the side of your building might go in or out by a half inch or so no matter how careful you are to keep things square.
.................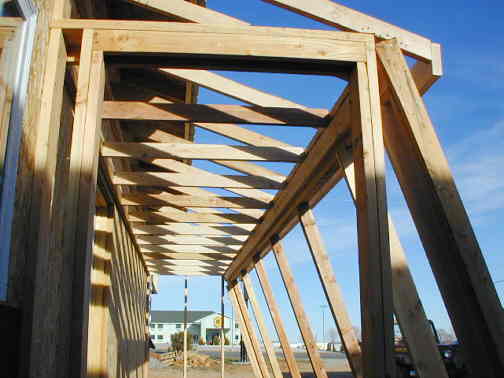
After the rafters I nailed in the ceiling joists. There again I made a pattern and used it to trial fit before cutting the final ceiling joist for that position.
.................
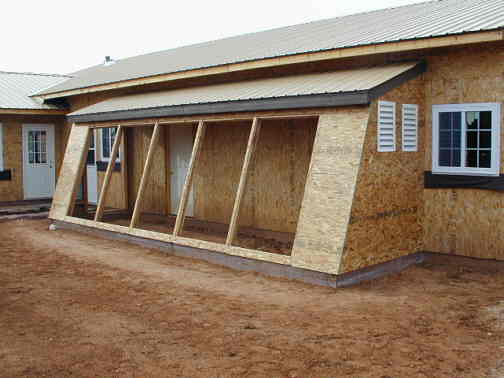
After I cut the rafters off and got the ceiling joists in I nailed a 2 X 6 facia board down the ends and across the front. Next I the nailed on 5/8 inch wafer board for the roof decking.
.................
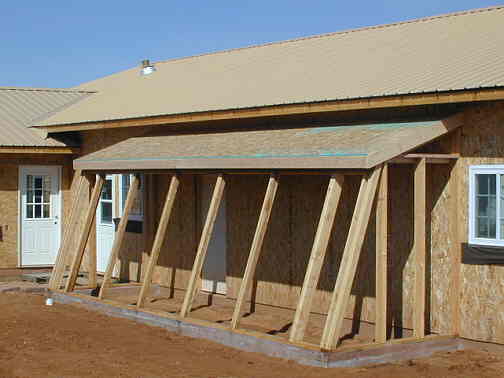
Before I put on the metal roofing I put on rolled felt (tar paper) over the decking. It is the black material showing to the left. Next I screwed on the metal roofing.
.................
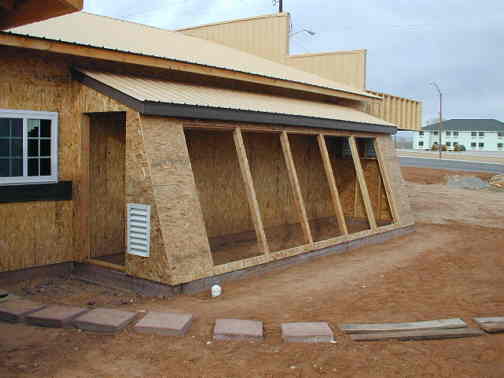
I used dark brown metal flashing under the roof and on the facia boards. This will protect the facia boards from weathering. I'll later do that on all of the house. This trim also helps to hold on and cover the soffit that will come later under the main house/shop roof eaves. The only exposed wood on the entire house will be the trim around the greenhouse windows. I want this house to be as maintenance free as possible.
.................
I cut a piece of plywood the same size as the finished windows and used it to put in wafer board strips around the window openings and between the windows. The wafer board in this area is 5/8 inch thick which is the same thickness as the window panes will be. So when the windows are in they will be flush with the sheathing and I can attach trim pieces to hold them in and then caulk everything.
I covered the end walls of the green house with 1/2 inch wafer board. On the east end I put in two high vents. These walls will be insulated and there will be insulated doors inside to close these vents during the winter.
.................
On the west end there is a door opening and one low vent. The prevailing winds are from this direction and I'm hoping that there will be enough cross ventilation during the summer so it doesn't get too hot in there. Also I'll make the door and it will be a split door so we can open the top half of it for more ventilation if needed.
..........................................................................Next Page
.................