.Our MacGregor Index Page.....Mac 26S Rigging Mods Index Page.........
....................... Previous Page...................................... Next Page If There Is One
=======================================================
.....................................--- Double Anchor Rollers Part II ---
=======================================================
Next came finishing off the main plate. We had added a roller furler to the boat and at the same time a Johnson Lever and other forestay fittings. The resulted in us moving the forestay and the top shrouds up the mast a ways from the stock location. I left the old forestay on the mast at its original location and wanted to have the option of possibly running it inside of the roller furler if needed. This would give us the option of having two head sails up or hoisting a storm jib on the inner stay. If we did this I want the inner stay to be rigged in such a way that it could quickly be attached or detached down at the bow. The rest of the time it would be bungeed to the mast out of the way.
..................
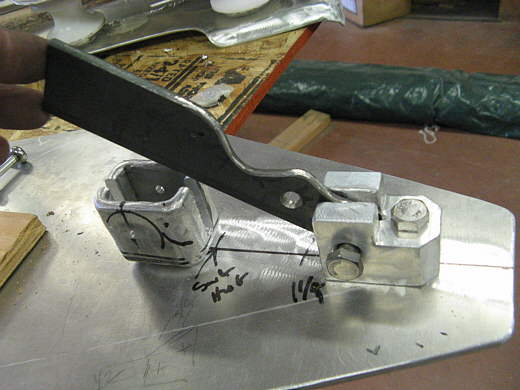
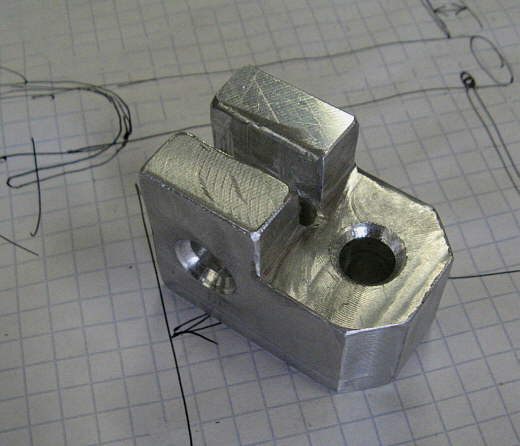
The above block was machined out as the first step and it was located at...
..................
... the front of the bow roller bottom plate. The piece of steel above will be how the inner forestay is attached. It will attach to the steel piece via the hole you can see above. With the front of the attach piece located next came a ....
..................
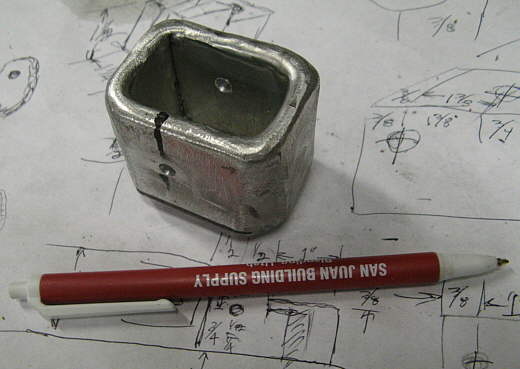
... piece out of aluminum for the rear. First some pieces were welded up to form a...
..................
... simple box and then a ....
..................
.... slot was made in the box for the steel piece to lower into. and next the box was ...
..................
.... further worked into the shape above. Later you will see how all of this works.
..................
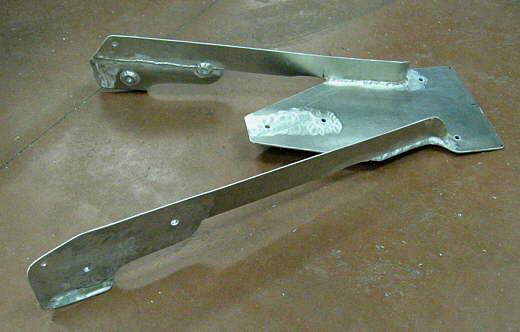
Next the outer arms were welded to the base and then the ...
..................
... inner arms were added and boxed in at the aft ends.
..................
... bails were made for the front ends of the arms next and then...
..................
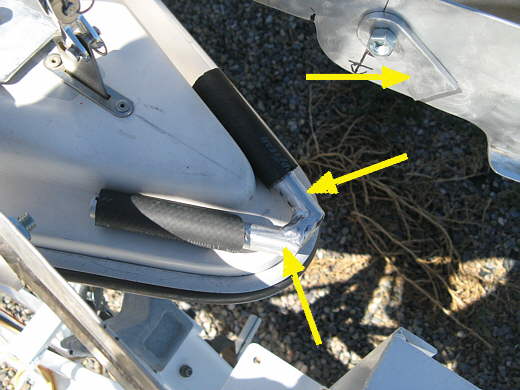
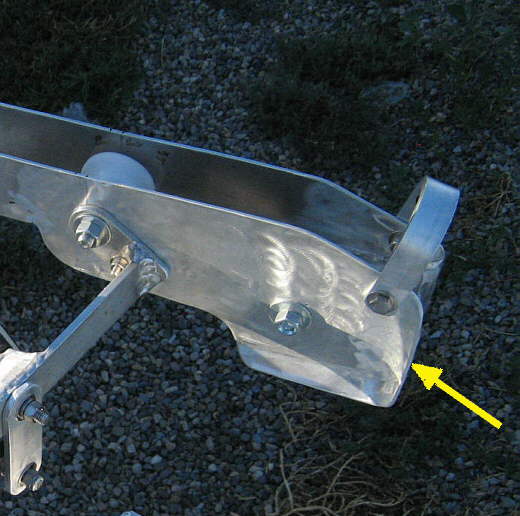
... a support for the arms started to take place at the bow of the boat, arrow, with first....
..................
... some side brackets, top arrow and also a center piece was welded up and covered with some rubber hose that lays on the bow, bottom tow arrows.
..................
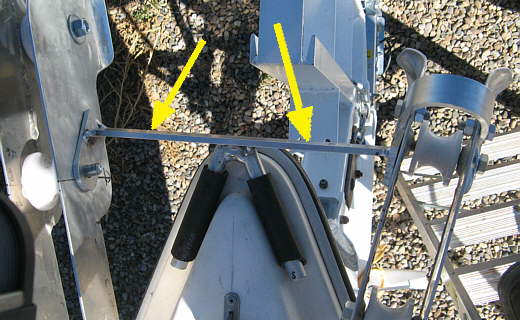
A cross piece was them added and welded to ....
..................
... the side tabs and the middle piece.
..................
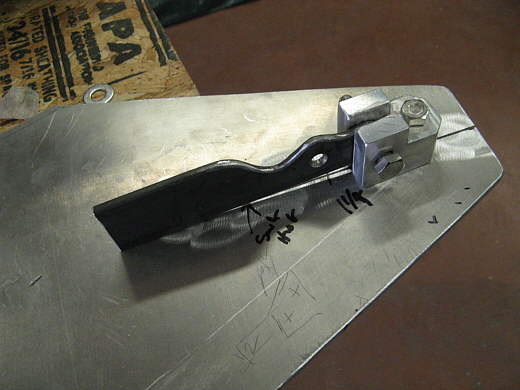
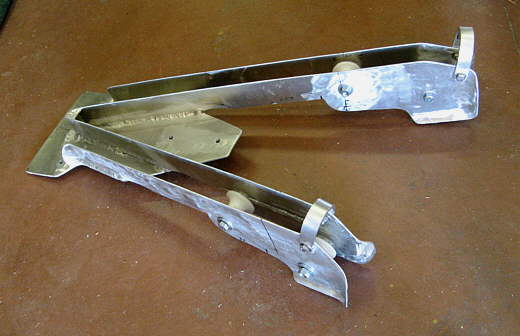
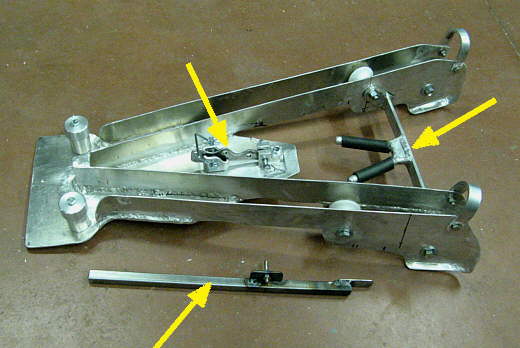
Above is almost the finished assembly. The bottom arrow points to a pry bar that can be used to attach the inner stay bracket.
..................
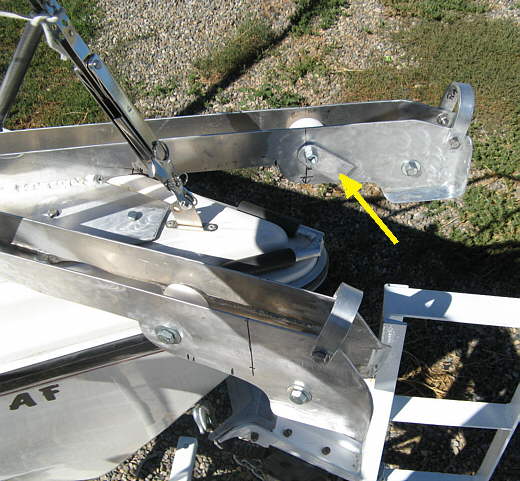
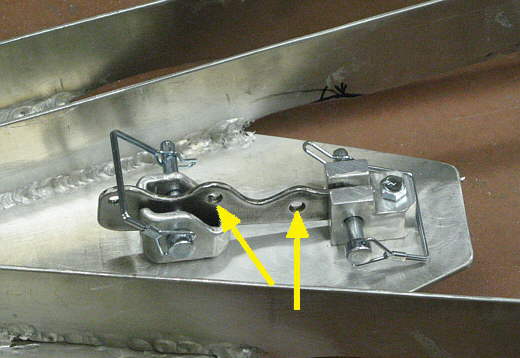
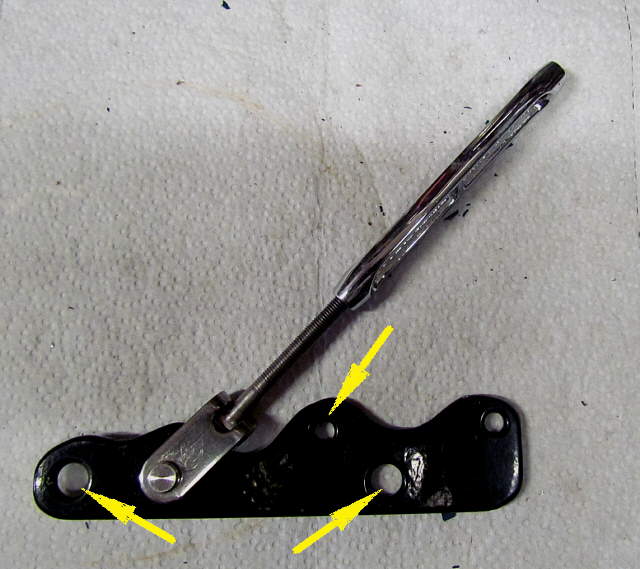
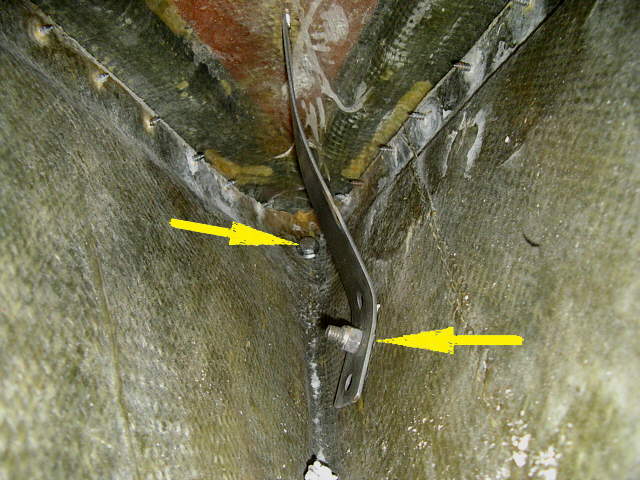
The inner forestay, original forestay, attaches to the steel piece at the front hole and the hank-on foresail attaches at the next hole back, left arrow. The steel pieces is left on inner stay while it is stored at the mast. To mount the inner stay you first put the steel mount in the forward block an pin it. At this point there isn't a lot of tension on the inner stay. Then using the pry bar if you have the turnbuckle set for more tension you pivot the steel mount down into the rear block and pin it. Now in just seconds the inner stay is rigged. To release it, just pull the two pins.
..................
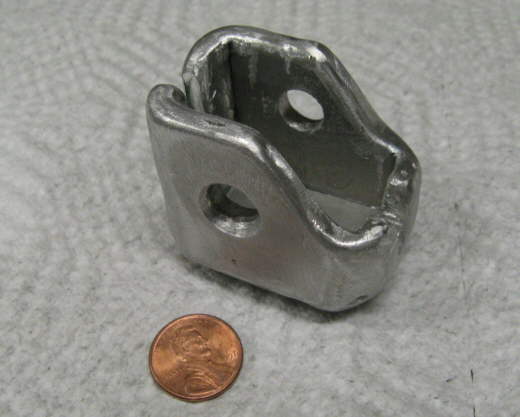
Here the steel bracket has been powder coated to help with corrosion. The bottom two arrows point to where it is pinned to the bow roller plate with the quick pins. The top arrow points to where the foresail tack attaches. The turnbuckle is the one that was on the original forestay which is also still being used.
..................
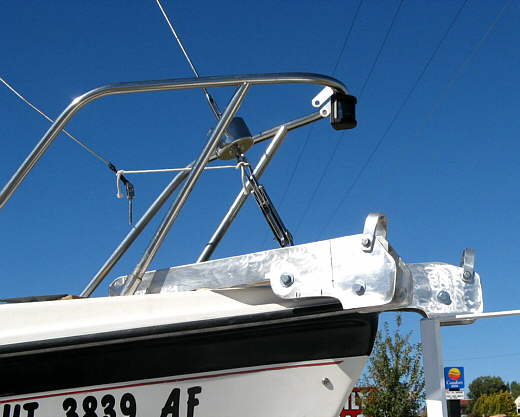
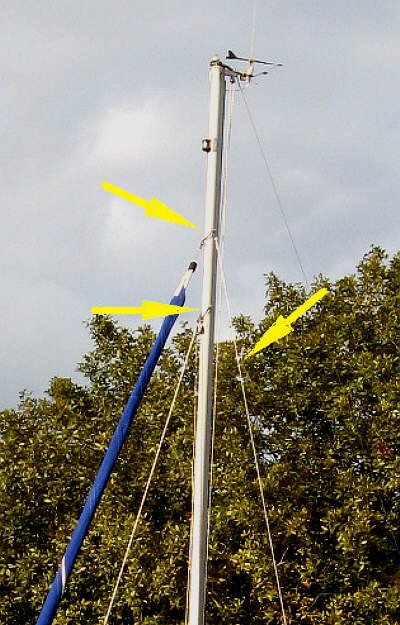
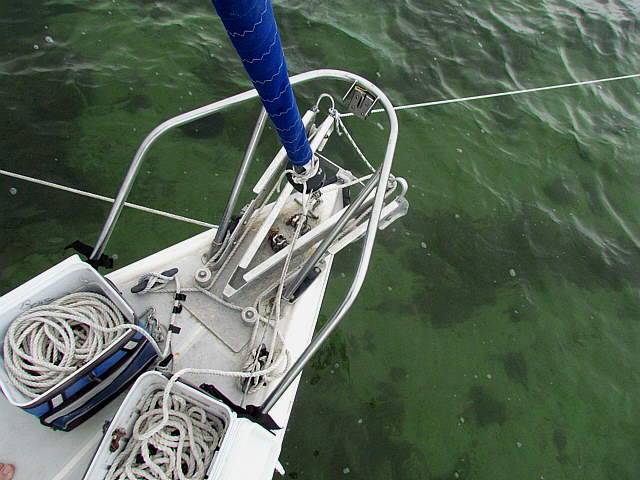
I thought I had a picture with the furler up and the inner forestay attached, but can't find it. The above picture is when I was tensioning the new standing rigging I'd made and was taken after we arrived in Florida in the fall of 2010. The bottom right arrow points to the gin pole used to raise the mast. The arrow near the top of the mast points to where the original forestay was and still is attached. This is the original forestay attach point. The forestay is hard to make out in the picture, but it is laying against the mast where it is bungeed in place. It is also located there on the water unless we want use it and pin it forward just behind the furler where the bottom left arrow is pointing.
The jib halyard is attached to the gin pole above. If the inner stay is pinned forward then the jib halyard is used to hoist the foresail that would be hanked-on to the inner forestay.
..................
In this picture you can see that the new furler attach point, top left arrow, has been raised up the mast above the original forestay, bottom left arrow. The old hounds were left on along with the old forestay, bottom left arrow. New hounds were added further up the mast for the new furler. Also I made new longer upper shrouds and they were attached to the mast at the new upper location for proper mast support.
..................
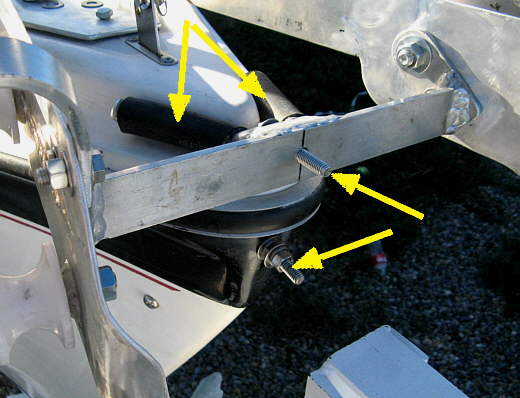
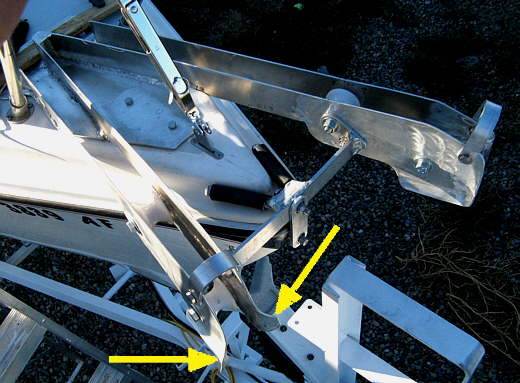
Now back to the double bow roller install. To further locate the front of the bow roller a hole was drilled in the bow of the boat and a SS bolt inserted, bottom arrow. Another hole was put into the side to side brace above.
..................
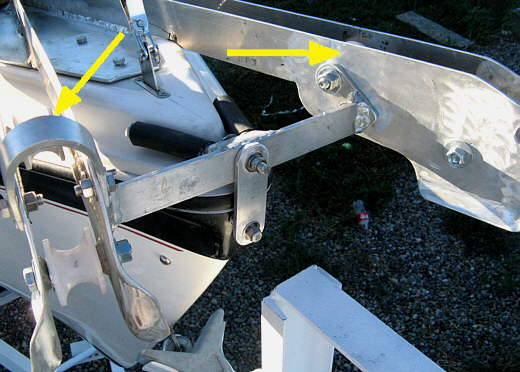
A short bracket is then used to tie the front of the brace to the bow of the boat. This ends up being very strong and is ...
..................
.... what you need if you are on an anchorage with waves and a lot of pressure on the roller assembly due to the rode. If things are really bad I'd move the rode to one of the side chocks that we will mount on the next page and cleat it off to a side cleat. The arrow points to the rounded edges on the front of the arms.
..................
I can report after a lot of use with these there was no wear ever on the rodes. One thing I would of change would of been going to rollers that were a little wider. I've had to make sure I don't use shackles on the chain/anchor attach point that are too wide. Some of the wide ones will want to hang up.
This has been the best anchoring mod on the boat. I can't believe how much easier it is now to deploy and retrieve the anchors. It is also much quicker and that is a big safety factor if you need to get an anchor down 'right now'.
..................
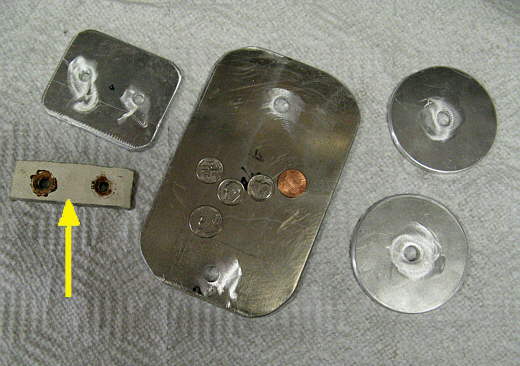
Above are the backing plates for the anchor roller platform and to replace the fiberglass one the factory installed behind the center cleat, arrow, at the front of the boat, which is also the cleat we use to raise the mast.
..................
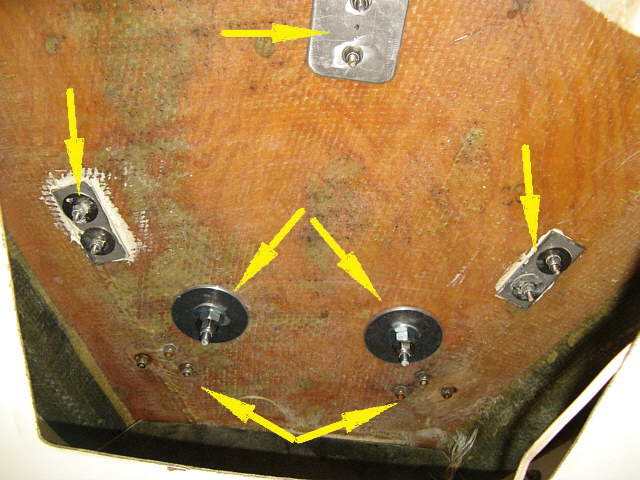
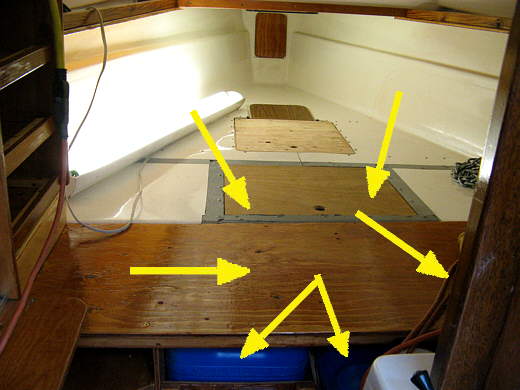
The bottom two arrows point to the pulpit mounts. I might make a backing plate for them at some point. The center arrows point to the round backing pieces for the the aft end of the bow roller. The two side arrows point to backing plates for the side cleats on the bow. The top arrow is the plate behind the center cleat. You get to all of these on an S by removing the cover and the foam over the head of the V-Berth.
..................
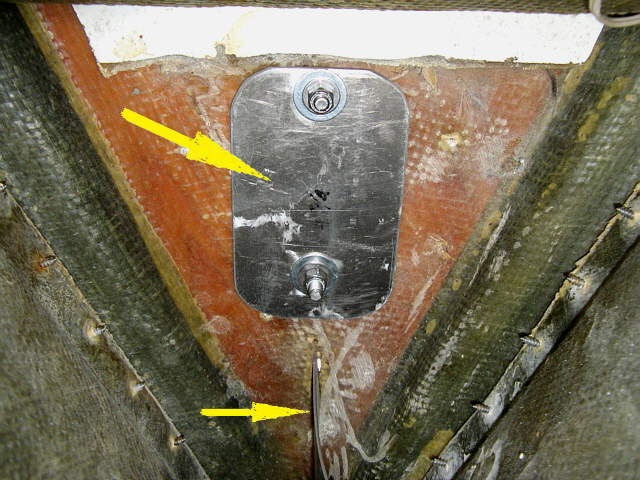
Above the top arrow points to the backing plate for the forward end of the bow roller. The bottom arrow points to the forestay mount that...
..................
... is also shown above, right arrow. It is held on by the bolt/screw that you can see outside the boat on the starboard side at the bow. The left arrow points to a bolt with washer I put in on the very bow of the boat to help support the bow anchor roller assembly there, seen about 4 picture above this one.
..................
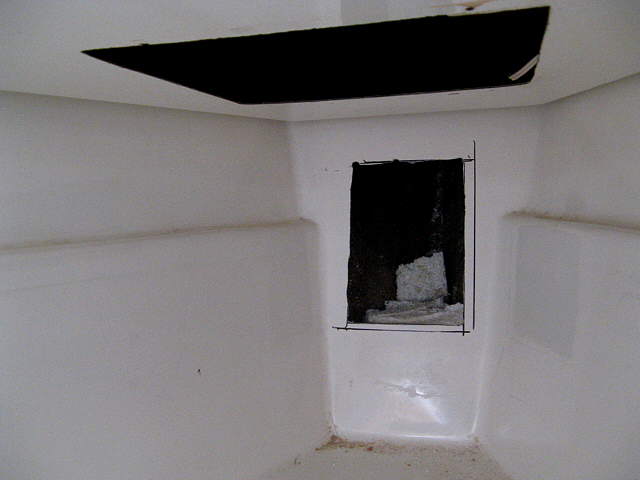
At the top of this picture you can see the access for the foam above the v-berth and where you get to the majority of the deck hardware. To get to the bow area you need to put a hole in the inner liner. Some people have managed to put in 4 to 6 inch round deck plates there to get to the bow strap bolt. I needed a bigger hole to reach further in and get my upper arm in and also to be able to see up there, so cut a larger rectangular hole and then covered it....
.. with a piece of stained plywood when I was done. It was still a real job getting the nuts/washers and backing plates on up in there for the bow roller mounts. I couldn't of done it with a 4 or 6 inch diameter hole.
..................
Above you can see 1 inch square tubing that was added to the sides of the bow roller to reinforce them. We hit and bent the bow roller on a piling with a direct hit, (my fault, Sum) on our Fall 2010 trip to Florida. I measure the arms and cut the square tubing at home and took it back to the boat in Florida for the spring 2011 trip and bolted the tubing to the sides for that trip. They are a lot stronger now, but maybe it was better that they bent on the piling hit and absorbed some of the shock. Who knows?
=======================================================
.................................................................................. Next Page If There Is One