..................
.......................................--- V-Berth Hatch Opener ---
Follow along as I make a crude, but effective opener for the V-berth hatch that is also very easy and cheap to make.
..............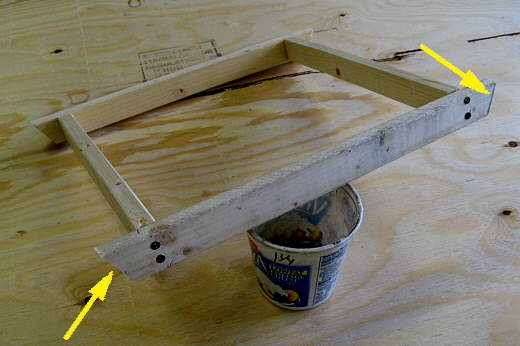
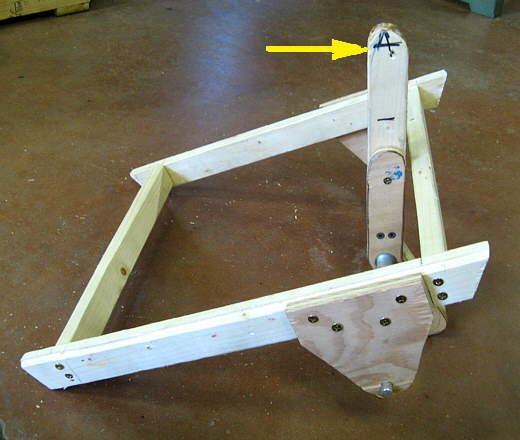
The only halfway critical pieces of this build are the two pieces that need to fit down into the tapered opening for the hatch. Make the one the arrows are pointing to and the one on the other side long enough and with taper cuts (arrows), so that they fit down into the opening below the latch, but don't fall on through. Start long and cut shorter and work on the angles as you shorten them. One side of the opening on the boat can be different than the other, so do them one at a time.
..............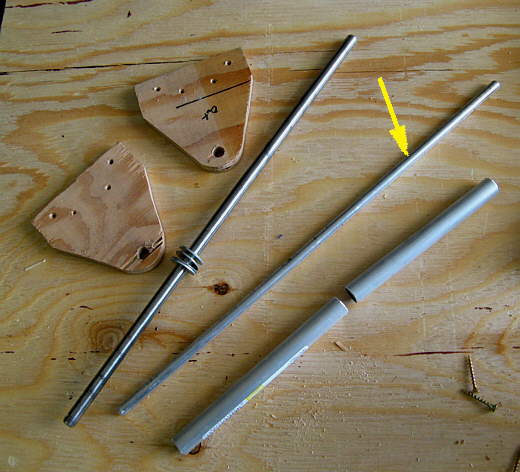
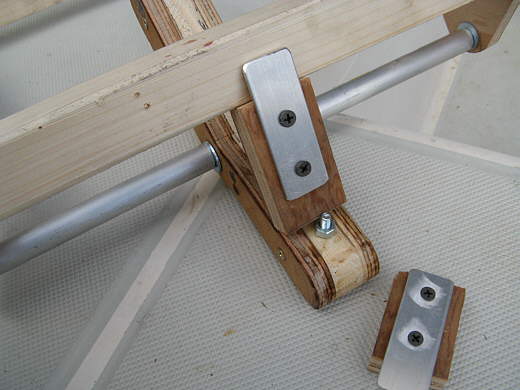
Next two plywood brackets were cut and drilled for the steel rod with the washers on it. I tried the aluminum one (arrow), but felt it bent to much. The two aluminum tubes act as spacers/positioners for the......
..............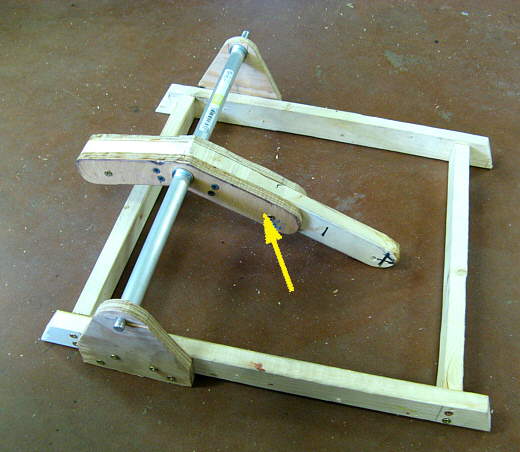
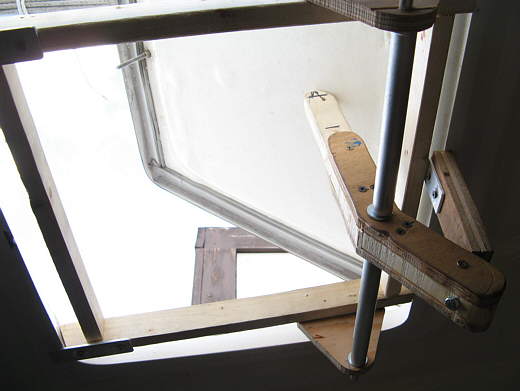
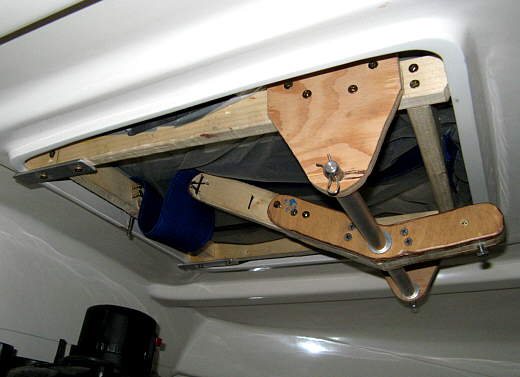
.......... lever arm in the window that pushes up on the hatch (right side of it) when you pull down on the other side. In this picture the whole assembly is upside down.
..............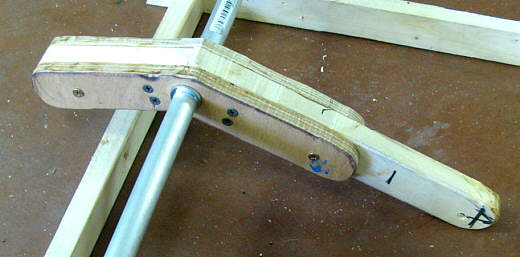
The lever arm is just two pieces of 1 X 2 cut at an angle and then joined together at the cut with some pieces of plywood on both sides that sandwich the 1 X 2's between them. Then drill the hole for the 1/2 inch steel rod. You can see how the two pieces of aluminum tubing along with the washers center the arm in the frame.
..............
Here the lever arm is in the down position (hatch closed) and.....
..............
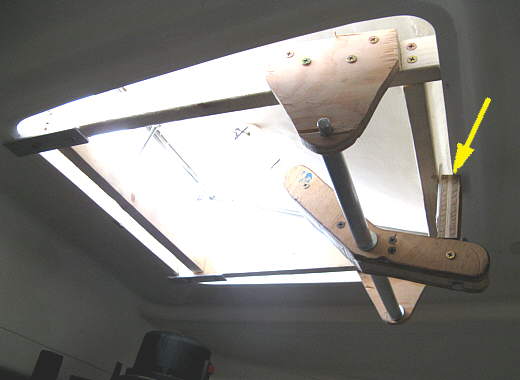
...... here it is in the up position (hatch open) and in a minute you will see how the lever arm is held in position, but first...............
..............
.......... theses two tabs made from aluminum flat stock were added to the front of the frame work. Note they extend past the angled cuts on the ends of the 1 X 2's.
..............
The purpose of the tabs (arrow) is when you pull down on the lever arm (right side) and it pushes the hatch open it makes the front of the framework rotate upward out of the opening and the tabs prevent that.
..............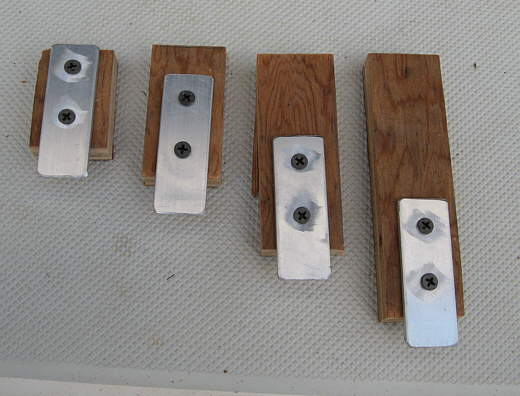
To hold the hatch open 4 'hi-tech' blocks with tabs were made in different lengths.
..............
A bolt was put in the lever arm and the block wedges against that and the cabin top (not against the frame as in the picture).
..............
Here you can see how the block wedges between the lever arm and cabin top (arrow). You just pull the arm down, the hatch opens and you insert the block. This is one of the short ones and the shortest just holds the hatch barely open for those cold nights when you don't want to loose too much heat, but want some fresh air.
..............
The longest block holds the hatch way open.
..............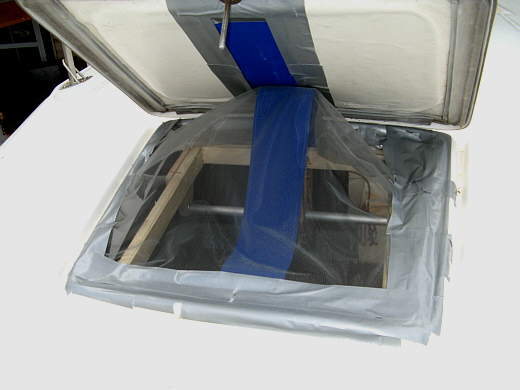
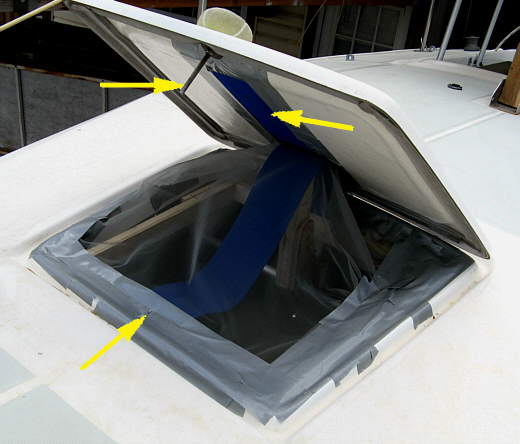
To keep the bugs out I duct taped some mosquito netting on loosely. We were about ready to leave on our Idaho/Canada trip and I had to do something in a hurry and this was the result. Not pretty, but effective and it is still on after 45 nights or so on the water and working fine.
..............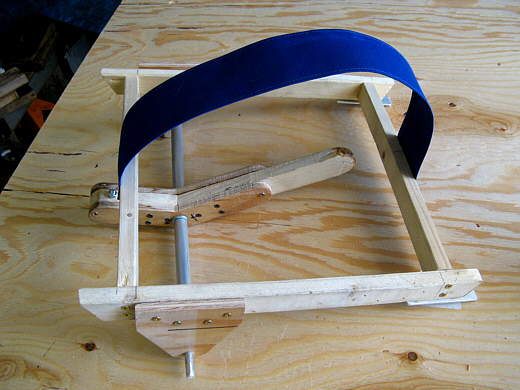
To protect the netting from the rubbing of the lever arm a piece of Sunbrella we had was attached to the frame and Ruth even hemmed the edges.
..............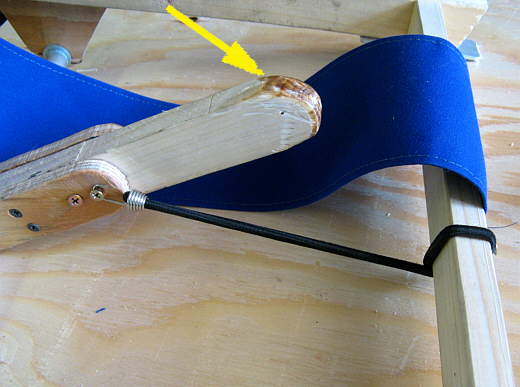
To make the lever slide easier on the Sunbrella I pulled the Sunbrella over to the side for a moment and took my metal grinder to the end of the lever and ground and burned it smooth.
..............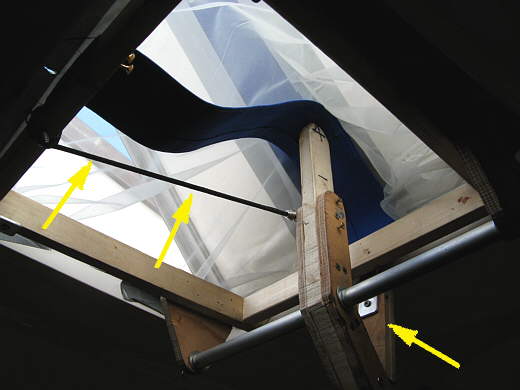
To keep the lever tight if the wind took the hatch back a little I added the small bungee (two left arrows). They kept a positive pull on the lever arm at all times and that keeps the lever tight against the height block (right arrow) so that it doesn't fall down, which would then let the hatch close.
..............
The right arrow points to another piece of Sunbrella that was duct taped to the under side of the hatch so to further protects the netting as the lever slides back and forth over it when the hatch is opened or closed. This has worked fine and the netting has shown no signs of wear at this point.
The top left arrow points to the stock bolt that holds the hatch closed. I just punched a hole in the duct tape (bottom left arrow) for the bolt to go through and it clears the frame's front crossmember.
..............
The whole assembly just sits in the opening with no fasteners to the cabin top and has worked just fine that way. It comes out easily at any point also.
This simple opener has worked very well for us and later I'll stain it and put a clear finish over that and we will just keep using it. One note is that the lever along with the brackets and cross bar that it pivots on does stick down into the cabin about 4 inches. We have both run into it with our heads, but now know that it is there. Just be forewarned if you make one of these. Other than that it has been a great mod and is easy to open from the inside and keeps the bugs out and lets fresh air in and you can make it in a few hours for a couple bucks.