..................
.......................--- Paul Brinkley's Lazarette Mods ---
.......................................--- Outside Fill & Vented Gas Tank ---
.....................--- Changes to Lazarette Plumbing ---
...................Below you will find the Mods in Paul's words, Sum
..............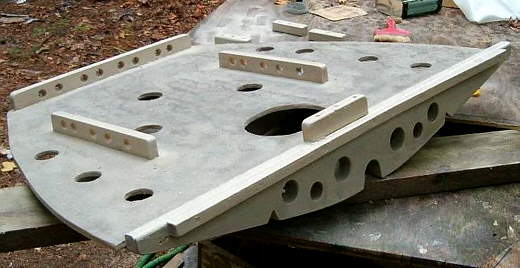
I started by putting in a raised deck in the bottom of the lazarette to provide a level surface to mount and sit things on. It could have been wider, but the deck would have to be higher. What I did was a compromise. The deck is treated ½” plywood over treated 1x6 at the forward end and a 1x4 in the center. The stringers, like the deck itself, have holes for air/water circulation. Any water that gets in will run to the forward (deepest) end, where I made provision for a bilge pump under the gas tank. The 1x2s on top of the deck stiffen the aft end (no stringer under there) and also serve to locate and hold the gas tank. I use a leftover piece of tie down webbing to strap the tank down. The cleats are screwed into 1x2 blocks under the deck. After assembly (and many trial fits), the whole works was given a layer of glass on top and bottom, with all surfaces and edges sealed with resin. Finally, I spray painted the whole thing gray. I used Tuff Stuff urethane foam to stick it in place. It can be removed, but not easily.
..............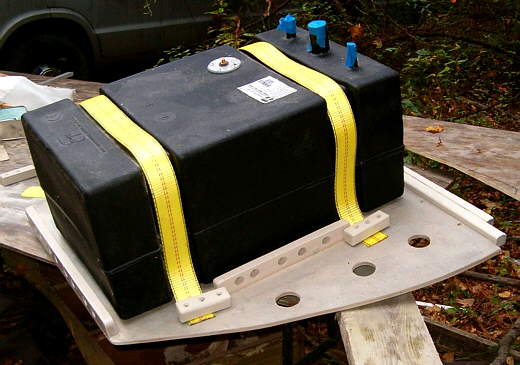
The gas tank is a Tempo 18 gallon # 5080024 bought from Trailer Parts. The deck fill is a Perko Gas Fill and Tank Vent # 1319DPGBLK (West Marine # 407744) mounted in the sidewall of the motor well.
..............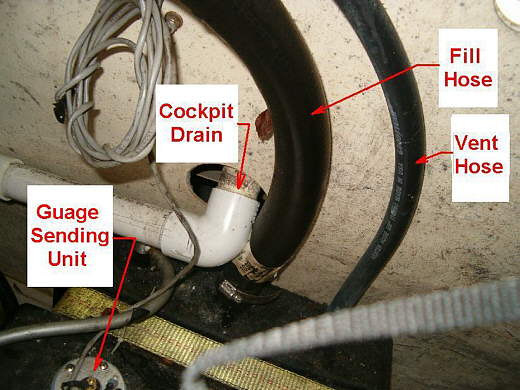
The tank is connected to the fill with a piece of 1-1/2” x 3’ gasoline hose I got from a NAPA store for about $40- had to cut off a little. The tank vent hose is a 5/8” x about 3’ gas line connected to the vent fitting on the Perko unit. The view above shows the 2 hoses coming from the forward end of the tank up the bulkhead past the cockpit drain to........................the deck fill (out of the picture).
..............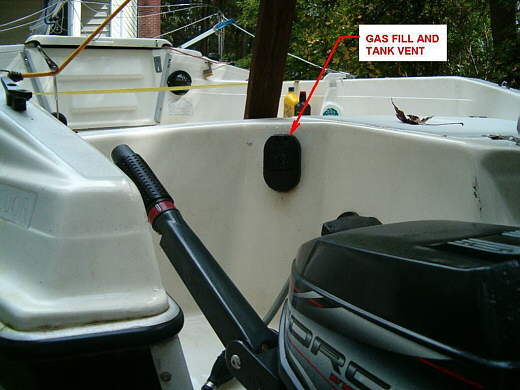
Gas Fill and Tank Vent located on..........
..............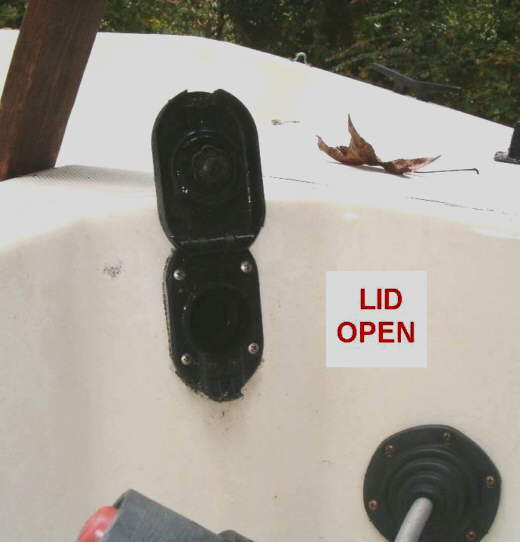
........ the side of the outboard well.
..............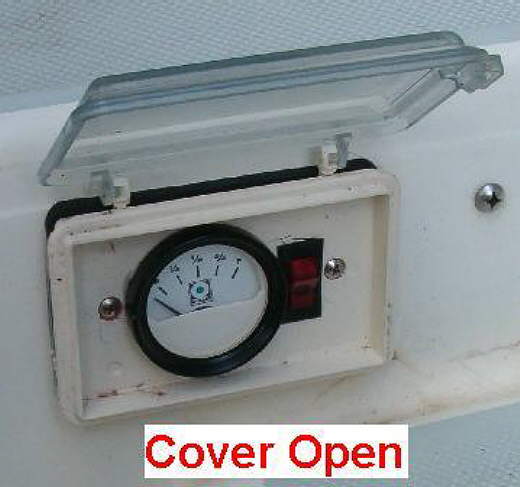
The gauge and switch are mounted as shown in a sealed electrical box ........
..............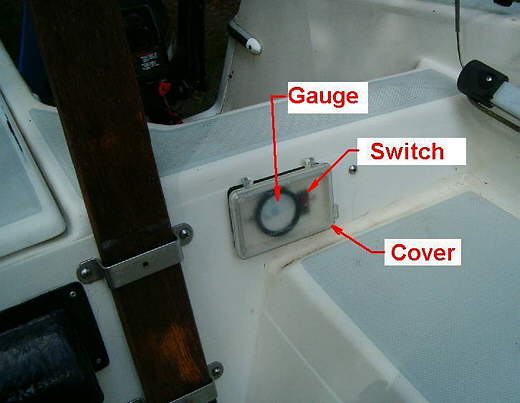
.........with a weather-resistant cover, and wired to the sending unit that came with the tank.
..............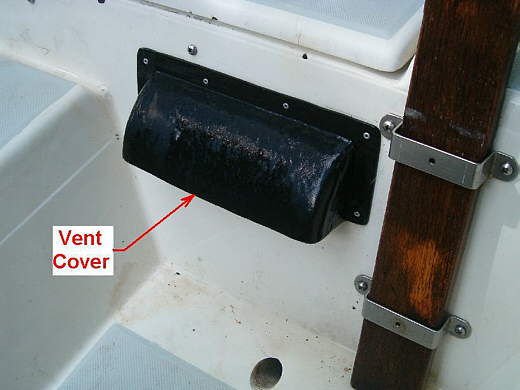
Natural ventilation is accomplished by providing an intake vent and an exhaust vent. The intake is in the bulkhead at the aft end of the cockpit. Fresh air enters the lazarette through three 2” holes through the bulkhead.
..............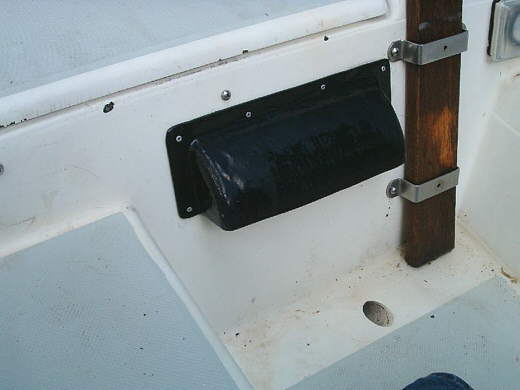
The holes are protected by a cover which keeps rain out and acts as an air scoop.
..............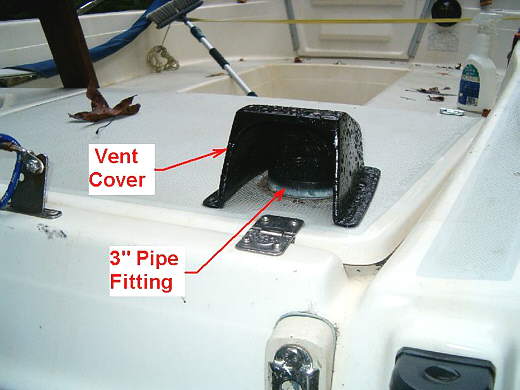
The exhaust is a 3” diameter hole in the aft starboard corner of the lazarette hatch.
..............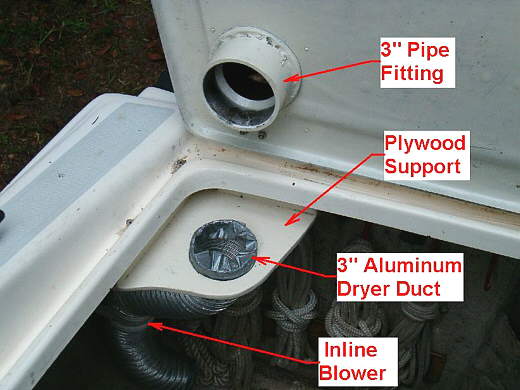
A 3” diameter plastic pipe fitting is inserted through the hole and screwed in place to provide a raised lip around the top of the hole, and to provide a fitting on the bottom of the hatch to mate with the 3” dryer vent hose inside the lazarette. On the top of the hatch, the hole and pipe fitting are covered with a vent cover to exclude rain. The dryer vent hose extends to within 6” of the deck, and...........
..............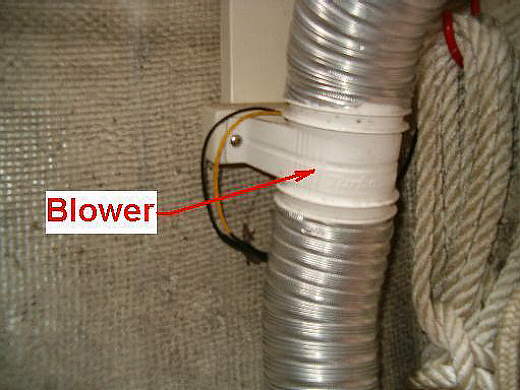
................ an Attwood Turbo 3000 in-line bilge blower is mounted about halfway down the hose. The blower is wired to the cabin switch panel
..............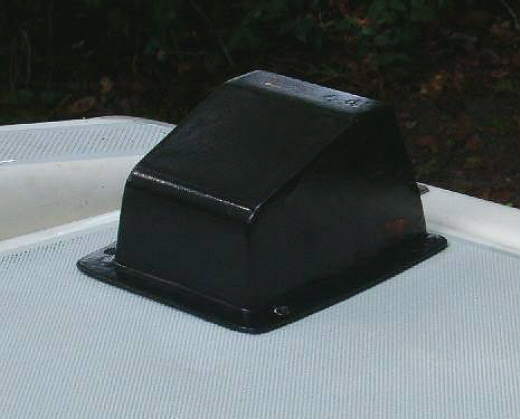
The covers for both vents are homemade. For the intake vent cover, I used an adjustable clear plastic residential floor vent deflector, glued the parts together for the size I wanted, then covered the whole thing with several layers of glass and resin. For the exhaust vent cover, I used the clear plastic bubble pack cover from a bilge pump package, and covered it with several layers of glass and resin. After trimming and sanding, they were spray painted black and riveted in place. If you want to try making covers like these, you don't necessarily have to use the shapes I did. Anything that approximates the right size and shape, and that is stiff enough to hold a couple of thickness of glass and resin until it hardens, should do. I used a couple of the Fiberglas repair kits (quart of resin, tube of hardener, piece of glass cloth) plus some extra glass cloth, all from Lowe’s, to do the deck and the vent covers.
..............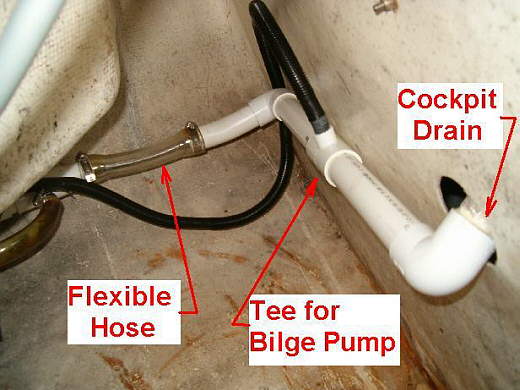
When I bought the boat, the Cockpit and Motor Well Drains hung way down in the way of storage and trapping large amounts of water below the level of the through hull. Kinks in some of the hose had nearly closed it in a couple of places. I decided to replace the old plumbing with all new stuff, and keep it out of the way. I used some PVC pipe and fittings to carry the cockpit drain along the bulkhead to the hull and turn aft toward the through hull. This was all cemented together and the assembly fixed to the bulkhead with Tuff Stuff urethane foam.
..............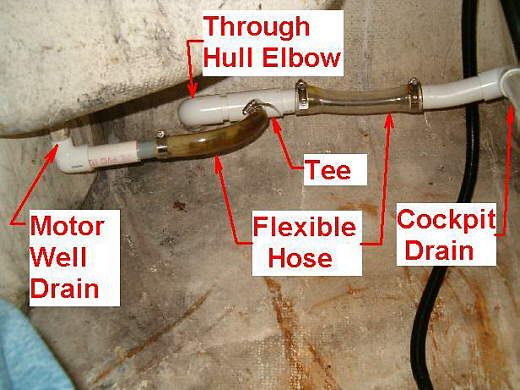
Similarly I came from the motor well drain toward the through hull with PVC pipe. A PVC elbow and tee cemented to the through hull provided for flexible plastic hose to connect both drains to the through hull. The pieces of flexible hose absorb any relative motion between the bulkhead, the motor well, and the hull. I had also put a tee in the line from the cockpit so a bilge pump could be connected (the tee points up to create a loop to prevent flow from the cockpit to the bilge pump).
..............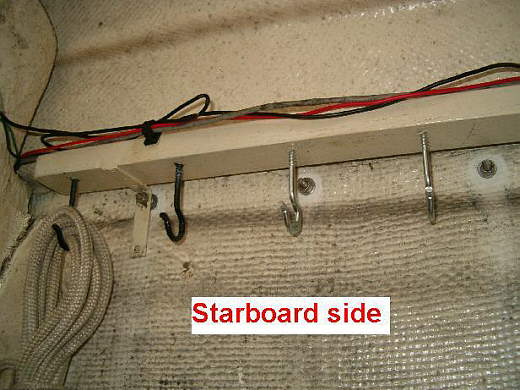
To organize my Line Storage a little, I made up 2 sets of hangers for dock lines and anything similar. Basically, these are lengths of 1x2 wood, each with two angle brackets from Lowe’s on each spaced so the brackets will fit over the ¼” bolts in the hull joint.
..............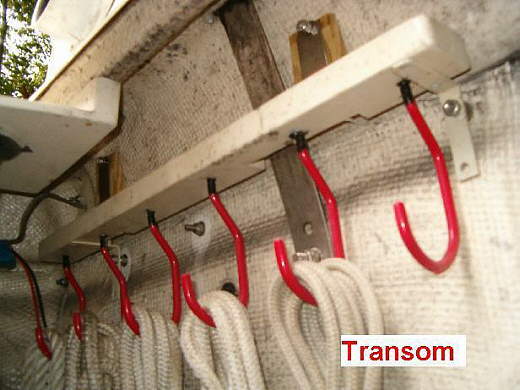
Each 1x2 then has several hooks (Lowe’s again) screwed into the bottom for hanging coiled lines for easy access.
..............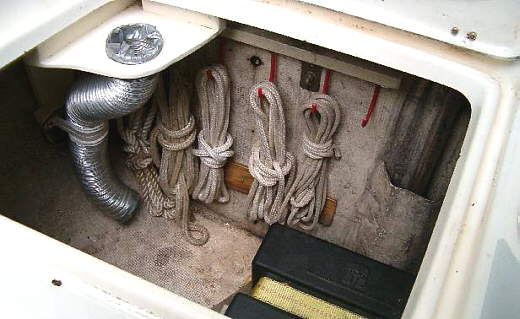
I put one on the transom and one on the starboard side.
...../..--- Paul, great work and I'll be duplicating a lot of it, Sum. ---