.................Previous Page........................................ Next Page If There Is One
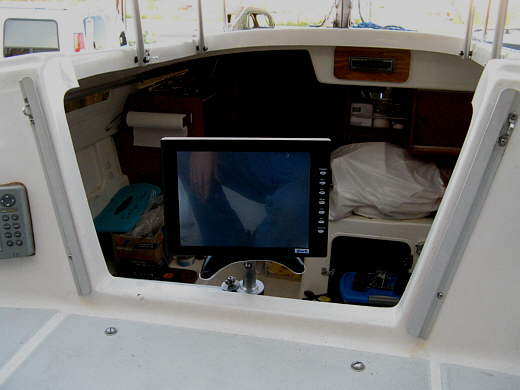
--- Monitor High/Low --Cabin/Cockpit Mount ---
I'll add a few comments now and more later...........
.........

T
.........
T
.........
Main mount.
.........
T
.........
One end of arm.
.........
The rubber washer will be a friction clutch to hold the arm in position.
.........
T
.........
T
.........
T
.........
The washer was welded to the flat on the plug that was welded into the arm.
.........
T
.........
The arm with the beginning of the high/low mount that will go on the end of the arm for the monitor.
.........
T
.........
Monitor support base.
.........
T
.........
T
.........
T
.........
The base and vertical bearing tube slides down over the vertical bar and is indexed to it with the slot and pin at the top. The base and the main vertical tube then rotate together around the end of the arm (arrow).
.........
The base that supports the monitor just slides over the top of the vertical tube and rests on a bolt and is then pinned in place as mentioned above.
.........
The components that make up the mount.
.........
The vertical tube rotates around the larger tube welded to the bottom of the end of the arm. The rubber washer (right arrow) provides friction and holds the monitor from rotating once you have it where you want it by turning the wing nut that pushes the rotating part down against the washer. It just takes a small turn on the wing nut to lock the monitor in place.
.........
The high mount is for viewing the monitor out in the cockpit. The monitor can also easily be moved to the bottom.
.........
Pull the pin (arrow) and light the monitor mount off the top and...
.........
Slide it up on the bottom and it will index against the top pin (top arrow) that is not removed. Then use the same pin you used on the top and put it in under the mount (bottom arrow) and it holds the mount up against the indexing top pin and slot.
.........
Moving from the top to bottom position takes just a couple seconds to pull the pin and move the mount and re-pin it.
.........
The arm itself is held at different locations by the nut and ....
.........
The friction of the rubber washer (top arrow). You can just finger tighten this nut to hold the arm in any position. I'll try and find or make a wing nut later. To remove the mount for say traveling on the trailer just unscrew the nut and drop the arm and put it on the bed or take a wrench and tighten the nut a little more than normal. Also the monitor easily removes from the arm and will sit on just its base.
.........
If I'm using the computer on the port seat the monitor can be swung around to view from there and it is at head level.
.........
It can also be swung around to any place desired if we want to sit on one side or the other of the cabin to watch movies. The mount that comes with the monitor and is still used allows it to be tilted and raised or lowered to some degree.
.........
Her the monitor is on the high part of the mount for viewing....
.........
...from the .....
.........
..... cockpit if it is being used as a chart plotter or we want to sit out there in the evening and watch a movie.
.........
It can be swung around for storage with the monitor facing the bulkhead or...
.........
...facing out. It is still very easy to go past it and the computer into the aft berth which we use for storage mainly since we like sleeping in the enlarged V-Berth.