.........................Endeavour Index Page............Plumbing Mods Index Page
..................................Previous
Page..............................
Next
Page If There Is One
=========================================
........................................--- Propane Supply Upgrade ---
=========================================
When we surveyed the boat before purchase I asked to see if the stove worked. The owner thought that the tanks might be empty (boat came with a tank in compartments on each side of the cockpit coaming).
We turned on the tank that is attached to the stove supply lines and the stove did light and that was the end of that. On our trip where we moved the boat to the storage yard we didn't try using the stove as we didn't trust the lines and so forth. We used the portable propane stove from the Mac.
When we returned to the boat I took a hard look at the lines and regulator and felt they were too old looking to trust so we decided to put in new ones. I thought the tanks might not be good either, but found out that they were the same make/model as new aluminum ones so took them to a propane dealer and had them checked. They tested them and put new test dates on them and told me they were both full so we only paid for the check that wasn't much.
..............
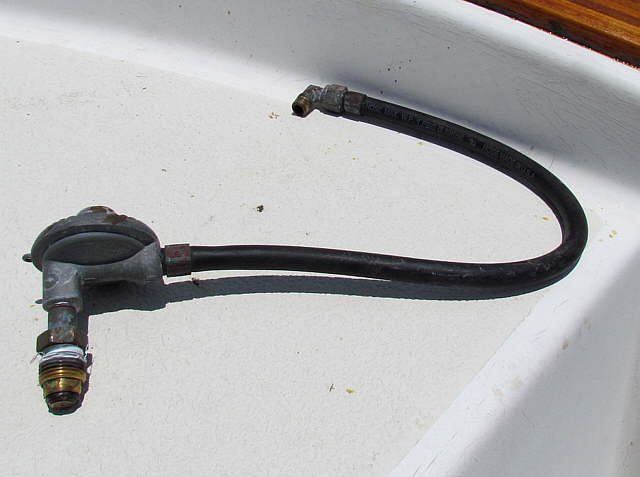
Above is the old regulator and the line from it that went directly to the solenoid that turns the gas on/off via an electrical switch down in the galley. This was all replace with...
..............
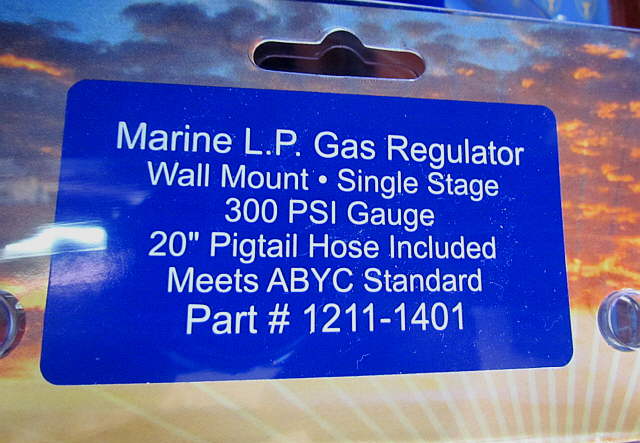
... a new regulator that also came with a 20" pigtail hose that connects with one end on the bottle and the other to the regulator. The regulator/hose is a TRIDENT Single-Stage Bulkhead-Mount LPG Regulator (Model #1211-1401). We bought it from West Marine and they matched Defender's price.
..............
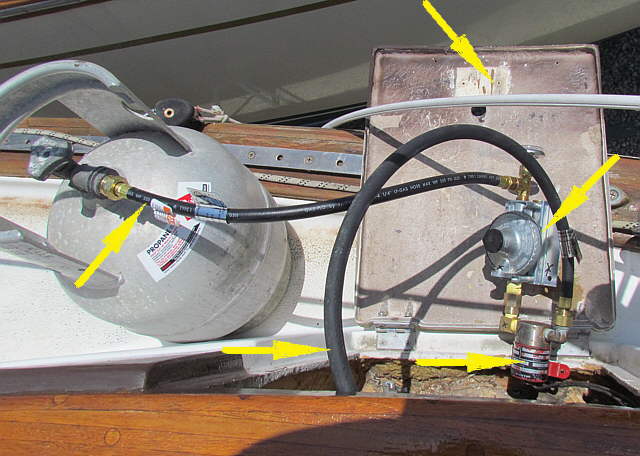
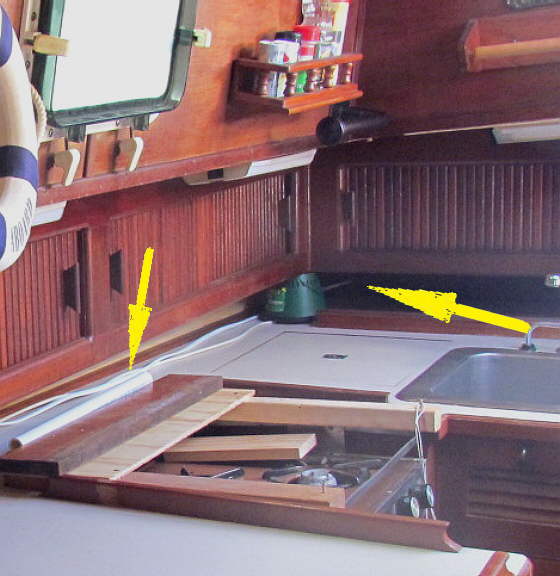
Above is the 20 inch supply line, left arrow, regulator, middle right arrow. The top arrow points to the door of the propane compartment which is open. The bottom right arrow points to the shut-off solenoid that is attached to the bottom of the regulator with some new fittings we had to buy.
The bottom left arrow points to the new line that goes from the solenoid down to the stove in the galley. The new line to the stove is a....
..............
.... Trident Model #1014-3838-180 15 foot supply hose. Not cheap, but we feel a lot better with this new hose in the boat. More on how we ran this hose below.
..............
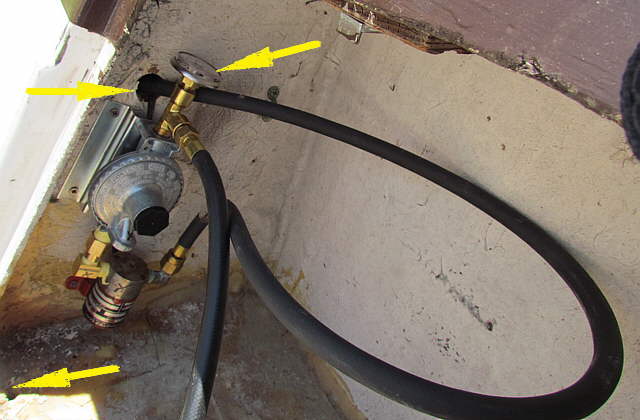
The new regulator/solenoid assembly was mounted to the side of the compartment. The compartment is tight with the bottle and I played around with different locations before settling on this one and it seems to work ok. The very top arrow mounts to a pressure gauge on the regulator that the old one didn't have. It is handy to tell if you have a leak. If the solenoid is close and the bottle valve is opened and then closed the pressure should stay the same at the gauge. I also soap tested all of the fittings you see above. There is high pressure before the regulator and very low pressure after it. The old regulator was not providing the right after pressure as it was too high.
The bottom left arrow points to a hole that is required in the bottom of a propane compartment to allow gases to drain away if they are present (they shouldn't be). I had to clean this hole out and the passage to where it exited the side of the boat a short distance away below the toe-rail.
The top left arrow point to where the line to the stove exits the compartment. This hole was caulked around the old hose and I re-caulked it after this picture was taken.
..............
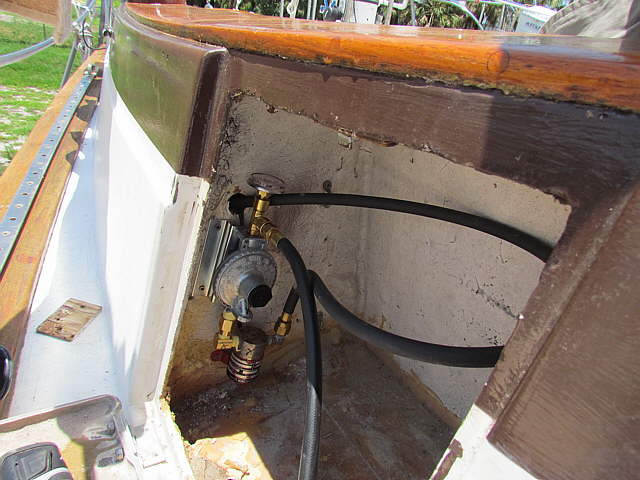
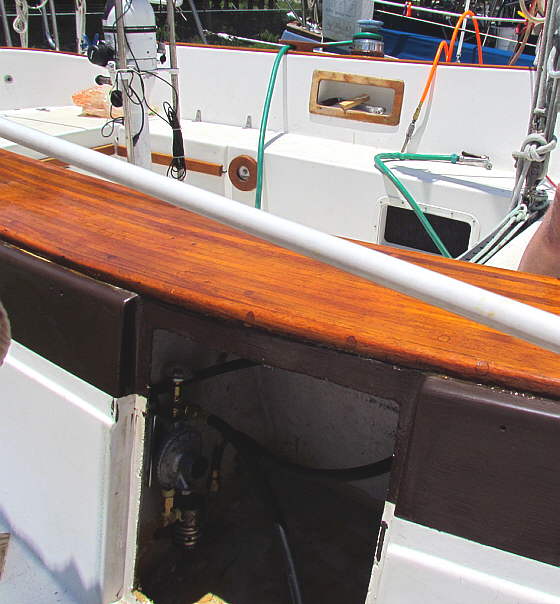
A view showing the relationship of the compartment to the cockpit coaming and the side of the hull to the left. At this point the bottle is still sitting outside of the compartment.
......................
Another view and there is a similar compartment on the port side but it is just for storage of the second bottle. There are no lines to it. Let's move on to routing the line to the stove.
..............
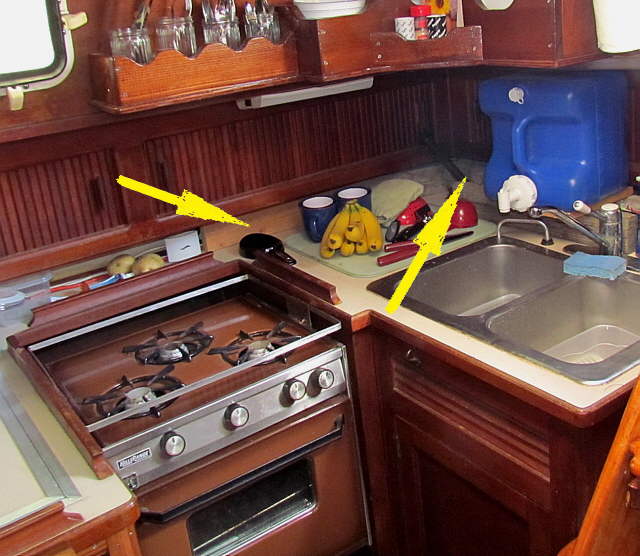
The original line went through the compartment wall and down into the area just ahead of the large starboard cockpit compartment under the seat there. Down in the compartment there is a removable door (this is on the B plan boats) and ahead of that door you can see the back of the galley bulkhead and can also climb in there and on down to the back of the diesel (another feature I like about the B plan -- more easy access to things).
The supply line went down into that space and then under the built-in ice box that is under the bananas above. I couldn't figure out how to get to that space to fish the new line in and going that low also meant the line had to be longer. I went for a new route.
I drilled a hole from the galley where the top right arrow is straight back and into the compartment there that is just under the propane locker. You can't see the exact hole in the picture above as it is hidden back in there behind the arrow.
I also drilled another hole through the counter top at the very back where where the left arrow is. I had to remove the stove for that, but it lifts out easily.
.....................
Above is an earlier picture of the galley before I worked on it and you can see some electrical wires that I added to the boat. Back where the right arrow is the wires go through the bulkhead there into the compartment behind the bulkhead. I added the new hole just to the side of the wires.
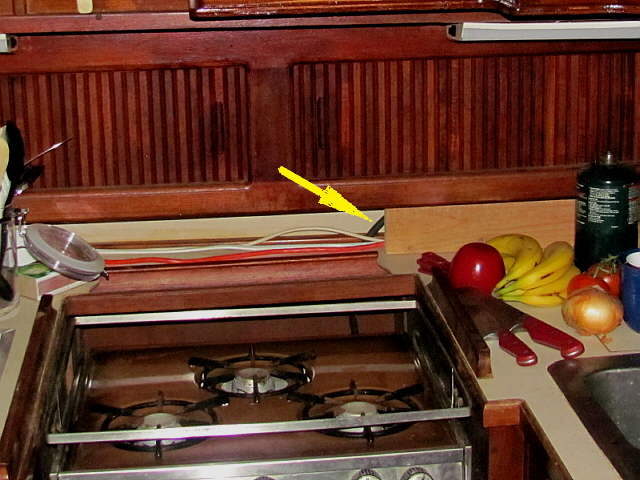
The new hole in the counter top is where the left arrow is. The supply line goes down from the locker and then forward though the new hole and along the top of the countertop next to the wires and then down the new hole (left arrow) to the area behind the stove. The 15 fool supply line was long enough for this run. I would not try a shorter one though.
..............
Above you can see where the supply line turns and goes down behind the stove. To the right is a board that keeps the line and the electrical lines back out of the way and protects them. There is also a board, not shown that does the same for the rest of the electrical run to the left of the arrow.
You loose a little counter space back there by doing this, but it is pretty much useless space anyway.
..............
The stove has a slide latch, arrow, that locks the stove in a permanent position. At sea you can unlatch that and the stove will swivel on the side mounts as the boat heels. With the latch undone the stove can be lifted out of the side mounts and you can put the supply line on or off.
..............
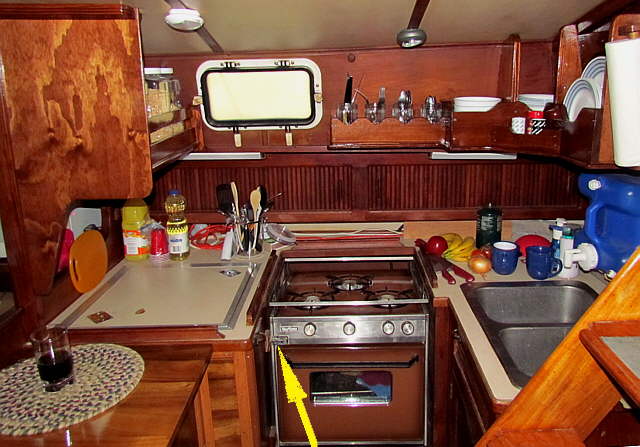
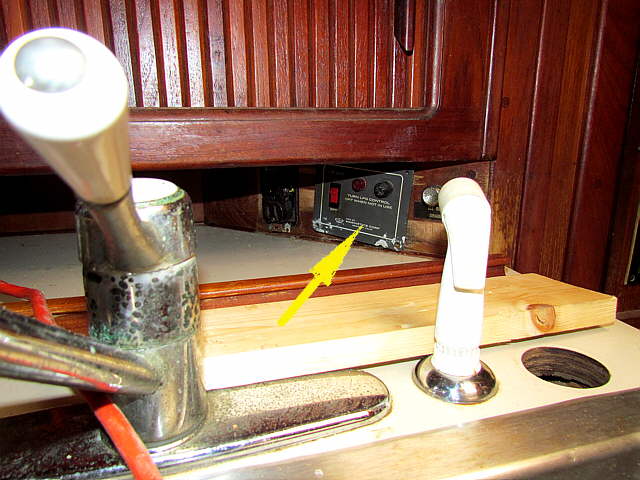
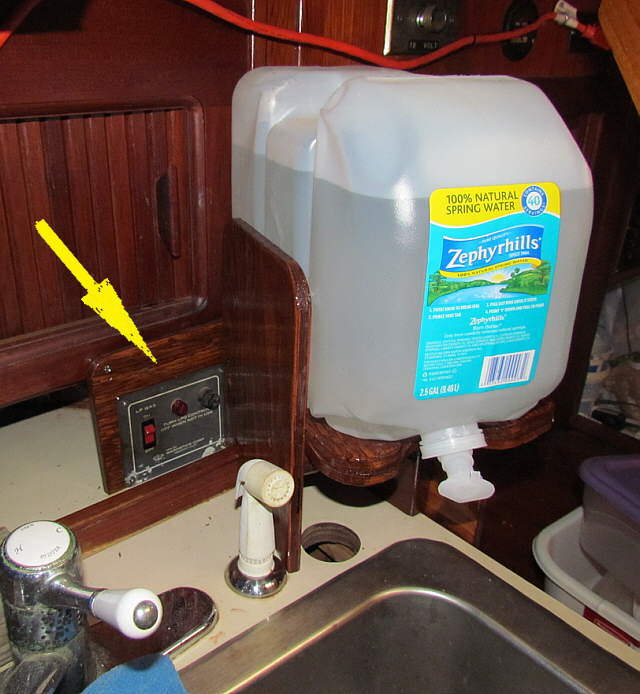
The next item to be changed was the switch panel for the shutoff solenoid up in the propane locker. We was quite a ways back under the cabinet behind the sink and very hard for Ruth and myself to reach and the indicator light was hard to see back there also.
..............
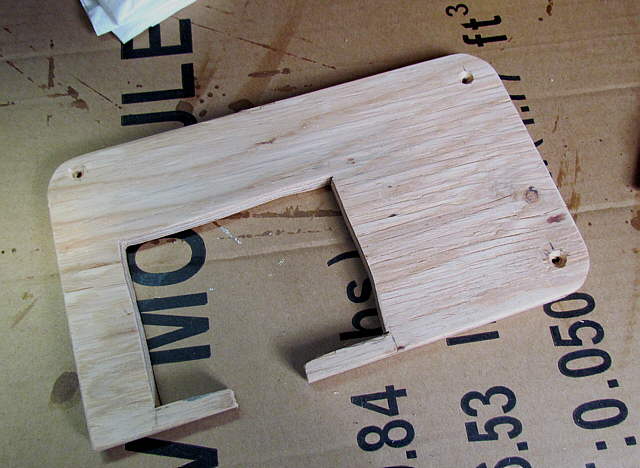
I cut out a small piece of plywood for the panel to mount to and the wires were just long enough to mount the panel and to move it ....
..............
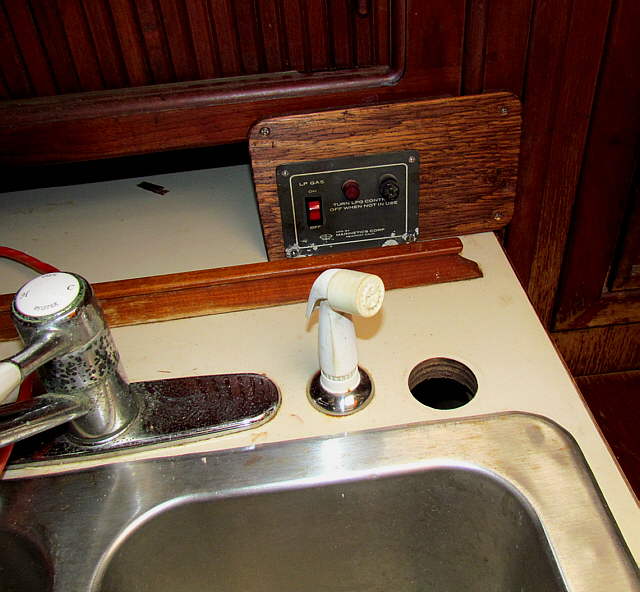
...out to a location just behind the sink were it is much easier to reach and see.
..............
I had also added a platform for our drinking water to the side of it, but we can now easily use it and see it. We turn it on to use the stove and off when we are finished cooking. It is easy to see if the solenoid is working as you can leave a stove top burner lit and then flip the switch and the burner should go out within a couple seconds. Don't forget then to turn the burner off.
I cleaned the stove inside and under the top burners and with the new parts installed we now use the stove with a lot more confidence. Before doing the above we continued to use our portable stove.
...=========================================
.............................................................................. Next Page If There Is One