..................
.............................................................................--- Dodger Page 1 ---
The Endeavour came with a dodge/bimini combo. That was good news and one of the reasons we took the trip to see the boat in the first place. The bad news was they were both shot. The bimini was up and on its frame, but not in good shape and the dodger was totally unusable with tears and torn out zippers and such. The boat had enough other redeeming features that we overlooked the condition of the bimini/dodger and bought the boat. We figured at least we had the frames and could use the pieces of the bimini and dodger to sew up new ones. Without the experience we had garnered making canvas projects for the Mac we would of never tried this.
When the time came to actually make the new bimini/dodger I had to learn how to sew, or at least more than I knew before. Ruth had to have surgery on both of her feet, one after the other and would be unavailable at the sewing machine until about December. I started work on these in October.
..........................................................................--- Design Changes ---
There were some fairly major design changes that we wanted to make. We used the original dodger to pattern the top and sides and the very bottom of the front. The original dodger had a removable front, but no bug screening and the front was either on or off. We wanted more options.
With the new design there is more viewing area. You can remove the whole front if you so desire, but the window is now zippered in such away with 4 zipper pulls that you can open any one part of the window or open it so that you have two parts of it open and opened to any size at any location on the window. Also you can unzip it and it will fold down into the boat. Additionally there is now a zippered bug screen that can easily be put on or off.
So let's build a new dodger.
..............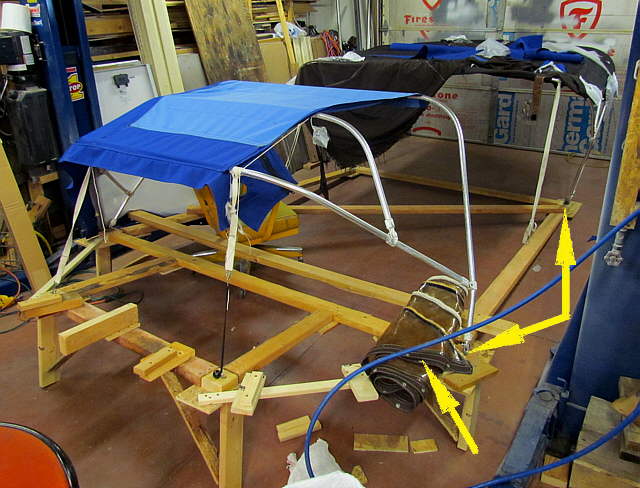
One hurdle we faced is that we were making a new dodger/bimini 2200 miles from the boat. I took some measurements on the boat where the dodger mounted in relation to the bimini, connected right arrows. and where the dodger tied down at the front. I felt pretty good about the measurements, but won't know for sure how all of this works out until we return to the boat (which hasn't happened at the time I write this). I made a wood jig and tried to also replicate the angle of the coaming that goes around the cockpit and up over the cabin top.
..............
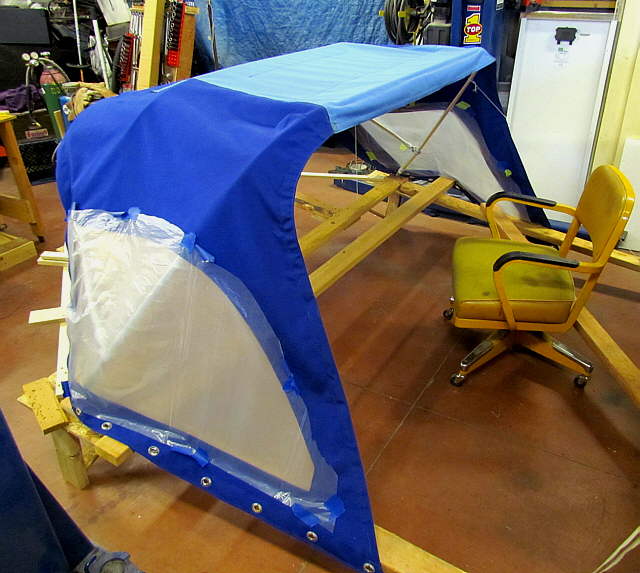
We love the Ocean Blue (Sailrite 6079) that we had on the Mac and wanted to use the same for the canvas work on the Endeavour, but to help keep heat below the dodger and bimini down we chose a contrasting lighter blue for the tops. It is also from Sailrite (Sailrite 6075).
..............
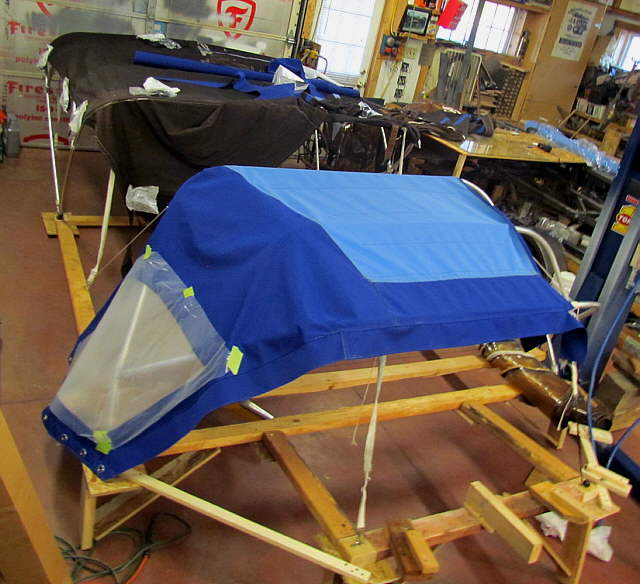
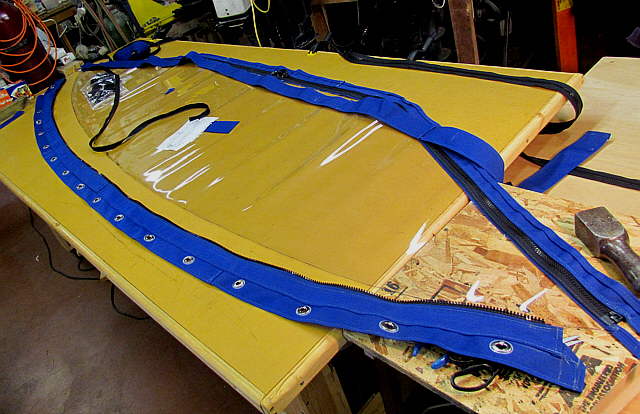
At this point I'm pretty much copied the original dodger by laying pieces of new Sunbrella over the original dodger. I'm made the windows using the methods that Sailrite suggests. Hint if you do this get their videos on 'Installing a new vinyl window' (#102960 and it has lots more on it) and also get their video on 'Zippers and how to install a curved zipper' (#102558). I was at first reluctant to spend the money on them, Ruth won out, but I'm sure glad that we did. They will pay for themselves, believe me.
Above I also have some 'drop-cloth' plastic taped over the window to reduce the chance of scratching them while working on them. I also installed common sense fasteners along the bottom. The original dodger had snaps down there and a lot of them had pulled out of the fabric. I tried to get the spacing the same and will unscrew the male part of the snaps off the boat when we return and screw on common sense studs where the snaps were.
..............
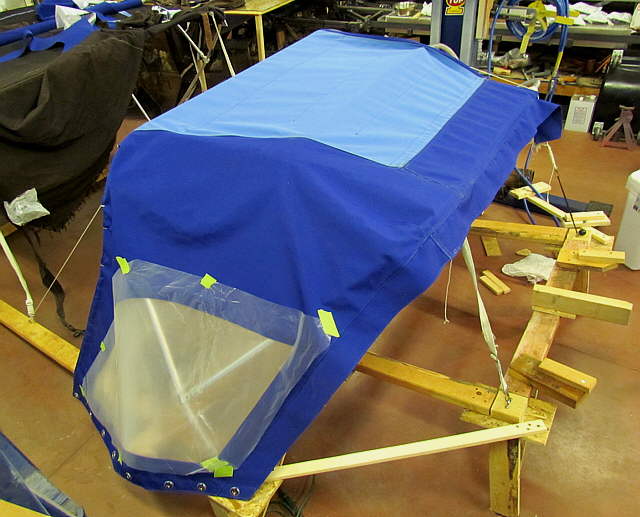
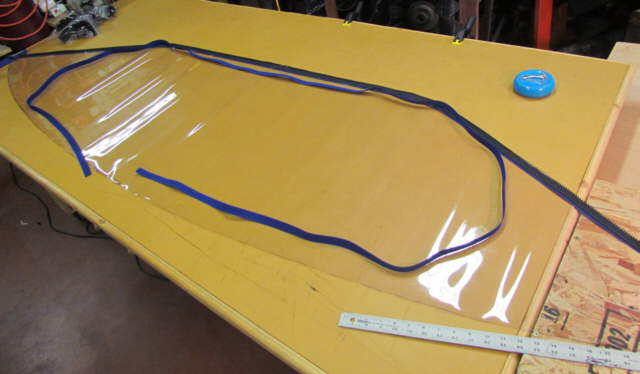
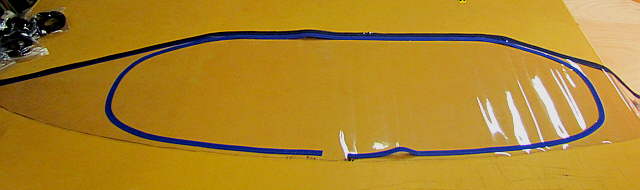
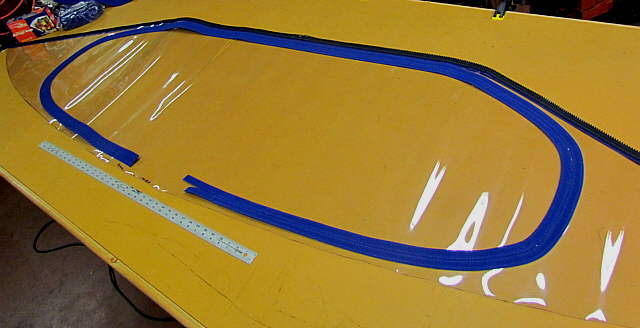
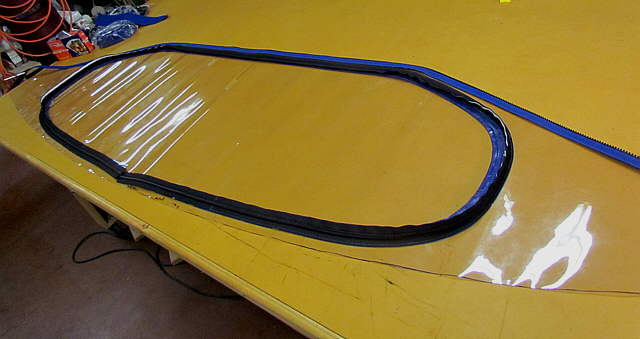
This gives some idea of the size of the dodger at this point. The table on the left is 8 feet long.
..............
Above the back of the dodger has been finished off with some tucks.
..............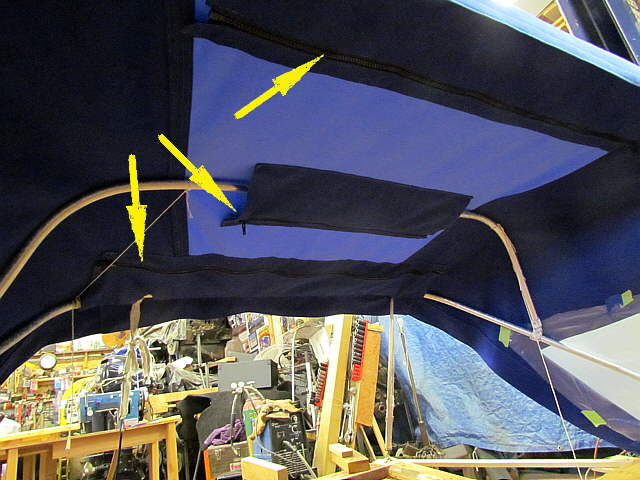
Here you can see the three zippered pockets that allow the dodger to be removed from the frame quickly. Since we will only use the boat part of the year we wanted to be able to easily remove the dodger and bimini canvas and leave the frames up if we so desired. Chances are we will remove the canvas/frames as a whole, but we now have the option to do otherwise without taking the frames apart.
..............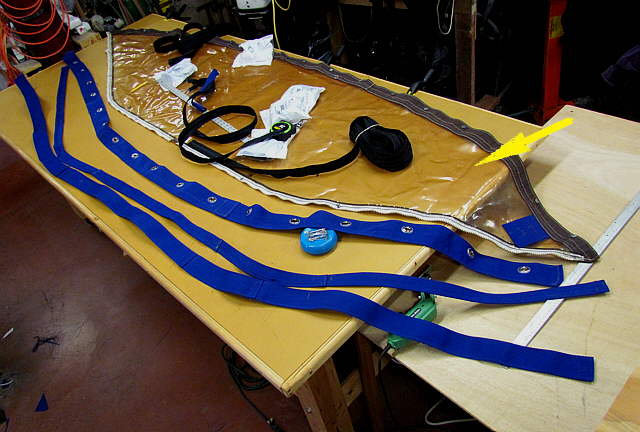
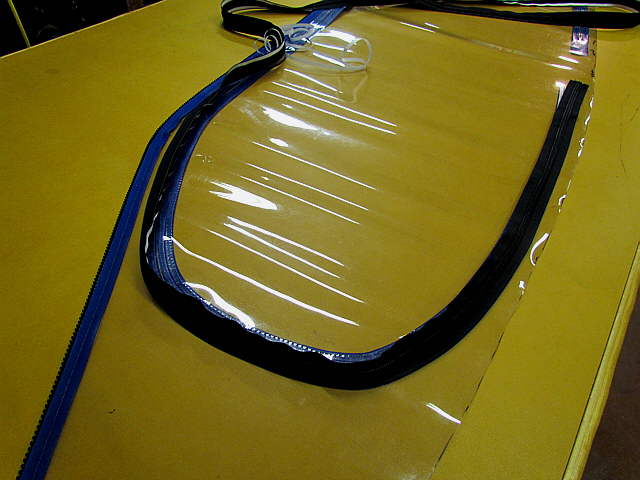
I used the old front window, timed in brown, as a pattern to make the new window. As you can see the old window could be removed as a whole unit. The new one will do the same, but you don't have to remove it as it can also be opened as you will see below.
..............
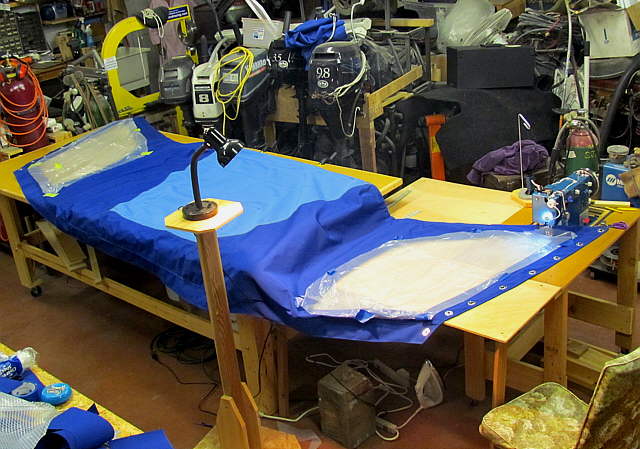
Here the new vinyl has been cut and the piece with the zipper sewed on at the top, but the bottom hasn't been attached. We used 30 gauge Crystal Clear from Sailrite and they recommended it since we wanted to take the dodger up and down. If you leave it up all of the time you might want to consider one of the 40 gauge options.
..............
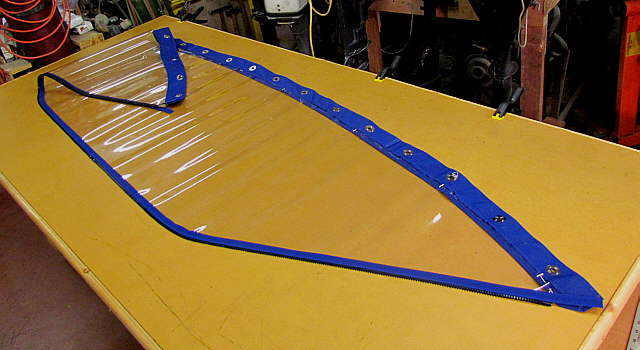
Here the bottom of the front has been completed along with the part above the zipper at the top that latter is sewn to the dodger.
..............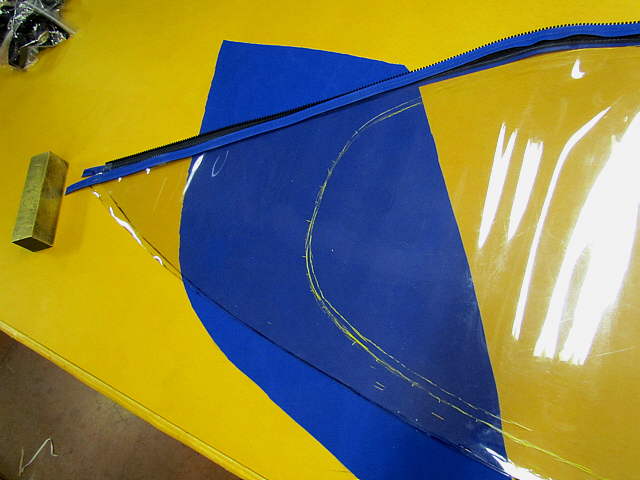
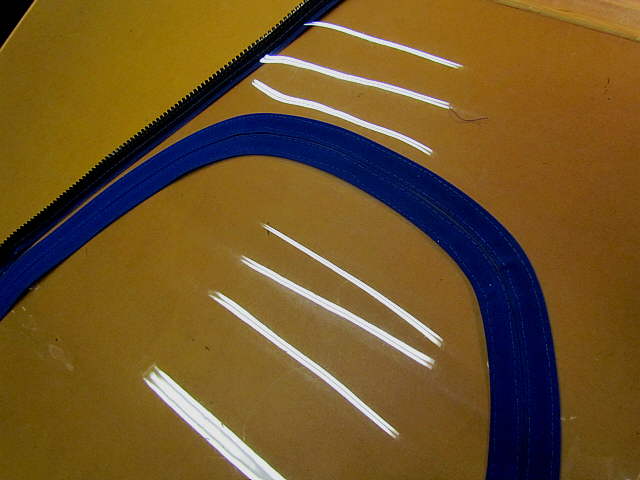
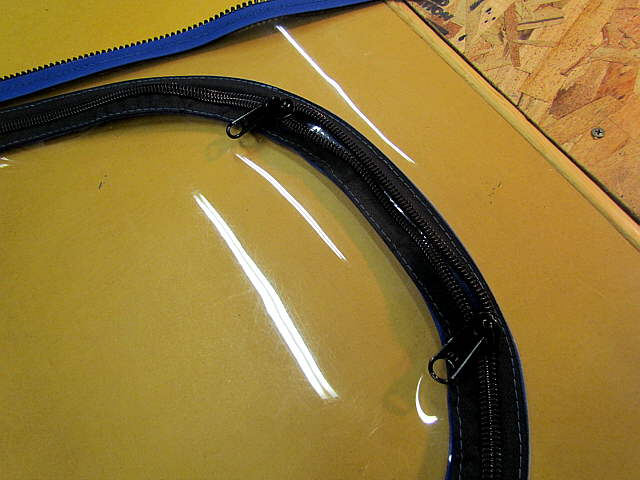
Here the path of the zipper is being laid out. The blue is just there for the sake of the picture to see the line.
..............
Here binding tape...
..............
... has been installed on one side of the future zipper and...
..............
..here on the other side.
..............
The zipper is sewn to each side.
..............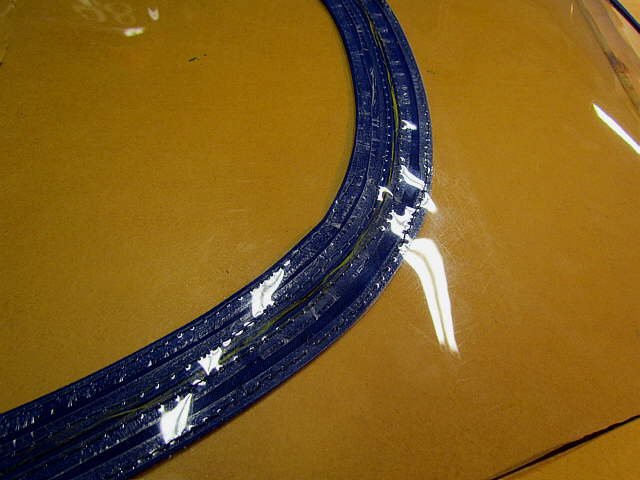
and after the zipper has been sewn on then the vinyl is cut.
..............
Above the zipper is first being sewn on one side..
..............
.... and then...
..............
...the other. You really need to get the DVD from Sailrite on installing zippers before trying this.