..................
.......................................................................--- Boat Fridge Build Part IV ---
..............
Now we need to fill the two openings with some lids. The bottoms are 1/4 inch plywood with stiffeners added and sides were also cut.
..............
The stiffeners were attached with stainless screws that I got from the Duckworks which has good pricing on screws.
..............
The stiffeners also made it possible to add the sides to the lid.
..............
1 inch foam was cut and added to the bottom inside of the stiffeners.
..............
Next, but not shown, another piece of 1 inch foam was added to the lid out to the sides and above the stiffeners.
..............
Finally more 1 inch X 7/8 inch stiffeners were added near the top of the sides, but were spaced down so that the top would recess into the sides.
Then another piece of 1 inch foam was added on top of the other two pieces and inside of the stiffeners. Thus the lid has a total of 3 inches of foam.
..............
One advantage of having the two openings during construction is that you can reach in the open one and control what is being placed in the other. In this case the lid for the small side.
..............
I made the lid with about 1/8 th inch clearance all the way around. You can see that it was a snug fit with pieces of plastic duck taped to the sides. The lid will not end up with plastic on it. The plastic is there to center it in the hole.
..............
Above is a close-up of the temporary plastic pieces.
..............
Next the top of the box was marked with two sets of lines, one inside the other by about 1/2 inch. The inner line will mark the piece that will be attached to the top of the lid.
..............
First I cut inside of the other line, by plunging the saw into the wood and just cutting to the corner and finishing the cut to the corner with a hand saw. Then I cut the piece along the inner line. This will create a clearance when taking the lid in and out.
..............
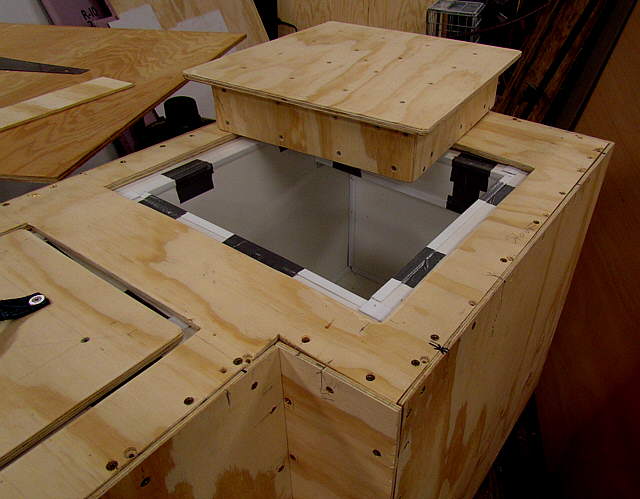
Here you can see the opening and how it is back from the lid. The arrows point to reference marks on the top so that I always install it to the same spot. The screw holes also accomplish about the same thing.
..............
Here the piece that was cut from the top is put back into place on top of the lid and is centered on the opening in the top. You can see how cutting it on the two lines now gives us clearance. The left arrow points at a pipe clamp that was use to keep the box from spreading the times I had to remove the wood piece that accomplished the same thing.
..............
A pattern was laid out for screws and the piece you see above was screwed to the lid under it.
..............
One lid almost finished. It will not get plastic on it, but will be stained and then about 5 coats of interior/exterior polyurethane applied to hopefully keep it from absorbing moisture and swelling.
..............
Before I got to the boat I was reluctant to caulk all of the molding in place just in case the box needed modification. On the boat I got the bottom caulked, but then we started using it. Later I'll caulk the rest of the molding and remove the duck tape you see in these pictures.
..............
Ruth sewed up a handle for the lid by doubling some webbing back on itself and then sewing it there. It was then screwed to the top with a couple SS washers under the screw heads.
..............
The same procedure was completed for the second lid for the large part of the box.
..............
Above you can see the second opening cut into the top. The piece removed again is ...
..............
..... screwed to the second lid after it has been centered in the opening and the piece...
..............
...centered in the box top.
..............
A few more screws were used on this side and ...
..............
...the second finished lid. Again Ruth made a web handle for this side.
..............
It was put on the lid at an angle since you will be standing where the big arrow is at the bottom and reach in at an angle. The right arrow points to where the stove will be and the upper arrow points to where the side of the hull will be.


