..................
.................................................................--- Mattress Covers ---
..............
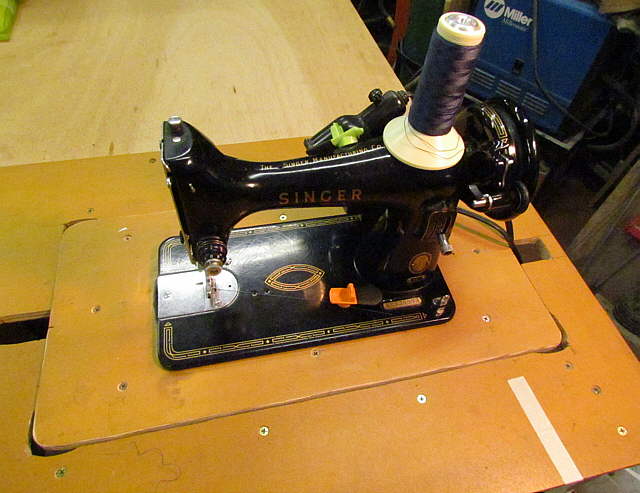
First off here is the older Singer 99 that we bought and used for the first canvas mods we did. Don't let the small size fool you. This machine will punch through a lot of Sunbrella. Since we bought a Sailrite LSZ-1 the singer has been demoted to some smaller jobs. The mattress covers on this page and the modified sheets on the next two pages are examples of jobs we use it for. These projects could also be done with any lighter home sewing machine.
.........................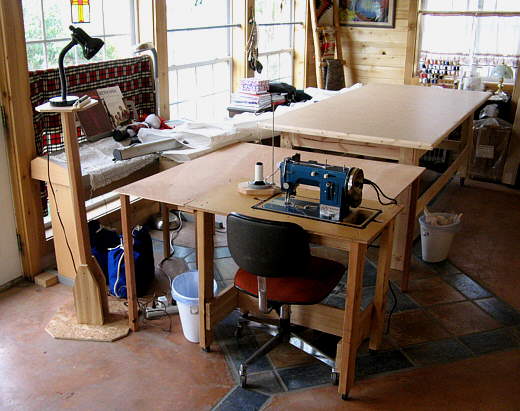
I'd made a table for the LSZ-1 so that its portable base could sit down into the top.
.................
We had an older sewing table for the Singer, but gave it to someone so they could use it for decoration in a mountain cabin they had.
........
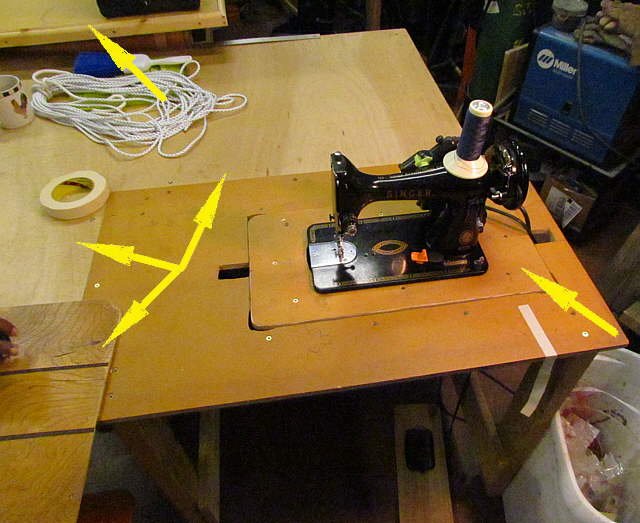
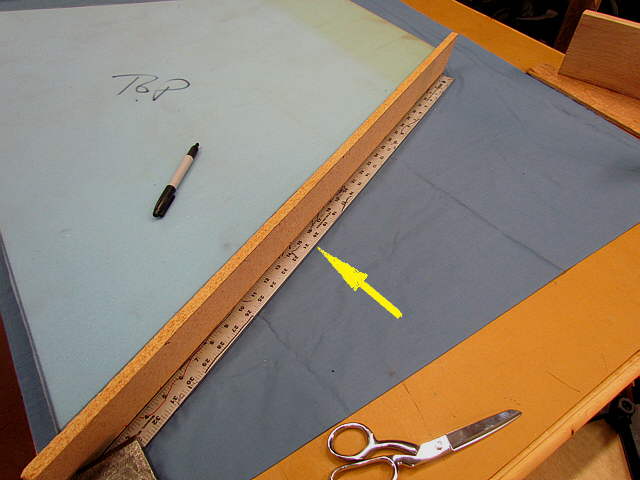
So I made a new base for the Singer so that it would be able to sit in the table for the LSZ-1. Above you can see the singer in the table, bottom right arrow and the other lower arrows point to simple platforms I made that easily attach to the table to increase the work surface. The top arrow points to the large 4' X 8' main work table were material is marked, cut and pinned before sewing.

.................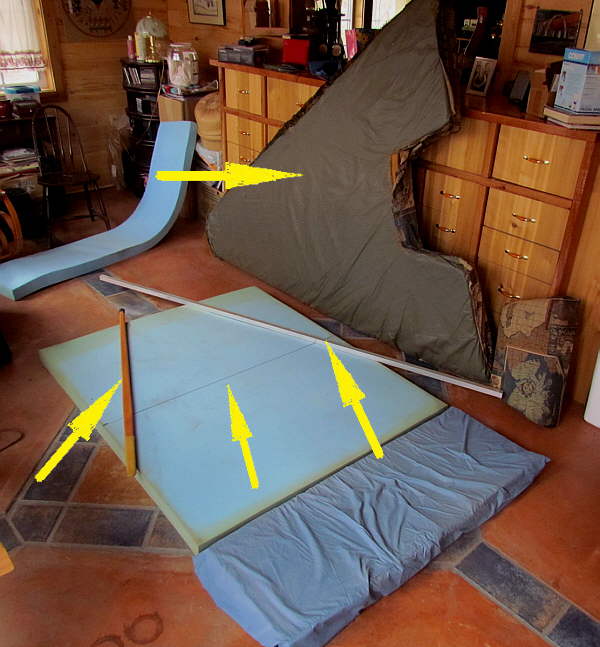
Above you can see the mattress from the Endeavour leaned up against the storage unit. We are replacing it with lux high quality foam in a 3 inch thickness from the Foam Factory's wholesale division. You have to buy whole sheets there whereas if you use their other site they will cut to size for you. It is a lot cheaper to get the full sheets and use a cheap electric carving knife and cut them yourself.
The lux foam is firmer than what was in the boat and since it is only 3 inches high we will have more room above the berth. You need to pick a foam that suits you. We like real firm.
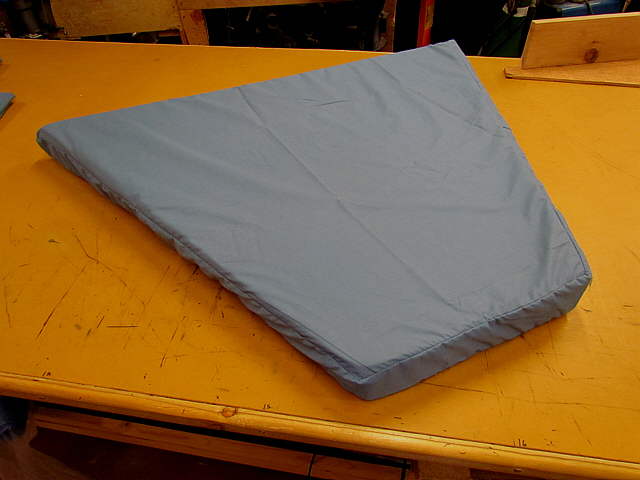
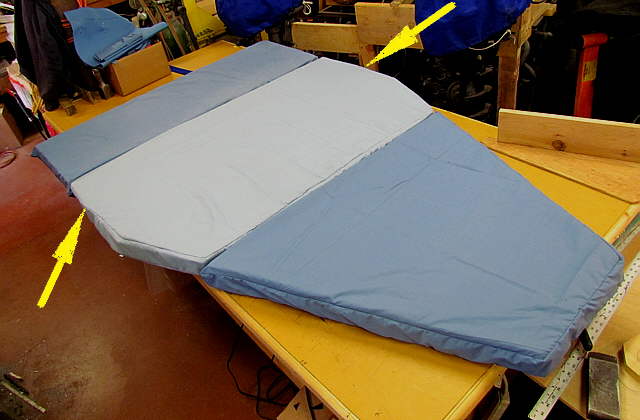
We cut the mattress for the Mac into 3 pieces and loved the fact that they were easier to handle and we could get to the storage compartments under them easier as we just had to lift one at a time. Above you can see one of the thirds to the right with a cover on it already. The next cut will be where the middle lower arrow is 30 inches down from the mattress piece with the cover on it. With the cuts at 16", 30" and 38" from the head to the foot we have had no problems with any part of our body going through the cuts. It feels like one mattress when you are laying on it.
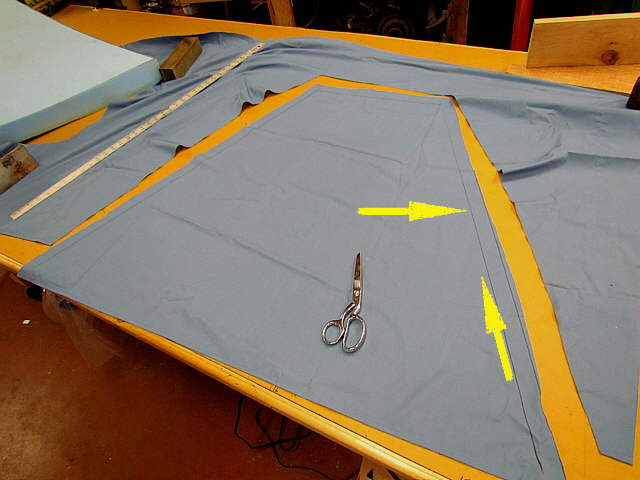
The side arrows mark the diagonal cuts that will be made. Also note that...
..............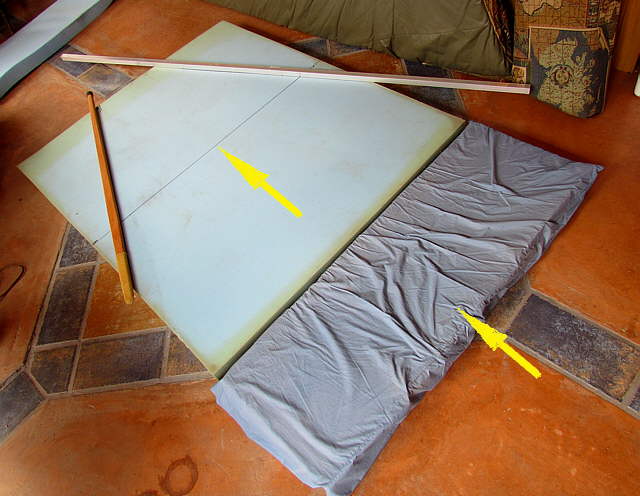
...the new mattress won't be as wide at the head as the one it is replacing. We have found that 50 inches wide for us is plenty and by bringing the sides of the mattress in at the top vs. the "V" shape all of the way to the head that we can then have more storage on each side....
......
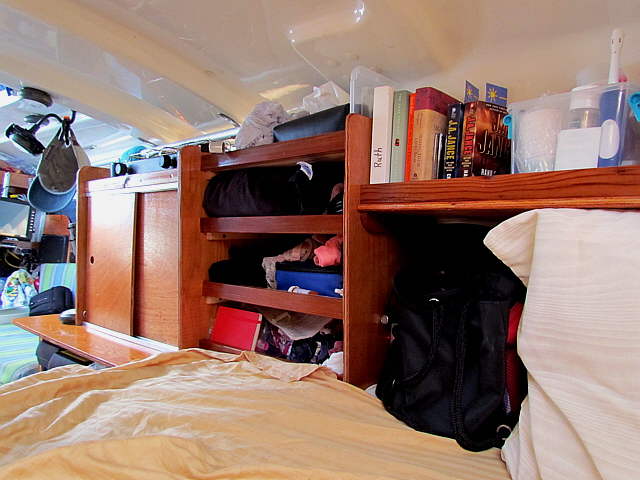
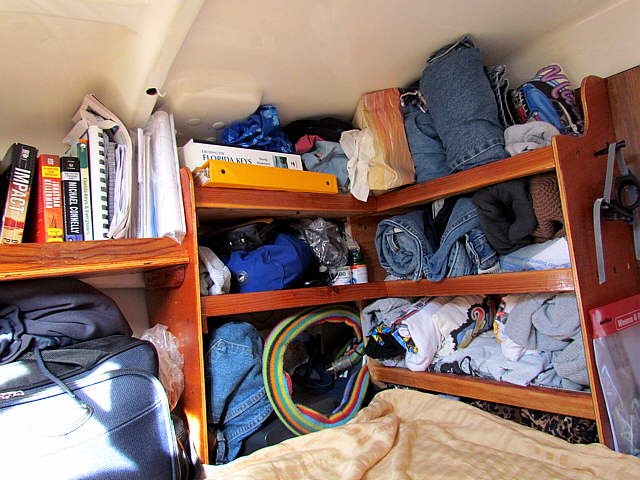
...like what we did with the Mac above on the port side of the mattress.
......
It gives me a good place for the CPAP machine that I use at night (below the hose). In the Endeavour I'll take the holding tank pump-out hose up past the v-berth in that area and box it in with a removable panel. I'll put in storage in that area on the starboard side. Right now the pump-out hose is a convoluted deal going down and forward past the head and then up (a nightmare--but it is now gone).
With the foam laid out and cut I'll show how we make the covers for each section using the section at the foot of the bed as an example.
..............
For material we used some sheet material that we had. Use what works for you. The material is on the work table with the foam on top of it.
......................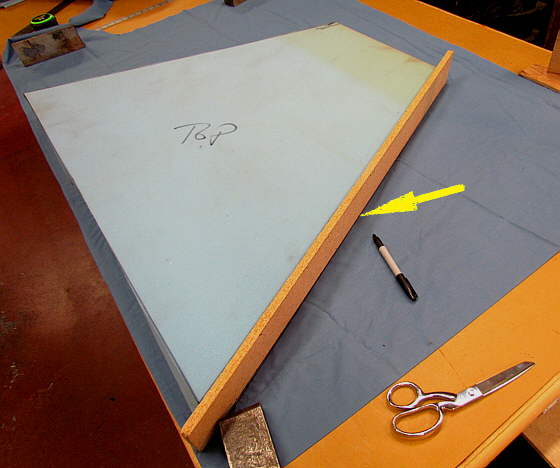
Next I place a piece of 1/2 inch thick particle board up against the foam and mark along the outside of the particle board with a felt tipped pen.
..............
Next I laid a yard stick up against the particle board and ...
..............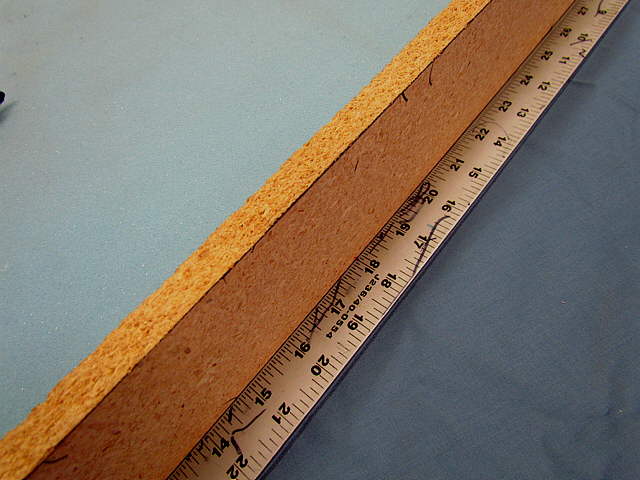
.... made another mark.
.....................
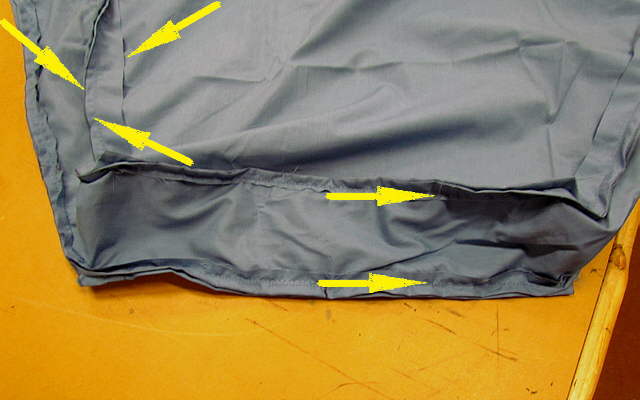
I did not take as many pictures as I should have so you might have to read this section a couple times to make sense, but it is really simple and keep in mind that the cover is made of 3 main pieces. The top and bottom, one of which we are cutting above and then the side panel that will connect the top and bottom.
Above the right arrow points to the cut line where the material will be cut. It will then be folded over once at the lower middle arrow to make a single hem. Finally this piece will be pinned to the side piece and sewed 1/2 inch in from the hem line to the side panel. The sew line will be where the edge of the foam is above (top arrow). This will create a cover that is the same size as the foam and the same height as the foam (3 inches for us)
..............
Above the material has been marked as per the instructions above this picture.
..............
Next it was cut out.
..............
Here is where more pictures might of helped. The top left arrow points to the cut line. The middle top left arrow points to the fold or hem line and the other arrow below it points to where it was sewn 1/2 inch in from the hem line.
The side piece is marked off similarly and the two arrows at the bottom show that when you are finished sewing the side to the top and bottom pieces that there is 3 inches, the thickness of the foam, between the two sew lines.
..............
A close-up view of the side panel being sewed to the top and bottom panels.
..............
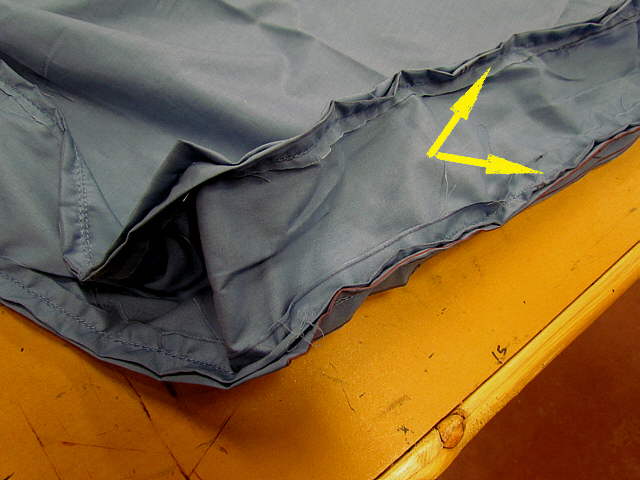
Above is the finished cover. It ends at the bottom arrow, which is where the foam goes to when inserted. The top arrow points to a flap that was sewn onto the cover body.
..............
The flap is there so that once the foam is inserted that...
..............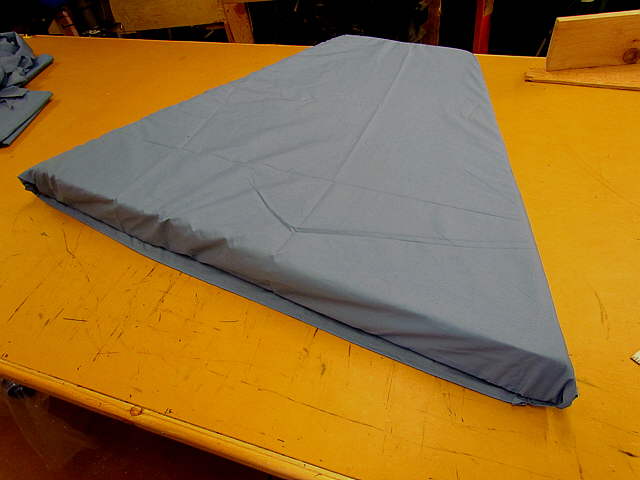
... you can tuck the flap in under the foam. This is pretty simple and we haven't...
..............
...seen the need to make it more complicated.
..............
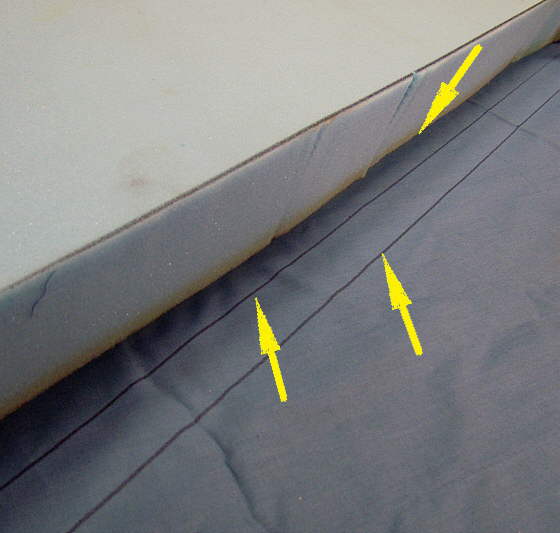
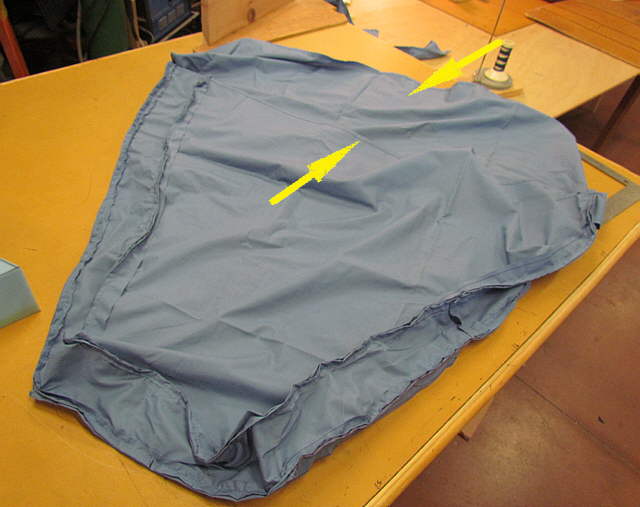
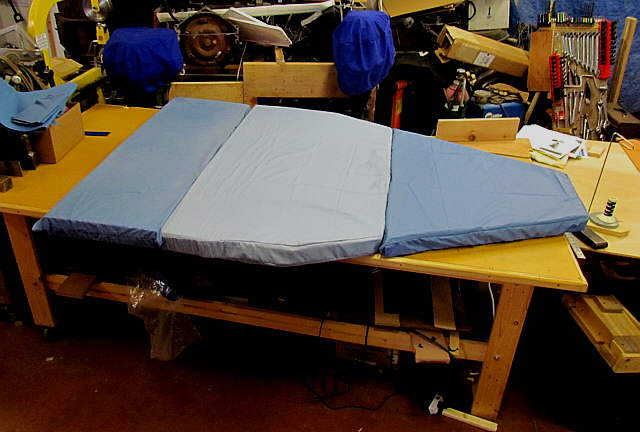
Here are the three sections made out of some different color sheets. The arrows point to where we made the sides straight a parallel once the width got to 50 inches wide coming up from the foot area. You might want more, but we are close sleepers.
..............
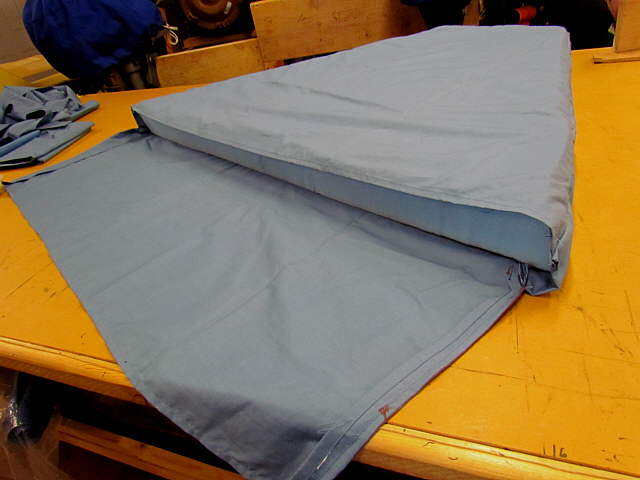
A final shot. The three sections also has the advantage of being easier to deal with if you want to pull the covers off and clean them. Also you will see in the next two pages that three sections let you make the bed standing up in the forward berth and not having to climb up into it to make the bed. I love that as I'm the bed maker.