...Return To Mine & Other Bonneville Car Construction Pages
.Previous Page...............B'ville Car Index Page.........................Next Page
..................... Brake Adjuster -- Pillow Block Shims
Since the rear carrier can now move forward and backwards in a 3/4 inch range for chain adjustment I needed to make it so the rear brake caliper could also move to keep it in the proper location on the brake rotor mounted on the rear carrier.
Note: I've had some people concerned that moving the rear carrier, the center of the independent rear end (IRS), would also change the wheelbase and could present wheel alignment problems. With the IRS setup the outer hubs that are located by "A-arm" and will not move. Only the center section of the rear end will move for chain adjustment. Misalignment will be handled by the U-joints on both ends of the half shafts that connect the center section with the outer hubs and is much less than the movement presented by suspension travel.
........................... .
.
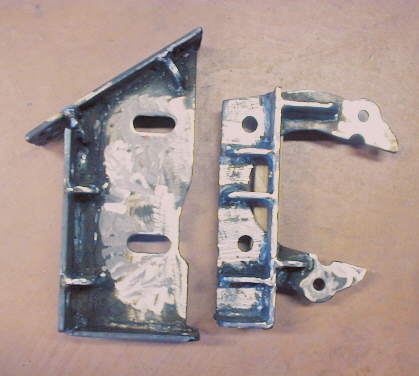
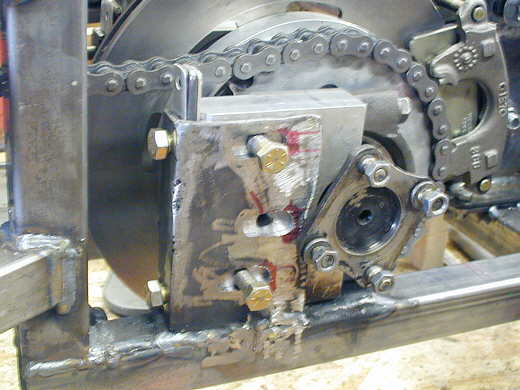
I slotted the bracket on the left (above) that the caliper bracket (above right) attaches to. Even thought the loads on that bracket are upwards in a circular motion I still didn't want to just rely on the friction of the bolts to hold the caliper bracket (above right) from moving in the slot. I took the caliper bracket and welded on a vertical piece and also horizontal braces to form an arrangement to hold horizontal adjustment/locator bolts (look two pictures down). I also added a vertical piece to the back of the left bracket and some horizontal braces to it for the other end of the bolts to go through.
........................ .
.
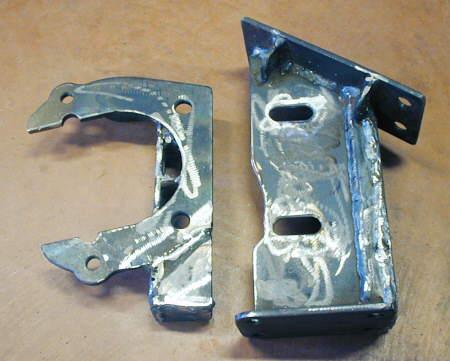
Here you can see both pieces from the opposite side. I also extended the caliper bracket (above left) on the bottom rear edge.
.............................. ....................
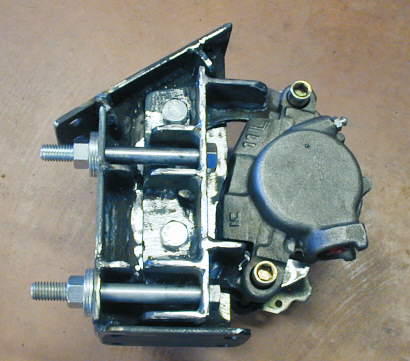
Here is the finished assembly with the caliper attached. The rear bolts (grade 8 later) will be in tension and resist the temptation for the caliper bracket to move forward in the slots under braking.
................................ .
.
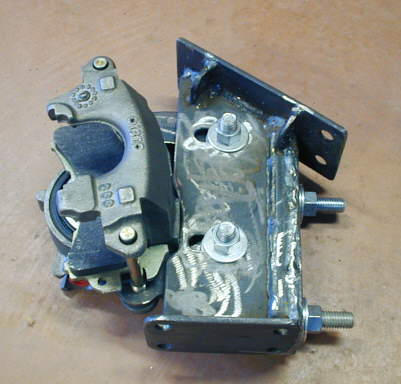
The other side (one brake pad is missing in the photo).
.......................
Mounted back in the chassis (left side of car).
...................
Photo of the looking at the right side.
..................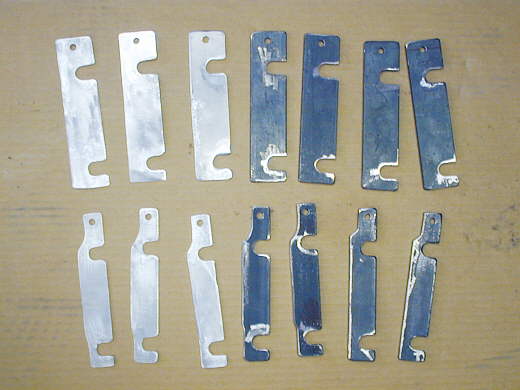
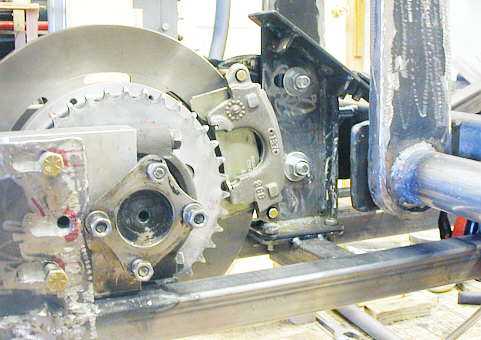
I made this set of shims to go between the back of the pillow block/bearing for the rear-end and the bracket that holds it in place. The top row of shims is for the left side and the bottom row for the right side. They are clearanced some to make sure the chain doesn't come into contact with them. They are different thickness. For each set there are 2 - .030" aluminum, 1 - 1/16" aluminum, 1 - 1/8" steel and 3 - 3/16" steel. With these I can shim form .030" to 3/4" in .030" increments depending on which ones I use.
...................
Here are 3 shims in use on the left side. I left the bolts loose so you could see better what is happening and how the pillow block is held in place. The bottom frame rail is also slotted and there is one bolt coming up from the bottom frame (top part of the box section) into the bottom of the pillow block.
...................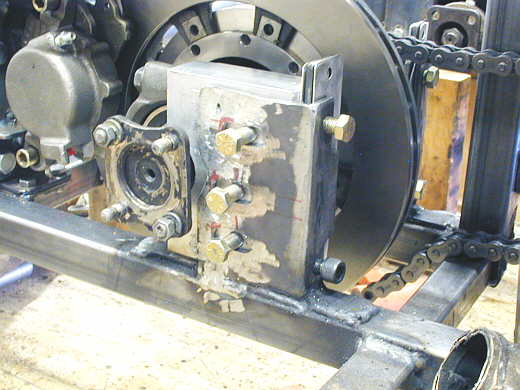
A view of the right side with 3 shims that equal those on the left side.
I think I'm about ready to start on the front of the car finally :-).
..................................................................Next Page