...Return To Mine & Other Bonneville Car Construction Pages
.Previous Page...............B'ville Car Index Page.........................Next Page
............................................ Rear Brake Part I
................................
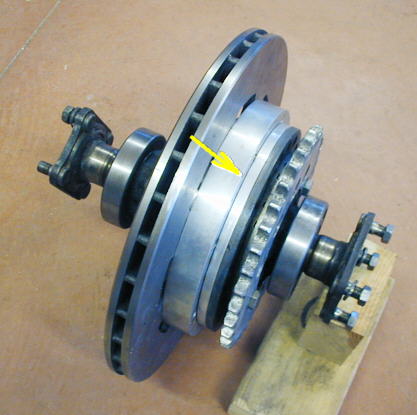
I wanted to move the rear brake rotor further away from the rear sprocket towards the center of the rear carrier (Datsun). This would make it easier to make a chain guard for the chain and also to make a shield to keep chain lube off of the brake rotor. I made the ring above out of some aluminum I had that was about 3/8 of an inch thick. I would have liked it to be a little thicker, but that was all I had.
............................. .
.
Here you can see it installed next to where the original ring gear went and to the right of the spacer/adapter for the brake rotor I made a long time ago.
............................... .
.
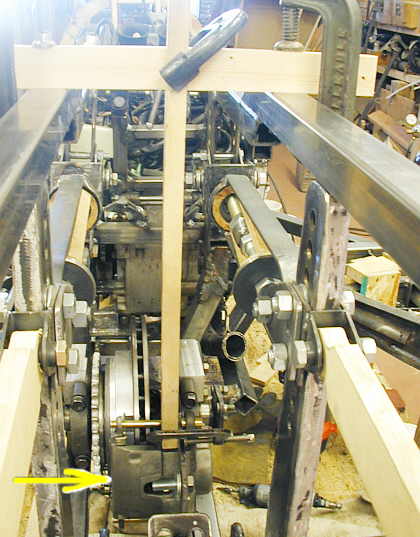
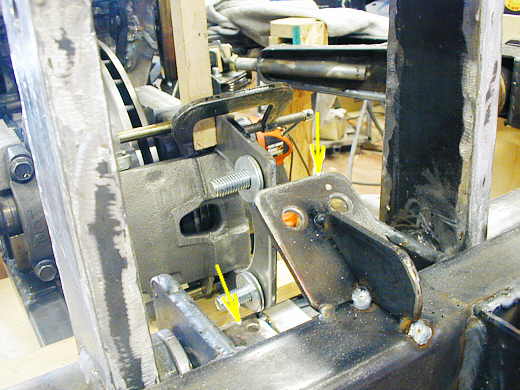
This moved the rotor to the right and helped by also moving the caliper assemble (arrow) to the right and away from the chain. In this picture I'm holding the caliper assembly in place with some wood and "C-clamps" so that I can make a bracket assembly to hold the caliper assembly.
............................... .
.
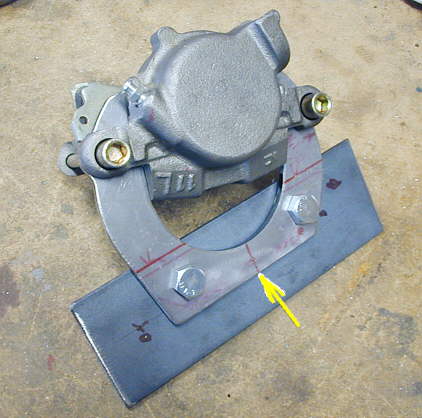
The piece that the arrow is pointing to is a piece you can buy to mount a caliper to a rear-end axle tube. Normally the caliper is mounted to it the other way around with the caliper assembly in the round hole area. I machined it a little so I could reverse the caliper on the bracket. I cut the bracket where the arrow is. Originally it went towards the arrow and had a round cutout that was there to weld the bracket onto the round axle tube. Next I cut and drilled the piece of strap and mounted the caliper bracket to it. This was the first step in making an assemble to mount all of this to the frame (see next picture).
.............................................. .
.
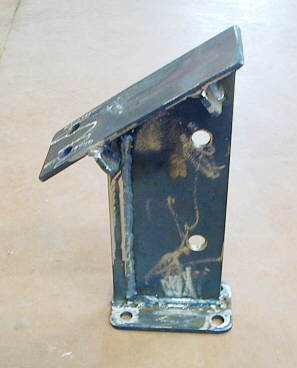
I took the piece of strap in the last photo and added pieces to it to come up with this adapter to mount the caliper and it's bracket to the frame.
.................... .
.
The adapter in the last picture sits on a platform (bottom arrow) that is attached to the bottom frame rails. On the rear cross-member I tacked the top attachment point (top arrow) for the adapter. I'll finish welding these later if I'm happy with everything.
.................... .
.
Here you can see the completed assembly for mounting the caliper.
.................... .
.
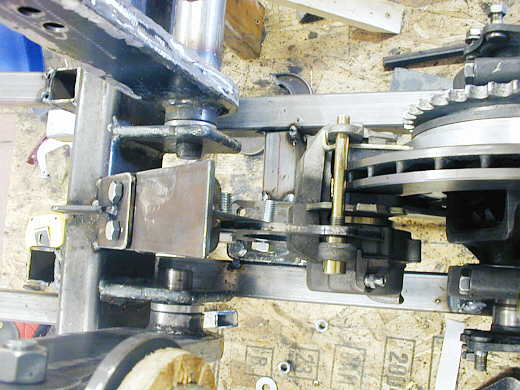
This view is looking straight down from the top. I spent a day and a half
on this work and then found out my mom could use me for a couple weeks and took off for Missouri with 1FATGMC.
I'll be back to work on the car the first part of May (2006), so check back.
..................................................................Next Page