...Return To Mine & Other Bonneville Car Construction Pages
Previous Page...............B'ville Car Index Page.........................Next Page.
.....T--- Machine Work on Rear Center Carrier ---
First a little note. All of the machine work that follows is the first machine work basically that I've ever done. So please go easy on me. I would like suggestions if you have any that would help me. I took a semester college course about 30 years ago that covered the mill and lathe, but we only did a couple easy projects.
When I got a divorce a few years ago I saw no need for keeping a life insurance
policy on myself, so I cashed in the two policies I had and used the money for an ENCO gear drive mill/drill (imported
and also sold by Harbor Freight and Grizzly); a 12 inch X 36 inch gear drive metal lathe from Harbor Freight (imported
and also sold by ENCO and Grizzly); and a 10,000 lb. Bend Pak auto lift. I don't have to tell you that I'm really
enjoying all of these toys. Sure beats trying to buy this stuff after your dead ;-).
.................
 .
.
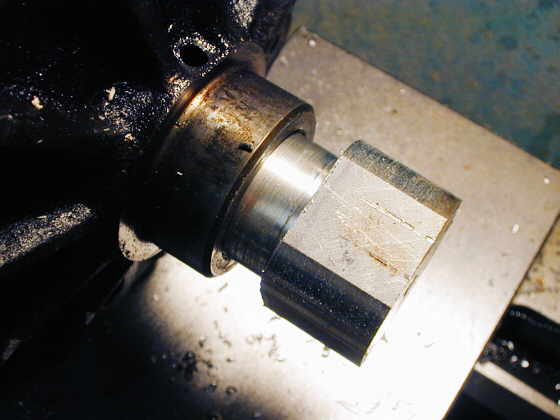
Before I started machining on the ring gear carrier I needed a way to support it in the live center of my lathe (the other end I put in the 3 jaw chuck). I took a piece of aluminum and made a plug that fit the end of the carrier where the output shaft goes. It has a tapered hole in the outboard side for the live center. Above you can see it pushed part way into the carrier.
.
................. .
.
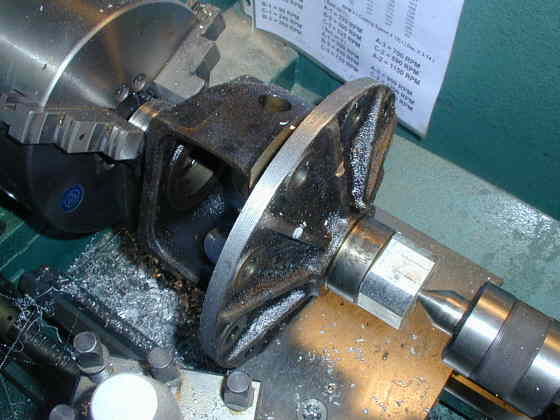
Here the carrier is mounted in the lathe ready for me to start butchering it. I'm going to cut into the web area on the right side and make a flat surface where I can mount the rear sprocket. I'm hoping that the webbing is there to give side support to the ring gear since the pinion would try to push it sideways. I won't have that force on the carrier with the chain drive. I'm mounting the sprocket as far to the left of the car as possible to help with the final motor mounting location. I'll make an adapter to mount where the ring gear use to be and mount the single disc brake rotor to it.
................. .
.
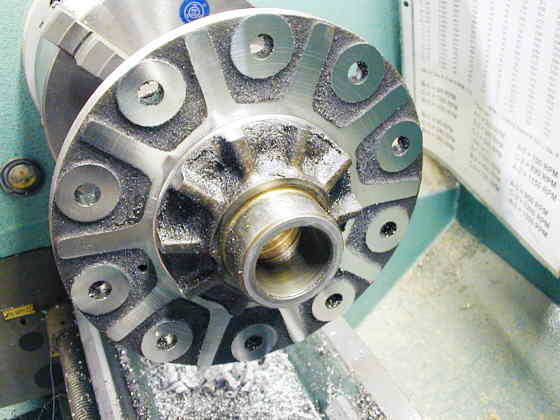
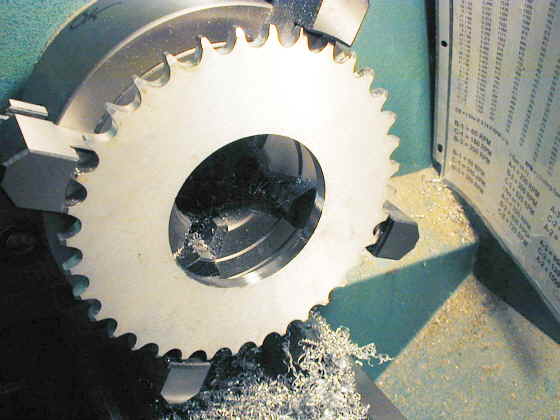
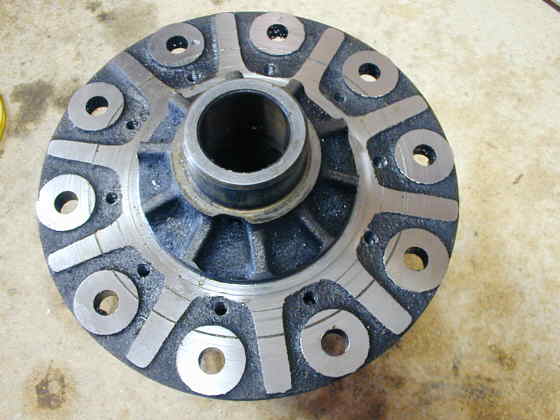
Here I've cut away most of the material to make the sprocket mounting surface. I'm starting with a 36 tooth sprocket, but I'm doing my machine work to accommodate a sprocket that would have a diameter as small as 31 teeth. I need to make sure that the center of the sprocket will go on and off over the main carrier bearings, which are pressed on. That dictated the diameter of this machined area and will also dictate the smallest bolt pattern that I can use to mount the sprocket.
................. .
.
Here I've finished the machine work on the end of the carrier.
...................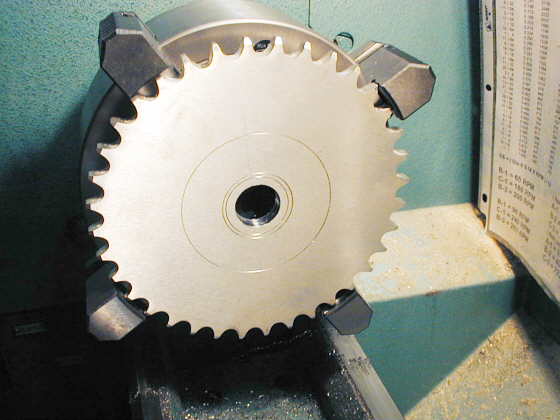
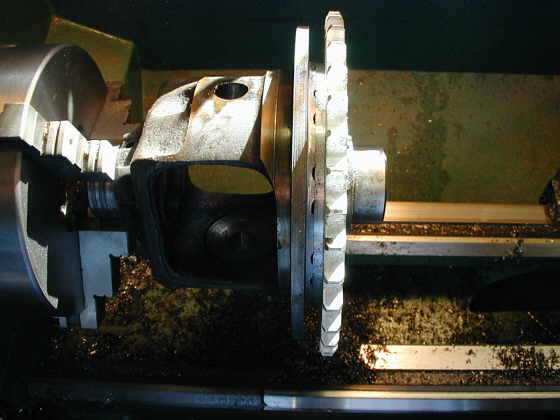
Next up was to cut the center out of the blank 36 tooth sprocket so that it would fit onto the end of the carrier. I mounted this in a 4 jaw chuck and put a cut mark at close to the diameter I needed as a guide for the next step.
.................
Then using a boring bar I cut the center out to the correct diameter..
.................
Here the sprocket has been put onto the carrier. Since the chain would hit the carrier, especially with smaller sprockets, I needed to make a spacer to move the sprocket away from the carrier. That was the next step.
.................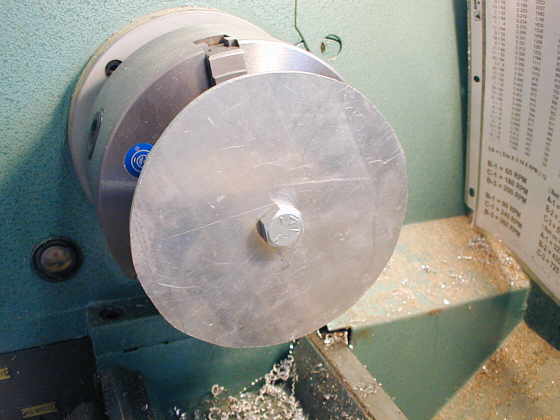
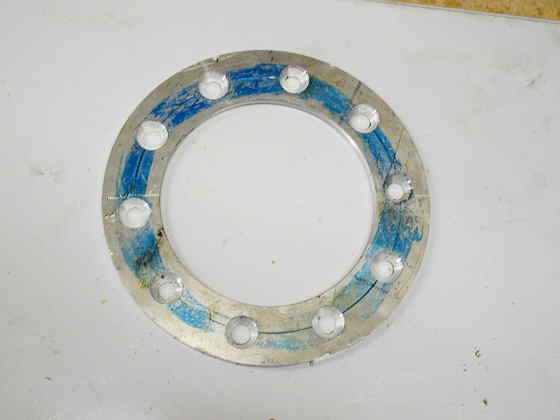
Using a saber saw I cut a round piece out of some scrap aluminum I had to the rough diameter. It is about .195 inches thick. Then I drilled a hole in the center and mounted it to the 3 jaw chuck with a bolt. Next I cut the outside to the correct diameter. It is a small enough diameter to clear the chain on a 31 tooth sprocket. Then I mounted it in a 4 jaw chuck (not shown) and bored out the center to the same diameter as the center of the sprocket so that it would fit onto the carrier.
.................
.The next step was to mount the spacer ring I made in the previous step to the carrier. I figured out the bolt circle diameter and marked off 10 hole location on that circle. I drilled and reamed out two of the holes and drilled into the carrier and tapped the holes in the carrier. This allowed me to mount the ring securely to the carrier. With it mounted I drilled pilot holes for the other 8 mounting screws.
.................
I removed the ring and drilled and tapped the other 8 screw holes in the carrier. They are the inner most
set of holes in this picture.
.................
Then I drilled and reamed the other 8 holes in the ring.
.................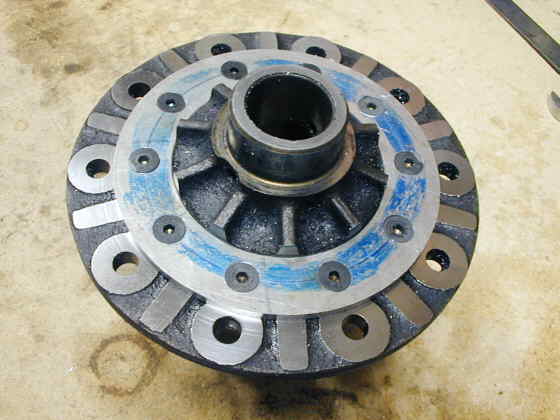
Here the spacer ring is mounted to the carrier with the ten 1/4 inch screws. I'll eventually, in final assembly loctite these in and they won't be able to back out since the sprocket will be bolted to the carrier with bolts that will go through this spacer ring. Those holes have not been drilled and tapped at this time.
.................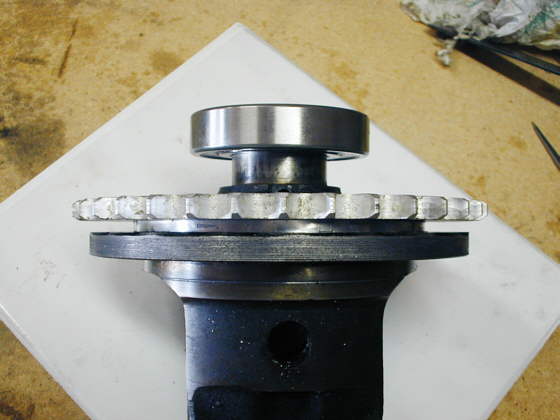
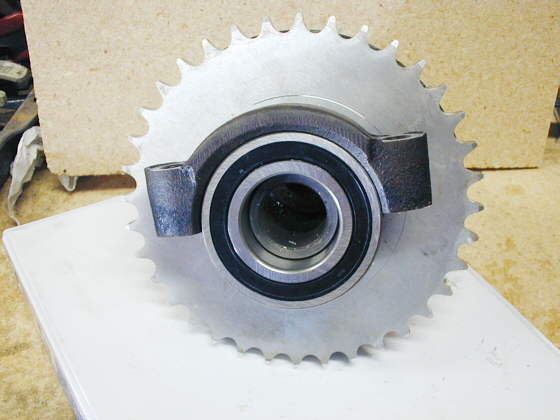
Here is a picture of the carrier with the spacer and the sprocket test fitted against it. Also in the picture is one of the ball bearings that the whole assembly will rotate on. It will need to be pressed on later. Also there still isn't enough room for the chain on the carrier side, so I will have to machine a little more off of the the ring gear mounting area on the sprocket side. I'll machine that area down to the same diameter as the spacer. I couldn't make the spacer thicker or the sprocket would be too close to the ball bearing to get mounting bolts on it. I want bolts so I can safety wire them.
.................
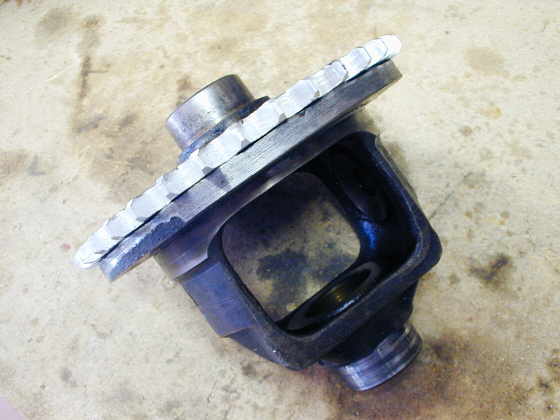
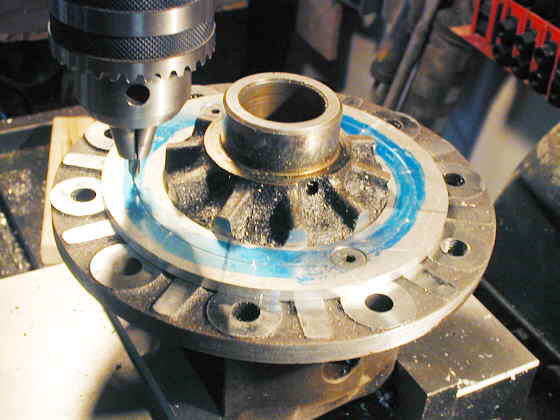
Here is a picture with the bearing cap that will hold the bearing. It is from the stock Datsun rearend. I need to machine a block that the bearing cap can bolt onto with a 1/2 round area cut out of it for the bearing. That block will also be used to mount the rear to the frame.
.................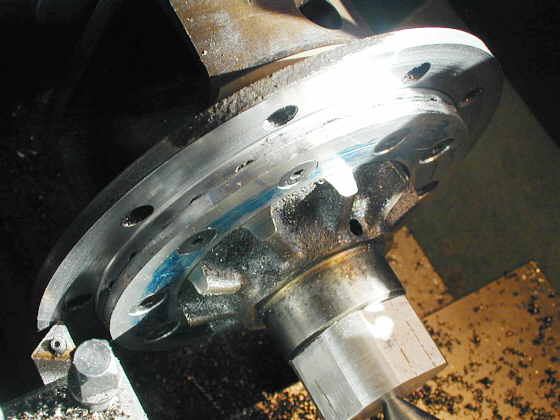
It's a day or so later and I finished cutting the carrier for chain clearance. You can see how much further I've cut into the carrier next to the sprocket spacer.
.................
Here you can see that with the spacer between the carrier and the sprocket and also with back-cutting into the outside face of the carrier I've now created enough clearance for the chain. I needed this in case in the future I run a smaller sprocket.
I'm waiting now trying to find a piece of aluminum that can be used to make an adapter for the disc brake rotor. It will mount where the old ring gear mounted. Benny is looking for the aluminum for me in Texas. Thanks Benny!!
Boy it feels good to finally be doing something on this car.
..................................................................Next Page