...Return To Mine & Other Bonneville Car Construction Pages
.Previous Page...............B'ville Car Index Page.........................Next Page
.............. Rear Spring & Shock Mounting - Part I
..................
On this page I'll start making the pieces that will connect the shock and spring from the lever arm to the chassis. I started by making these brackets and welding a shock mount from Speedway to them. At this stage I just tacked the shock mount to the brackets.
................. .
.
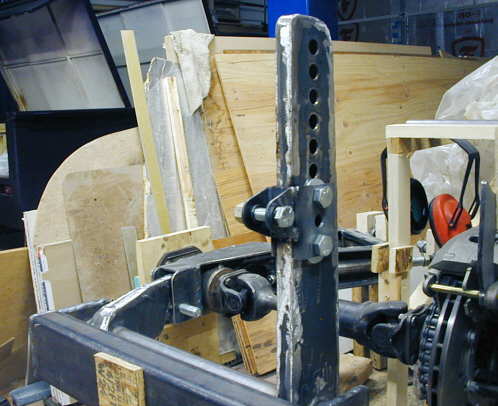
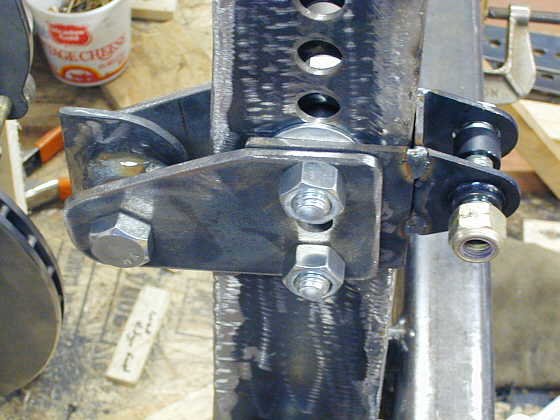
Here the shock mount is bolted to one side of the lever arm. The holes in the lever arm permit different mounting heights for different leverages on the shock. The shock will lay horizontal to the ground behind the lever arm and next to the parachute tube.
................... .
.
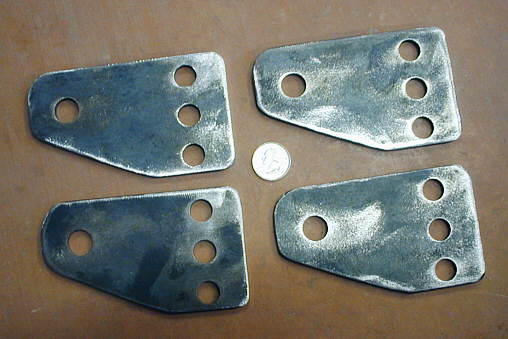
These are the four brackets to mount the spring assemblies to the two lever arms.
................................ .
.
Next came a piece that will be part of the spring housing assembly and that will attach to the brackets above. I bought a 5/8 inch ID bushing from the hardware store and took a piece of 1 1/4 inch round cold rolled steel and bored it out so the bushing would fit into it and bored the bracket out so that the cold rolled piece would fit into the bracket.
........................... .
.
I welded the cold rolled piece to the bracket, centering it.
............... .
.
Here you can see how the shock mount attaches on one side of the lever arm and the spring mount attaches to the other side. They don't have to be opposite each other. Both can be mounted at any location on the lever arm by using spacers if they aren't opposite each other.
............... .
.
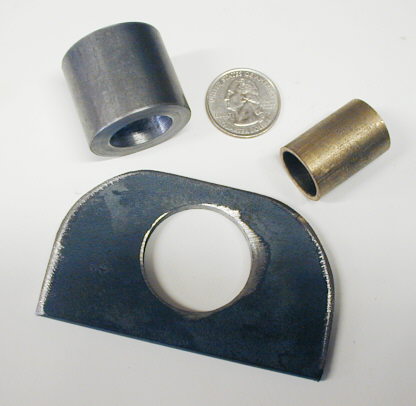
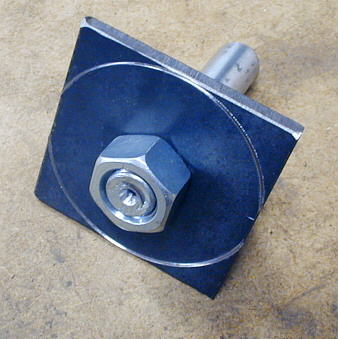
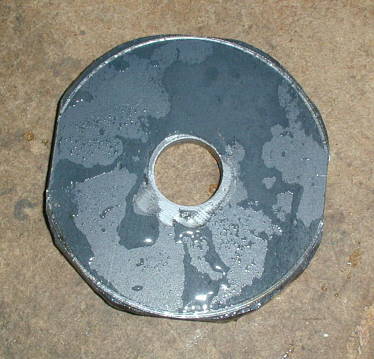
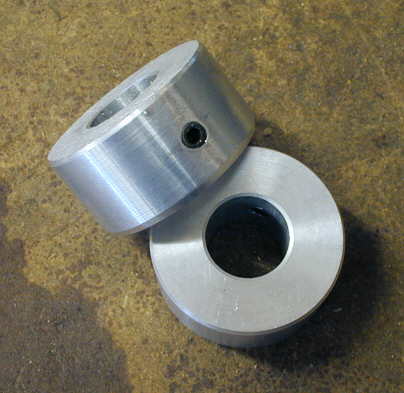
The piece above will mount inside of the coil over spring (where the shock would normally mount) and the large round washer to the right will be a stop on one end of the 2 inch by 10 inch coil over spring. On the left end is a "jack bolt" round nut that will be held stationary so that the jack bolt can pull the spring towards the nut and set the ride height of the car. This will make more sense on the next page when you see the completed assembly.
........................................ .
.
I made the large "washer like" piece above from a piece of 3/16 X 3 inch strap. I cut a piece 3 inches long and drilled a hole in center for a bolt with the head cutoff. I mounted that in the lathe and turned a circle on it.
.................................... .
.
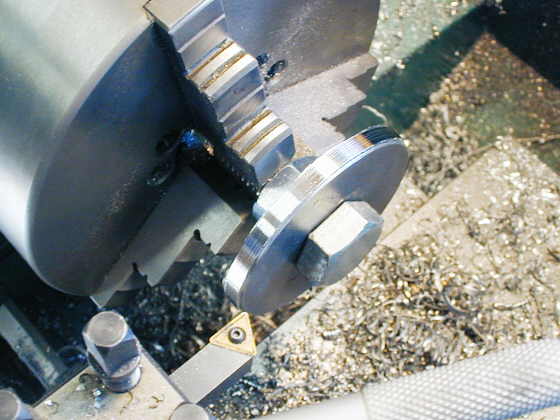
Then I cut the corners off with the chop saw and hit it with the hand grinder to get it close to final shape.
............. .
.
By putting it back in the lathe I was able to turn it to the final diameter in a couple minutes.
............................. .
.
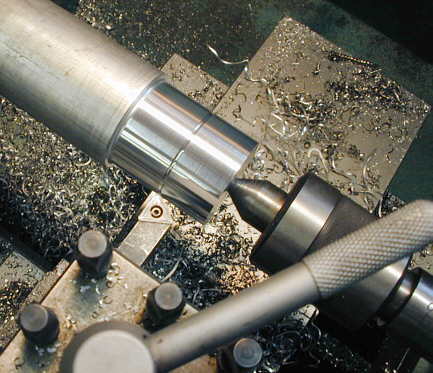
I wanted a bushing next to the piece above on the bolt so that the spring would stay centered on the flat washer. I turned a piece of 2 inch aluminum down to the coil over spring ID (made two so I would have one for the other side of the car).
............. .
.
I bored the above piece to 3/4 inch for the bolt that will go through it.
................................ .
.
Next I drilled and tapped a hole for a set screw so that the bushing will stay in place next to the larger washer on the bolt shank.
............ .
.
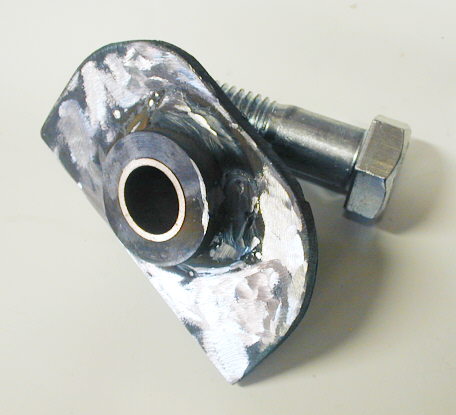
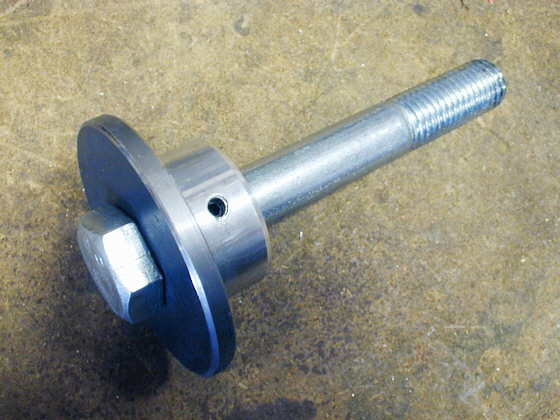
Here is the last couple pieces assembled on the 3/4 inch bolt. This will hold one end of the coil over spring when I'm done.
........................... .
.
I needed a means of connecting the 3/4 inch bolt to the 1 inch jack bolt and still fit inside of the spring. The 3/4 inch bolt is there to get me enough length to go all the way through to the end of the coil over spring. To make the connector for the two different diameter bolts I cut tapers (to give me more weld area) on a 3/4 inch black nut and a 1 inch black nut. Then I took a piece of round steel and turned it down so that the 3/4 inch nut could slide on and would be centered on and against the 1 inch nut.
...........................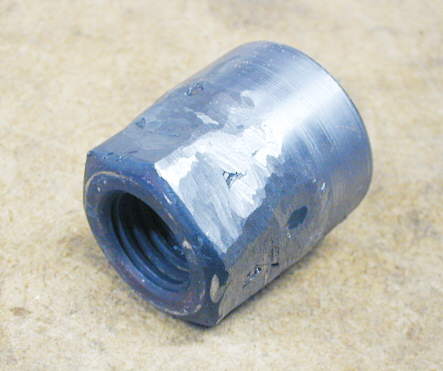 .
.
Next I welded the two nuts together using the round bar as a guide. After they cooled I turned them down slightly on the lathe. This concludes the piece that will control one end of the coil over spring.
............................
And another picture of the above components assembled together. As I'm making
all of these parts I'm making enough for the other side of the car at the same time. I'll just have to weld them
together when I make sure this looks like it will all work.
..................................................................Next
Page