...Return To Mine & Other Bonneville Car Construction Pages
.Previous Page...............B'ville Car Index Page.........................Next Page
............................--- Rear Control Arms Part III ---
Next up on the rear control arms is to make a point for the suspension to pivot off of similar to the way some drag cars/dirt cars have a arm off of their torsion bars that rides on the top of their front axles. In my case the lever arm will ride on a 3/4 inch bolt at the rear of the outer hub and transmit the lever action to the center of the car where the springs/shocks will be via a steel tube.
...........................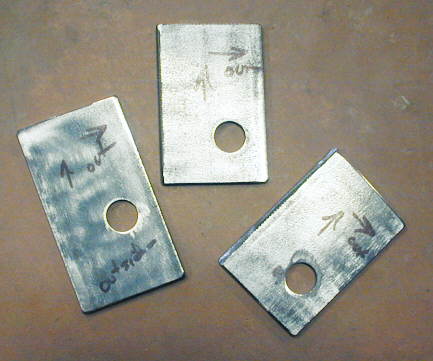
I cut and drilled these 3 plates from 3/16 inch strap. The hole is for the 3/4 inch bolt that I talked about above. I drilled through all 3 pieces at the same time so that the hole would for sure be in the same place in each one. 2 of the pieces are the same length and will attach at the back of the hub to the A-frame assembly and the third will attach to the bracket that bolts to the bottom of the hub and to the A-frame.
.......... .
.
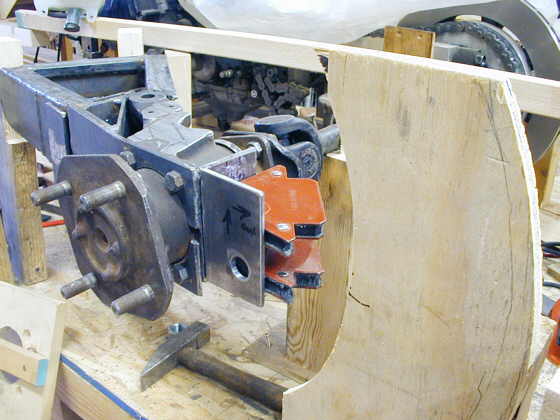
I positioned one of the inner 2 pieces from the previous step where I wanted it and tacked it there. The curved plywood to the right represents where the wheel rim and tire will sit. I made it so I wouldn't have to keep putting the wheel/tire on to check clearances.
............ .
.
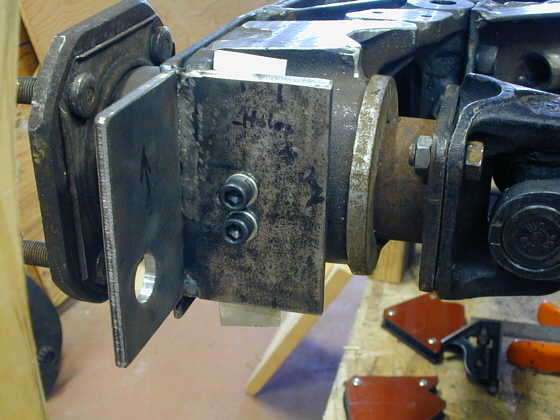
I also drilled and tapped two holes for these allen screws to better tie the back of the A-arms to the hub. I placed a piece of very thin aluminum behind the back at this point when I welded the vertical piece with the screws through it to the rest of the A-arms. I wanted a little clearance to help in removing the A-arms from the hub when the hub needed maintenance. You can see the thin aluminum in the upper part of the picture sticking up.
.................. .
.
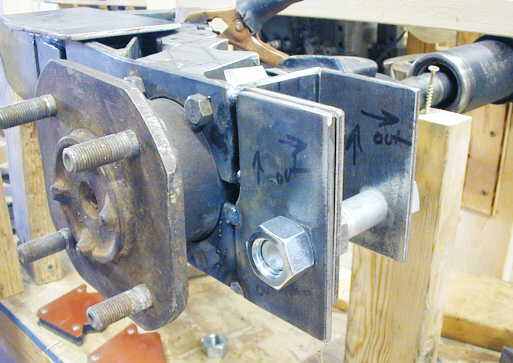
After I had one piece tacked on I welded the longer piece to the left onto the bracket that goes around the bottom of the hub. Then I inserted a 3/4 inch bolt (not the one I will use when finished) into the two left pieces and double nutted it. That held the piece for the right side in position while I welded it to the A-Frame assembly.
.......................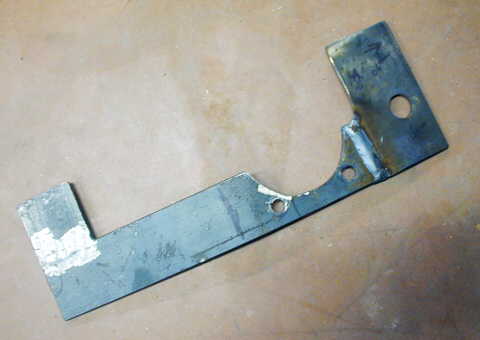
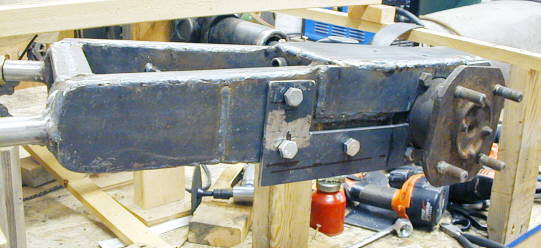
Here is the bracket that goes below the hub. I removed it and finished welding the plate on the right side of it. This piece as you will see later will bolt to the bottom of the hub and to the A-frame on both sides of the hub to help reinforce the entire A-frame.
.....................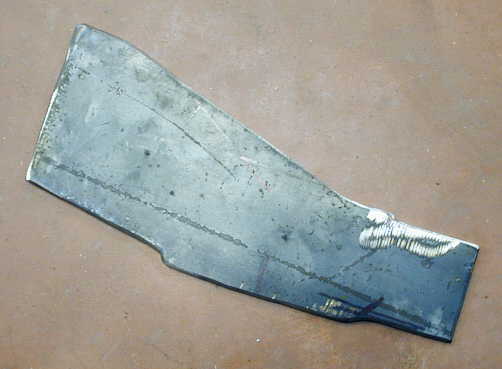
I cut and ground this piece of 3/16 X 4 inch strap into the shape I wanted to put into place on the top of the A-frame over the hub area.
..............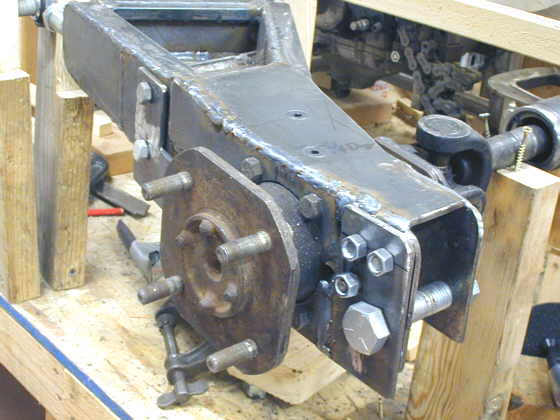
Here you can see the previous piece welded into place. I also drilled and tapped holes through it and into the top of the hub for two allen headed taper headed screws that will tie all of this to the hub even more. You can also see the bracket from two steps above bolted into place below the hub and with additional bolts in the back and front of it.
.................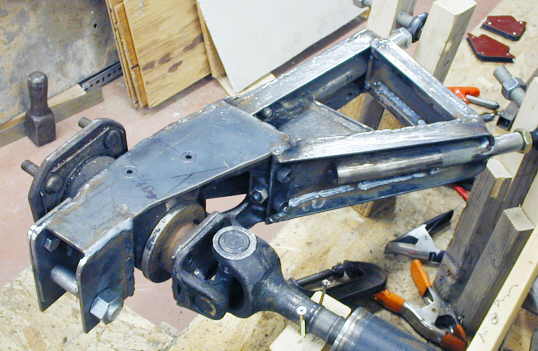
A view of the entire assembly at this point.
................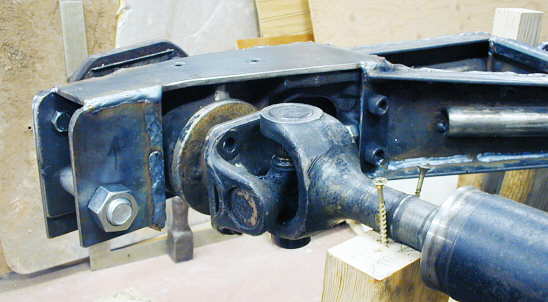
Not shown here, but added after this picture was taken, is a piece of 1/2 inch square tubing that I welded in between the two vertical plates right below the 3/4 inch bolt at the bottom left corner of the bolt support pieces.
................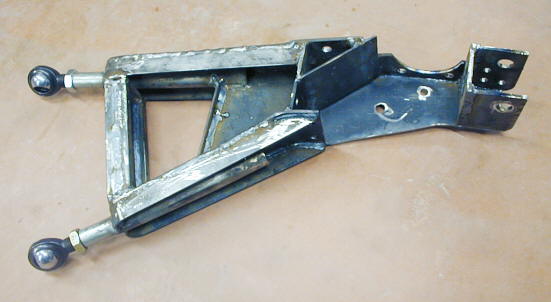
A view of the A-arm (control arm) off of the hub. I never took it off until I had everything welded in place and had worried all the time that I might have trapped it on the hub, but it came off easily.
...................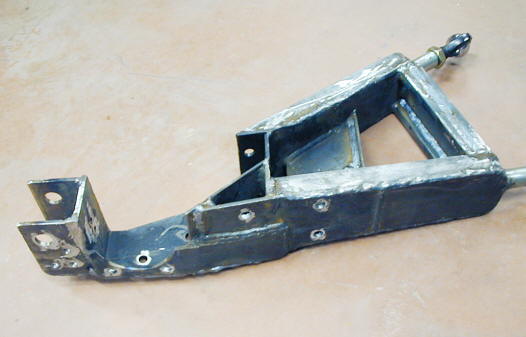
From the other side.
................
And with the bottom support piece in position.
..................
Now I have to make a second one for the other side of the car. I'm never crazy
about duplicating something I have already figured out. I guess I'll have to, since that is the only way I can
go onto the next step, which is constructing the lever arm to ride on the 3/4 inch bolt I've made a home for here,
and the tube and inboard lever to hook all of this to some springs and shocks.
..................................................................Next
Page