...Return To Mine & Other Bonneville Car Construction Pages
.Previous Page...............B'ville Car Index Page.........................Next Page
...............................--- Seat & Roll Cage Part II ---
What is the saying about two steps forward and one step back. I ended up re-doing some of the mockup cage from a day or so ago. I was having a real problem getting in and out of the car and moving back under the helmet hoops. In a reclining position you can't roll your head out of the helmet hoops. You have to slide forward and then raise your head. Sliding forward was a problem due to the foot pedals and if I tried to bend at the knees and slide forward my knees would hit the top of the foot tunnel.
I had been trying to keep the cage simple with straight crossmembers on the bottom. This just wasn't going to work, so since the bottom of the car is going to be rounded I decided to make the bottom crossmembers curved to fit the bottom of the car. The only negative about this is that I'm going to have to get this .120 X 1 5/8" tubing bent by someone with a mandrel bender. I'll have that done at the same time I have the helmet hoops bent.
............. .
.
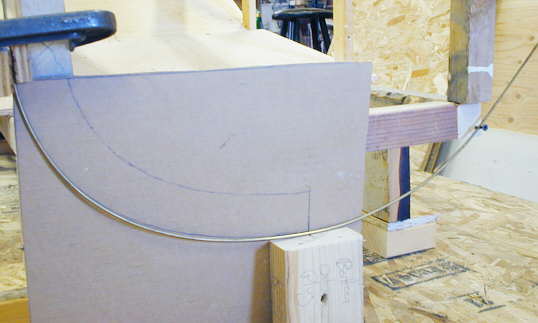
At the same time I will move the bottom rails up a few inches to get a nice curve on the bottom of the car. They will be moved up to the "X" area on the left upright by the C-clamp. They will also move out about 1/2 inch. I clamped a wire 1/2 inch out on the left side and put a block of 2 X 4 coming up from the surface plate. The block represents the bottom of the motor and the bottom of the car. I then bent the welding wire into the desired curve.
............ .
.
I put a piece of cardboard behind the wire and marked the bottom contour. Then using a thin piece of wood 1 5/8 inches long (thickness of the final crossmember) and a pencil I scribed a second line to represent the top of the crossmember.
........... .
.
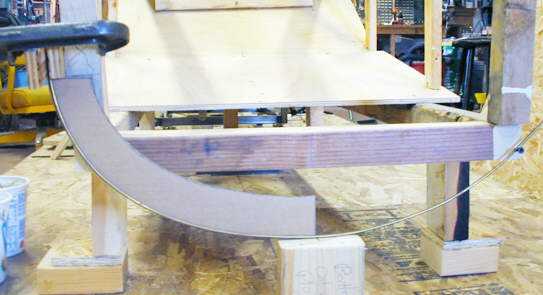
I cut the piece out and tried it for fit.
......................................... .
.
I then used that piece to make a final cardboard pattern by flipping the 1/2 pattern over. It looks wide, but remember I'm going to spread the bottom rails to the same width as the top rails.
............................
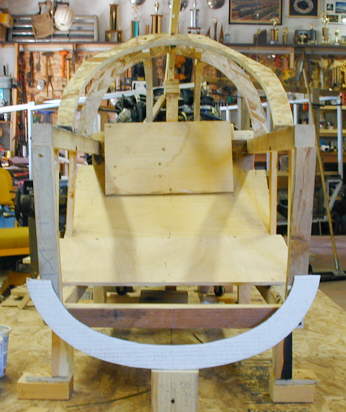
I then used the pattern to cut a couple wafer board cross members. I supported the top of the cage with some temporary wooden pieces and took out the uprights and bottom rails. I shortened the uprights and put them back in which moved the bottom rails higher than before (see above). The horizontal 1 X 2 on the front of the bottom crossmember is to hold the bottom of the temporary foot tunnel (see next picture).
..........................................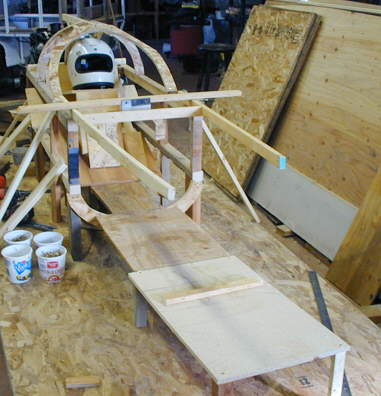
Here I have added a couple pieces to represent the bottom of the foot tunnel. The board laying crosswise on the bottom is where my heels go. The two boards sticking out the front are there so I can lay something on them to see if my knees don't hit that area on entry/exit. The horizontal board at the top of the cage above the new bottom cross member represents the first top crossmember. The next board towards the back of the car is my steering wheel mocked up. My butt is now lower in the car and it is easier to enter and exit the car. This will be the tallest part of the body (along with the motor) and it is a little less than 30 inches top to bottom from the top of the roll cage to the bottom of the bottom crossmember.
..................................................................Next Page