...Return To Mine & Other Bonneville Car Construction Pages
.Previous Page...............B'ville Car Index Page.........................Next Page
..................................-- Side Pod Mounts Part I --.................
.................. .
.
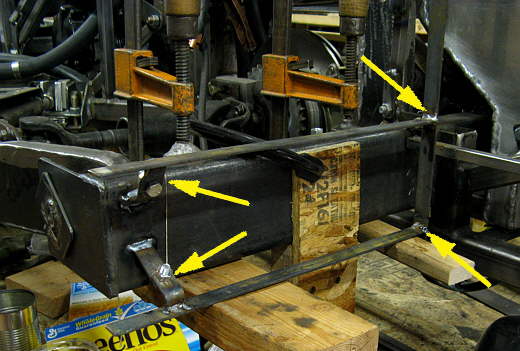
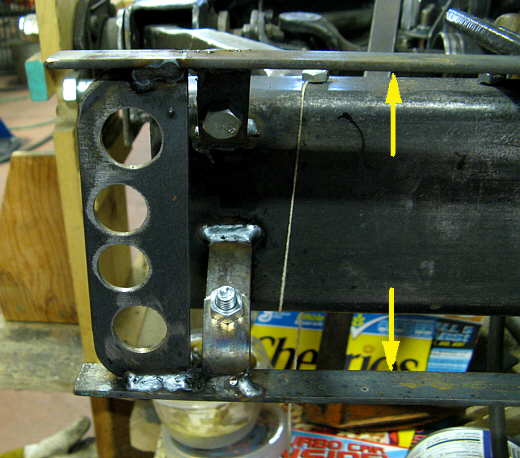
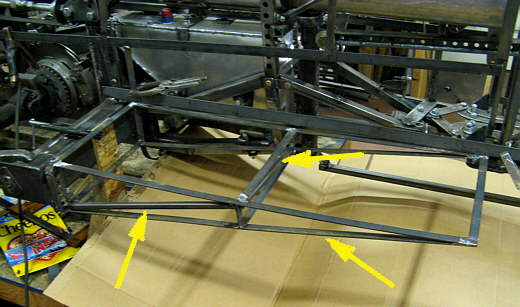
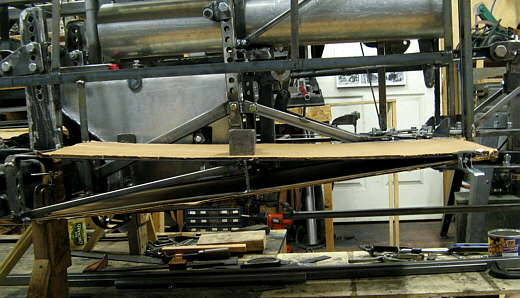
Well as per usual I got the mounts made for the body on the doors, but then decided I needed the mounts below the door. This led me to decide that I should do the rear of the side pods also and connect all of these mounts together so that they would come off together and hopefully the whole rear of the body can also be one piece when it is done. I started right behind the rear cross-member that locates the lever arm out on the outer axle. Two horizontal pieces of strap were located with the tabs welded to the cross member (left 2 arrows) and onto a vertical piece (right 2 arrows) that goes up to the upper body mounts. The side pods are 6 inches thick at the rear axle and the bottoms slope up from there to this point at under 7 deg.. So at this point the pod is 5 inches thick.
.................. .
.
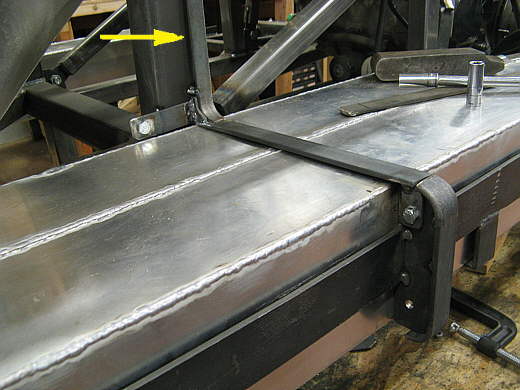
Here is a picture from before up at the firewall area of the pods. On the right side of the pod is a piece that curves and goes down the side of the pod and then curves at the bottom and goes back to the pod. At the rear where we are working on this page I wanted a similar piece, but only needed it to be 5 inches tall.
.................. .
.
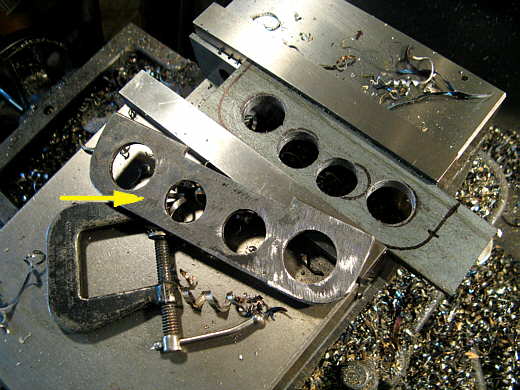
I used one of the front ones (6 inches tall) as a pattern and made the back ones (one for both sides of the car) and shortened them to 5 inches.
.................. .
.
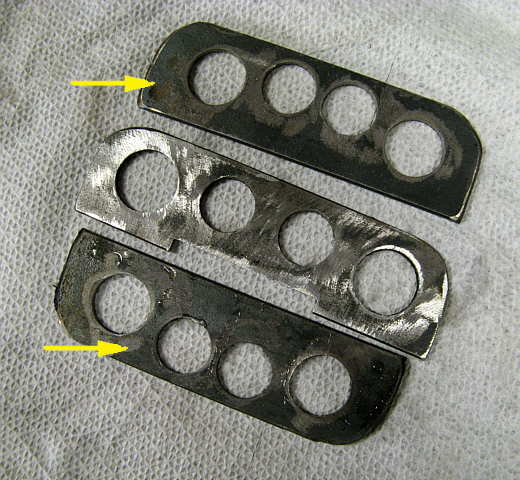
Here are the two finished ones (arrows) for the back of the car with one of the front ones between them.
.................. .
.
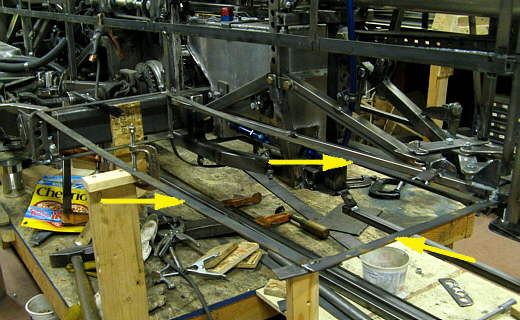
These were welded to the ends of the two horizontal pieces (arrows) so that they were the same distance from the centerline of the car as the ones further forward on the car.
.................. .
.
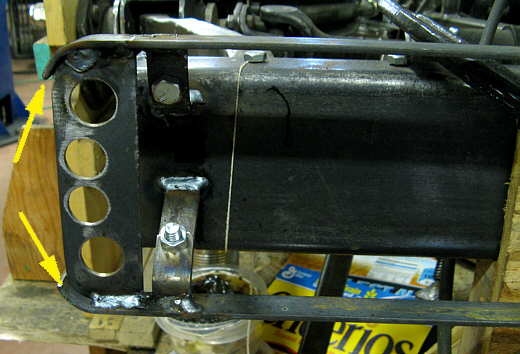
The ends of the horizontal pieces (arrows) were then bent around the ends and the gap between the two arrows was filled with a short piece of strap (not shown).
.................. .
.
The arrows point to the inside top of the pod body mount. It curves down about an inch and ends right at the front of the chute door. The curve was to lower it to clear the leading edge of the door when it opens and to shorten the length of the end of the pod. The right arrow points to a piece temporarily tacked there to hold the strap where I wanted it.
.................. .
.
The top of the pod slopes down a little steeper at the front and comes....
.................. .
.
........ a much shallower angle at the rear where it will meet the upward slopping bottom of the pod. There again I want them to meet in a fashion that they will become parallel to each other for better flow.
.................. .
.
Once I had the inner top piece (middle top arrow) I welded in the outer piece (left arrow) and the end piece (bottom right arrow). I used pieces of wood to get the curve on the outer one equal to the inner one. I laid a level from side to side at various places.
.................. .
.
Next I welded in the bottom piece on the outside (bottom left arrow) and also the inside one (behind the middle arrow) tapering up with similar angles as the top (steeper then moving towards horizontal at the end). The left arrow points to a 1/2 X 1/2 thin wall square tubing diagonal brace and the middle arrow points to another. This has a little flex at the very back outer corner, but I think when the body is all welded up in this area that will be gone.
.................. .
.
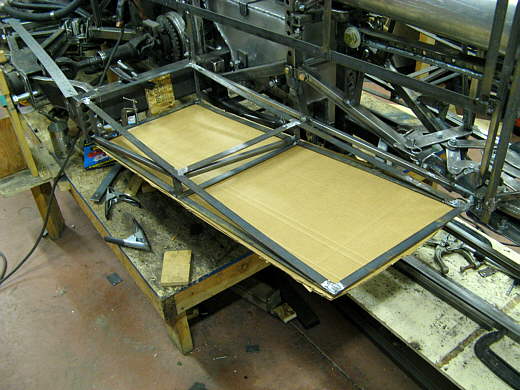
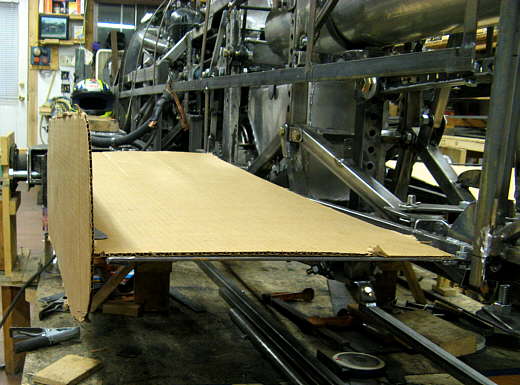
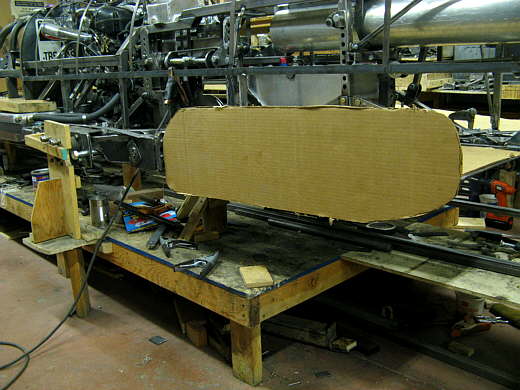
The cardboard gives you an idea how the pod will slope up from the bottom.
.................. .
.
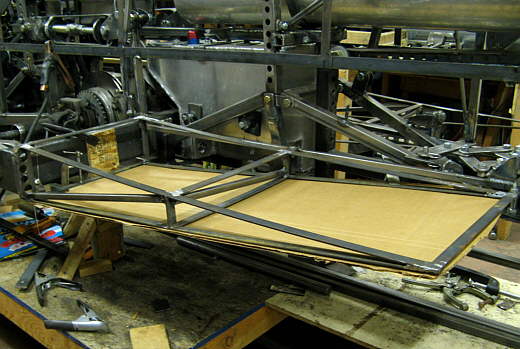
Another view.............
.................. .
.
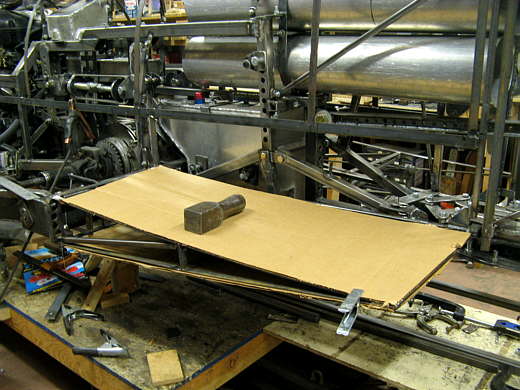
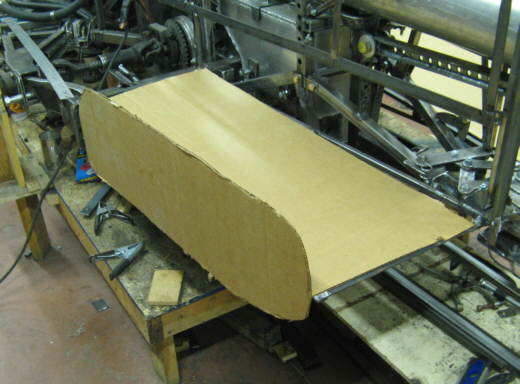
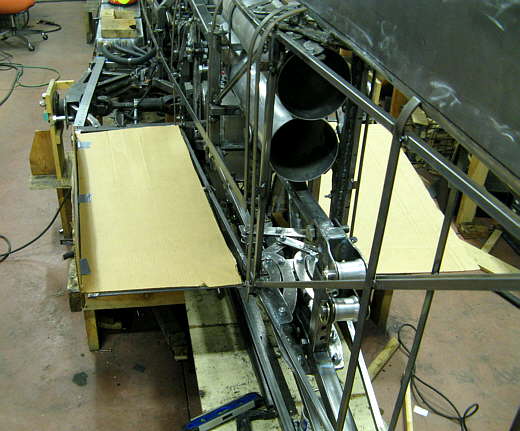
Here is how the top should end up looking.
.................. .
.
You can see how the top an bottom come together like the back of a wing and........
.................. .
.
........... how they meet at a very shallow angle.
.................. .
.
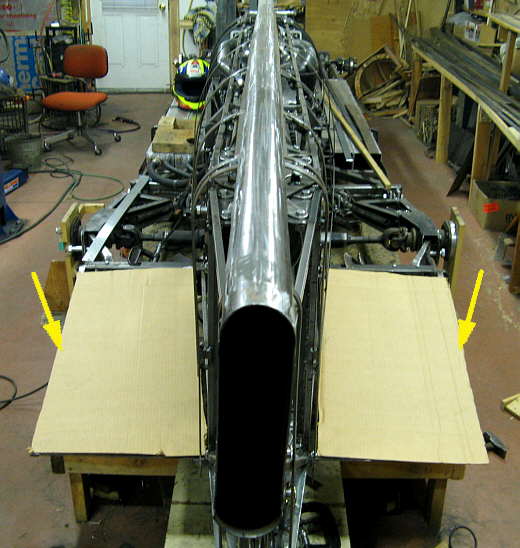
From this area forward on the car the sides of the pods are parallel to the car's centerline. Back here behind the rear wheels/tires the start to follow the body in at around a 7 deg. angle.
.................. .
.
Theoretically the side pods and their shape at the front and rear could/might produce some down force, but who knows for sure. I toyed with the idea on attaching spill plates back here to keep the air on the wing like shape and not have it spill off of the sides.
.................. .
.
The unknown is the wheel/tire in the same area and the inward angle that the spill plates would be at that might...
.................. .
.
...................induce more drag, interfere with the chute doors, etc.. So for now I don't
.................. .
.
.......plan on putting spill plates on the sides, but might try it at some point down the road.
..............................................................Next Page