...Return To Mine & Other Bonneville Car Construction Pages
.Previous Page...............B'ville Car Index Page.........................Next Page
...............................................-- Firewall Part I --.................
.......................
 .
.
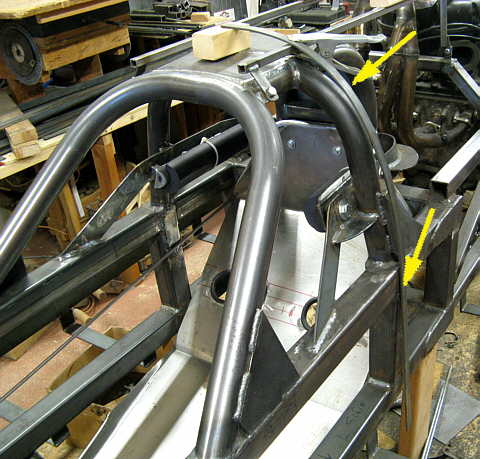
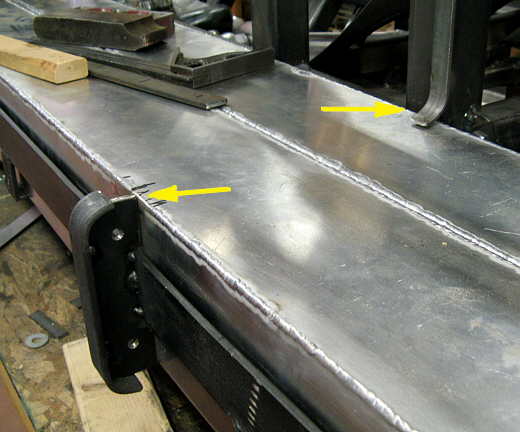
I was about ready to start on the inlet and exhaust tracks that will be on top of the car. And to go that I needed to know where the top of the car was going to be. I decide to build the fire wall behind the driver compartment as it would define the final body shape of the car there, which also happens to be the widest and tallest part of the car/body. I bent a pieces of strap (arrows) into the shape that I wanted the body to be at this point.
.................. .
.
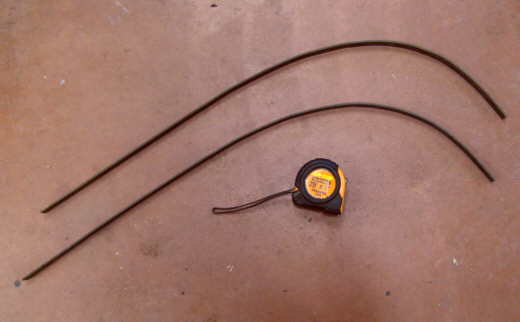
Then using the first piece I bent a second piece so the other side would be identical.
.................. .
.
The two pieces were welded together (top middle arrow) and tacked to the frame (left arrow). Every thing below this curved piece has to be filled in with at least .060 metal with .095 being preferred. I'll be using both, .060 steel in parts and .095 aluminum in the rest).
.................. .
.
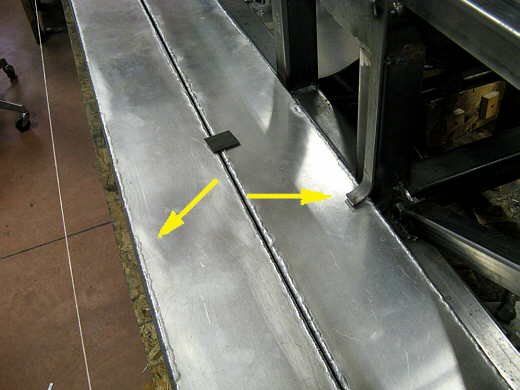
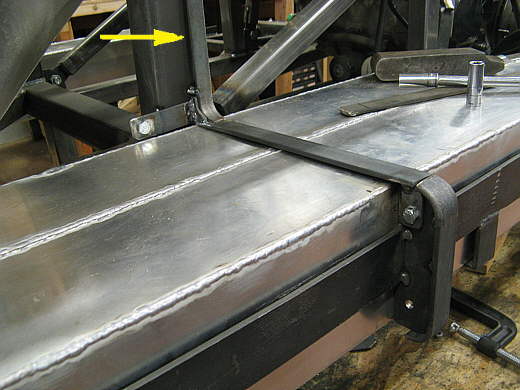
The body/fire wall also has to cross over the water tanks on both sides of the car and under them and then back under the car. The arrows point to where the water tanks will be crossed. The right arrow points to the bottom of the previous installed piece. I also have to be able to remove these tanks.
.................. .
.
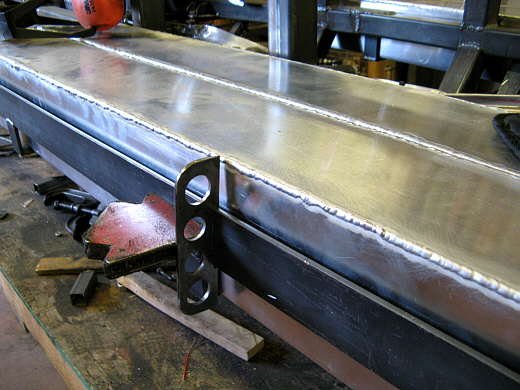
There is a two inch piece of strap that runs down the length of the outside tank. I made these pieces to weld to that strap on both sides of the car.
.................. .
.
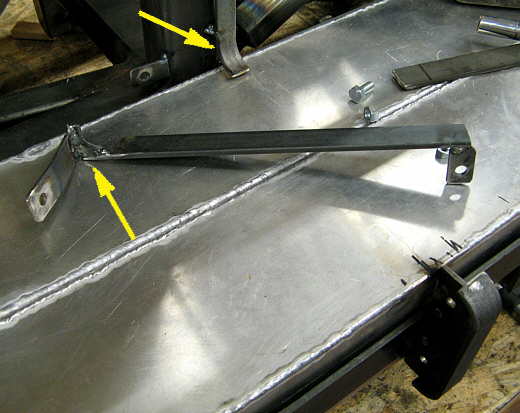
Here the one on the left side of the car has been tacked to the strap and a piece of flat strap wrapped around it. This piece will be the shape of the body skin that will go around the tanks and this piece is like a little mini fire-wall in this area. Next a piece had to be made to bridge the gap between the arrows and.................
.................. .
.
............ this is the piece that was made to do that and be removable for tank removal. The tabs on it secure it to the main frame on the left and the out-rigger on the right. The left arrow points to a built up area the fills in the area that the right arrow is pointed at. Remember is is the fire-wall and openings have to be filled.
.................. .
.
The body panels will all fit against the pieces made so far.
................................ .
.
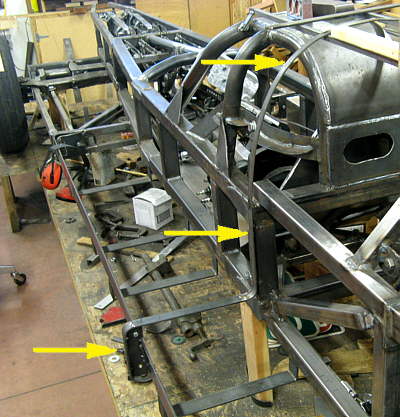
The arrows point to what has been done to this point. I wanted some more of the out-riggers like the left arrow is pointing to to go along the side pods every so often to support the body.
.................. .
.
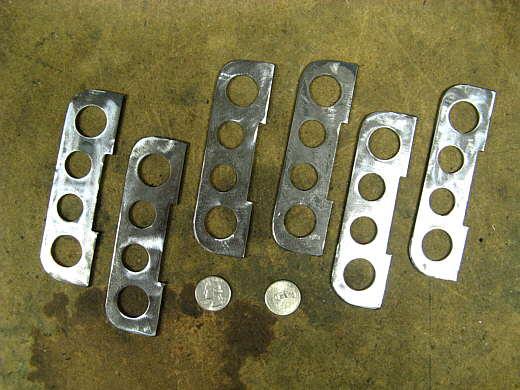
I use the first ones as patterns to make a number more. Since these are not fire-walls I could drill holes in them, which I did.
................................. .
.
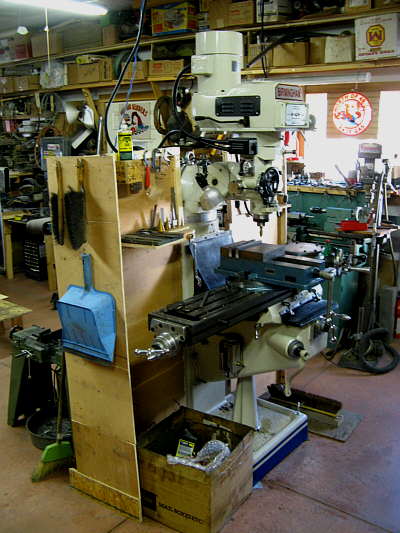
Now for the new addition to the shop. I've enjoyed the machine work so much that I've been saving for the last couple years for a big mill and I just got this one from Harbor Freight before the prices went up. It has a 9 X 49 table and is variable speed. Needless to say I love it, but still there isn't anything that I couldn't make on the mill/drill that I've been using. This one just makes life easier.
.................. .
.
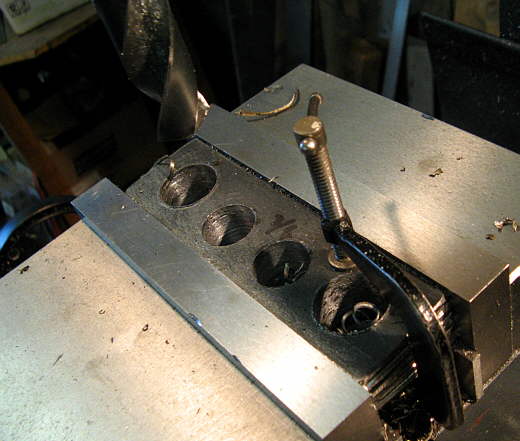
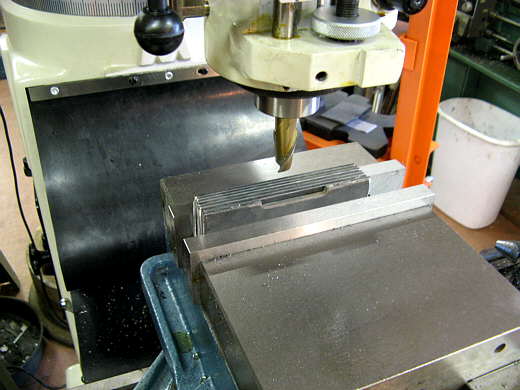
Ok now for one of the first things I've use the new mill on. I used one of the side brackets as a guide to where I wanted to mill out the other ones so that they could be welded to the strap next to the water tanks.
.................. .
.
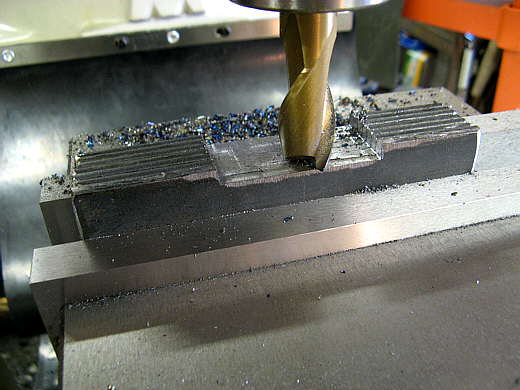
The mill cut them like butter compared to my other smaller one. I never like doing steel much on it as I had to take small cuts. This one can really take some metal off fast.
.................. .
.
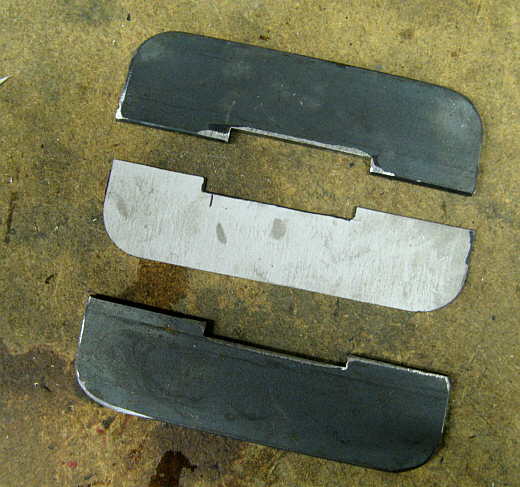
Here are the finished brackets, three for each side of the car and ..................
.................. .
.
............ where they will go later.
..............................................................Next
Page