...Return To Mine & Other Bonneville Car Construction Pages
.Previous Page...............B'ville Car Index Page.........................Next Page
......................-- Finish 95% of the Driver's Cage --
It was finally time to replace the wooden cage around the drivers head with real steel. A year ago almost I had the hoops bent at my friend Sam Woodard's shop in Oklahoma when I was going through. I took some patterns and we bent them as close as possible to the patterns with his tubing bender. I recently spent a lot of time in the car raising and lowering the wood hoops until I was comfortable getting in and out and with my line of sight out the front of the car.
................... .
.
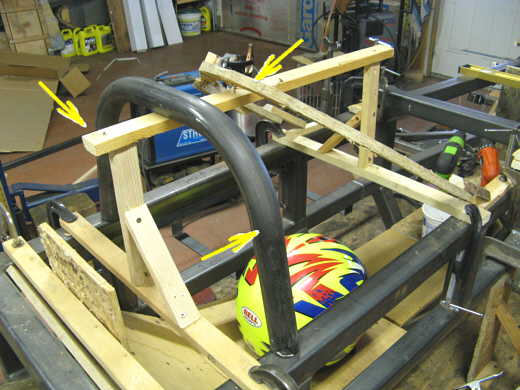
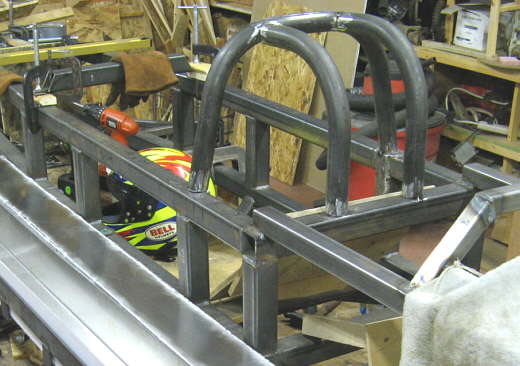
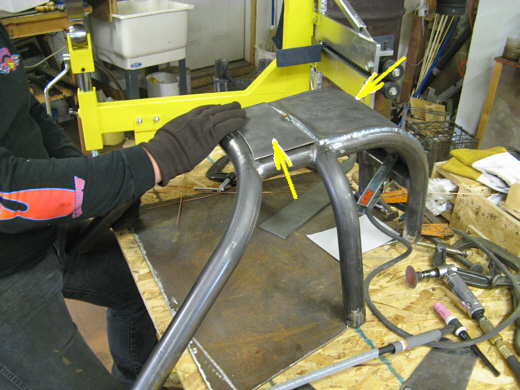
I started by putting a wooden structure (top left arrow) down the center line of the car and at the height I wanted the hoops. The front hoop is represented by the wooden one (top right arrow). I cut the rear hoop (bottom left arrow) to the correct height and centered it on the wood support and tacked it to the top frame rail.
................... .
.
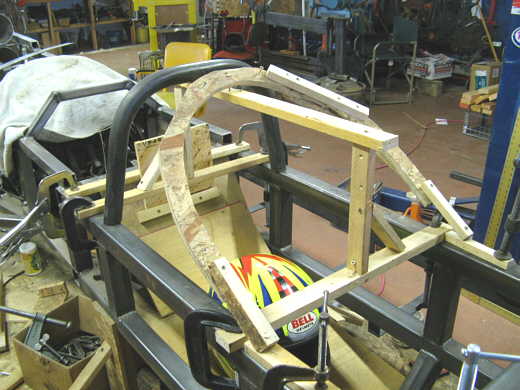
Here is another view with the rear hoop in place temporarily.
................... .
.
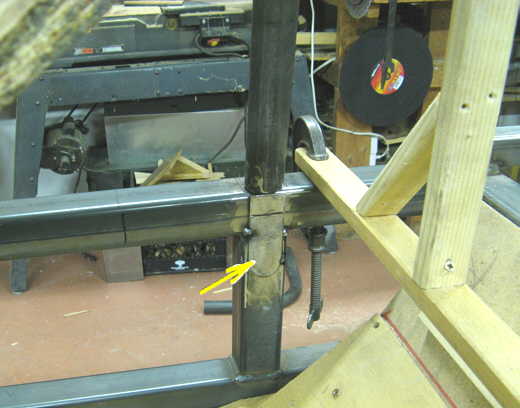
The hoop was slightly narrower than the frame rail. I tacked 3/13 inch strap to the frame on both sides. It also helps to tie the top rail to the vertical member. After I was satisfied I completely welded the strap in place.
................... .
.
Next I took the two back 90 degree bent tubing (one shown by arrow) and trimmed it to fit vertically to the first hoop. It was tacked into place.
................... .
.
Then I did the same for the other side of the back. All of this is 1 5/8 roll bar tubing. I had also bent the front hoop at Sam's, but wasn't real happy with how it fit so while I was at Phil's in Colo. a few days before this work I left him with a new pattern so he could bend a new front hoop.
................... .
.
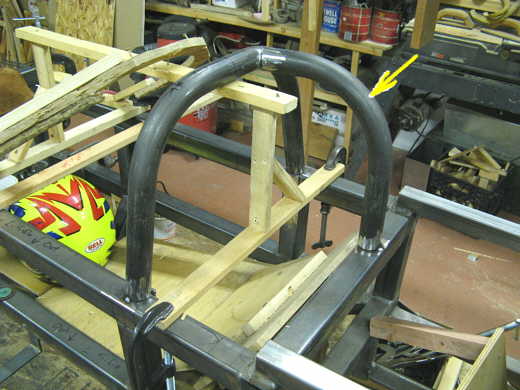
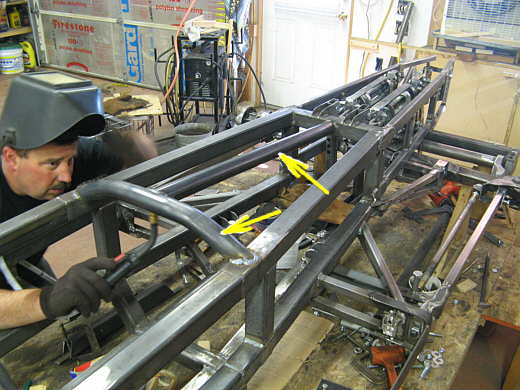
Phil does all of his roll cages out of 1 3/4 inch tubing and that is what his bender is setup for so the front hoop is 1 3/4 inch tubing. He came over on Sat. with the new front hoop (right arrow) and also a crossmember (left arrow) that I had also given him a pattern for. They both fit really good and I'm real happy about them Above you can see them after we trimed them to fit and tacked them into place. We also added two straight pieces (not shown) that tied the front hoop to the back hoop at the top and that were in line with the back two 90 deg. hoops.
................... .
.
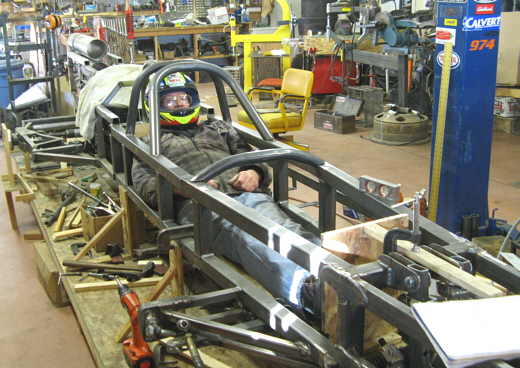
Here I am in the car which is 22 inches wide from outside of the frame rail to the outside of the frame rail on the other side. The areas where my elbows are will be plated between the two uprights in that area. It was tricky getting that front crossmember in just the right place where I could get in and out and also be low enough to see over when the body will be on the car. It all works good at this point.
................... .
.
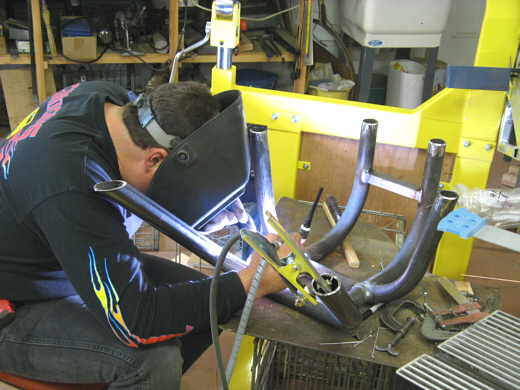
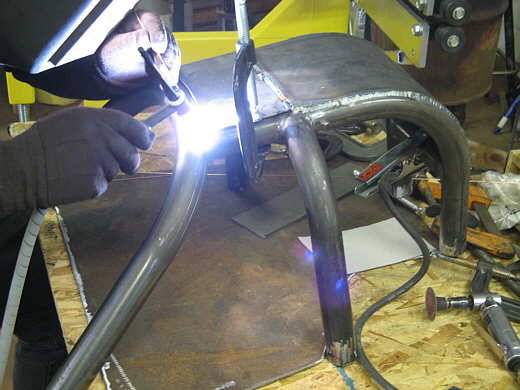
After the cage was all tacked together we cut the tacks holding it to the top frame rail and Phil finish welded it with the tig welder.
................... .
.
Next we took some .120 plate and bent it around the hoops from down on the back side up to the middle of the back hoop. Phil then ...............................
................... .
.
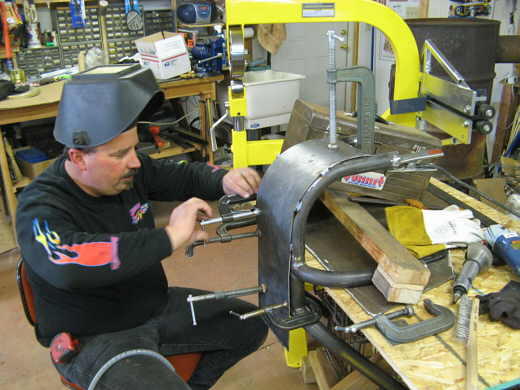
..... welded that all together (back arrow) and then fitted a piece (left arrow) to tie the front ......
................... .
.
..............hoop to the back hoop and welded that on.
................... .
.
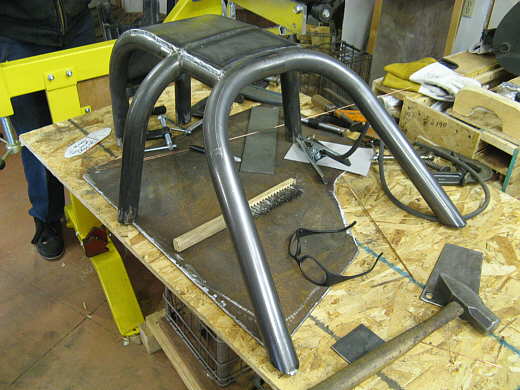
Looks nice doesn't it?? Phil did a good job of helping me fit this to the car and finish weld it.
................... .
.
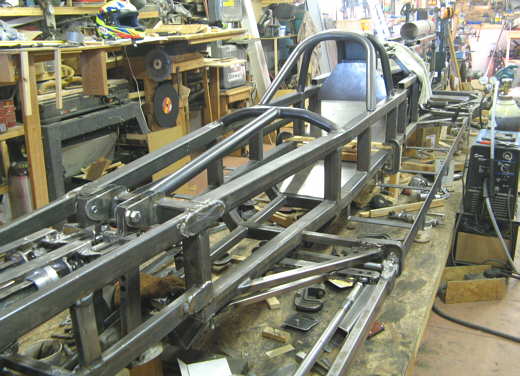
Here it is temporarily back on the car. We didn't want to finish weld it until the seat was done that you see started in this picture. I was working on that while Phil was welding the cage.
................... .
.
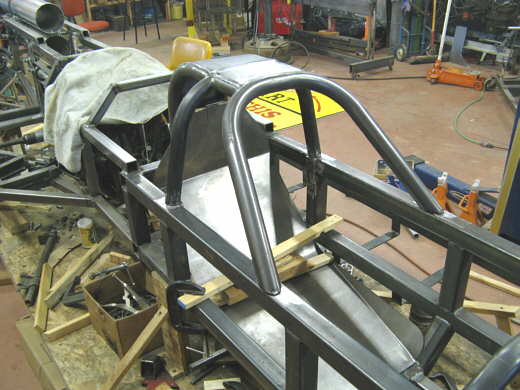
With the new crossmember (bottom left arrow) in place a piece of round tubing (top arrow) was added to tie the crossmember into the front of the cage.
................... .
.
A picture showing progress to this point. Once the cage is permanently welded in gussets will be added as per the rules and side supports will be added to limit the lateral movement of the head/helmet. Phil thinks it now is starting to look like a potential race car.
..............................................................Next Page