...Return To Mine & Other Bonneville Car Construction Pages
.Previous Page...............B'ville Car Index Page.........................Next Page
................. SBC 383 -- Starting on the Front-end
............................. .
.
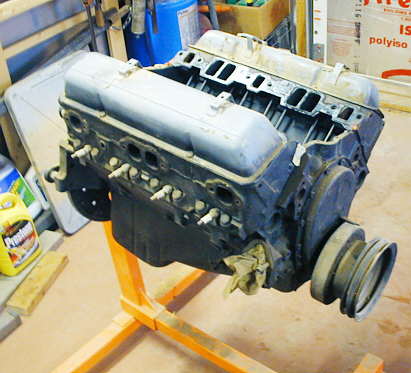
My wife has a '72 Ford 3/4 ton with a camper on it and a 390 motor with a C-6. It gets about 10 miles to the gallon no matter what. I can't talk her into selling it, but was finally able to talk her into a motor swap. I'm going to build a Chevy 383 and put a 700R4 behind it. I'm hoping that gets us up into the 15 to 17 mpg range. The motor in the picture came out of the '73 Camaro parts car I used to build my pickup (1FATGMC).......
.................. .
.
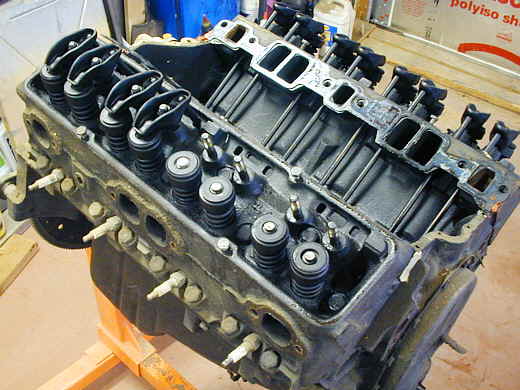
.....It had a 2 barrel and cast exhaust manifolds. I put a Q-jet and headers on it and used it in my pickup for 10,000 miles. It had good performance and got 24 mpg, but had bad valve guides and used a quart of oil every 300 miles. After a year I pulled it out and had a 4 bolt 350 built and that is in my truck now with 120,000 miles on it. So I decided the old motor would become the wife's 383 (350 with a stroker crank for the non-chevy guys that read this). I tore it down this past week.....
.................. ....................
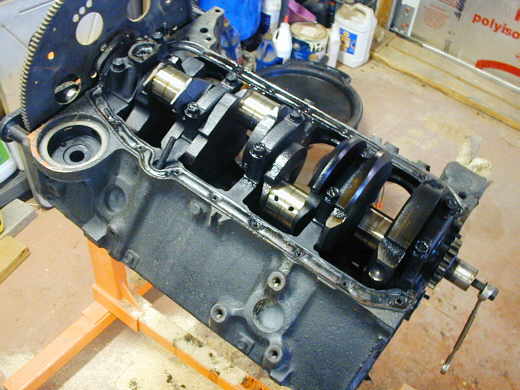
....and took it to a machinist in Colorado to have it bored and honed. Here I'm almost done tearing it apart. Just had to pull the crank and the freeze plugs. I'm waiting on him now to see if I can use .030 over pistons. Now back to the important car the "lakester".....
............................ .
.
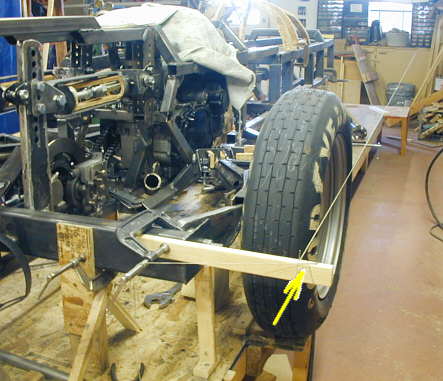
I'm not done with everything in the back of the car, but was getting anxious to start on the front-end for the car. The first thing I had to do was be able to locate the front tires and make sure they were aligned with the rear tires (same tread width) for aero purposes. I attached a board to the rear crossmember and attached a string to the outer of the two nails (see arrow above -- picture was taken after what I'm talking about). I then attached the string to the wall ahead of the car in a manner where the string was the same distance from the build table (parallel to the table).
.....................
Then with a tire mounted I measured to the front side-wall of the tire and the back side-wall and using the a-arm blocks above I moved the heim joints in and out and changed the shims on the sides of them to align the tire so that it was the same distance from the string front and back. I also changed the shim pack under the heim joint bracket up and down to get the camber on the tire to zero using a level.
...........................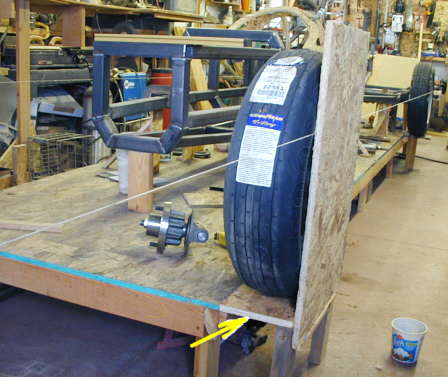
After getting both rear tires aligned I moved the string in till it was just touching the front and rear of the rear tires and built a jig to hold the front tire in alignment and with the camber to zero while building the frontend. I had to add a small extension to the sides of the build table that were as wide as the string distance from the table. Then I added vertical uprights to hold the tire.
.....................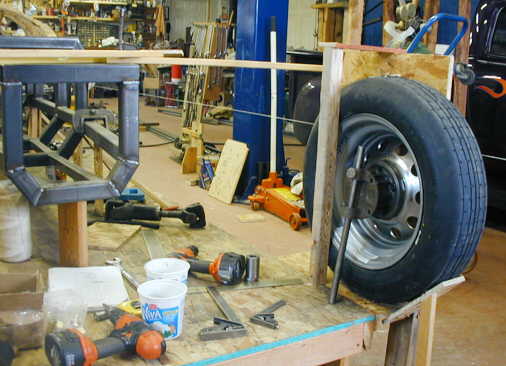
Next I added an inside piece that clamped the tire in position. At this point I had the front hub assembly/spindle mounted to the wheel.
....................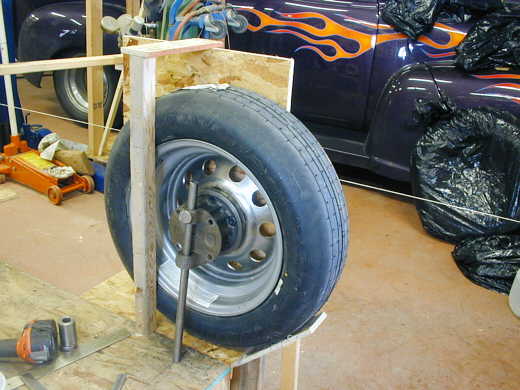
I measured off the round back side of the spindle and also used the tube in the spindle to set the tire/wheel where I wanted it for the wheelbase I had worked out. You can see a line on the table that the tube is going to. This is the front axle (axles) centerline.
I didn't know if I was wise or not to include the following sketches or not, but I decided to. It might be next to impossible to explain what I'm doing up front and I know it is way to complicated for a car that runs in a straight line on smooth salt (most of the time), but it is the way I am ;-).
..............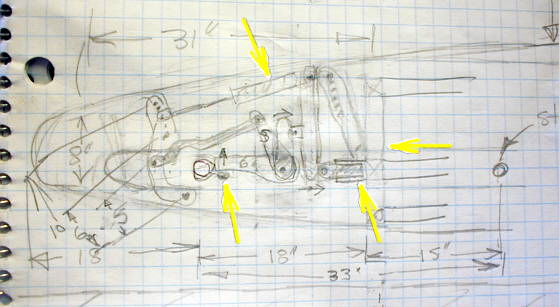
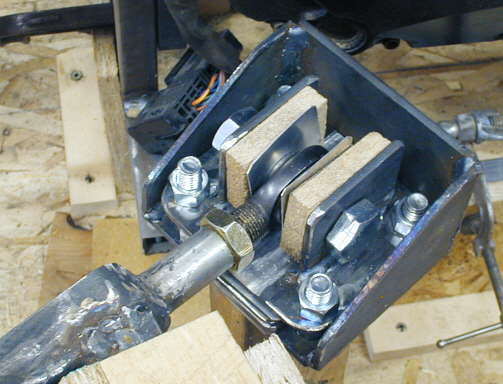
Ok there are going to be 2 axles (Ford twin I beam kind of). So the axle center line is the round circle to the left of the bottom left arrow. A lever arm (like in the rear of the car) will rest on a bolt at the back side of the axle. When it goes up (bump) it will rotate a tube with another lever arm in near the center of the car. That moves an arm that is pinned at the top of the car. The bottom of that arm pushes another arm (right bottom arrow) that goes out past the cage and acts on springs that are along side the cage. The right arrow points to the front of the present cage. The top arrow points to the shocks that are also operated off of levers and arms that are activated by the lever arm on the front axle.
The shocks and springs will be able to be moved on their arms like in the back of the car to provide different shock and spring rates with one shock and one spring.
The purpose of all of this is to give the car limited suspension (about 1 1/2 inches in compression and 1/2 inch in re-bound) and keep all of the suspension parts out of "the air" in the nose of the car and in the pods going down the side of the car.
............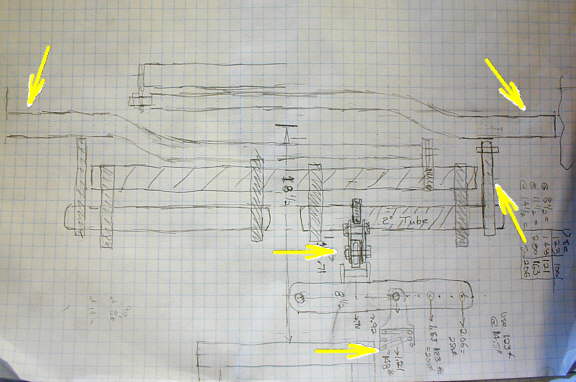
Here is a top view of the same area. The top right and left arrows point to the two axles. The right middle arrow points to the lever arm that will rest on the back of the axle. The middle of the picture arrow is the suspended arm that is pushed on and then pushes itself on the arm that the spring is attached to (bottom arrow). You can see various holes in that arm to change the spring location and leverage on the spring. The numbers are how far the spring will travel in different locations with a 1 inch rise in the lever arm that goes to the back of the front axle.
....................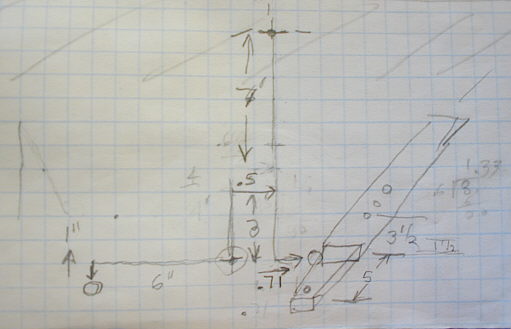
This diagram was used to figure the movements on each arm. On the left if the axle goes up one inch the 6 inch long arm will move the inboard vertical 3 inch tall arm .5 inches to the right. That will push the 10 inch long vertical arm that pivots from the top inboard .71 inches to the right. It pushes the outboard arm where the spring is attached to the right. The distance will depend on where the spring is mounted. 1 inch of axle movement up will compress the spring between 1.21 inches to 2.06 inches depending on the location of the spring on the arm.
Well if anyone is still reading at this point I"m sure they are shaking there head and wondering about good old Sum. c ya!!!
..................................................................Next Page