...Return To Mine & Other Bonneville Car Construction Pages
.Previous Page...............B'ville Car Index Page.........................Next Page
................................-- Chute Attach Points Again --
.................
.................. .
.
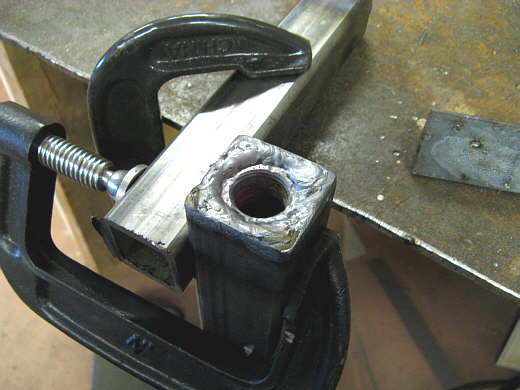
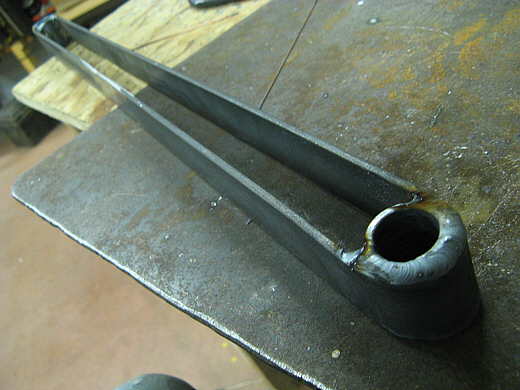
Moving the chute tubes back left the chute attach points way up inside the car and not a good deal. Besides moving them back I also decided to move them back past the ends of the chute tubes so that the attach points would be as far back as possible. I needed to make a new upright to attach the adjustable (height wise) chute line attach mounts to. I started by welding a 3/4 inch nut inside the end of a piece of 1 1/2 inch square tubing.
.................. .
.
The extended push bar got a 3/4 inch hole put into it where I wanted the upright to go and a 3/4 inch bolt went through the hole.
.................. .
.
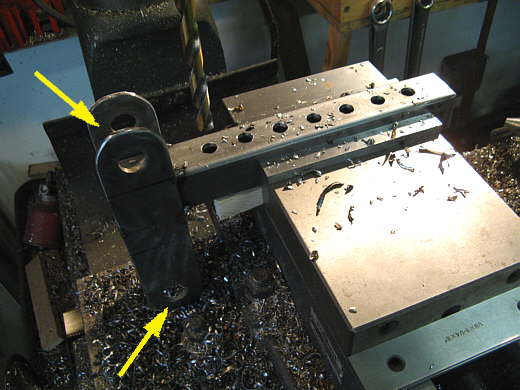
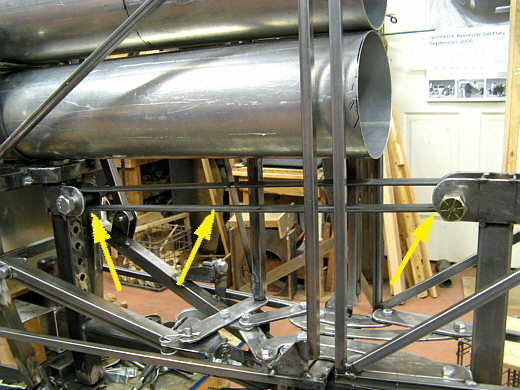
The upright had holes drilled in it to allow the chute mounts to be mounted at different heights in the car if needed. I also made a permanent mount at the top of the bar that can be used or not used. The arrows point to the permanent mount. The holes on one end or for the roller that the chute lines go around and attach to. The hole on the other end is for a bar to attach to that will go back to the old chute mount upright and will support this upright at the top with the 3/4 inch bolt at the bottom in the push bar.
.................. .
.
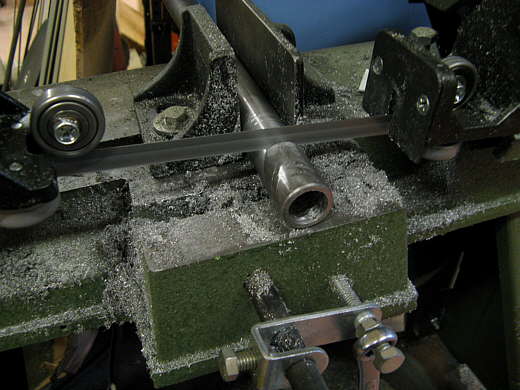
Two bushings were required for the upper support that will tie the new vertical chute mount back to the old one. 1 inch round stock was drilled to 3/4 inch in the lathe and then cut at 1 1/2 inches. Two of these were made and ..............
.................. .
.
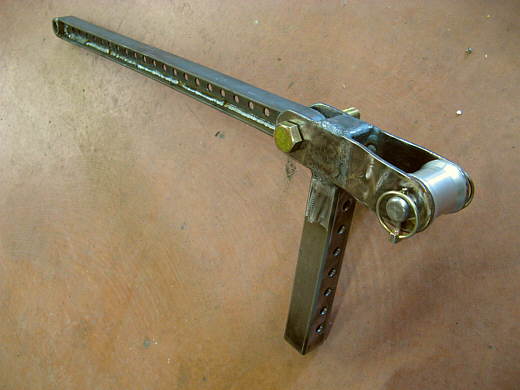
............ this picture shows one in the top mount of the vertical chute mount (middle arrow). The right arrow points to the other one that I just laid there for the picture and the bottom left arrow points to the new vertical chute mount.
.................. .
.
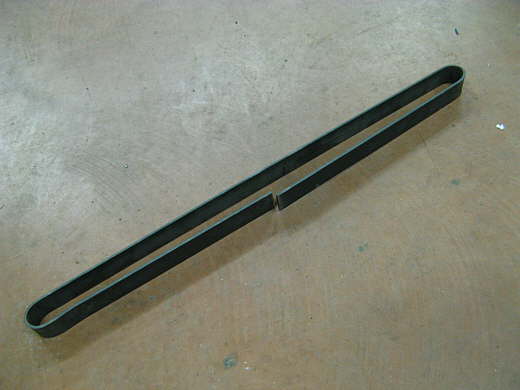
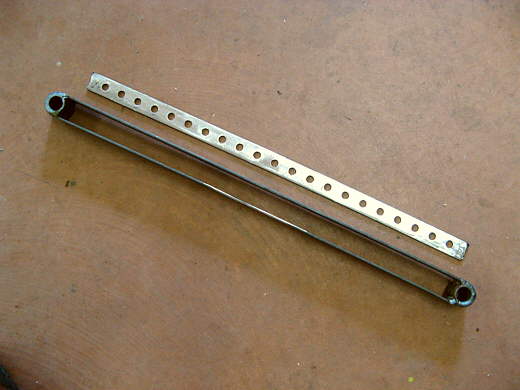
This strap was cut and bent and will tie the new upright to the old one further forward in the car.
.................. .
.
The bushings that were made above were tacked into the ends of the strap (end arrows) and the strap was tack welded in the middle (middle arrow).
.................. .
.
Then the finish welds were made with the TIG to the middle and to the bushings. The TIG sure beats the MIG for stuff like this.
.................. .
.
Then a piece was made to go down the middle. Since this is a race car I thought I should have some lightening holes somewhere on the car ;-).
.................. .
.
Here is the finished new chute mounts. I still have two mounts that can slide up and down on the mount if necessary.
.................. .
.
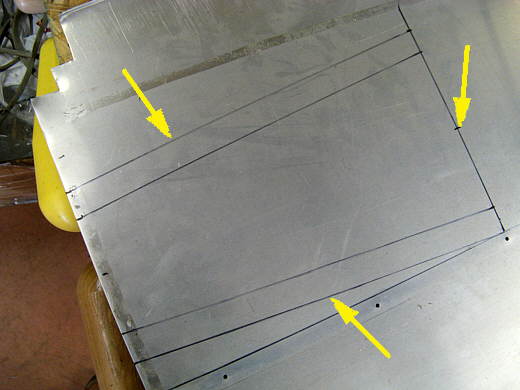
Since this mount extends past the ends of the chute tubes I decided to cover the top of it just in case the chute or lines came into contact with it. I started with some .030 aluminum I have and laid out a pattern. The arrows point to the cut lines and the inside lines are fold lines.
.................. .
.
Here some of the edges are being bent over.
.................. .
.
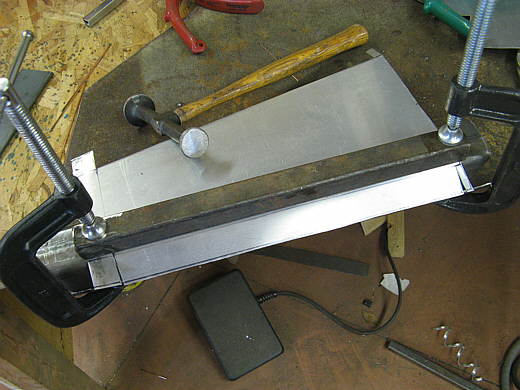
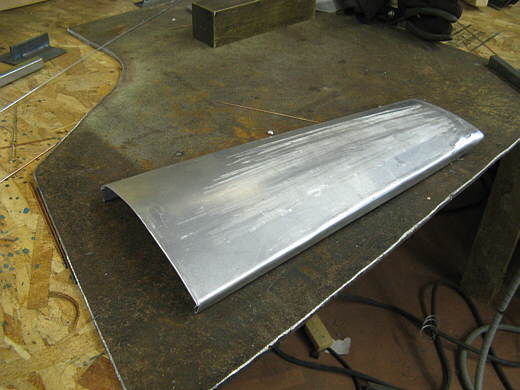
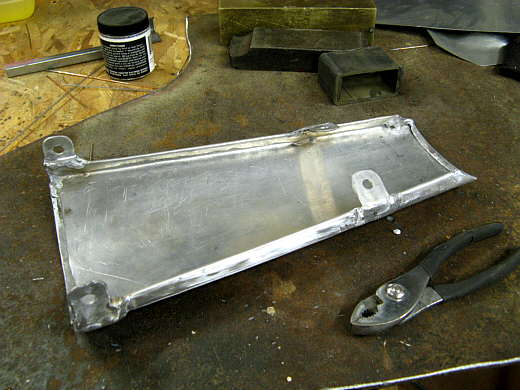
Once bent they were bent again so that there would be no sharp edges anywhere. I also decided to try the English wheel I had picked up from Harbor Freight on sale and put a slight bend in the piece to give it some strength. You can see the wheel tracks on the top.
.................. .
.
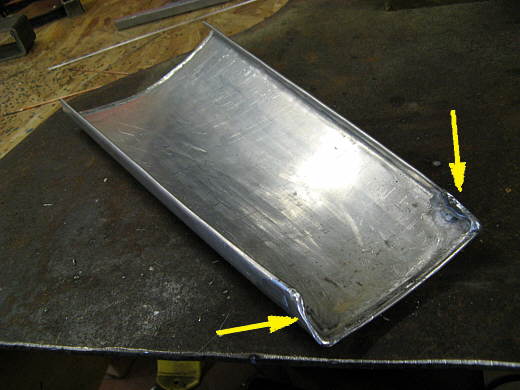
The ends were also folded in and I welded up the ends to further smooth those areas (arrows). I was happy that I could weld this thin .030 aluminum with the TIG as the body will be .050.
.................. .
.
Four mounting tabs were also welded to the piece and .........................
.................. .
.
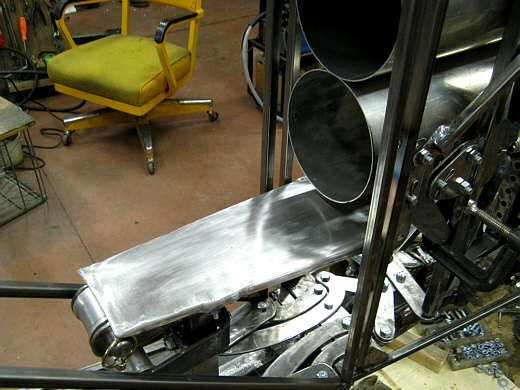
....................... then it was mounted into place behind the chute tubes. You can see that the doors just clear all of this on both sides.
.................. .
.
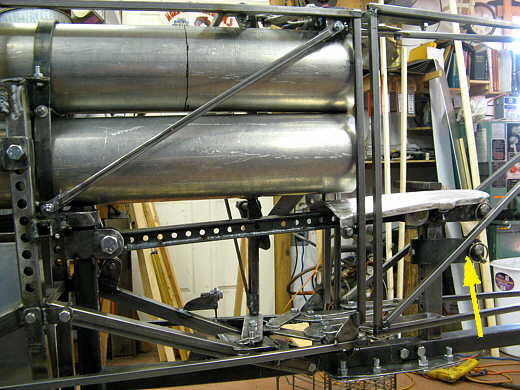
An overall picture of the new chute mounting location and you can also see a second chute mount (arrow) in a possible location. The car looks like it will be 23-24 feet in total length. It only takes a few minutes to remove the back 3 feet, from right behind the chute tubes back if that becomes necessary to trailer the car, but I think I have it figured out so I won't have to.
..............................................................Next Page