.......Under Construction Page Five................................................................Under Construction Page Seven
Interior Pictures
.
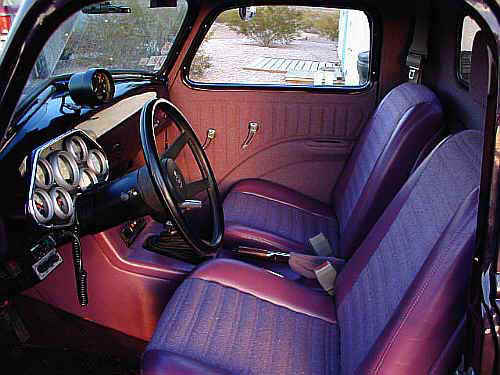
The interior was upholstered by Josh Parriott of Moab, Ut in the spring of 1998 at the same time the truck was painted.
I made all of the panels to be covered and he did the actual upholstery of them and the seats and the rest of the cab. I am very please with his work and he was actually done with the panels and seats before I was ready for him to finish the rest of the cab interior. How many times have you heard of where the upholster had to wait on the owner?
............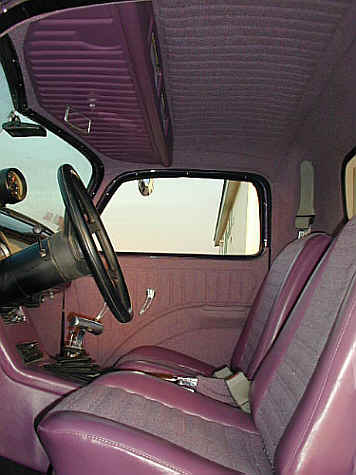
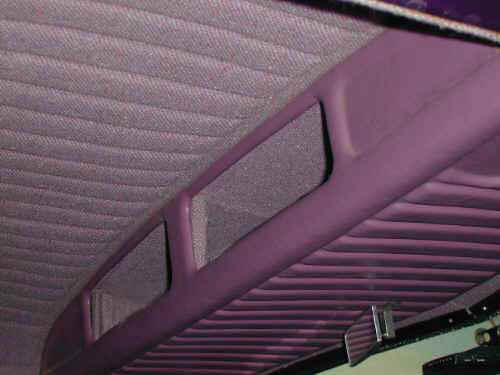
I made the console at the top of the cab out of square tubing and 16 & 20 gauge cold rolled steel. It is constructed in such a way that it is removable (takes about 10 min.), so it was upholstered out of the truck. The head liner was bought and is plastic and I can't remember where I got it. Josh pleated it and covered it. It only goes from the console back just beyond the pleats. I
The seats came from a neighbor in Wyoming and I'm not sure what they came out of. A couple people have said late 60's Camaro.
The Shoulder belts hook onto metal straps inserted behind the interior metal in the cab corners. I hope I don't ever have to test them.
..
Looking in from the passenger side the homemade center console is clearly seen.
The side panels are flat steel and come out in a minute for easy access to all the cars wiring and fuse panel which is in this area.
Right under the handle for the emergency brake is a panel that just lifts up. Under it is the fuse panel. It is in a very convenient position.
Once that panel is lifted out you have access to 2 screws that release the side panels.
..
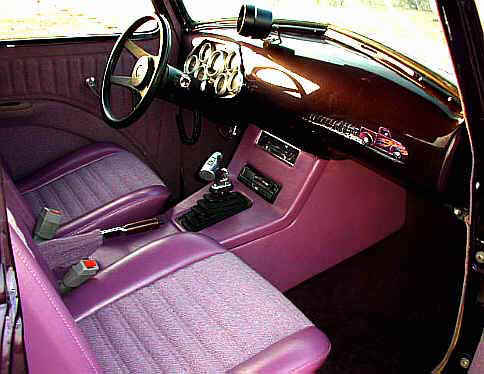
The shifter is a B&M Mega shifter. Above it is the radio and above that the heater controls.
On the top of the dash is the tach.
The steering wheel is from the 73 Camaro which donated numerous parts to this truck.
I forgot what I got the emergency brake lever from, but Jokester on RRT said it looks like it came from a Vega
or Pinto.
..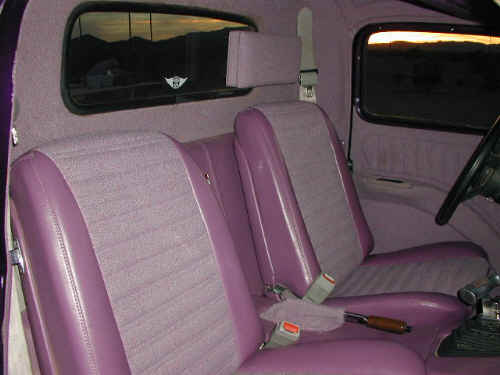
The headrest behind the seat is supported by bolts off to the right side of it that are welded to the inside of the cab.
The outer cushion (that your head rests against) is attached with Velcro to the rest of the headrest and pops off to provide access to the mounting bolts and wiring.
On the back side of the headrest facing out the window is a Moab Rod Benders club plaque. It is held on by 4 lighted bolts that also act as a third brake light.
..........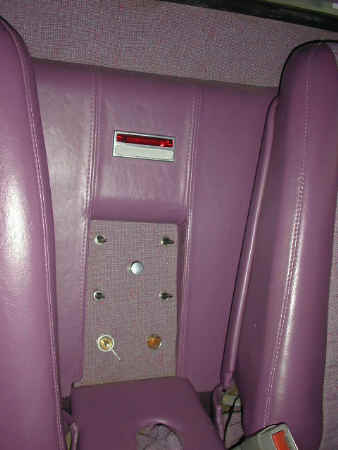
This panel between the seats has the electrical control switches for the truck and above it is the interior light.
The switches are as follows:
Center -- Headlight switch
Top right -- Controls the lock-up converter for the 700R4 transmission (up=manually locked, down=auto lockup going into and out of 4th, and center is off=no lockup in any gear)
Top Left -- Aux. Radiator Fan
Middle Left -- Interior Lights
Middle Right -- Windshield Wipers (high -- off -- low)
Bottom Left -- Main electrical disconnect
Bottom Right -- Cigarette lighter socket.
.
........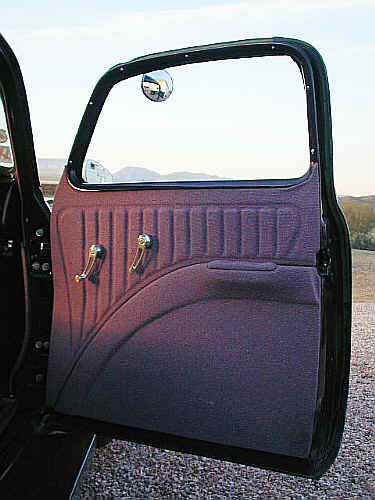
The doors are covered with panels from Rod Doors. They are two piece plastic and the seam is in the swoop part
of the design that starts at the arm rest and goes down to the left. Because of this pattern in the doors (the
arm rest and on down) these panels will not bend much. The stock doors have quite a curve to them on the inside
that kind of follows the outside body curve. I welded Pieces of metal down the side of the doors to make the doors
flatter inside. Then I used a heat gun to curve the door panel slightly. The panels are held on with Velcro.
.
.
.
.
.
.
.
 .Another
shot of the overhead console. The backside of the front piece has bolts welded to it. You reach inside and take
the nuts off and then it comes off. Likewise there are bolts welded onto the bottom panel. Take them off and it
drops down. Then all that is left is a square tubing cage that fits into holes in the side of the cab top and is
secured with one screw.
.Another
shot of the overhead console. The backside of the front piece has bolts welded to it. You reach inside and take
the nuts off and then it comes off. Likewise there are bolts welded onto the bottom panel. Take them off and it
drops down. Then all that is left is a square tubing cage that fits into holes in the side of the cab top and is
secured with one screw.
Since the cab is small this has proven very handy for storage...
.
.
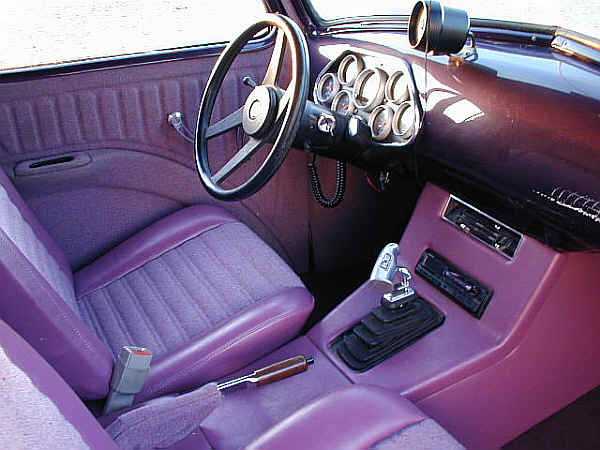
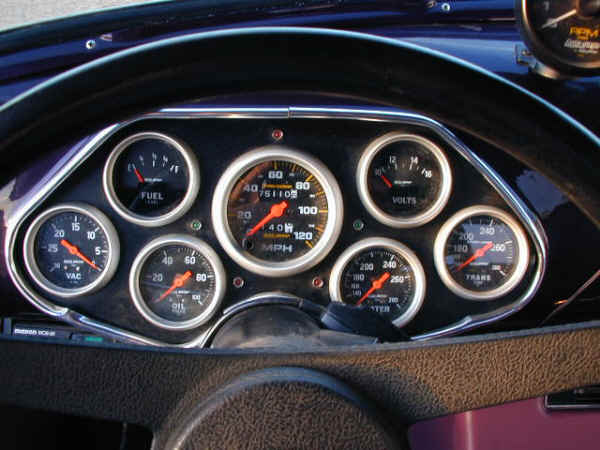 All
of the gauges are Auto Meter.
All
of the gauges are Auto Meter.
On the left is Vacuum, Fuel, and Oil Pressure.
To the right is Water Temperature, Voltage, Transmission Temperature.
The top LED is the high/low beam.
The LED's to the left and right of the speedometer are for the turn signals.
The Bottom left LED is Oil Pressure and the bottom right LED is lit when the lockup converter is locked.
Notice the 75,110 miles on the odometer. This was Dec. 2000. I started driving the truck in the late spring of 1993 and when I painted it in 1998 there were 30,000 miles on it. I also had speedometer troubles and there were two others in before this one, so the total mileage is about 3000 more than shows here. I found my problem wasn't with the speedometers, but the cable was in a bind where it came out the back and went by the steering column support. Once I got a 90 degree adapter for the back of the speedometer I had no more problems..
.........
.
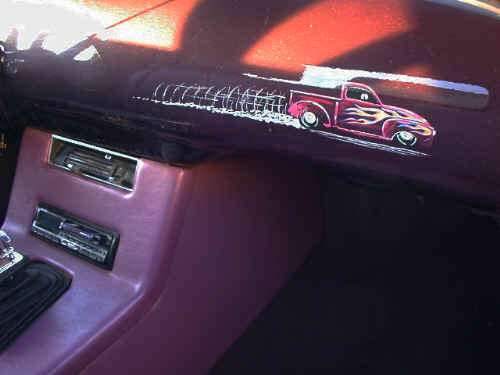
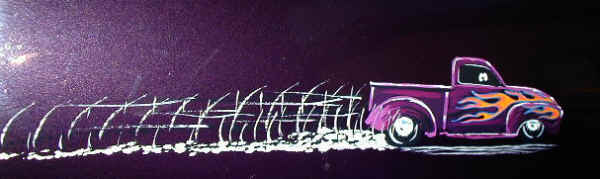
I Filled the dash all in for a smooth look.
The truck on the dash was painted by Bob Bond, who has been pin-striping for years. He also did some striping under
the hood. He use to live in California, but now lives outside of Kansas City.
.
.
.
..................
One thing I like about the dash painting is the eyes looking out the side remind me of my dog Shush who always rides with me and that is her window.
.
.
..
.
..................
.............