- Teardrop Index Page ____________ Page Two
_________Teardrop Trailer Page 1
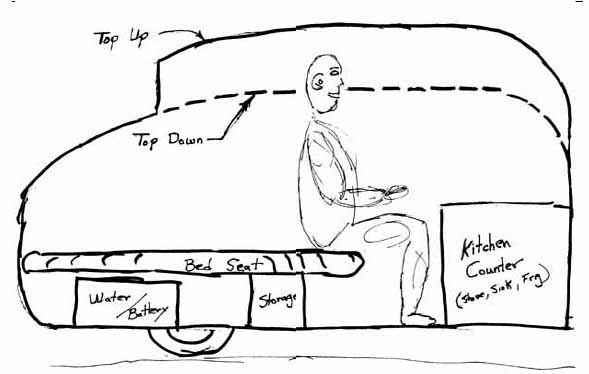
Cut-away Trailer Drawing -- This rough drawing gives you an idea of the layout of the trailer and how the top will appear in the up and down position.
........................................ 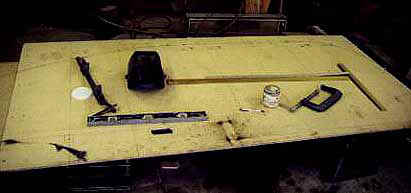
Lay-out on Particle Board -- The above picture shows the layout of the trailer full size on 2 sheets (a 4 X 8 sheet and a partial sheet to the left) of 1/2 inch particle board. On it I have the side view of the trailer, location of the main frame rails, locations of spring mounts, area of trailer that will raise and some of the upright support locations.
Just below and to the right of the level you can see burn spots where I laid the main frame rails and tacked them together with my welder using the particle board as a jig. Later I cut the particle board along the trailer outline to give me a full size side view of the trailer (you will see it in a later picture).
........................................ 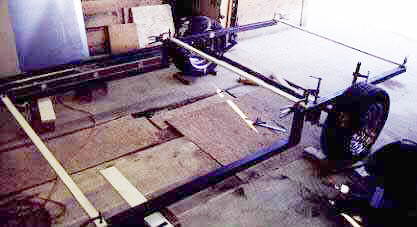
Frame (first step) -- Here I have leveled the axle side to side, the frame rails front to back and side to side. I have the spring mounts clamped on for a final check on placement and am ready to start welding in the cross members. The frame rails are 2 X 2 X .125 square tubing (along with the tongue and main cross members).
........................................ 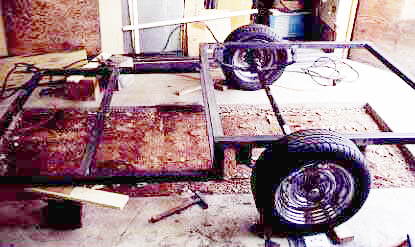
Frame (step 2) -- I now have the main (structural) cross members welded in and the spring mounts welded in also. The two cross members where the frame kicks down are 1 X 2 X .065 box tubing. The first, second and last cross members are 2 X 2 square tubing.